
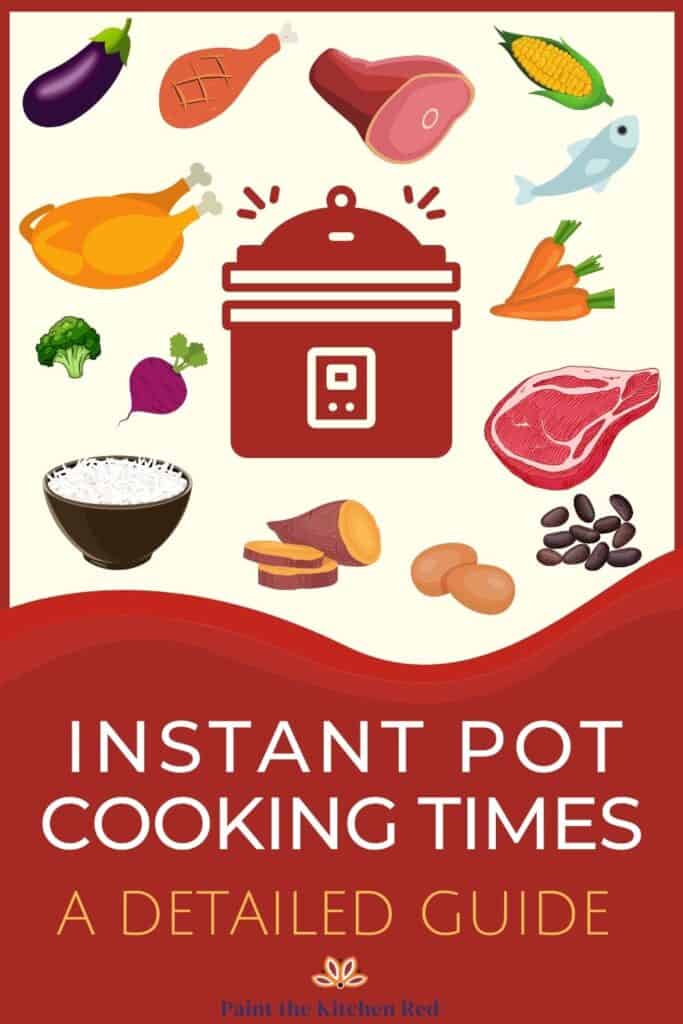
This is your comprehensive guide to Instant Pot cooking times. This Instant Pot quick reference guide gives you all the information you need to cook a variety of foods. The Instant Pot cooking time charts are organized by type of food and how long to cook each type of food e.g. pork, chicken, vegetables, beef, seafood, rice, grains.
This post contains affiliate links. As an Amazon Associate, I earn from qualifying purchases. Please read the disclosure.
Table of Contents
If you’re new to the Instant Pot and aren’t familiar with how to use it, here are my guides on how to use some popular Instant Pot models:
- Instant Pot Directions for Beginners
- Instant Pot ULTRA Beginner’s Manual
- Instant Pot DUO EVO PLUS Beginner’s Manual
- Instant Pot DUO NOVA Beginner’s Manual
- Instant Pot DUO GOURMET Beginner’s Manual
- Instant Pot PRO Beginner’s Manual
- Instant Pot DUO CRISP Beginner’s Manual
- Instant Pot PRO CRISP Beginner’s Manual
- Instant Pot PRO CRISP vs DUO CRISP
Introduction
The Instant Pot has changed the way I cook. It’s amazing to me that I use it to cook as many recipes as I do every week. It’s gotten to point that I sometimes forget how to use my stove!
All this has allowed me to become very familiar with the Instant Pot cooking times of all kinds of foods. If you’re new to the Instant Pot, don’t worry – the more you cook in the Instant Pot, the more familiar you’ll become with determining how long to cook foods.
In this guide, I’ll give you general Instant Pot cook times and tips for different types of foods.
If there’s anything missing or inaccurate, feel free to comment and let me know.
I have many guides and tips for the Instant Pot that might be helpful to you especially if you’re new to the Instant Pot. Reading these tips could help prevent some common issues.
Pressure Cooking Tips
The Instant Pot is different from traditional cooking methods in a few ways. There are some general tips that I like to share with new Instant Pot users when they first begin to cook in the Instant Pot.
Here are a few things you need to know about pressure cooking in the Instant Pot.
Cook Times
One of the misperceptions new Instant Pot users have is that a recipe with a 5 minute pressure cooking time will take a total of 5 minutes to cook. In fact, the total time to pressure cook food is made up of the following three times:
- Time it takes to come to pressure
- Time to pressure cook
- Time it takes to release pressure naturally (releasing pressure using the quick release method takes very little time – at the most, a couple of minutes)
So if a recipe tells you to cook food for 5 minutes under high pressure, it will take longer than 5 minutes.
How much longer depends on the quantity and temperature of the food. The more liquid there is, the longer it takes to come to pressure and release pressure. The colder the contents of the Instant Pot, the longer it takes to come to pressure.
So a 5-minute pressure cooking recipe could take:
- 10 minutes to come to pressure + 5 minutes to pressure cook + 10 to 30 minutes to release pressure = total time of 25 to 45 minutes.
Cooking times can also vary based on the Instant Pot model and size. Please adjust the cook times based on your individual experience with the Instant Pot.
If you find that food is overcooked with the provided timings, decrease the pressure cooking time by a few minutes the next time you make the recipe. If food is undercooked, you can go ahead and close the lid again and pressure cook for an additional few minutes.
0 (Zero) Minute Pressure Cooking
Some foods are so delicate that even one minute of pressure cooking will overcook them. For this reason, these foods need to be cooked for zero minutes. Some Instant Pot models allow you to program a 0-minute pressure cook.
If your Instant Pot does not have the option to set zero minute pressure cooking time i.e. it only goes as low as one minute, program it for 1 minute but as soon as the float valve goes up and the time changes from On to 00:01, press Cancel and do a quick release of pressure.
Releasing Pressure
There are a few different ways of releasing pressure, the most common being natural release and quick release. Pressure release methods can vary from recipe to recipe. Some foods benefit from a quick release because they are fast-cooking.
Other foods taste best when you do a natural release. In the cooking time charts below, I give you general guidelines on what pressure release method is best for each type of food.
[Read More: Different pressure release methods and when and why you would use each one.]
Low Pressure vs. High Pressure
Food can be cooked under low or high pressure. Some Instant Pots don’t have a low pressure setting and so in order to accommodate all Instant Pots users, the timings I’ve specified in the charts below are for high pressure.
Feel free to use low pressure. You may or may not need to increase the pressure cooking time by a couple of minutes.
Quick-cooking foods (e.g. vegetables, seafood, fruit) can get overcooked in the pressure cooker. These types of foods may benefit from low pressure (if you have it available on your Instant Pot.) If you find that a certain food is getting overcooked even if you reduce the pressure cooking time, use low pressure the next time.
Most recipes you find online or in cookbooks use high pressure to cook foods. If a recipe doesn’t indicate whether to use high or low pressure, you can assume it’s high pressure.
6 Quart vs 8 Quart vs 3 Quart
This guide is written with the 6 quart Instant Pot in mind. You may find that the 8 quart Instant Pot takes longer to come to pressure due to the increased quantity of liquid required.
Generally, I don’t need to change the Instant Pot cook times when using an 8 quart. However, one instance where I find my 8 quart requires more pressure cooking time than the 6 quart is when I use the Pot-in-Pot method (PIP). I usually add a couple of minutes to the pressure cooking time. You might need to experiment when doing PIP cooking in the 8 quart.
If you find that your 8 quart is consistently undercooking foods, you can add a minute or more to recipes.
Some of my readers who use the 3 quart say that they need to add a couple of extra minutes for vegetables and meats and about 25% more time for beans.
The 3 quart is half the size of the 6 quart, and therefore takes less time to come to pressure. While the Instant Pot is coming up to pressure, food begins to cook.
One theory is that the reduced time to come to pressure causes the food to be undercooked in some cases, especially dense foods like beans.
If you find that your 3 quart is consistently undercooking foods, you can add a minute or two to recipes.
Fill Level
The Instant Pot inner pot has markings to guide you on how much food you can put in the inner pot. You should keep most foods at the ⅔ full mark or lower.
However, if you’re cooking rice, grains, beans, or dehydrated foods, you need to keep to the ½ full mark.
And whatever you do, never fill the Instant Pot to the top!
Frozen Foods
Some frozen foods can cook inconsistently and unevenly. This is particularly true of large or unevenly sized foods. You may find that the food is overcooked on the outside and undercooked or possibly frozen on the inside.
I avoid cooking frozen foods if possible. I prefer to thaw the food before pressure cooking.
The one exception to this is if I’m pressure cooking small (1 to 1 ½ inch) pieces of meat in a soup or stew. In those cases, using frozen meat has no noticeable negative impact.
Understandably, there are times when you might forget to thaw! I’ve tried to provide frozen cooking times for many foods.
Doubling a Recipe
In general, when you double a recipe you don’t need to modify the pressure cooking time. The only exception to this is if you’re cooking a large piece of food or a thicker piece of food than the recipe calls for.
For example, if the cooking time says 5 minutes for 1-inch thickness, and your food is 2 inches thick, you would probably need to increase the cooking time.
If you’re halving a recipe you don’t need to change the pressure cooking time.
High Altitude
If you live at a high altitude and you find that the cooking times you’re using aren’t thoroughly cooking the food, add 5% to the cooking time for every 1000 feet above 2000 feet altitude. e.g. if you live at 4000 feet, add 10% to the pressure cooking time.
Keep a Journal
One of the things I started doing when I first started cooking with the Instant Pot was to start recording the cooking times that worked for me when I made different types of foods. This has been so invaluable to me.
I encourage you to do the same. Whether it’s a physical notebook or a digital file, you’ll be glad you started keeping track.
Vegetable Cooking Time Chart
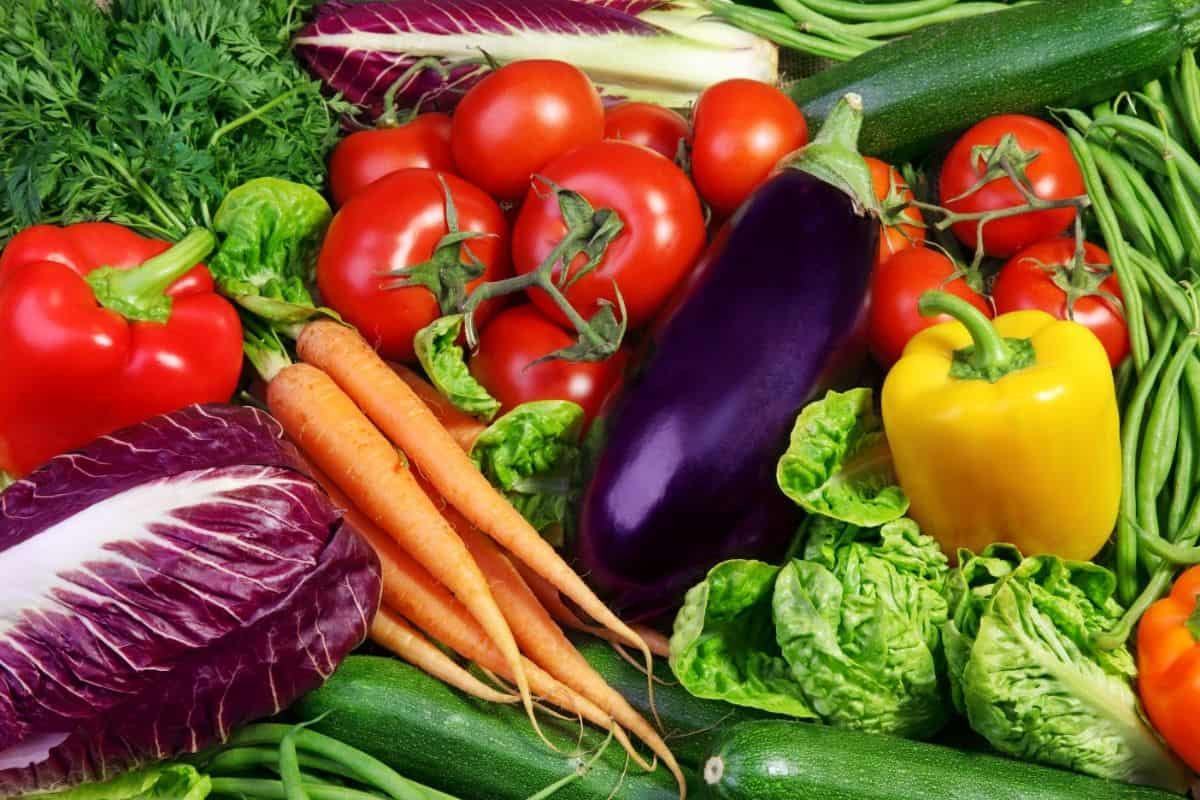
- Vegetables can be cooked in the Instant Pot with quick and consistent results. Because of the nature of pressure cooking, vegetables retain more nutrients when pressure cooked than when cooked traditionally.
- Most vegetables require a quick release of pressure, otherwise they will overcook.
[Read More: Natural Release vs. Quick Release and Other Steam Release Methods] - Vegetables are best when steamed rather than boiled because steaming helps retain the nutrients. Add 2 cups of water or broth to the inner pot and place a trivet or steam rack in the water. The water level should be slightly lower than the rack. Place the vegetables on the trivet or steam rack. You can add any flavorings or spices to the steaming liquid to impart more flavor to the vegetables.
[Read More: What is a Trivet and How Do You Use it?] - The liquid used to steam the vegetables can be used for cooking other foods in place of water or broth.
- If you’re cutting the vegetable into larger pieces than indicated below, you may need to increase pressure cooking time by 1 minute.
- If the vegetable is thinner or smaller than usual, decrease the pressure cookng time by a minute or use the Low Pressure setting.
- If the vegetable gets overcooked with high pressure, decrease the cooking time by a few minutes or use low pressure next time.
- If your recipe calls for al dente vegetables, immerse them in an ice bath immediately after pressure cooking. Because food can continue cooking even after pressure is released, the ice bath immediately stops the cooking process.
Instant Pot Vegetable Recipes
| Vegetable | Cooking Time | Steam Release Method |
|---|---|---|
| Artichoke (whole) – small | 11 minutes | Quick or Natural |
| Artichoke (whole) – large | 15 minutes | Quick or Natural |
| Asparagus (thick) | 1 minute | Quick |
| Asparagus (thin) | 0 minute * | Quick |
| Beet (small) | 12 minutes | Quick |
| Beet (large) | 15 minutes | Quick |
| Broccoli rabe | 2 minutes | Quick |
| Broccoli (florets) | 0 minutes * | Quick |
| Brussels sprouts (whole) | 3 minutes | Quick |
| Butternut squash (whole) | 25 minutes | Quick or Natural |
| Butternut squash (halved) | 9 minutes | Quick or Natural |
| Butternut squash (1 inch) | 3 minutes | Quick |
| Cabbage (chopped 1 ½ inch) | 5 minutes | Quick |
| Cauliflower (whole) | 2 minutes | Quick |
| Cauliflower (florets) | 1 minute | Quick |
| Carrots (baby) | 2 minutes | Quick |
| Carrots (½ inch) | 2 minutes | Quick |
| Chard | 2 minutes | Quick |
| Collard greens | 4 minutes | Quick |
| Corn on the cob | 2 minutes | Quick |
| Eggplant (1 ½ inch) | 3 minutes | Quick |
| Green beans | 2 minutes | Quick |
| Kale | 3 minutes | Quick |
| Parsnips (1 inch) | 2 minutes | Quick |
| Potatoes (small whole) | 12 minutes | Quick |
| Potatoes (medium whole) | 15 minutes | Quick |
| Potatoes (large whole) | 20 minutes | 10-minute Natural Release |
| Potatoes (sliced ¼ inch) | 2 minutes | Quick |
| Potatoes (1 ½ inch) | 3 minutes | Quick |
| Pumpkin (1 ½ inch) | 3 minutes | Quick |
| Rutabaga (1 ½ inch) | 4 minutes | 5-minute Natural Release |
| Sweet potatoes (medium whole) | 35 minutes | 10-minute Natural Release |
| Sweet potatoes (small whole) | 15 minutes | 10-minute Natural Release |
| Sweet potatoes (1 ½ inch) | 3 minutes | Quick |
Fruit Cooking Times Chart
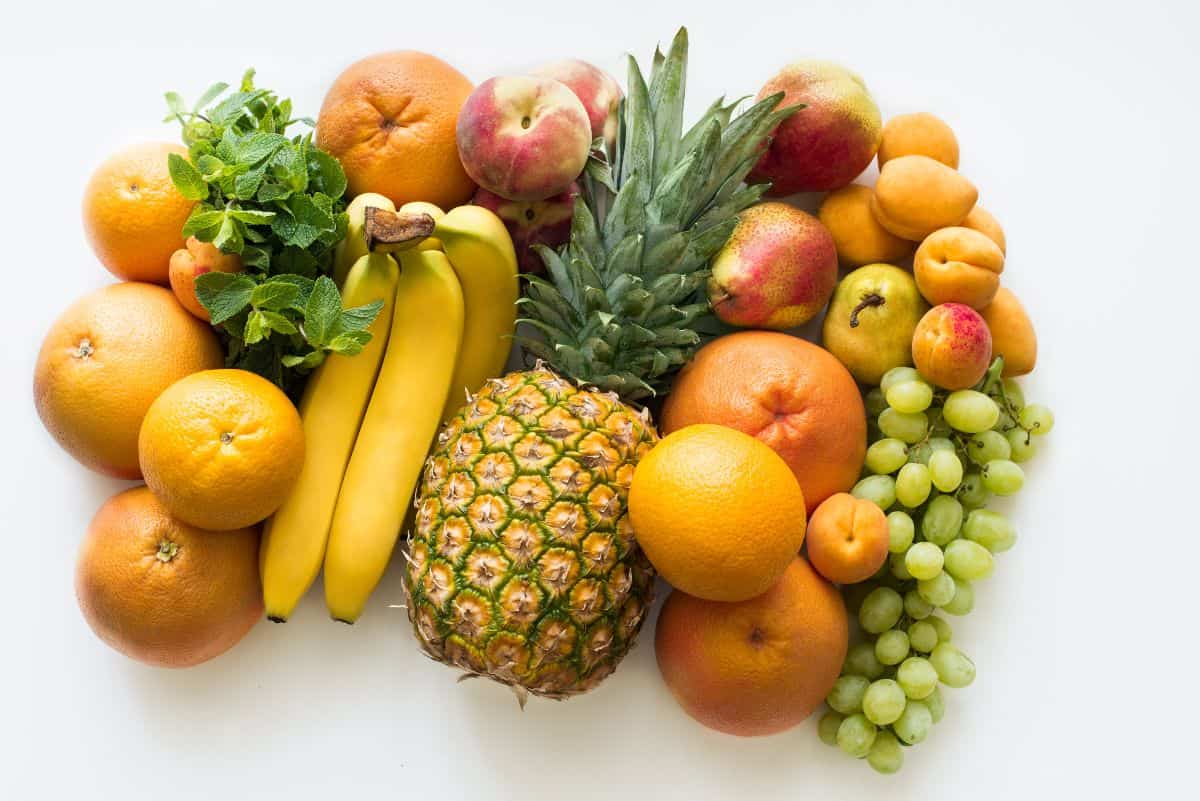
- Generally fruits are pressure cooked to make jams, jellies, chutneys and desserts. Check out my delicious and easy Instant Pot Peach Crisp.
- Pressure cooking fruits requires very little pressure cooking time for soft results. If you want the fruit to be more firm, pressure cook on Low Pressure for the same amount of time, if that option is available on your Instant Pot model.
- Since fruits cook quickly, it’s helpful to do a quick release of pressure. However, some fruits (e.g. strawberries) foam a lot so if you find that there’s a lot of mess when you do a quick release, go ahead and do a 10-minute natural release.
[Read More: Natural Release vs. Quick Release and Other Steam Release Methods] - Turn off the Keep Warm setting when cooking fruits. This prevents the fruit from overcooking.
- Fruits can be cooked directly in the liquid or placed on a steam rack or trivet.
[Read More: What is a Trivet and How Do You Use it?]
| Fruit | Cooking Time | Steam Release Method |
|---|---|---|
| Apple (1 ½ inch) | 1 minute | Quick |
| Apricot (halved) | 2 minutes | Quick |
| Blackberries | 2 minutes | Quick |
| Blueberries | 3 minutes | 10-minute Natural Release |
| Cherries | 1 minute | Quick |
| Cranberries | 2 minutes | 10-minute Natural Release |
| Peach (halved) | 3 minutes | 10-minute Natural Release |
| Pear (halved) | 1 minute | Quick |
| Pear (whole) | 2 minutes | Quick |
| Plum (halved) | 2 minutes | Quick |
| Strawberries | 1 minute | 10-minute Natural Release |
Beans Cooking Times Chart
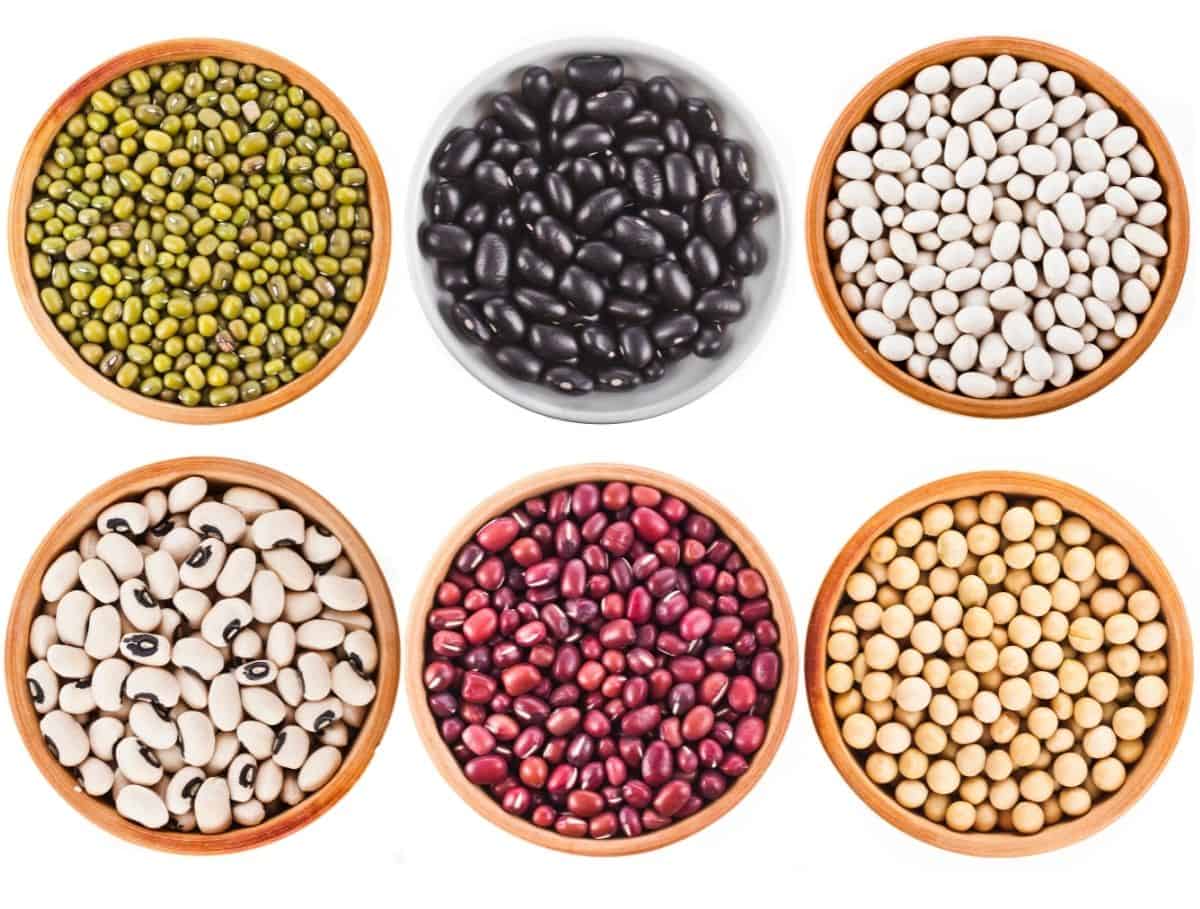
- Pressure cooking beans/legumes is a great alternative to buying canned beans. Homemade beans have more flavor and better texture than canned beans.
- Sort through the beans and remove any debris such as small stones.
- Rinse the beans thoroughly before cooking them.
- Soaking the beans reduces the cooking time. Beans can be cooked straight from dried or you can soak them for 6 to 8 hours.
- To soak beans the traditional way, place beans in a bowl and fill with enough water to cover by 1 inch.
- If you need a shortcut for soaking beans, find out more on my method for how to quick-soak dried beans.
- If you open the Instant Pot and the beans aren’t cooked enough, just pressure cook them for 10 more minutes. If necessary, add some more water.
- The cooking time of beans can vary based on the age of the beans. The longer the beans have been sitting on a shelf or in your pantry, the longer they take to cook. Buying beans from health food stores or groceries where you can buy the beans in bulk might offer a fresher stash of beans. If you’re cooking a pot of beans and they don’t cook properly, no matter how long you cook them for, you might want to try a fresher bag.
- Cook beans at high pressure.
- The steam release method for beans is a full natural release.
- The ratio of beans to liquid is 1 : 1.5. That means that for every cup of beans, use 1 ½ cups of liquid. The beans should be submerged fully to prevent uneven cooking.
- Don’t fill the Instant Pot past the ½-full mark. The beans need room to expand.
Instant Pot Bean Recipes
| Bean | Dried Cooking Time | Soaked Cooking Time |
|---|---|---|
| Adzuki beans | 22 minutes | 8 minutes |
| Anasazi beans | 35 minutes | 15 minutes |
| Black beans | 30 minutes | 10 minutes |
| Black-eyed peas | 17 minutes | 6 minutes |
| Cannellini beans (White beans) | 30 minutes | 12 minutes |
| Chickpeas | 50 minutes | 20 minutes |
| Cranberry beans (Borlotti) | 40 minutes | 20 minutes |
| Fava beans (dried) | 28 minutes | 20 minutes |
| Great northern beans | 35 minutes | 22 minutes |
| Kidney beans | 25 minutes | 12 minutes |
| Lentils (Black Beluga) | 10 minutes | n/a |
| Lentils (Brown) | 10 minutes | n/a |
| Lentils (Green) | 10 minutes | n/a |
| Lentils (Red, whole) Masoor dal (whole) | 15 minutes | n/a |
| Lentils (Red, split) Masoor dal (split) | 4 minutes | n/a |
| Lentils (Yellow, split – moong) | 5 minutes | n/a |
| Lima beans Butter beans | 25 minutes | 7 minutes |
| Moong dal (whole, green) | 20 minutes | 15 minutes (4 hour soak) |
| Navy beans | 30 minutes | |
| Pigeon peas (split) Toor dal | 6 minutes | n/a |
| Pinto beans | 40 minutes | 20 minutes |
| Red beans (small) | 35 minutes | 25 minutes |
| Soybeans | 45 minutes | 30 minutes |
| Split peas | 16 minutes | n/a |
Rice Cooking Times
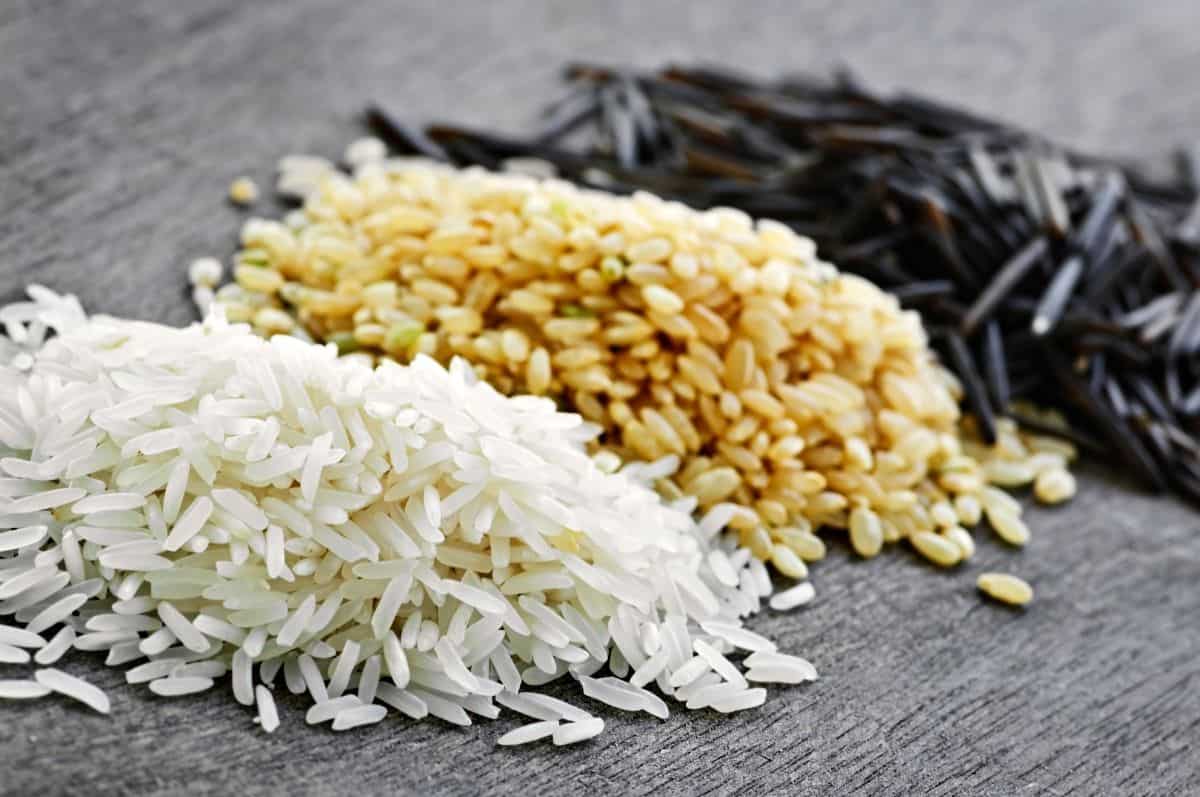
- Once I got my Instant Pot, I’ve never had to bring out my rice cooker. The Instant Pot cooks rice so consistently!
- In general, you can start out by using the 1:1 ratio for rice to water. However, there are some types of rice for which adding some extra water makes the rice softer.
- Rinse the rice before pressure cooking. Rinsing rice is a key to making rice successfully in the Instant Pot.
- There’s no need to soak the rice.
- Don’t fill the Instant Pot past the ½ mark when cooking rice.
- Do a full natural release or 15-minute natural release.
[Read more: Different Pressure Release Methods] - Coat the inner pot with a bit of cooking oil spray because this helps prevent the rice from sticking to the inner pot.
- If your rice turns out too sticky, reduce the liquid by a tablespoon or two next time.
- Turn the Keep Warm mode off if you’re going to let the rice sit in the Instant Pot for longer than 30 minutes.
- Feel free to substitute broth for water and add butter and salt to the rice before pressure cooking.
- If the rice is undercooked, next time increase the cooking time by a couple of minutes and/or add another tablespoon of water.
- Rice can be cooked using the Pot-in-Pot method. You can increase the pressure cooking time by a couple of minutes if the rice isn’t getting completely cooked with this method.
- After the pressure releases, fluff up the rice by stirring the rice.
- The rice paddle that comes with many Instant Pot models is very helpful for stirring up the rice.
Instant Pot Rice Recipes
| Rice | Rice:Water Ratio | Pressure Cooking Time |
|---|---|---|
| Arborio (risotto rice) | 1 : 2 | 5 minutes |
| Basmati (white) | 1 : 1 | 6 minutes |
| Basmati (brown) | 1 : 1.25 | 22 minutes |
| Black rice | 1 : 1 | 22 minutes |
| Brown (long grain) | 1 : 1.25 | 22 minutes |
| Brown (short grain) | 1 : 1.25 | 20 minutes |
| Calrose rice | 1 : 1.25 | 6 minutes |
| Jasmine | 1 : 1.25 | 4 minutes |
| Parboiled brown rice | 1 : 1 | 8 minutes |
| Parboiled white rice | 1 : 1 | 6 minutes |
| Sticky rice (glutinous rice) | 1 : ⅔ | 12 minutes |
| Sushi rice | 1 : 1.25 | 10 minutes |
| White (long grain) | 1 : 1 | 6 minutes |
| White (medium grain) | 1 : 1 | 6 minutes |
| Wild rice | 1 : 1.5 | 28 minutes |
| Wild rice blend | 1 : 1 | 26 minutes |
Grain Cooking Times
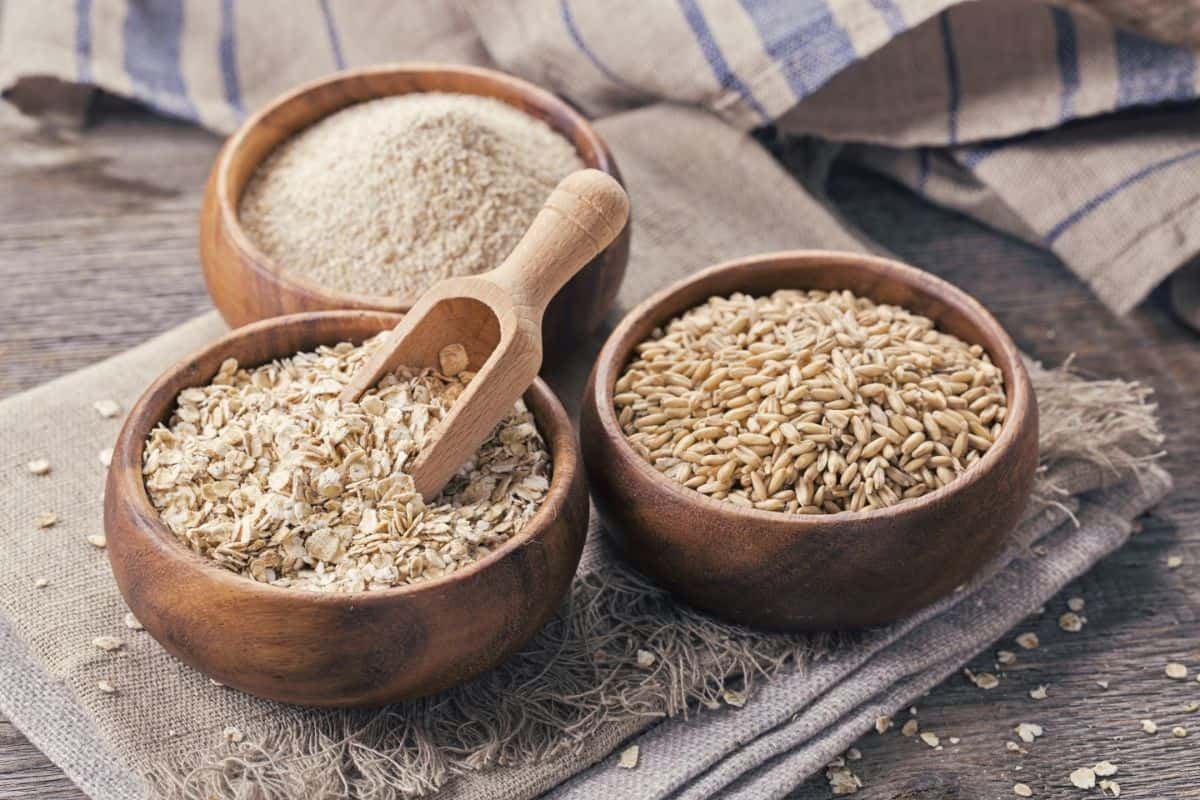
- I love pressure cooking grains in the Instant Pot because they cook so much faster than on the stovetop. I also love the fact that I don’t need to watch the stove.
- The biggest issue that people face when cooking grains in the Instant Pot is the possibility of the Burn Message. To avoid this, you can try to use the pot-in-pot method to cook the grains. I use pot-in-pot for oatmeal, polenta, and grits. In general, I use the same pressure cooking time for both methods: direct and pot-in-pot. However, some foods don’t cook as quickly with Pot-in-Pot compared to the direct method. You might need to add 30% more time. The nice thing is that it’s easy to check for doneness and if it needs to cook some more, just program the Instant Pot to pressure cook for a few minutes.
- Don’t fill the Instant Pot past the ½ mark when cooking grains.
| Grain | Grain : Water | Pressure Cooking Time |
|---|---|---|
| Barley | 1 : 2 | 20 minutes |
| Bulgur | 1 : 1.5 | 5 minutes |
| Couscous (Morrocan) | 1 : 1.5 | 1 minute |
| Couscous (Israeli) | 1 : 1.25 | 5 minutes |
| Farro | 1 : 2 | 10 minutes |
| Millet | 1 : 1.75 | 10 minutes |
| Oatmeal (rolled, old-fashioned) | 1 : 1.5 | 3 minutes |
| Oatmeal (steel-cut) | 1 : 2.5 | 5 minutes |
| Polenta | 1 : 4 | 9 minutes |
| Quinoa | 1 : 1 | 1 minute |
| Wheat berries | 1 : 4 | 30 minutes |
Pasta Cooking Times
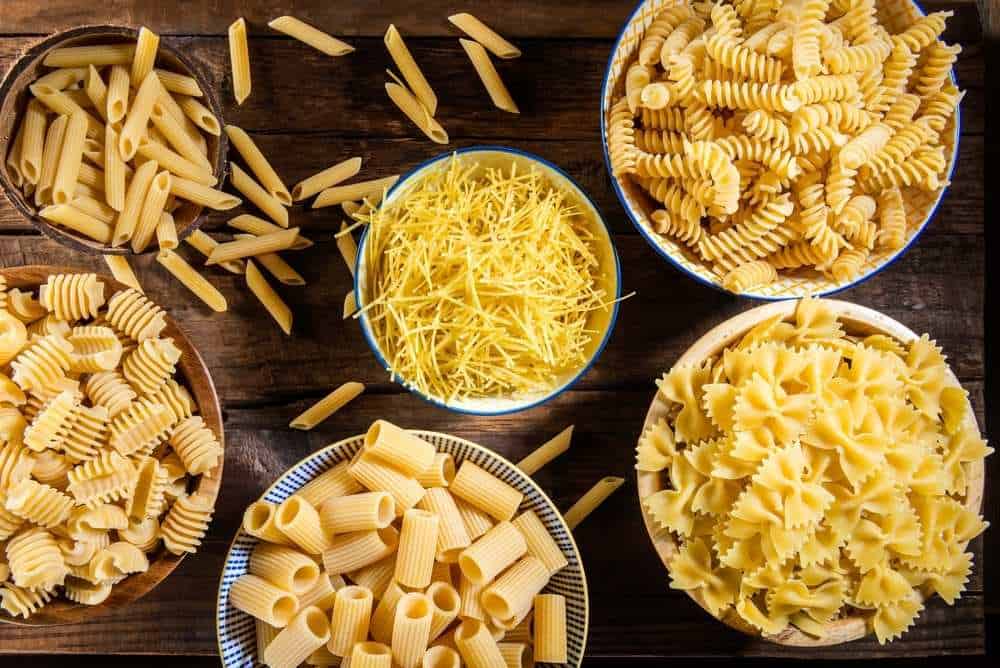
- I love pressure cooking pasta in the Instant Pot because of the convenience of a one-pot meal.
- Unlike cooking pasta on the stovetop, you don’t need to worry about watching it. You can let it cook without worrying about overflowing or foaming.
- The biggest issue that people face when cooking pasta in the Instant Pot is the possibility of the Burn Message. To avoid this, you want the pasta to be the last ingredient you put in before pressure cooking and don’t stir it in. Push the pasta gently with a spatula to allow it to submerge in the liquid.
- Don’t fill the Instant Pot past the ½ full mark when cooking pasta.
- The pressure cooking time for pasta is generally computed with this formula:
(Stovetop cooking time on the box / 2) + 1. If the answer is a fraction, round down.
So if the box tells you to cook the pasta for 11 minutes: 11 / 2 = 5.5 + 1 = 6.5 minutes (round down to 6 minutes). - Use 2 cups liquid per 8 ounces of pasta.
- The times below are for Barilla brand of pasta. If you’re using another brand, check the box and use the above formula to compute the pressure cooking time.
- Release pressure using the intermittent quick release method. This means you release pressure for a second and stop, repeat until the pressure starts to come out with less force, at which point you can release all the remaining pressure.
- When pasta is done cooking and pressure has been released, you might see some liquid. If you stir up the pasta and let it rest for 7 to 8 minutes, the liquid should get absorbed.
Instant Pot Pasta Recipes
- Instant Pot Penne with Sausage
- Instant Pot Spaghetti with Meat Sauce
- Instant Pot Vegetarian Rigatoni Bolognese
- Instant Pot Pasta with Garlic Shrimp
- Instant Pot Thai Peanut Noodles
- Instant Pot Burmese Noodle Soup
- Instant Pot Italian Wedding Soup
| Pasta | Pressure Cooking Time |
|---|---|
| Angel hair | 3 minutes |
| Ditalini | 6 minutes |
| Elbow macaroni | 4 minutes |
| Farfalle | 6 minutes |
| Fettuccini | 7 minutes |
| Linguini | 5 minutes |
| Mostaccioli | 6 minutes |
| Orechiette | 7 minutes |
| Orzo | 5 minutes |
| Pastina | 4 minutes |
| Penne | 6 minutes |
| Rigatoni | 7 minutes |
| Rotini | 4 minutes |
| Shells (Medium) | 5 minutes |
| Spaghetti (No. 5) | 5 minutes |
| Spaghetti (Thick) | 6 minutes |
| Spaghetti (Thin) | 4 minutes |
| Ziti | 6 minutes |
Poultry/Chicken Cooking Times
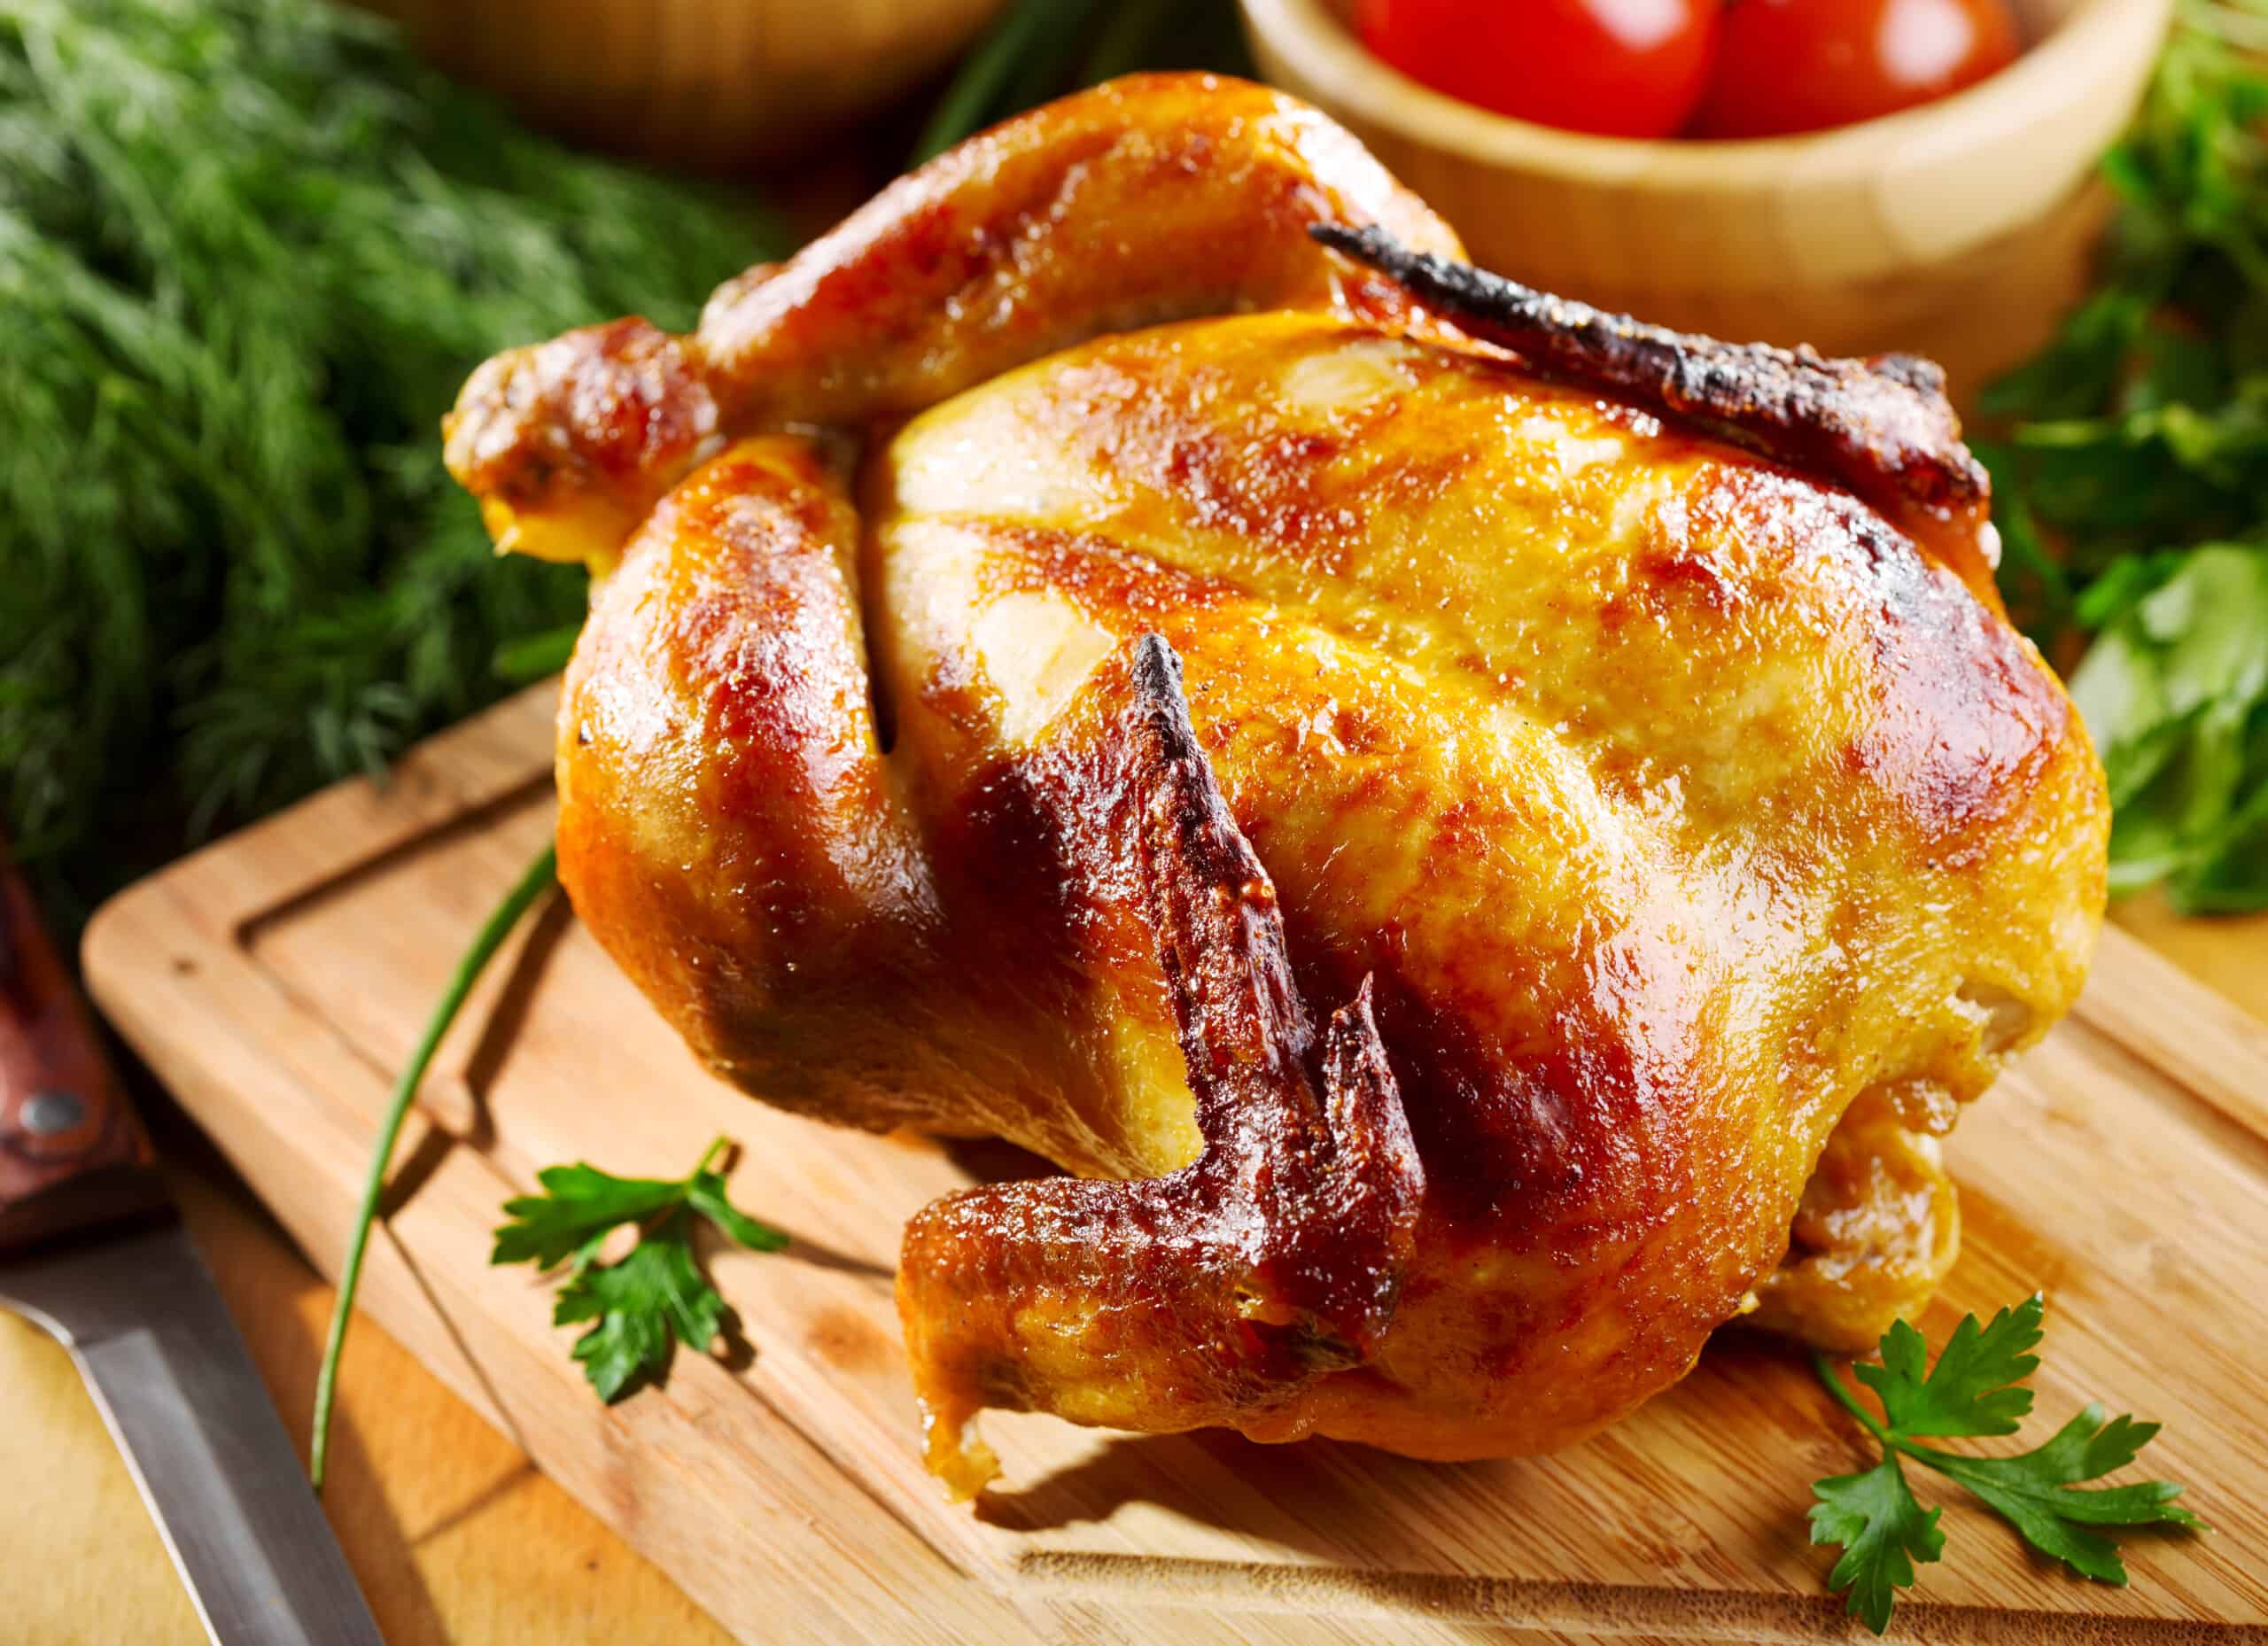
- If the size of your chicken is different from the chart, add or subtract a minute or two from the stated times.
- Chicken breasts can easily get overcooked. If you’re cooking small boneless chicken breasts, pressure cook them for 6 minutes. Large breasts may need another couple of minutes.
- I generally don’t like to cook with frozen chicken. I find that frozen meat tends to cook too unevenly and the frozen food releases a lot of liquid into an already liquidy recipe. The only time I use frozen chicken is if the recipe calls for small pieces of chicken submerged in liquid, e.g. soups and stews.
- If you choose to use frozen poultry, a general rule of thumb is to add 50% to the cooking time. For larger chunks of frozen food, add even more time.
- When freezing chicken that you plan to use in the Instant Pot at a future time, it’s best to freeze the pieces separately so they’re not in a big chunk when you need to cook them from frozen.
- Use a trivet to place the frozen chicken on, with water or broth below the trivet.
[Read More: What is a Trivet and How Do You Use it?] - I like to apply a dry rub on (thawed) chicken before pressure cooking it on a trivet.
- It’s best to use at least a 10-minute natural pressure release, if not a full natural pressure release when cooking chicken. The only time I break this rule is when the chicken is fully submerged in liquid, in which case I will sometimes to a 10 or 15 minutes natural pressure release.
[Read more: Different Pressure Release Methods] - Chicken that’s been pressure cooked can often benefit from a quick searing after pressure cooking, whether on the stovetop, oven, broiler or grill.
- The times I’ve listed below are approximate. Please measure the temperature of the thickest part of the meat before eating. Refer to the FDA safe temperature chart.
| Chicken | Cooking Time | Frozen Cooking Time |
|---|---|---|
| Chicken breast (bone-in) | 12 minutes | 25 minutes |
| Chicken breast (boneless) | 7 minutes | 12 minutes |
| Chicken thigh (bone-in) | 9 minutes | 14 minutes |
| Chicken thigh (boneless) | 7 minutes | 10 minutes |
| Chicken (1 ½ inch cubes) | 4 minutes | 5 minutes |
| Chicken (in a frozen block) | n/a | 20 minutes |
| Chicken bone broth | 2 hours | n/a |
| Cornish game hen (2 lbs) | 15 minutes | 45 minutes |
| Chicken (whole 3 lbs) | 20 minutes | 40 minutes |
| Turkey breast (boneless 4 lbs) | 25 minutes | 50 minutes |
| Turkey breast (bone in 7 lbs) | 30 minutes | 80 minutes |
| Turkey leg (2 count) | 20 minutes | 30 minutes |
Seafood Cooking Times
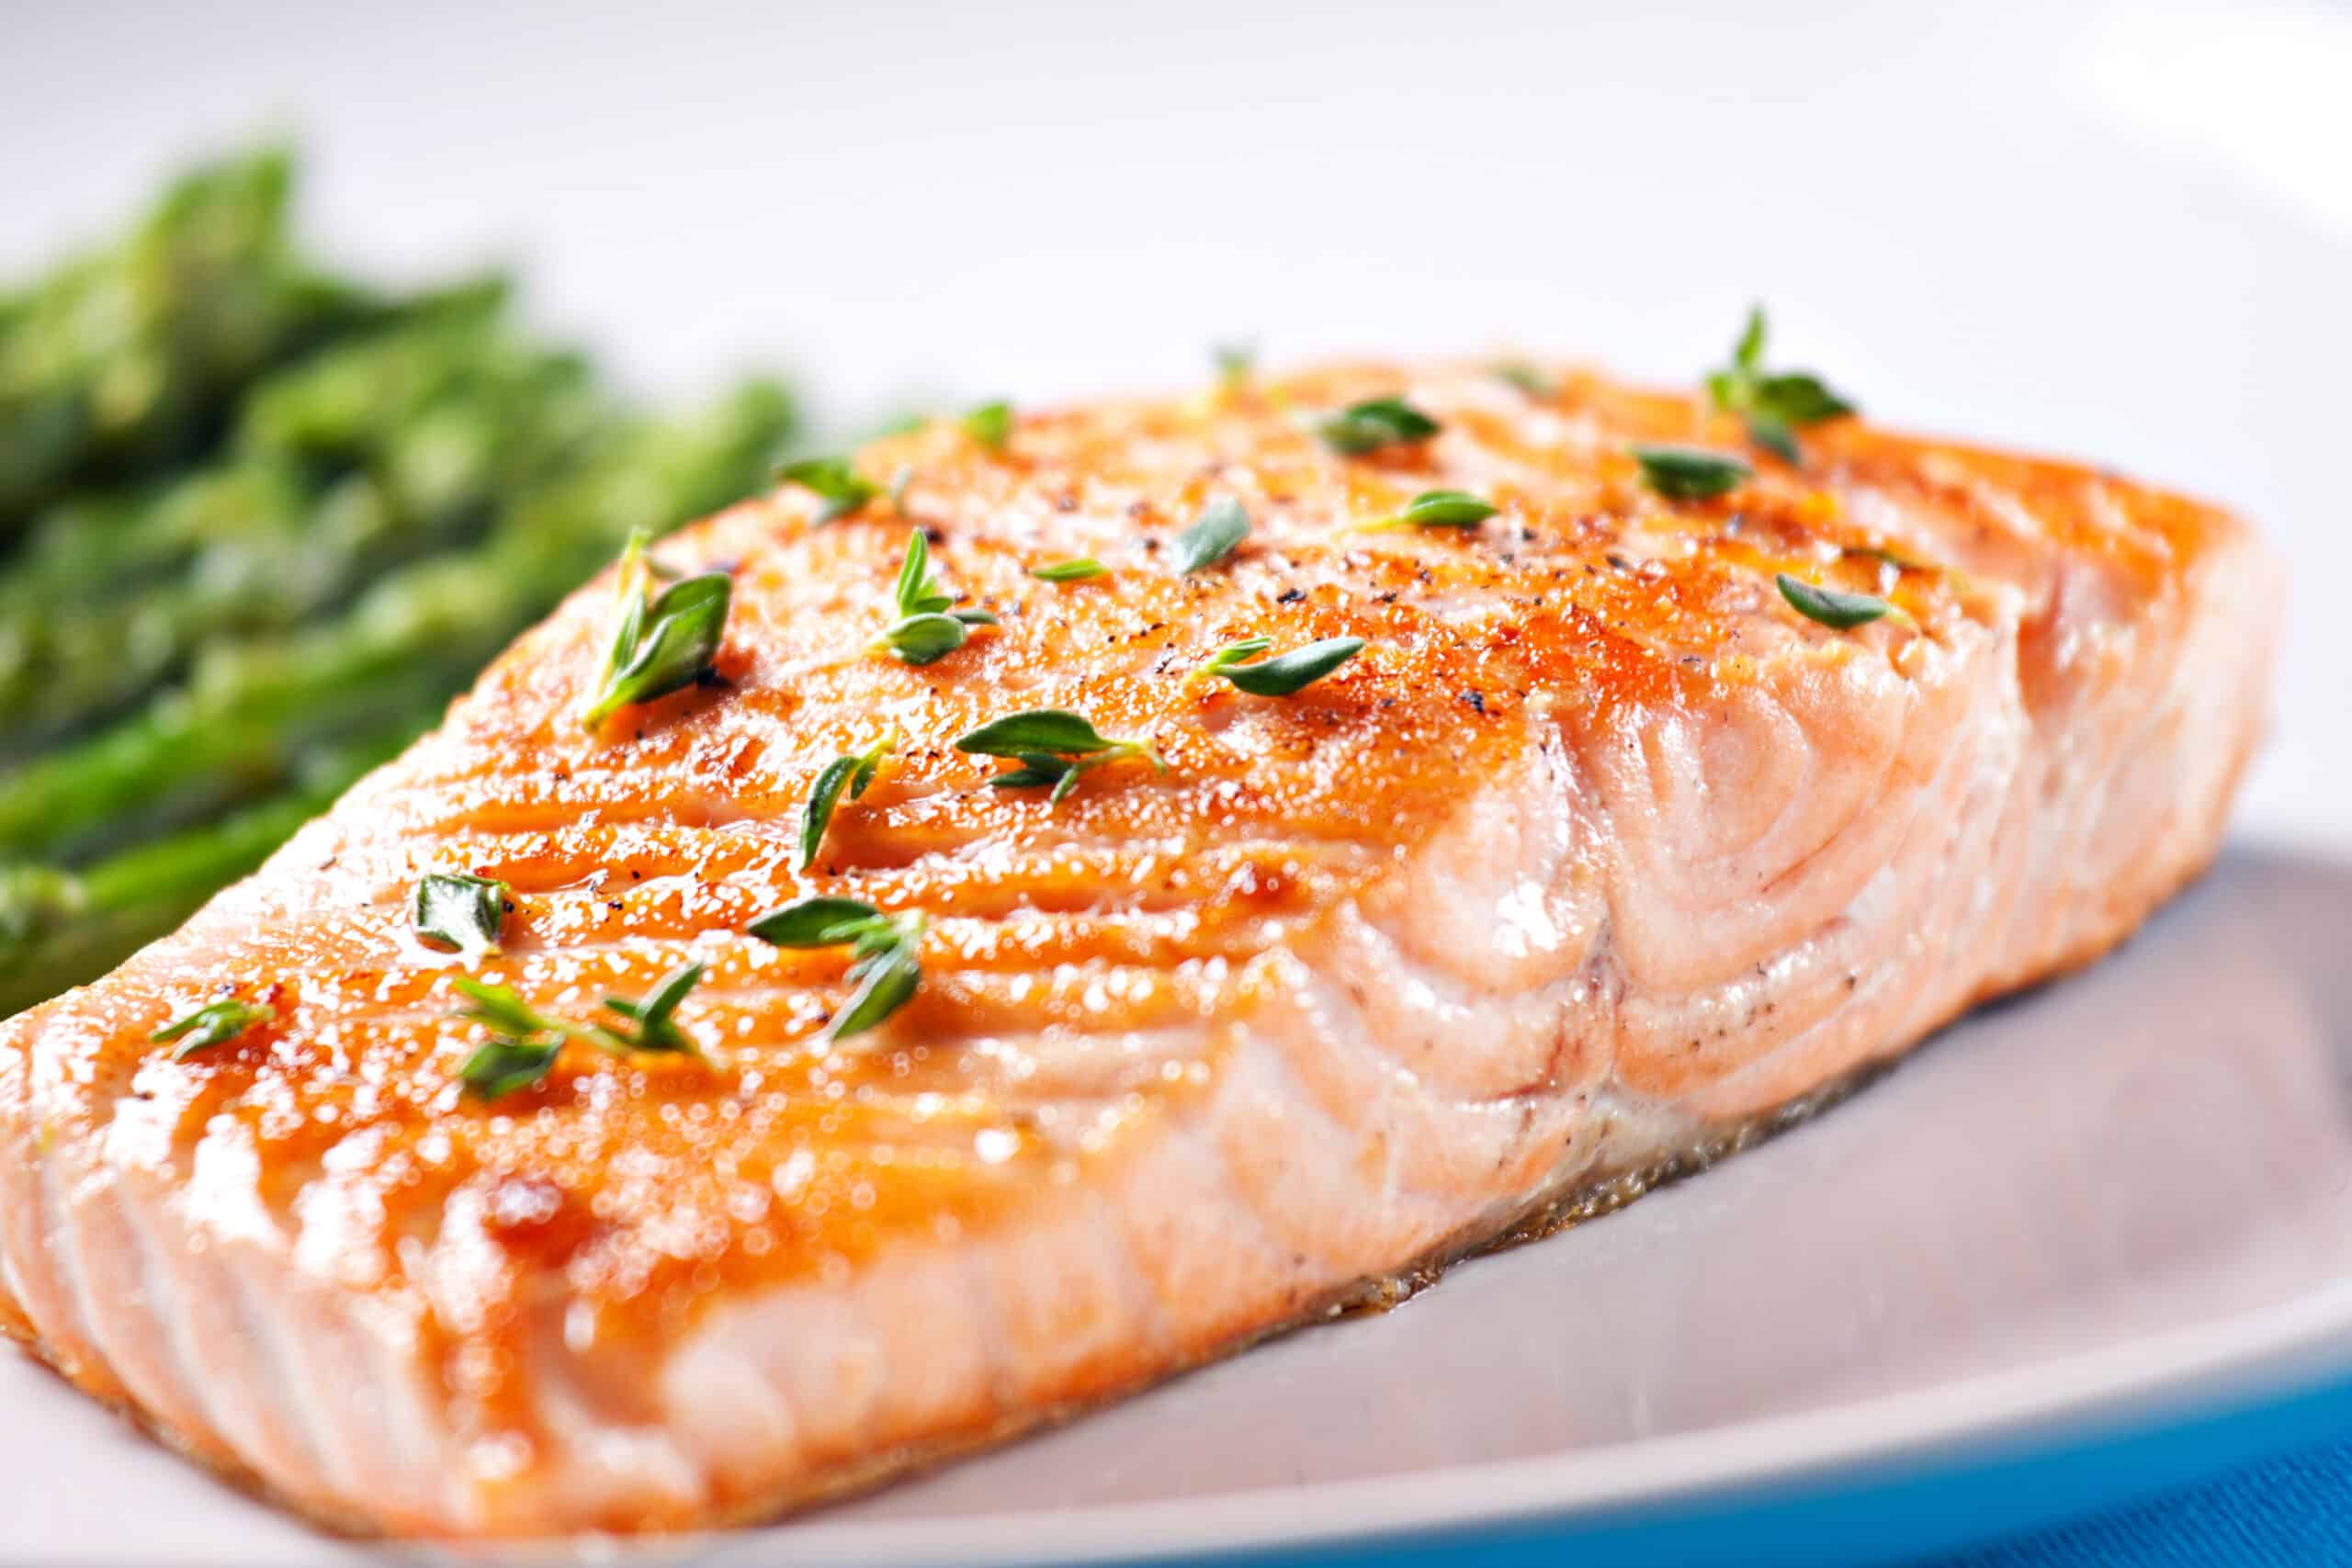
- The charts below provide times for cooking seafood under high pressure. However, low pressure cooking is a great option for seafood. It allows the seafood to cook evenly without becoming rubbery. If you try the timings and find that the fish is overcooked or tough, try using Low Pressure next time, if that’s an option on your Instant Pot. Add an extra minute of cook time.
- Add another minute of pressure cooking time for each extra inch of thickness.
- Make sure frozen fish pieces are separated from each other and not frozen in one big chunk.
- Pressure cooking large pieces of frozen fish will result in uneven results i.e. the outside of the fish will cook more than the inside. It’s better to cut the frozen fish into smaller pieces.
Instant Pot Seafood Recipes
| Seafood | Fresh/Thawed | Frozen | Steam Release |
|---|---|---|---|
| Clams | 1 minute | 2 minutes | Quick |
| Cod (1 inch thick) | 2 minutes | 3 minutes | Quick |
| Crab legs | 2 minutes | 5 minutes | Quick |
| Halibut (1 inch) | 2 minutes | 4 minutes | Quick |
| Mussels | 3 minutes | 5 minutes | Quick |
| Salmon (1 inch) | 3 minutes | 5 minutes | Quick |
| Sea bass (1 inch) | 3 minutes | 5 minutes | Quick |
| Seafood stock | 30 minutes | n/a | Natural Release |
| Shrimp (large) | 1 minute | 2 minutes | Quick |
| Swordfish (1 inch) | 3 minutes | 4 minutes | Quick |
| Tuna steaks (1 inch) | 3 minutes | 4 minutes | Quick |
Lamb Cooking Times
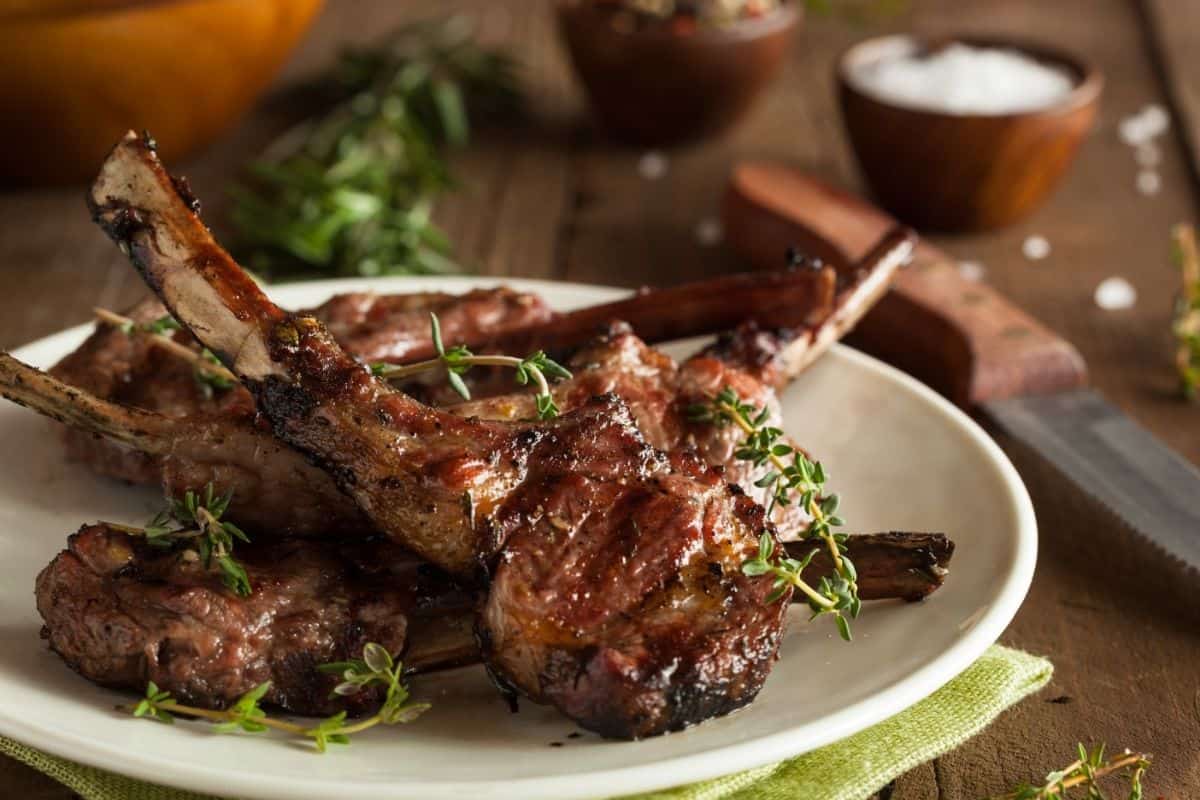
- It’s best to use a full natural pressure release when cooking lamb. The only time I break this rule is when the lamb is fully submerged in liquid, in which case I will sometimes to a 10 or 15 minutes natural pressure release.
[Read more: Different Pressure Release Methods] - When using a trivet or steam rack, I like to rub a dry rub on meats.
- Pressure cooking large pieces of frozen meat will result in uneven results i.e. the outside of the meat will cook more than the inside. It’s better to cut the frozen meat into smaller pieces.
- Add 10 minutes per extra pound of meat.
- The times I’ve listed below are approximate. Please measure the temperature of the thickest part of the meat before eating. Refer to the FDA safe temperature chart.
Instant Pot Lamb Recipes
| Meat | Cooking Time |
|---|---|
| Ground lamb | 8 minutes |
| Ground lamb (meatballs) | 3 minutes |
| Lamb shanks (4 count) | 45 minutes |
| Lamb stew meat | 30 minutes |
| Leg of lamb (boneless 3 lbs) | 45 minutes |
Beef and Veal Cooking Times
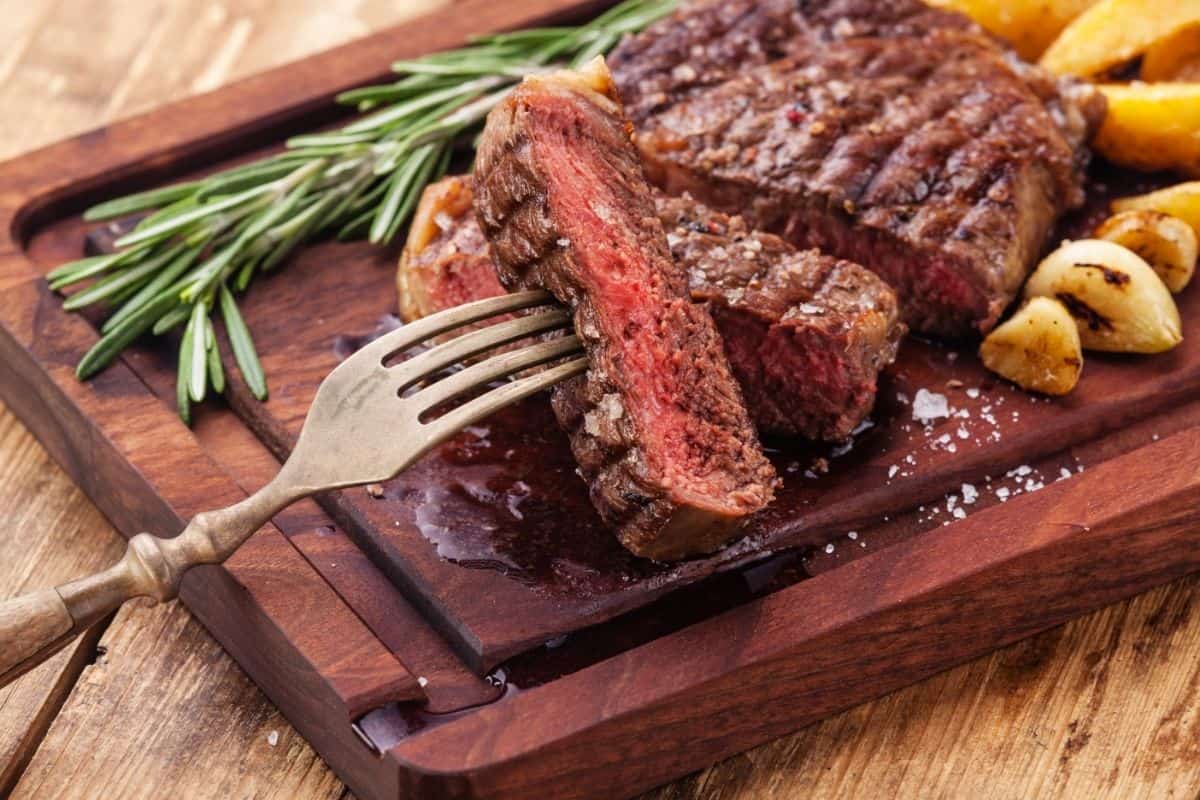
- In general, add 15 minutes per extra pound of meat.
- Make sure the pieces are separated if frozen. They shouldn’t be clumped together in one big chunk.
- Pressure cooking large pieces of frozen meat will result in uneven results i.e. the outside of the meat will cook more than the inside. It’s better to cut the frozen meat into smaller pieces.
- I like to rub a dry rub on meats before pressure cooking them on a trivet or rack.
- Lean cuts of beef don’t fare that well in the Instant Pot (round roast, sirloin roast). You’re better off using sous vide, or cooking directly on the stove or grill. However, since some readers prefer to cook leaner meats, I’ve provided some general times.
[Read More: How to use the Instant Pot Sous Vide Function] - Beef that’s been pressure cooked can often benefit from a quick searing after pressure cooking, whether on the stovetop, oven, broiler or grill.
- The Instant Pot meat cooking times I’ve listed below are approximate. Please measure the temperature of the thickest part of the meat before eating. Refer to the FDA safe temperature chart.
Instant Pot Beef Recipes
| Meat | Cooking Time | Frozen |
|---|---|---|
| Beef (stew meat) | 18 minutes | 28 minutes |
| Beef ribs | 30 minutes | 40 minutes |
| Brisket (2 lbs) | 75 minutes | 90 minutes |
| Chuck roast (3 lbs) | 45 minutes | 60 minutes |
| Chuck roast (cubed) | 15 minutes | 17 minutes |
| Corned beef (2 lbs) | 75 minutes | 90 minutes |
| Flank steak (2 lbs) | 50 minutes | 65 minutes |
| Flank steak (strips) | 12 minutes | 15 minutes |
| Meatballs | 7 minutes | 9 minutes |
| Meat loaf | 25 minutes | 40 minutes |
| Round roast (2 inches thick) – Medium rare | 3 minutes | 4 minutes |
| Rump roast (3 lbs) | 90 minutes | 110 minutes |
| Short ribs (3 lbs) | 45 minutes | 60 minutes |
| Sirloin roast (3 lbs) | 25 minutes | 40 minutes |
| Sirloin tips | 15 minutes | 17 minutes |
| Veal shanks | 30 minutes | 40 minutes |
| Veal stew meat | 25 minutes | 27 minutes |
Pork Cooking Times
- When using frozen pork, make sure meat pieces are separated and not frozen in one big chunk.
- Pressure cooking large pieces of frozen meat will result in uneven results i.e. the outside of the meat will cook more than the inside. It’s better to cut the frozen meat into smaller pieces.
- Add 10 minutes per extra pound of meat.
- I like to rub a dry rub on meats before pressure cooking them on a trivet or steam rack.
- In general, lean cuts of meat don’t fare that well in the Instant Pot (pork chops, loin, tenderloin). You’re better off using sous vide, or cooking directly on the stove or grill. However, since some readers prefer to cook leaner meats, I’ve provided some general times.
[Read More: How to use the Instant Pot Sous Vide Function] - Pork that’s been pressure cooked can often benefit from a quick searing after pressure cooking, whether on the stovetop, oven, broiler or grill.
- The times I’ve listed below are approximate. Please measure the temperature of the thickest part of the meat before eating. Refer to the FDA safe temperature chart.
| Meat | Cooking Time | Frozen |
|---|---|---|
| Baby back ribs (1 rack) | 25 minutes | 35 minutes |
| Country-style ribs (bone-in, 3 lbs) | 25 minutes | 35 minutes |
| Country-style ribs (boneless, 3 lbs) | 20 minutes | 30 minutes |
| Pork chops (boneless 1 ½ inch thick) | 1 minute | 2 minutes |
| Pork chops (bone-in 1 ½ inch) | 2 minutes | 3 minutes |
| Pork loin roast (2 lb) Center cut | 15 minutes | 22 minutes |
| Pork shoulder (boneless 3 lbs) (Pork butt) | 60 minutes | 80 minutes |
| Pork shoulder (bone-in 4 lbs) | 70 minutes | 90 minutes |
| Pork tenderloin (1.5 lbs) | 3 minutes | 5 minutes |
| Ham (bone-in, cooked, uncut, 6 lb) | 15 minutes | 30 minutes |
| Honey baked ham Spiral-cut ham) | 2 minutes per pound | n/a |
| Ham slices (2 lbs) | 4 minutes | n/a |
If you found this article to be helpful, please share it on social media using the social media share buttons at the top and bottom of this post. Thank you so much!


Lisa says
Two round roast, 13.5#
How lonw to pressure high cook?
Thx Lisa
Neena Panicker says
You’ll probably need to cut the roast into smaller pieces and cook in batches. I’m not sure about the timings since I’ve never pressure cooked a roast.
Christine says
Sorry. I see it now. Scrolled too fast on my phone.
Neena Panicker says
Christine, no worries. I’ll put an asterisk on that cook to lead to the appropriate paragraph. Thanks for pointing it out!
Christine says
How do you cook vegetables for 0 minutes? I don’t get it and you don’t explain.
Wai Kwong Sito says
Hi ! May I know can I pressure cook without adding water? If minimum amount? I am referring to the Instant Pot Duo Crisp
Paint the Kitchen Red says
Hi there, you need a minimum amount of water to pressure cook and the quantity depends on the capacity. For a 6 quart I can get away with a cup, for an 8 quart about 1.5 cups. Also keep in mind that vegetables release liquid and that helps towards to minimum water requirement. The same for sauces like soy sauce etc. However, if you’re using the air fryer option you don’t add water.
Mansi says
This manual is extremely helpful! I don’t have social media to share it with others, but I will recommend it to all my friends. Thank you for your hard work in putting this together! It is better than the manufacturer’s site! 🙂
Paint the Kitchen Red says
Thank you so much, Mansi!
Tiffany says
Hi, Is this guide available in a binded paperback version for sale? I’d love to have a print out!
Paint the Kitchen Red says
Hi Tiffany, I’m so sorry to say that it isn’t available in print form.
KELLI says
I have used this website many times! I had some problems with my instapot and they HELPED OUT SO MUCH.. BUT NOW I CAN’T SEEM THE BASIC RECIPES ,AND COOKING DIRECTIONS FOR ALL KINDS OF BEEF ROAST.
Paint the Kitchen Red says
Kelli, I don’t have any beef roast recipes on the site, and I haven’t removed any recipes. Is there a particular basic recipe you’re referring to? I can try and find it for you.
Gary Lazarus says
Hi Neena, I’m looking for an opinion on searing and cooking double cut pork chops in my insta pot. Two chops with bone weigh 2 1/4 lbs. Thank you
Paint the Kitchen Red says
Gary, do you have the sous vide button, by chance? That would be your best bet for pork chops, since pressure cooking works great on fattier cuts. I have a post that will show you exactly how to sous vide. If you still wish to pressure cook them, I would use 1 to 2 minutes still.
Nancy Rhodes says
Thank you so much for the great charts. The information was exactly what I was looking for.
Paint the Kitchen Red says
Nancy, I’m happy to help. Thank you for your feedback!
Sharon says
Thank you so much! I have the IP cooking chart, but your charts are way more extensive.
Paint the Kitchen Red says
Sharon, that’s great – I’m glad you find them helpful!