These Deviled Eggs with Wasabi are a Japanese take on a crowd-pleasing recipe. Plain deviled eggs get a flavorful kick from wasabi and pickled ginger. The perfect easy appetizer to take to any party.

This post contains affiliate links. As an Amazon Associate, I earn from qualifying purchases. Please read the disclosure.
Table of Contents
Introduction
Even if you’re not a big fan of deviled eggs, you just might become a convert when you try this unique twist to deviled eggs. Wasabi deviled eggs are a burst of flavor when you pop them in your mouth. And they’re addictive!
Deviled eggs are a classic appetizer made with hard-boiled eggs. The yolks are mixed with mayonnaise and spices, which are used to fill the egg whites.
One of the things I love about these wasabi deviled eggs is how easy they are to make and how they’re a great last-minute appetizer. They are a great option for the holidays: Thanksgiving, Christmas, Easter, and even the 4th of July.
I keep pickled ginger and wasabi paste in the fridge, and they last for quite a while. Wasabi paste found in the West is different from wasabi in Japan and is generally made from horseradish.
You don’t need an Instant Pot for this recipe, but the Instant Pot makes it so easy! I now don’t know how I managed to boil eggs without the Instant Pot! Here’s my Instant Pot hard boiled eggs 2 minutes recipe.
Tips and Substitutions
How to Cut the Eggs
When you’re cutting up the eggs, slice them in half lengthwise and wipe your chef’s knife clean with a wet paper towel after cutting each egg. That’ll keep your egg whites from getting yolks on them.
How to Get the Perfect Filling
You want to have just the right amount of mayonnaise mixed in such that the filling isn’t too hard or soft, so adjust the quantity of mayonnaise as needed. The filling should have structure and hold the shape when it’s piped into the egg whites.
To make the filling fluffier, you can use a food processor to break up the yolks or push the yolks through a mesh sieve with the back of a spoon.
Make sure that you taste the egg yolk mixture and adjust the seasonings to taste. Add more salt and pepper, wasabi, or even add some chopped scallions for more flavor.
Mayonnaise
I prefer to use Hellman’s or Best Foods brand of mayonnaise. To lighten up the recipe, you can substitute some or all of the mayonnaise with light mayonnaise or Greek yogurt. But please note that the wasabi deviled eggs won’t be as flavorful!
How to Fill the Deviled Eggs
I like to pipe the yolk into the egg whites. I use a piping bag fitted with a tip that has a larger opening, making the piping come out easily. I prefer to use a 2A star tip or 2D round tip and these disposable pastry bags.
However, if you don’t want to use pastry bags, transfer the yolk mixture into a quart-size plastic storage bag. Fill the bag with the filling and snip about ⅛ inch at one corner of the bag. You can also use a small spoon to fill the egg whites.
Wasabi Paste
I purchase S&B wasabi paste in a tube and it keeps in my fridge for a long time. It’s pretty pungent, so I recommend adding ½ teaspoon at a time and tasting the filling as you go. For a very subtle wasabi flavor, reduce the quantity of paste.
Pickled Ginger
Pickled ginger is found in a jar and it also keeps for a long time in the fridge. You can cut each piece into strips and roll them up to garnish the deviled eggs. The quantity of ginger you’ll need will depend on the size of the pieces. I like to cut them into thin strips, roll them up and a small piece of ginger to each egg white half.
Rice Vinegar
Rice vinegar is also referred to as rice wine vinegar. It’s frequently used in Asian dishes. It’s different from regular vinegar because it’s milder and has a sweet flavor. I use Marukan Rice Vinegar.
Make Wasabi Deviled Eggs Ahead
Cook the eggs ahead of time, cut the eggs and separate the yolks. Refrigerate the whites and yolks until ready to use. If you refrigerate the whole egg, the yolk can be harder to separate easily. Alternately, make the filling and refrigerate in an airtight container until you’re ready to fill the eggs.
Transporting the Eggs
To transport the eggs, you can use a deviled egg container, which is really handy. If you don’t have one, you can use this hack:

- Line an 18-count egg carton with aluminum foil and push the foil down into the egg slots.
- Wrap the foil around the bottom of the carton and pinch the edges to secure the foil.
- You can now place the eggs in the egg slots and put the carton into a box to transport.
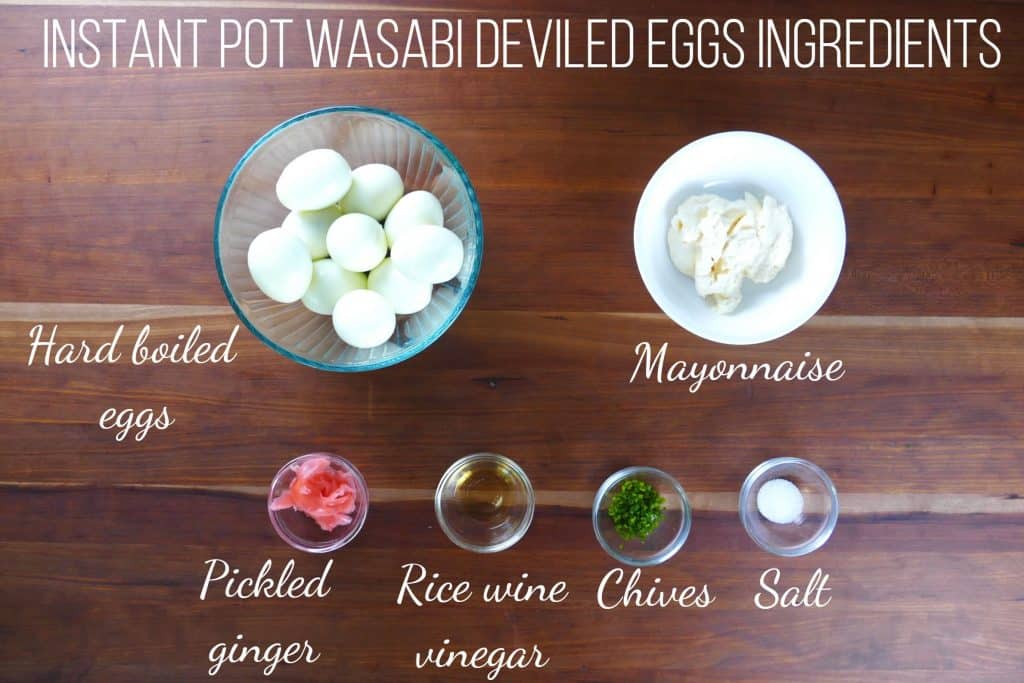
Wasabi Deviled Eggs Ingredients

- Boiled eggs
- mayonnaise
- pickled ginger
- rice wine vinegar
- chives
- salt
How to Make Deviled Eggs with Wasabi (Step by Step Instructions)
- Cook and peel eggs
- Remove the yolks
- Make filling
- Pipe filling into egg whites
- Garnish
Cook and peel boiled eggs

- Cook the eggs using the recipe for Instant Pot hard-boiled eggs or stovetop eggs.
- Remove from heat and let stand. Peel them once they’re cool.
Make the filling

- Transfer eggs to a cutting board and cut the eggs in half lengthwise.
- Remove the yolks carefully with a spoon and place them in a medium bowl. Arrange the egg whites on a serving platter.
- Add mayonnaise, rice vinegar, chives, wasabi, and salt to the yolks. Taste and add more salt and pepper to taste. Add wasabi for more spiciness.
Fill the pastry bag

- Mix all ingredients together using a fork or spoon and push down the yolks to break them up and create a smooth paste.
- Fit a piping bag with a tip with a large opening and place the bag into a mug, folding down the edges over the outside of the mug.
- Fill the bag with the yolk mixture.
Pipe filling back into eggs

- Lift the piping bag from the mug; unfold and straighten out the piping bag.
- Twist the top of the piping bag and squeeze the filling to the tip.
- Pipe the yolk mixture back into each egg white half in a circular motion, ending in a slight peak.
Garnish

- Place a rolled-up ¼ inch wide piece of ginger on each egg.
- Sprinkle eggs with chopped chives. Add a sprinkle of paprika for an added splash of color.
- See the tips section on how to transport the eggs.

Wasabi Deviled Eggs Recipe
Ingredients
- 10 eggs
- ⅓ cup mayonnaise or more for a creamier filling
- 2 ½ teaspoon rice vinegar
- 1 tablespoon chives chopped, plus more for garnish
- 1 ½ teaspoon wasabi paste or to taste
- ⅛ teaspoon salt or to taste (optional)
- 7 pieces pickled ginger cut into ¼ inch wide strips
Instructions
- Cook the eggs using the Instant Pot Hard Boiled Eggs 2 minutes recipe or boil the eggs in water.
- Cool the eggs naturally or by placing them in cold water or an ice bath.
- Peel the eggs and slice each egg in half, lengthwise.
- Separate the egg yolks from the whites carefully (use a spoon if necessary) and place the yolks in a medium bowl.
- Arrange the egg whites on a serving platter.
- Add the mayonnaise, rice vinegar, chives, wasabi paste and salt to the yolks. *
- Use a spoon or fork to mash up the yolks and other ingredients into a smooth paste. Add more mayonnaise if needed. Add more wasabi for more spice.
- Fill a piping bag with the egg filling. Pipe the filling into the egg halves.
- Place a rolled-up strip of pickled ginger on each egg.
- Sprinkle with chives.
Notes
- * Add the wasabi paste ½ teaspoon at a time, tasting as you go. Add extra mayonnaise, one tablespoon at a time, for a creamier filling.
- See the blog post for more detailed recipe tips.
Nutrition
Thank you for visiting Paint the Kitchen Red. All photos and content are copyright protected. Please don’t use any content without prior written permission. If you’ve made this recipe and would like to share it with your friends, please link back to this recipe. Thank you!
I am not a certified nutritionist. I provide my best estimate of nutritional information merely as a courtesy to my readers. If you depend on nutritional information for dietary or health reasons, I suggest using your favorite online nutrition calculator to confirm the nutritional value of this recipe based on the actual ingredients that you use.
Did you know that the best way to support your favorite bloggers is to comment and rate recipes, and share on social media? If you loved this recipe, please comment and give it a five ⭐ rating in the comment section below. If you’re a pinner, pin this post using the Pin buttons at the top and bottom of this post and in the recipe card above. Thank you for your support!
Recipes You Might Like!


Ben
Made these deviled eggs last weekend in my Instapot and everyone really liked it. I love wasabi so I added a couple of teaspoons! Thanks for sharing.
Paint the Kitchen Red
Thanks, Ben! I’m really glad you liked the recipe. They’re my new go-to appetizer 🙂