


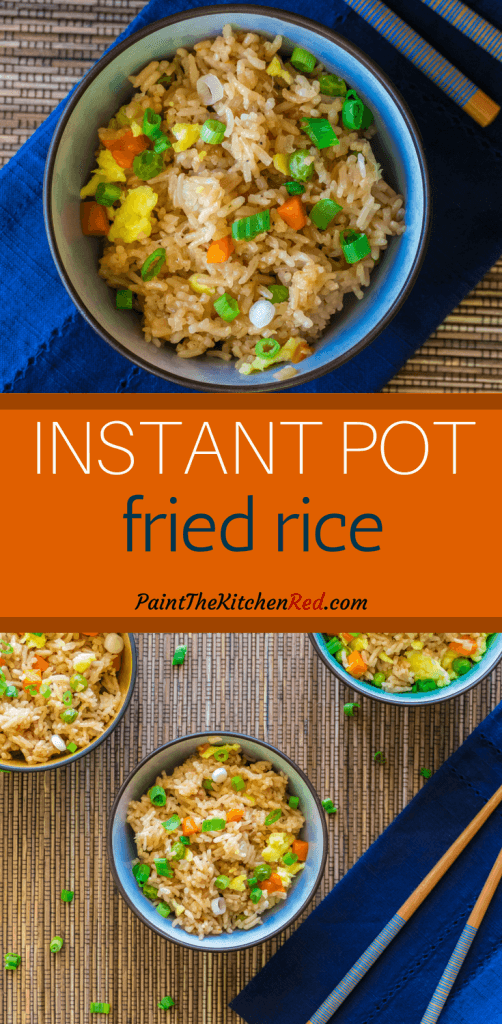
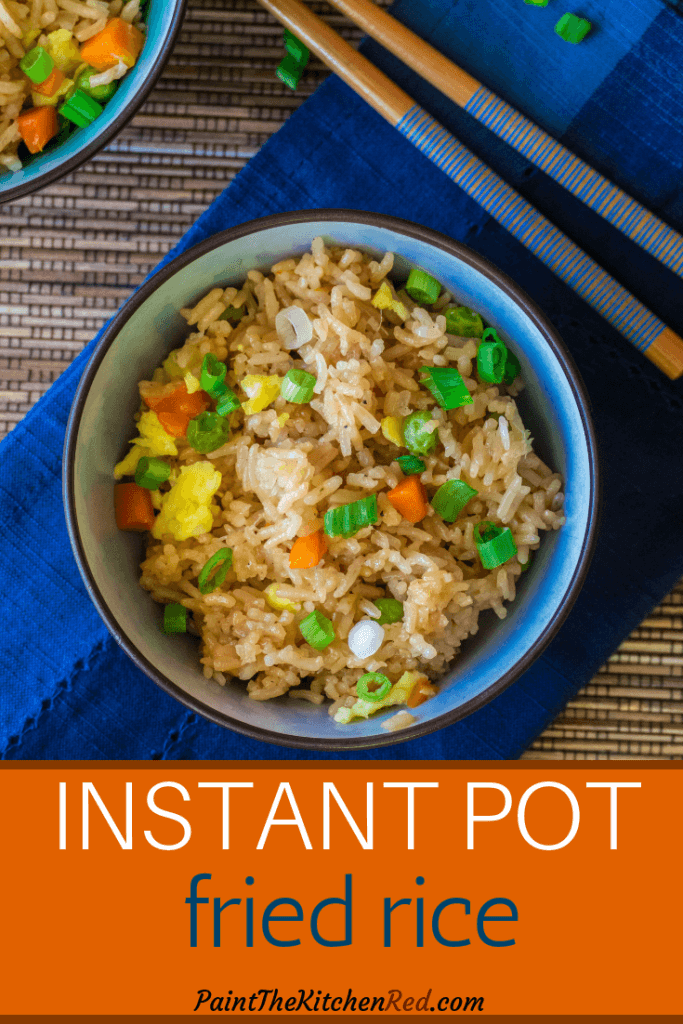
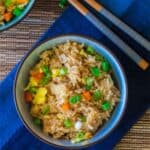
If you’re looking for that last-minute easy recipe to complete your Asian dinner menu on a busy weeknight, this Instant Pot fried rice is perfect for you. Ready in just 30 minutes, this Instant Pot Chinese rice delivers authentic flavors with minimal hands-on time!
This post contains affiliate links. As an Amazon Associate, I earn from qualifying purchases. Please read the disclosure.
My fried rice Instant Pot recipe calls for frozen vegetables and ingredients you probably have on hand, and it requires minimal prep work. Add some sriracha sauce to give it that extra zing!
Isabelle says ⭐️⭐️⭐️⭐️⭐️
This is so good and so easy! I make this rice almost every week! My toddler loves it too 🙂 Thank you for sharing this!
Let me be honest: this isn’t authentic Chinese fried rice. Authentic fried rice requires a super-hot wok and constant stirring.
But this Instant Pot version? It’s a game-changer for busy nights. You get delicious fried rice with minimal effort and almost no cleanup.
I make this rice a lot because more often than not, evenings at my house are super busy, and this recipe goes well as a side dish with any cuisine, especially Asian dishes.
I fry the eggs separately and add them to the rice at the end. This avoids the sticky mess that can happen when you fry an egg in the Instant Pot! But the downside is that you do have another pan to clean.
❤️ Why You’ll Love this Fried Rice Instant Pot Recipe
- Easily doubles for meal prep or larger families
- Ready in 30 minutes, start to finish, with very little hands-on time
- Uses pantry staples and frozen vegetables
- Perfect fluffy texture, never sticky or mushy
- Minimal cleanup compared to wok cooking
➡ If you’re looking for some other seasoned rice recipes, you might like Instant Pot Brown Fried Rice, Instant Pot Jambalaya, or Instant Pot Lebanese Rice and Lentils. For plain rice, try Instant Pot Jasmine Rice, Instant Pot Brown Jasmine Rice, or Instant Pot Parboiled Rice.
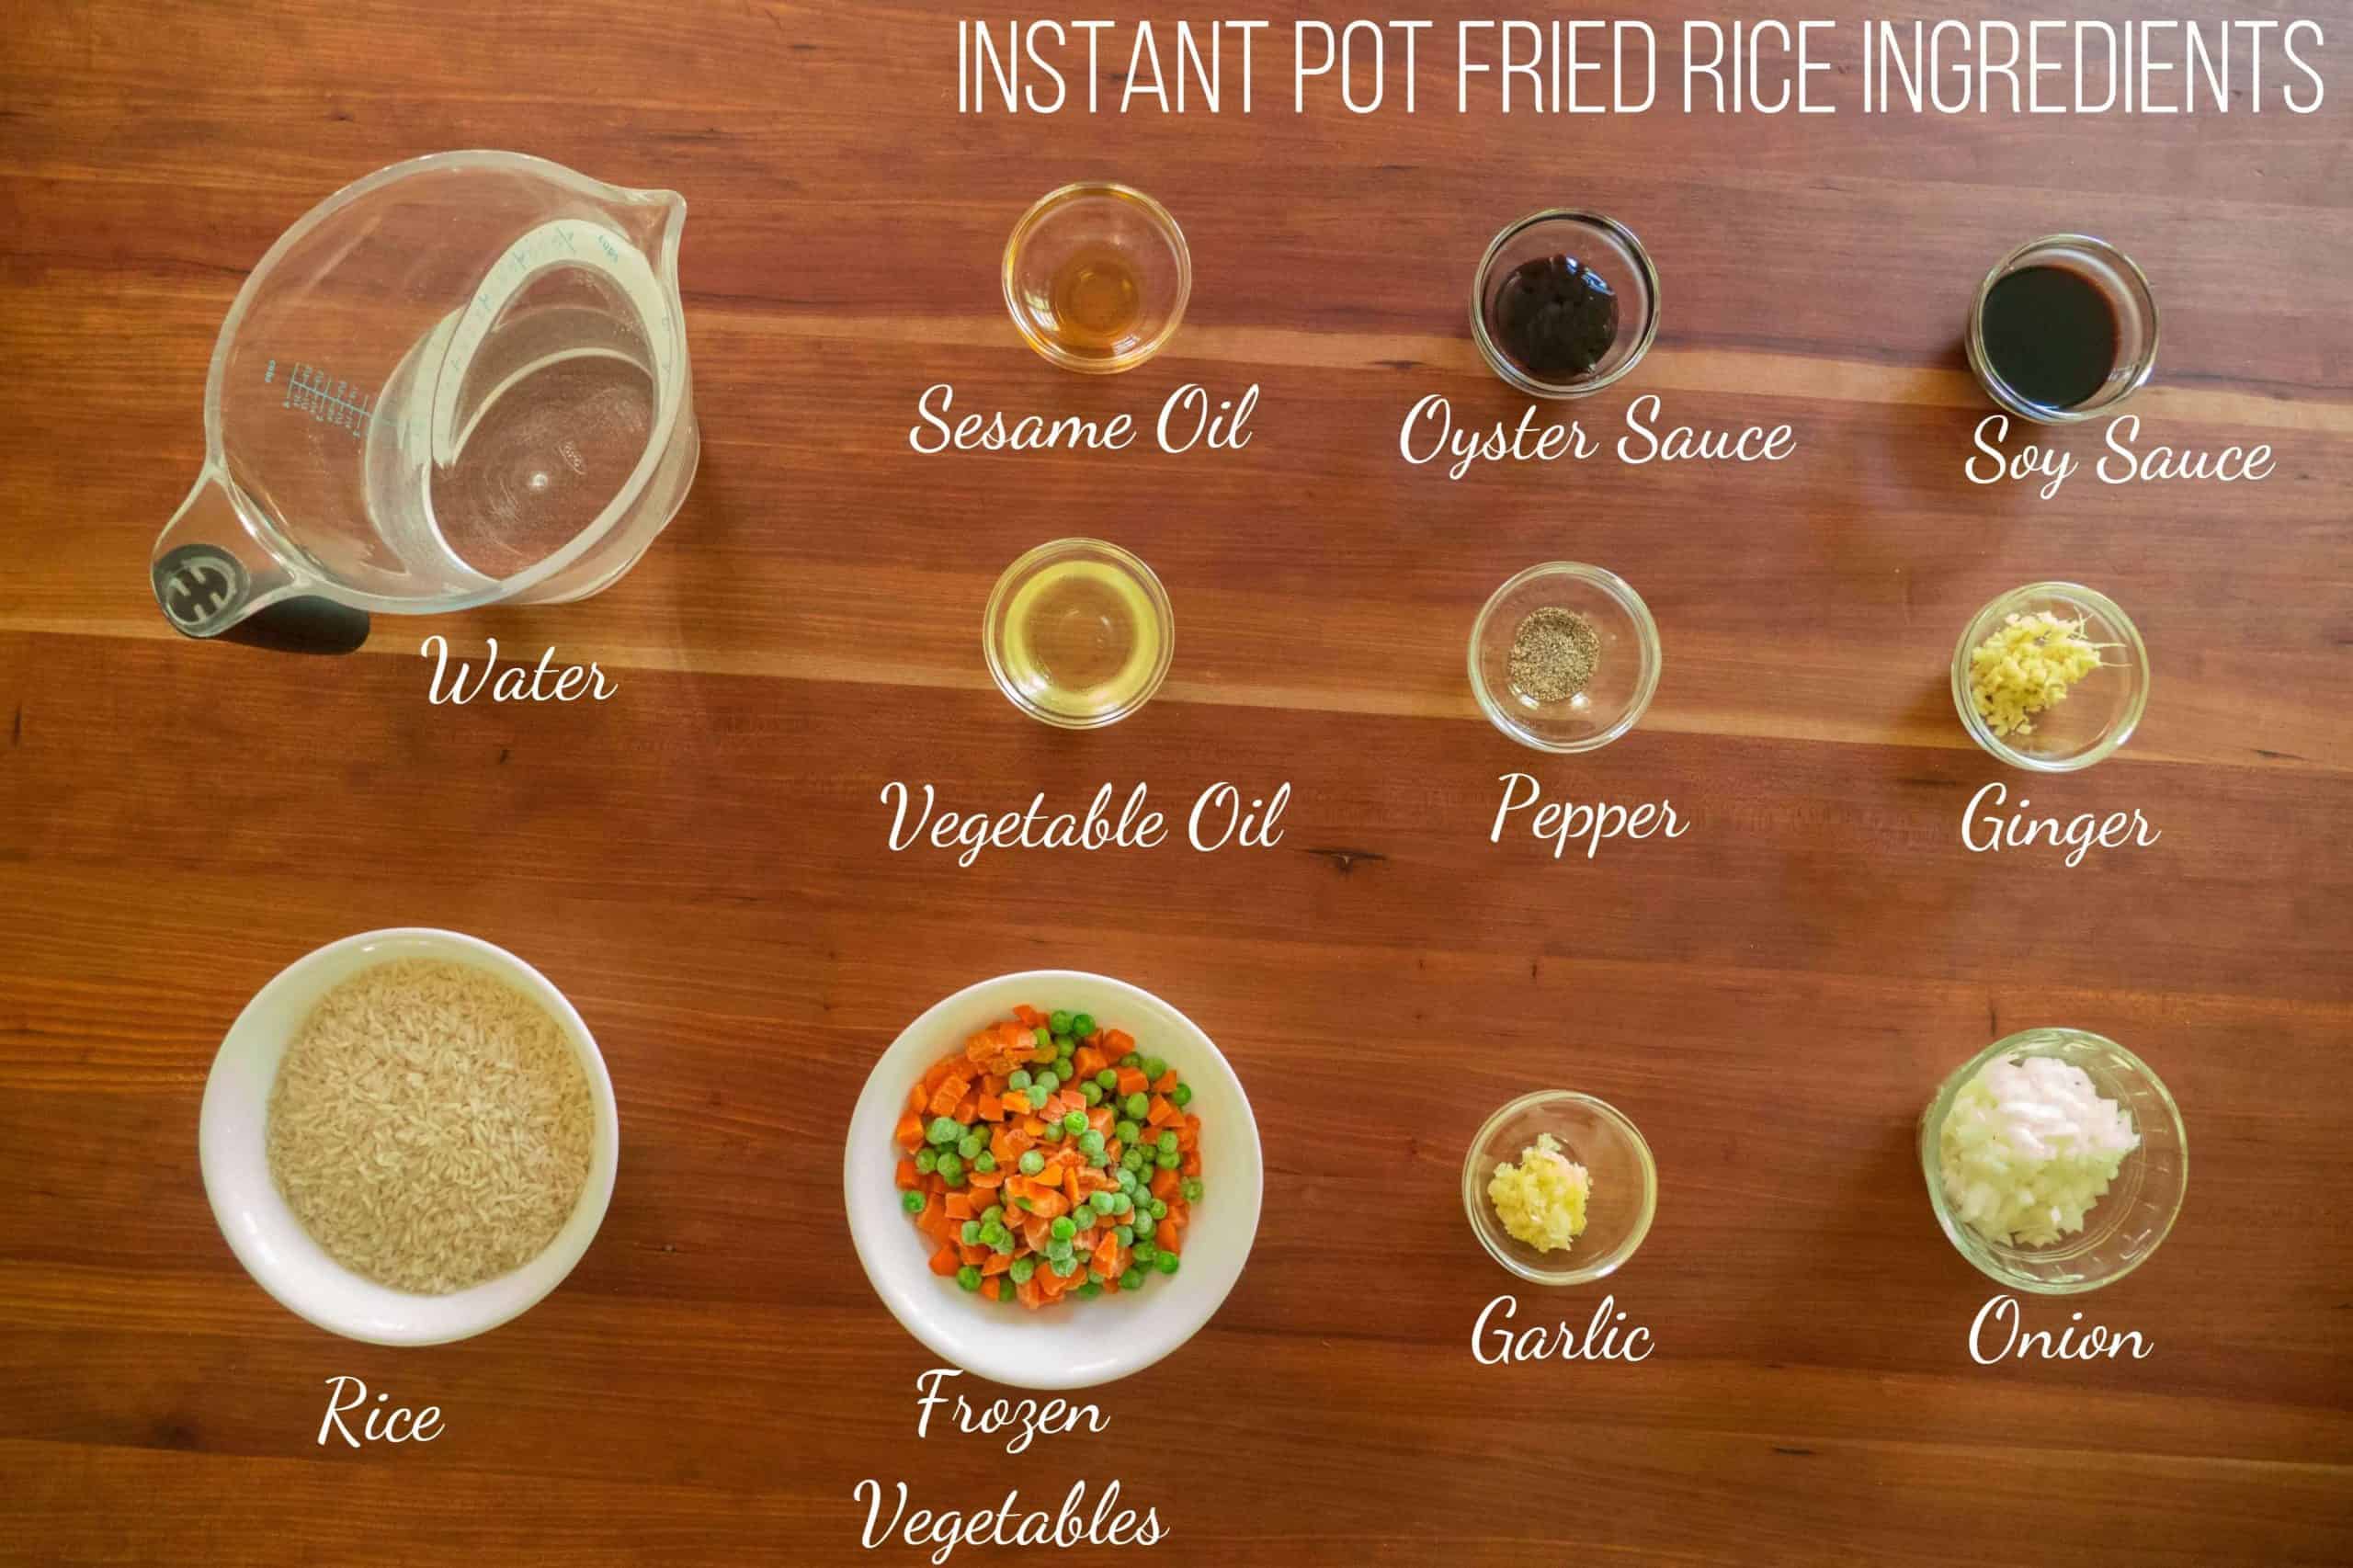
Ingredients and Tips
🧂 Ingredients for Fried Rice in Instant Pot
💡 Ingredient and Recipe Tips
🍚 Rice: I prefer Jasmine rice. Other types of white rice (long grain, basmati) will need 6-7 minutes cook time and adjusted water ratios. For chewier rice, pressure cook 4 minutes. After releasing pressure, fluff rice and let it rest open for a few minutes to separate grains.
🥕 Vegetables: For crisp-tender vegetables, stir them into rice immediately after opening the lid, then close for 5 minutes. Frozen peas and carrots work great for convenience. For fresh vegetables, sauté first in oil, remove with a slotted spoon, then stir into cooked rice. Try green beans, bell peppers, or mushrooms.
🍗 Protein: For chicken fried rice, briefly sauté bite-sized chicken thighs after the onions, then continue with the recipe. For shrimp, season with salt, pepper, soy sauce, or oyster sauce. Stir-fry seasoned shrimp first, remove with a slotted spoon, and add back once rice is cooked.
🍄🟫 Vegan: To make it vegan, use vegetarian oyster sauce.
🥣 Broth: Substitute water with chicken or vegetable broth for extra flavor.
🌿 Cilantro: Sprinkle chopped cilantro on rice before serving for fresh flavor.
🌶️ Spice Level: Add 1-2 teaspoons sriracha or hot sauce with other sauce ingredients before pressure cooking.
🍶 Soy Sauce: Regular or low-sodium soy sauce both work fine.
🥄 Oil: Use peanut, vegetable, olive, or avocado oil. Sesame oil is optional.
🔥 Burn Message: If your Instant Pot gets burn errors, add rice last and don’t stir – just push down with a spatula.
⏲️ How to Make Instapot Fried Rice
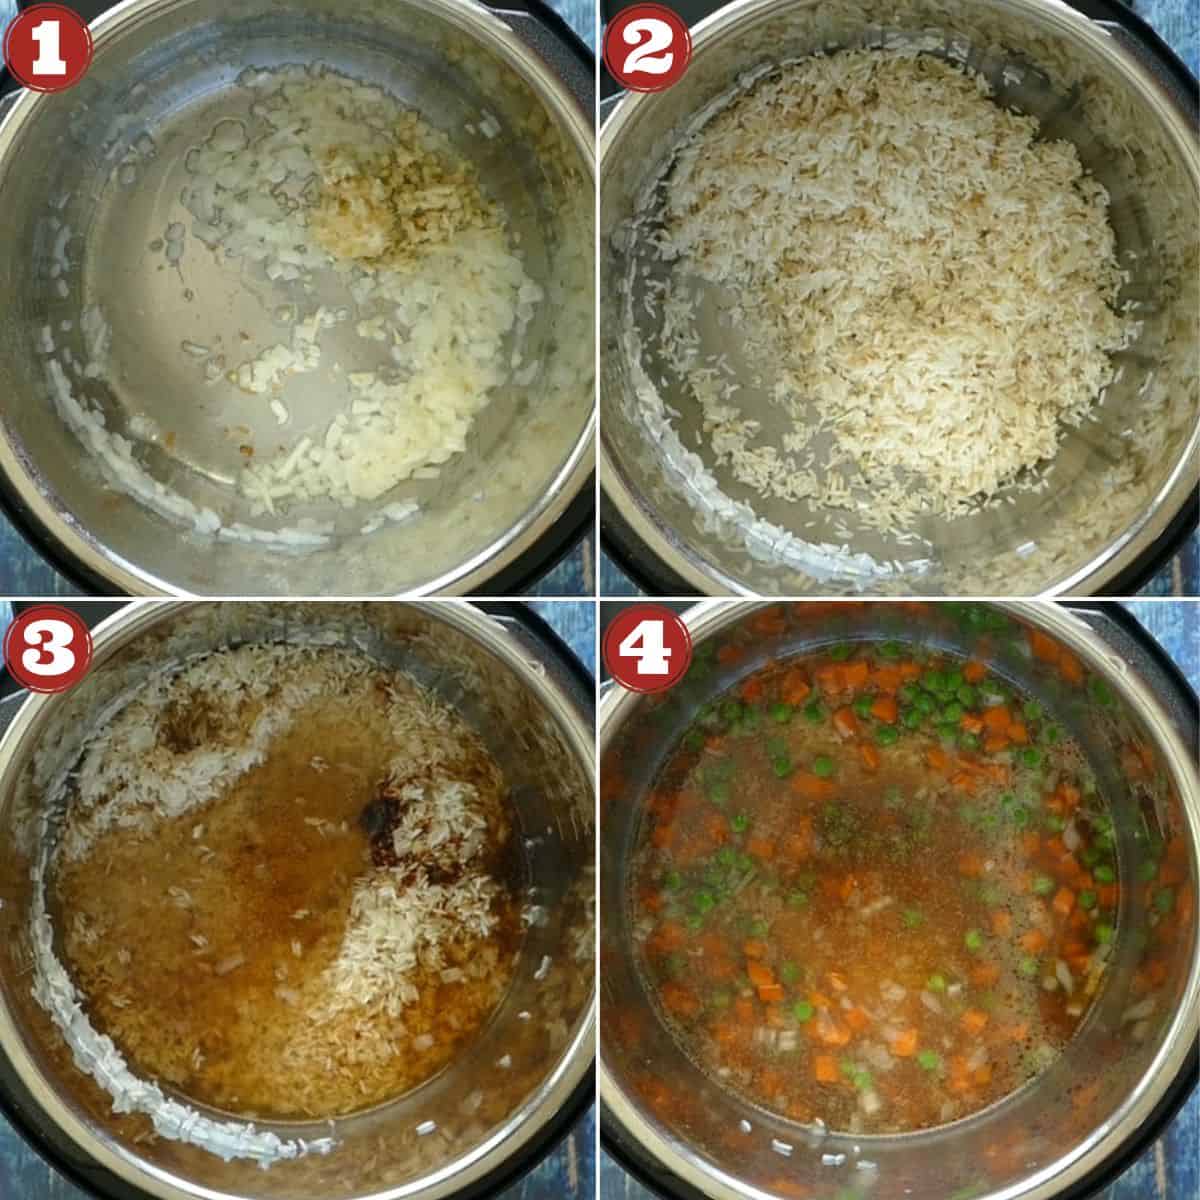
- Turn on Saute mode. Once the Instant Pot has heated up, add vegetable oil to the Instant Pot inner pot. Saute onions till translucent, about 2 minutes. Press Cancel. This will allow the Instant Pot to cool down while you do the next steps. Saute ginger and garlic for 30 seconds, on residual heat.
- Stir in rinsed Jasmine rice until coated with oil. Deglaze inner pot with a tablespoon or two of water if there’s anything stuck to the bottom of the pot.
- Add soy sauce, oyster sauce, black pepper, sesame oil, frozen vegetables, and water.
- Stir to mix.
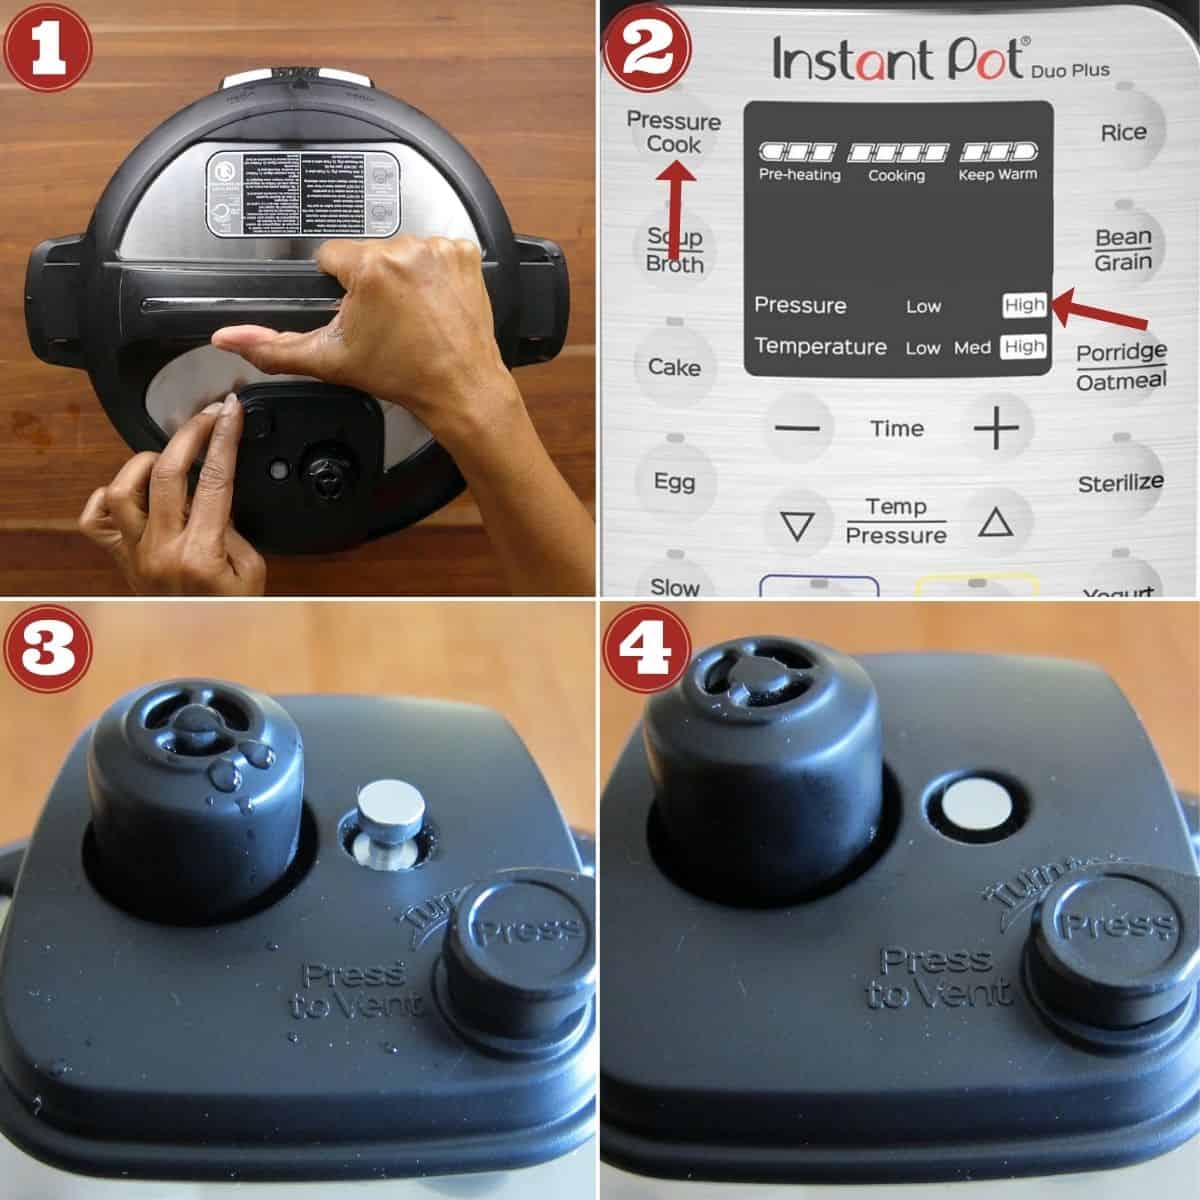
- Close the lid.
- Select Pressure Cook mode and cook on high pressure for 5 minutes.
- The display will go from On to 5:00. The float valve will go up after a few minutes. The display will count down to 00:00.
- Do a 10 minute natural release of pressure. Once the float valve goes down, the lid can be opened.
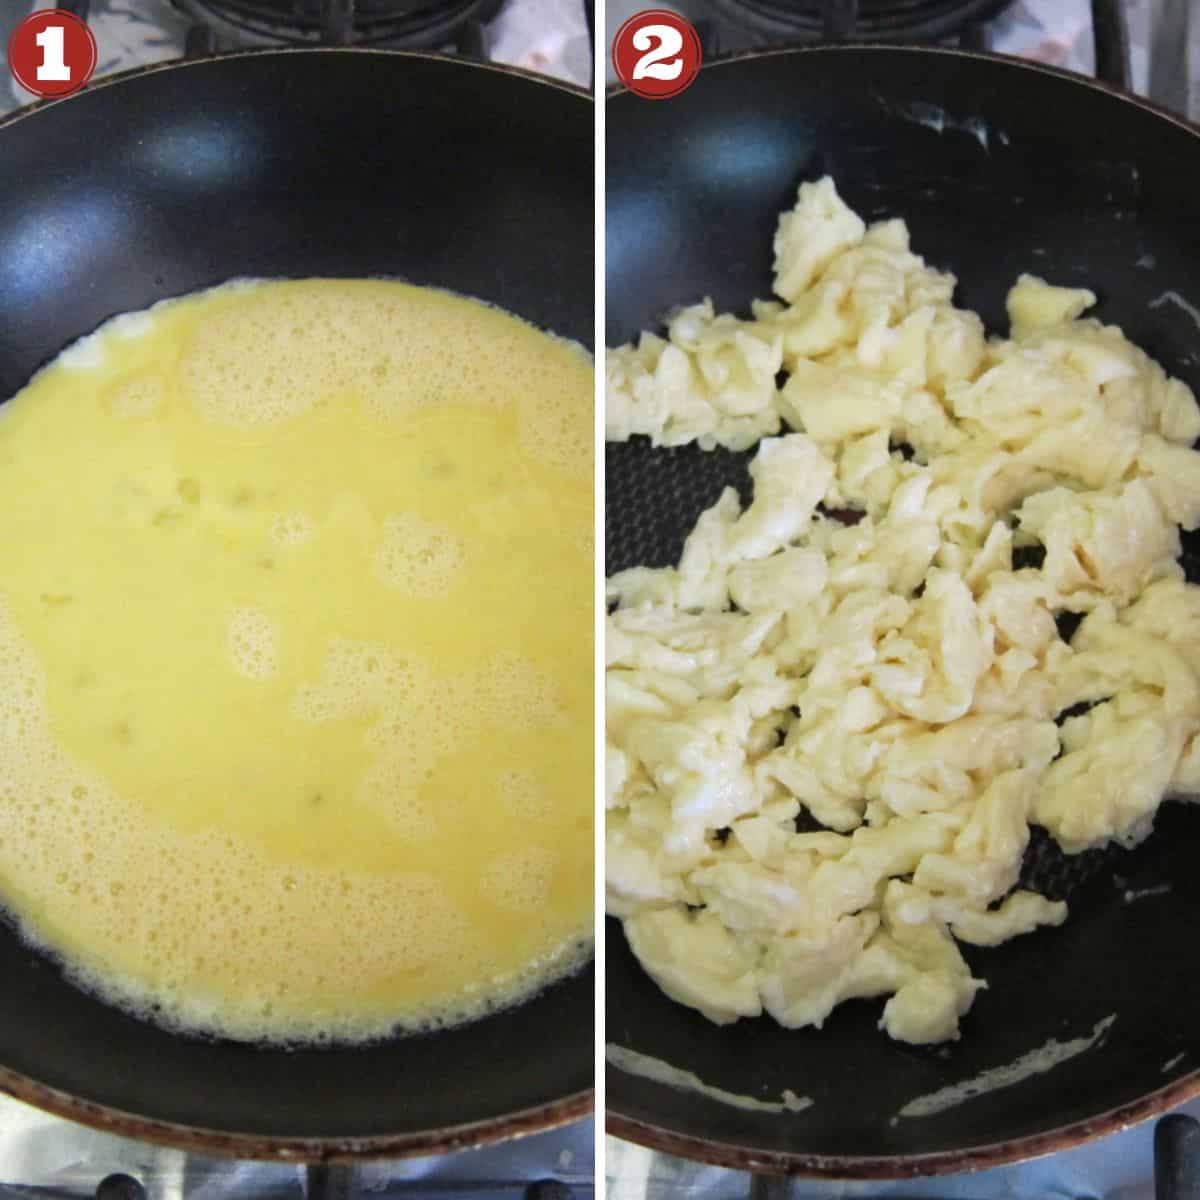
- Break eggs into a medium bowl and beat with a whisk. Heat a large nonstick frying pan over medium heat. Add 1 teaspoon vegetable oil and stir to coat. Pour eggs into frying pan and allow to set for 30 seconds to a minute.
- Using a silicone spatula, gently break up the eggs and flip until scrambled and cooked through.
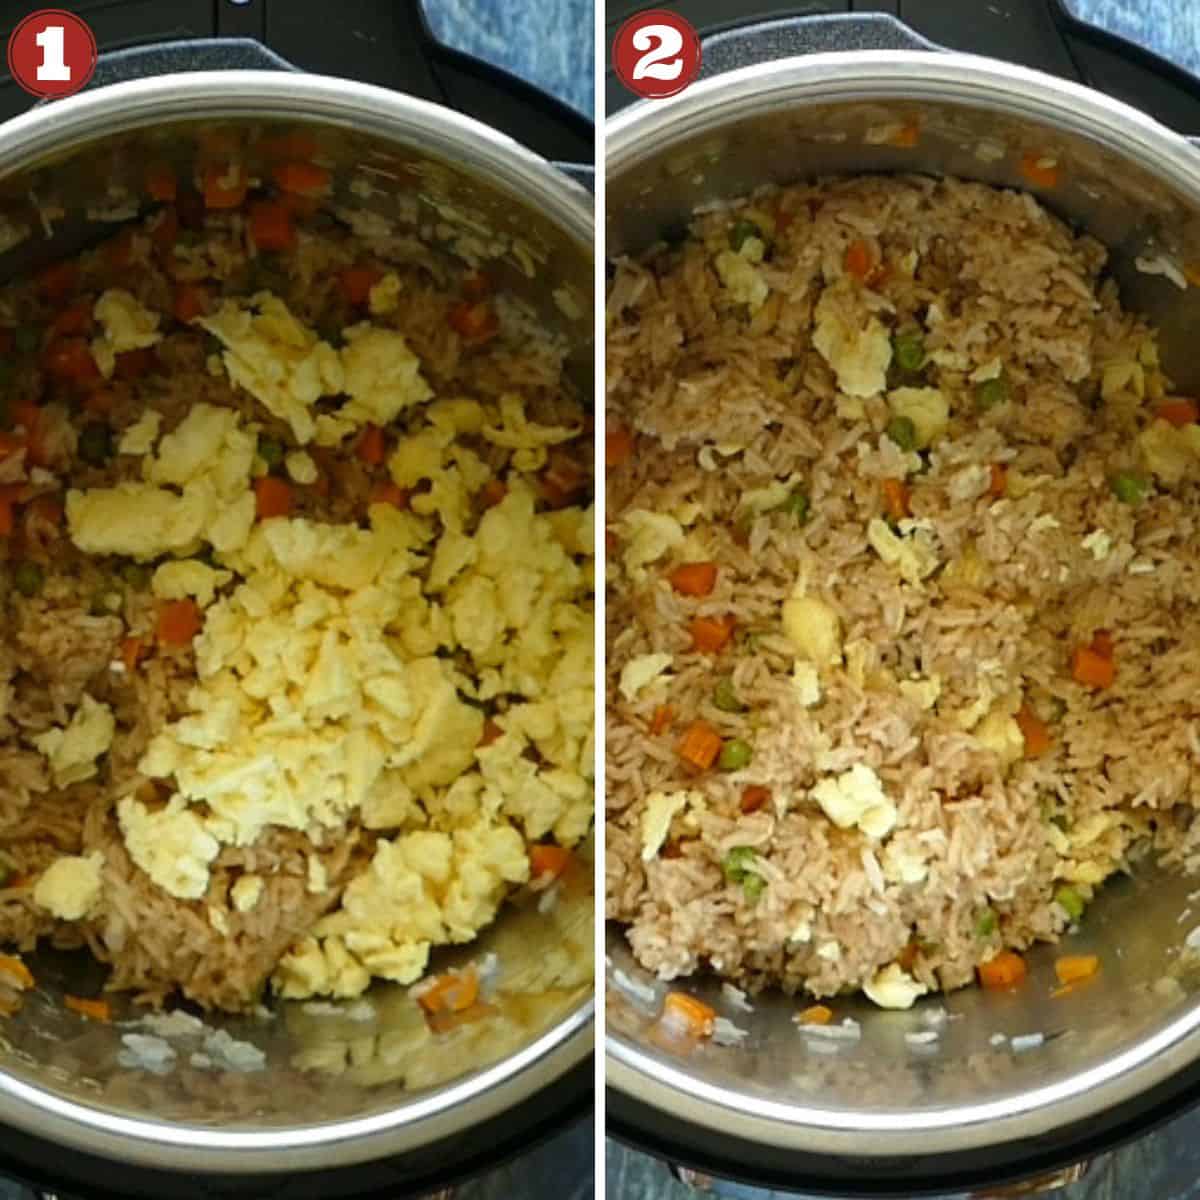
- Add eggs to the inner pot.
- Gently stir the Instant Pot Fried Rice. Sprinkle with chopped spring onions and sesame seeds (optional) before serving.
See the recipe card below for detailed instructions.
Instant Pot Fried Rice
Ingredients
- 1 ½ cups Jasmine rice
- 4 tsp vegetable oil divided
- ½ cup onions finely chopped
- 2 teaspoon ginger finely minced
- 1 Tbsp garlic finely minced
- 3 tablespoon soy sauce
- 1 Tbsp oyster sauce
- ½ teaspoon sesame oil
- ¼ tsp black pepper powder
- 1 ½ cups frozen peas and carrots
- 1 ¾ cups water
- 2 eggs beaten
- 3 tablespoon chopped green onions
Instructions
- Select the Saute function and allow the Instant Pot to heat up.
- Rinse and drain 1 ½ cups Jasmine rice; set aside.
- Add 1 tablespoon vegetable oil to the Instant Pot inner pot.
- Saute ½ cup onions till translucent, about 2 minutes, stirring often.
- Press Cancel. This will allow the Instant Pot to cool down while you do the next steps.
- Saute 2 teaspoon ginger and 1 Tbsp garlic for 30 seconds, stirring constantly.
- Stir in rinsed Jasmine rice until coated with onion mixture. [See Note 1]
- Deglaze inner pot with a tablespoon or two of water if there’s anything stuck to the bottom.
- Add 3 tablespoon soy sauce, 1 Tbsp oyster sauce, ½ teaspoon sesame oil, ¼ tsp black pepper powder, 1 ½ cups frozen peas and carrots, and 1 ¾ cups water.
- Stir to mix.
- Close the lid and pressure cook for 5 minutes on High Pressure.
- Let the pressure release naturally (NPR) for 10 minutes and then release any remaining pressure using the Quick Release (QR) method. [Read More: The Different Pressure Release Methods].
- Open the lid and let the Instant Pot Fried Rice rest for a few minutes.
- Heat a large nonstick frying pan over medium heat on the stove.
- Coat the frying pan with remaining vegetable oil and pour in the 2 eggs.
- Scramble the eggs by gently breaking up the eggs and flipping until eggs are set.
- Add eggs to the rice.
- Add 3 tablespoon chopped green onions and stir the rice gently to mix together all ingredients.
Notes
- Note 1: If you are prone to getting the burn message, add the rice on top of all the ingredients right before pressure cooking, and don’t stir.
Nutrition
Thank you for visiting Paint the Kitchen Red. All photos and content are copyright protected. Please don’t use any content without prior written permission. If you’ve made this recipe and would like to share it with your friends, please link back to this recipe. Thank you!
I am not a certified nutritionist. I provide my best estimate of nutritional information merely as a courtesy to my readers. If you depend on nutritional information for dietary or health reasons, I suggest using your favorite online nutrition calculator to confirm the nutritional value of this recipe based on the actual ingredients that you use.
Did you know that the best way to support your favorite bloggers is to comment and rate recipes, and share on social media? If you loved this recipe, please comment and give it a five ⭐ rating in the comment section below. If you’re a pinner, pin this post using the Pin buttons at the top and bottom of this post and in the recipe card above. Thank you for your support!


Isabelle says
This is so good and so easy! I make this rice almost every week! My toddler loves it too 🙂 Thank you for sharing this!
Paint the Kitchen Red says
Thanks, Isabelle! Happy toddler = happy mama 🙂
Dhanya Mudaliar says
Hi Neena,
I tried this recipe last night for the first time . It tasted okay, but I found the rice to be too sticky and overall the salt content was lower than I expected. I don’t usually use Jasmine rice at home and got a small bag specifically for this. I just wanted to ask you where you think I went wrong.
I used 2 cups of Jasmine rice and 2.5 cups of low sodium veg broth to cook it in. I used freshly diced carrots and French beans and bell peppers – about 2 cups in all. I did not use the oyster sauce as I didn’t have any on hand – everything else was the same, except I added a little more onions. I’m guessing I should have reduced the broth to 2.25 cups and used some of that to deglaze the pot while sautéing instead of adding a bit of extra water to deglaze.
Thanks for your help! Hope it is more successful the next time around. 😊
Paint the Kitchen Red says
Dhanya, I’m also guessing there was a bit too much water. Maybe 2 1/4 or 2 1/3 would have worked better. And the oyster sauce provides saltiness so if you omitted it, you could have added a bit more soy or salt. I too, hope that you have better luck next time. Thanks for reaching out.
Dhanya M says
Hi Neena,
I wanted to update you – I tried this recipe again and it was really good. I used the vegetarian oyster sauce and reduced the quantity of veg. broth. I used frozen mixed vegetables and added a little salt to flavor them since they had no sodium added. I used 4 minutes of pressure cooking time instead of 5. It was perfect for me. Thanks so much!
Paint the Kitchen Red says
Dhanya – great to hear and thanks for the update. I was hoping you’d be able to make it work 🙂 Thank you for being a loyal reader!
Megan says
I don’t know what happened, but epic fail. It keeps burning. What am I doing wrong? I have an instantPot Ultra.
Paint the Kitchen Red says
Megan, did you stir the rice in or let it sit on top? Did you deglaze well so that nothing burnt was stuck to the bottom? Have you successfully cooked other meals without getting a burn error? It’s possible you need to add more water to the recipe. Your Instant Pot may just run hotter than others – this is a known issue I’ve seen with other users. Sorry you had trouble.
shristi sargent says
I’ve made this so many times and my family all loves it! I add more soy sauce and spices to our taste.
Also, after I do npr, I take the IP inner pot and put it on top of my stove burners (with rice still in it) and let it cool completely. My husband does not like mushy rice at all, so letting it cool helps it to be more fluffy. Then a few hours later, I cook the eggs and whatever meat I’m using and mix it all up in a hot pan. Top with Sriracha, green onions, cilantro, and sesame seeds.
We love this and so many other recipes from this site! Thank you Neena!
Paint the Kitchen Red says
Shristi, thank you for the lovely comment especially the tips for other readers. It’s my pleasure to share recipes with you 🙂
Jodi Portnoy says
The recipe did come together pretty easily. I added frozen raw shrimp on top before I sealed the pot, and they were terrific when done. However, the rice was very soft – I think maybe overcooked and waterlogged, and it was pretty bland. I wish I had added a lot more garlic, ginger and onion than what was called for, and less liquid. I may try to make it again but I will definitely make some adjustments.
Paint the Kitchen Red says
Jodi, there are a few reasons you had issues with the recipe. When you use frozen foods, you need to reduce the quantity of liquid in a recipe. The frozen item contributes liquid and that is the reason your rice was overcooked and mushy. And having too much liquid is the #1 reason why pressure cooked foods taste bland. If you try the recipe again, I would suggest using thawed shrimp but it would probably overcook at 4 minutes. So instead you can open the lid after the rice has cooked, add the thawed shrimp and let it cook in the residual heat. Hope you’ll give it another try.
Nancy says
For rice in the IP, you are supposed to use a 1:1 ration of liquid. This recipe calls for more than that with 1.5 cups rice to 1.75 cups water, and then another quarter cup of liquid with the soy and oyster sauces. There may be a slight amount of wetness added from the onions and other vegetables, and then the added water from the frozen things you are putting in. I would suggest starting out with less water, such as either cut it down to 1.5 cups of water and then there is still the extra from the sauces. Or just go with 1.25 cups water plus the extra 1/4 cup from the sauces which will get you the 1:1 ratio. You can just play around with it as well to get it to your liking. Also, this rice made in the IP will not have the same texture as actual fried rice and will definitely be more soft than fried rice. I’m actually making this tonight, although I tweaked the recipe a bit for some of our dietary issues.
Paint the Kitchen Red says
Nancy, the ratio for rice is different based on the type of rice I use. Jasmine is generally 1:1.25. I’m fairly sure that the frozen shrimp was the biggest contributor to the issues this reader had. Anyway, I hope the recipe works for you with your modifications and thanks for your response to this reader.
Lindsey says
Have you tried making this with brown rice? If so, how much did it change the directions?
Paint the Kitchen Red says
Lindsey, yes I do make it with brown rice. I don’t add the frozen veggies and pressure cook for 22 minutes instead of 5. Once I open the lid, I add the thawed veggies, stir them in, close the lid and let the rice sit in the residual heat for about 10 to 15 minutes.
Lindse says
Great, thank you! I’m looking forward to trying this!
Emme says
I just stumbled onto this site and it’s so refreshing to see a clear written out recipe. I know how much extra work it must be, but I really appreciate the step-by-step photos instead of 30 glamour shots of the final product most food blogs have. Thanks for the recipe!
Paint the Kitchen Red says
Thank you, Emme, for taking the time to comment. It’s always great to get feedback like yours, because you are right; I do spend a fair amount of time creating the detail in the posts!
Dave says
Best How-To on the net
Paint the Kitchen Red says
Thank you for the rating and comment, Dave!
Heather says
Thanks for this recipe! My 13 yo has been begging for fried rice and I’ve been doing everything in my IP lately. I didn’t have any oyster sauce so I left that out…had to add some more soy sauce at the end to give it a bit more flavor. I did leave my frozen veggies out until the end because I didn’t want them mushy. I think maybe I stirred the rice too much to incorporate the frozen veggies as my rice got sticky and glutinous. Very easy and tasty, tho! Next time I’m going to try and follow this recipe to a T!
Paint the Kitchen Red says
Heather, yes the vegetables will be cooked more than if you were to stir fry. But I find that the taste is great and the convenience just can’t be beat. Thanks for your comment.
Froggie Doodle says
Made this for my small group. It was delicious! Didn’t have oyster sauce. Could I have used fish sauce? I find it a bit too strong.
Only thing, I forgot to bring extra soy sauce and Sriracha. Everyone like it!! Thank you for a great recipe!!
Paint the Kitchen Red says
Thanks for your comment! I don’t think that fish sauce would be a good substitute because oyster sauce has a sweet flavor base and fish sauce plus soy sauce would be too salty. Hoisin is a good substitute. Or you could replace the soy sauce with fish sauce plus a bit more, add a smidge of sugar, and omit the oyster sauce.
RINI INDRAWATI says
Can I double the recipe using 6Qt IP?
Paint the Kitchen Red says
Rini, your Instant Pot should not go past the 1/2 full mark with rice and liquid, though, to allow for expansion. That being said, you should be able to double it.
Dorothea says
OMG! Just got my 9 in 1 instant pot and this was my first recipe. The beginner tips were helpful too as it’s book is a bit confusing. I added chip to,this dish along with basil and heat to make more like Basil n chic fried rice. Hubby loves it and it was done in less than 30mins to include prep. A few questions:
1. If I double, how much more water do I need?
2. If I use steak strips vs chip, should I leave while cooking or keep aside as you suggested for shrimp?
Thanks for making it less scary!
Paint the Kitchen Red says
Dorothea, if you double the recipe, you’ll double the water. Make sure you don’t go over the 1/2 full mark because you’re cooking rice (as per the Instant Pot safety precautions). If you’re adding cooked steak strips, I’m not sure they’ll cook completely with the stated cooking times. You might have to saute them until half cooked and then pressure cook the rest of the way. Enjoy your new Instant Pot, and thank you for your comment!
Karen Magno says
Looking forward to trying this it I might add some diced chicken. Should I add cooked chicken at the end or can I cook the raw chicken at the same time as the rice?
Paint the Kitchen Red says
Karen, what I suggest is that you lightly saute the chicken after the onions etc. Then proceed with the recipe as usual. I do this sometimes. Hope you like it.
Karen Magno says
Thank you I made this tonight. It was so delicious.
Paint the Kitchen Red says
Excellent, Karen. Thanks for letting me know 🙂
Jen says
We really enjoyed this! I added frozen peas at the end while the rice was resting, so they stayed bright green, and added a bit of leftover roasted chicken and a splash of fish sauce. The recipe worked perfectly.
tina mollins says
hi can use chicken broth instead of water and how much would you need thanks
Paint the Kitchen Red says
Hey there Tina – You absolutely can! Try and get low-sodium or you could adjust the soy sauce a bit so it’s not too salty. Same quantity as the water.
Dev says
Would it be possible to make this without egg? How could I make it spicier?
Paint the Kitchen Red says
Hi Dev – you absolutely can do without the eggs. If you’re vegetarian, use vegetarian oyster sauce. I would add some sriracha sauce at the end, or saute some sliced serrano chili peppers with the onions.
Shristi says
5 stars!
Shristi says
This recipe is great! I dice up Spam and cook it in a large pan that I later “fry” the rice in. My husband lived in Hawaii for a few years so he loves Spam in his fried rice :). Thanks for another great recipe! I’ve loved everything I’ve tried on your site!
Paint the Kitchen Red says
I’ve heard Spam is popular in Hawaii! I’m really happy to have you as a “regular”, Shristi!
Anna says
Your website is fantastic. You should promote and advertise more. This site deserves more followers. Post on reddit.com especially in r/instantpot – https://www.reddit.com/r/instantpot/ . Somebody mentioned about you in reddit. That is how I came to know you.
Paint the Kitchen Red says
Hi Anna, that’s so sweet of you to say. I actually used to share my recipes on that sub (user paintthekitchenred) but I often got complaints about self-promotion and also they didn’t like the fact that my GO DIRECTLY TO RECIPE link was not right at the top. I am a wimp, and I couldn’t handle the criticism (to the point of tears!) and so I stopped sharing my recipes on there. But I really appreciate you taking the time to let me know and most importantly, I’m really glad you found me.
Gillian DidierSerre says
Hi there are you using the cup provided with the instant pot or is it the standard 250 ml cup?
Paint the Kitchen Red says
Gillian, I measure my rice and liquid in the same 1 cup dry measure cup which is 250 ml appx. Good question. Thanks for asking!