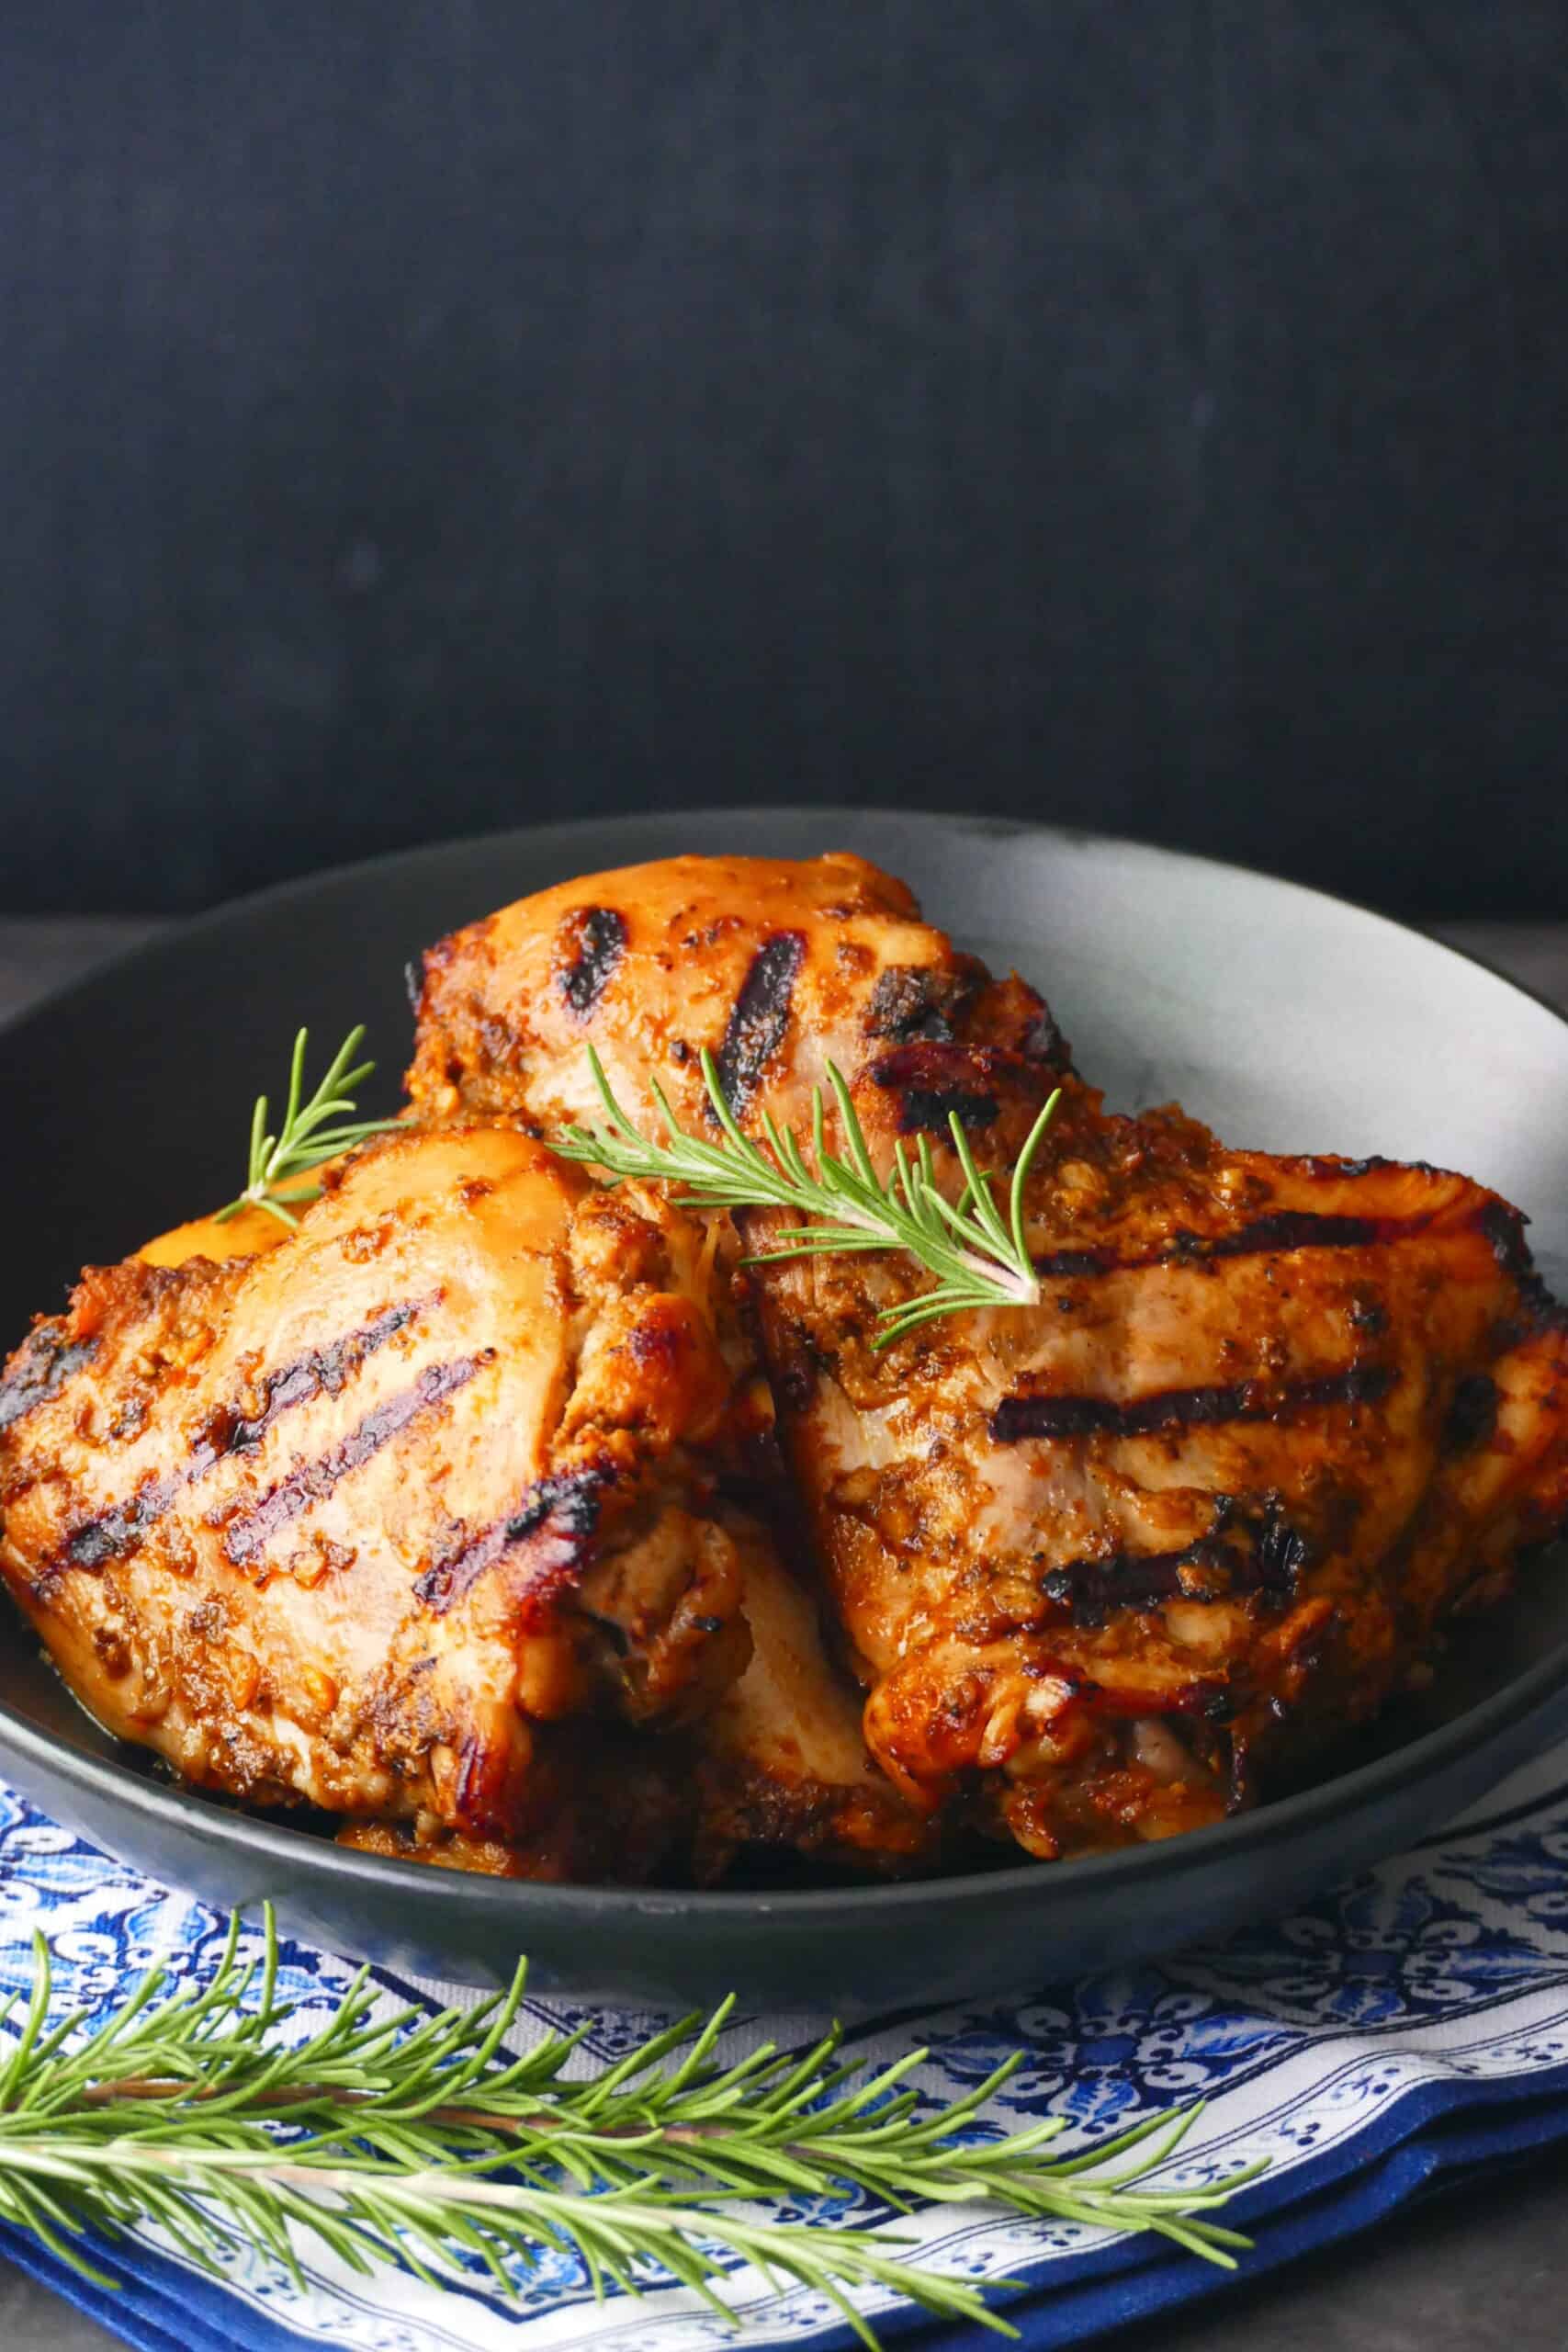
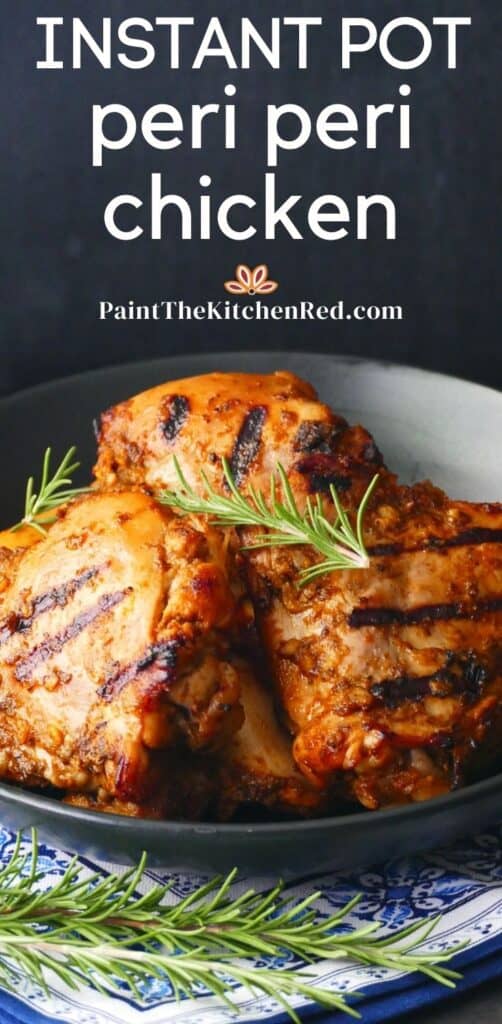
Peri peri chicken is a spicy, tangy recipe with a vibrant blend of flavors. Pressure cooking the chicken first and finishing on the grill makes this a great make-ahead recipe. [Grill-only instructions also included.]
This post contains affiliate links. As an Amazon Associate, I earn from qualifying purchases. Please read the disclosure.
Table of Contents
Introduction
What is peri peri chicken? Peri peri is a spicy sauce traditionally made with African bird’s eye chilis or malagueta chilis. Many people are familiar with peri peri chicken because of the restaurant chain Nando’s. Nando’s is a South African fast-food chain that’s not as well-known in the United States but is very popular worldwide. Their specialty is peri peri chicken.
However, Nando’s didn’t invent peri peri chicken. It originated in Mozambique, a former Portuguese colony. It was exported to Portugal in the 1970s when many Portuguese returned to Portugal from the colonies in Africa. In Portugal, it’s called frango piri piri (spicy chicken).
Peri peri chicken is also known as piri piri, peli peli or pili pili chicken. Peri peri chicken is made with chili peppers, lemon juice, vinegar, and garlic. Traditionally, peri peri chicken is marinated for a day and grilled over hot charcoal.
I make it in the Instant Pot and then grill it or broil it to give it a grilled look and flavor. It can also be made exclusively in the oven, on the grill or in the air fryer.
Here are some grilled chicken recipes you might enjoy:
– Instant Pot Jamaican Jerk Chicken
– Instant Pot Korean Gochujang Chicken
–Instant Pot Thai Grilled Chicken
Tips and Substitutions
Peri peri marinade
- I recommend that you marinate the chicken. You’re really going to notice a difference when you marinate the chicken for even a few hours. 8 hours to overnight is ideal. But in a pinch, you can skip the marinating and cook directly.
- Reducing the sauce and serving it on the side adds a lot of flavor to the chicken.
- You can even increase the quantity of the peri peri marinade recipe and set some aside for later.
Grilling
- Grilling the chicken after pressure cooking gives the chicken a more traditional flavor. If you want to make this peri peri chicken recipe in the winter time, or you don’t have access to a grill, place the chicken thighs in the oven 4 inches from the top and broil the chicken on both sides until browned.
- You can also broil the chicken in the air fryer for a few minutes on each side at the highest temperature. In my Instant Pot Duo Crisp + Air Fryer, that’s 400 degrees Fahrenheit.
- You don’t have to brown the chicken after pressure cooking it. You can just reduce the sauce by letting it cook in Saute mode. The chicken with the sauce tastes great over plain basmati rice or Jasmine rice with some stir fried vegetables. If you choose not to grill the chicken, add an extra minute to the pressure cooking time.
- And finally, you can skip the pressure cooking and just grill the chicken. If you do, use a instant-read thermometer to check the temperature. Chicken thighs are cooked when they reach 170 degrees Fahrenheit.
Paprika
- I like to add paprika to this recipe to give the peri peri sauce a rich red color. Feel free to reduce the quantity of paprika.
Thai Bird’s Eye Chili Peppers
Although peri peri marinade is traditionally made with chili peppers, I like using hot sauce in this recipe because it’s so easy to find and I always have it on hand. I use Frank’s red hot sauce, but you can also use Tabasco sauce.
If you have access to fresh African or Thai bird’s eye chilis, go ahead and substitute the hot sauce with the chili peppers. They are pretty spicy so I would use about 2 to 5 peppers depending on your tolerance for spice.
Or you can use any fresh red chili pepper of your choice, such as chiles de arbol, cayenne peppers, red jalapeno peppers, or red serrano peppers.
You can also increase the spice level by using red pepper flakes, sriracha sauce, or sambal oelek, cayenne pepper, or chili powder.
Chicken
I love the flavor of bone-in chicken, but I do make this recipe with boneless skinless chicken thighs as well. The cooking time should be reduced to 6 minutes if you’ll be grilling the chicken after pressure cooking, and 7 to 8 minutes if you won’t be grilling.
Some people like peri peri chicken breast. I’m not a huge fan of pressure cooking chicken breast. But if you’re planning on grilling the chicken without pressure cooking it, you could use chicken breast.
Broth
You can use chicken broth instead of water to pressure cook the chicken. Broth always adds more flavor. Reduce the quantity of salt as needed.
Herbs
There is no hard and fast rule on what herbs you can add to the peri peri sauce. I sometimes add only rosemary or only oregano instead of both. I’ve also made it with cilantro or thyme or Italian seasoning. I do love the flavor of cilantro!
Honey
I always like adding a touch of sweetness to tart recipes. You can add even more honey to make the sauce sweet. Or you can reduce or omit the honey. Brown sugar is a good substitute for honey too.
Make Ahead
As a timesaver, I often pressure cook this Instant Pot Peri Peri Chicken recipe, and then refrigerate the chicken and the reduced sauce separately. I remove the chicken and sauce from the fridge before grilling, using the sauce to baste the chicken. This works great if I want to prepare this for guests.
Burn Message
I haven’t encountered the burn message while making this Instant Pot recipe in my 6 quart Instant Pot. All the sauces contribute toward the liquid requirement. The chicken also releases some liquid.
If you’re prone to getting the Burn error, feel free to add a couple of tablespoons of extra chicken broth to the chicken before pressure cooking.
FAQS
Peri peri is a spicy, citrusy, garlicky sauce. It has a strong tangy flavor and it’s quite spicy. Nando’s peri peri sauce is the most popular store-bought brand. This peri peri marinade recipe is my take on peri peri chicken.
Yes, you can substitute boneless chicken thighs for bone-in thighs. Reduce the cooking time to 6 minutes. If you’re not planning on finishing on the grill, pressure cook for 7 or 8 minutes.
I like to remove the skin when I’m pressure cooking chicken. But it’s okay to leave it on especially if you’re going to be grilling it afterward.
I am not a big fan of pressure-cooking chicken breast. I find that the chicken comes out too dry. If you want to pressure cook chicken breast, change the cooking time to 5 or 6 minutes.
If you’re not pressure-cooking the chicken and just grilling, then yes, you can use chicken breast instead of thighs.
I highly recommend that you marinate the chicken for 8 hours or overnight. If you just can’t find the time to marinate, then you can pressure cook it right away. The flavors will be mellower.
Some side options are roasted potatoes, corn on the cob, or risotto.
You could add Thai chili peppers. They are quite spicy so a little goes a long way. If you can’t find them, use chopped red serrano or red jalapeno peppers.
Reduce the quantity of hot sauce if you want a milder sauce.
Peri peri sauce is quite acidic but if you would like it to be less sour, decrease the quantity of vinegar and lemon juice by a couple of teaspoons. You can also add a bit more honey or some brown sugar to the peri peri marinade.
Yes, you can double the recipe. Keep the cooking time the same.
When pressure cooking, to avoid the Instant Pot burn message, you can put a trivet in the inner pot and place the chicken on top of the trivet. This prevents overcrowding at the bottom.
If you’re making it in the Instant Pot, since this recipe has a minimal quantity of liquid already, halving it might give you the Burn error. You might be able to get away with it if you’re using a 3 quart Instant Pot. If you’re just grilling, yes you can halve the recipe.
All Instant Pot models and other brands of pressure cookers such as Ninja Foodi can be used to make this recipe.
I freeze the chicken pieces and the sauce separately. They’ll keep in the freezer for 3 to 4 months.
You can try and marinate the chicken for longer to get the spices and flavors to penetrate the chicken pieces.
If you haven’t reduced the sauce, it will be liquidy. Heat the sauce in Saute mode and reduce it to thicken it and concentrate the flavors. If you did reduce the sauce and found it to be bland, the next time you make it, increase the spices by 25%.
Grilling the chicken isn’t necessary but it does add a special flavor to the chicken. You can also use the broiler or air fryer. If you’re not planning on grilling or broiling the chicken, increase the pressure cooking time by a minute.
I often pressure cook the chicken ahead of time, refrigerate it, and then grill it right before we’re ready to eat.
If you’re new to the Instant Pot and aren’t familiar with how to use it, you might find it helpful to first read one of the following guides and then come back here to learn how to make this recipe.
- Instant Pot DUO Beginner’s Manual
- Instant Pot ULTRA Beginner’s Manual
- Instant Pot DUO EVO PLUS Beginner’s Manual
- Instant Pot DUO NOVA Beginner’s Manual
- Instant Pot DUO GOURMET Beginner’s Manual
- Instant Pot DUO CRISP Beginner’s Manual
- Instant Pot PRO Beginner’s Manual
- Instant Pot PRO CRISP Beginner’s Manual
Peri Peri Chicken – Ingredients
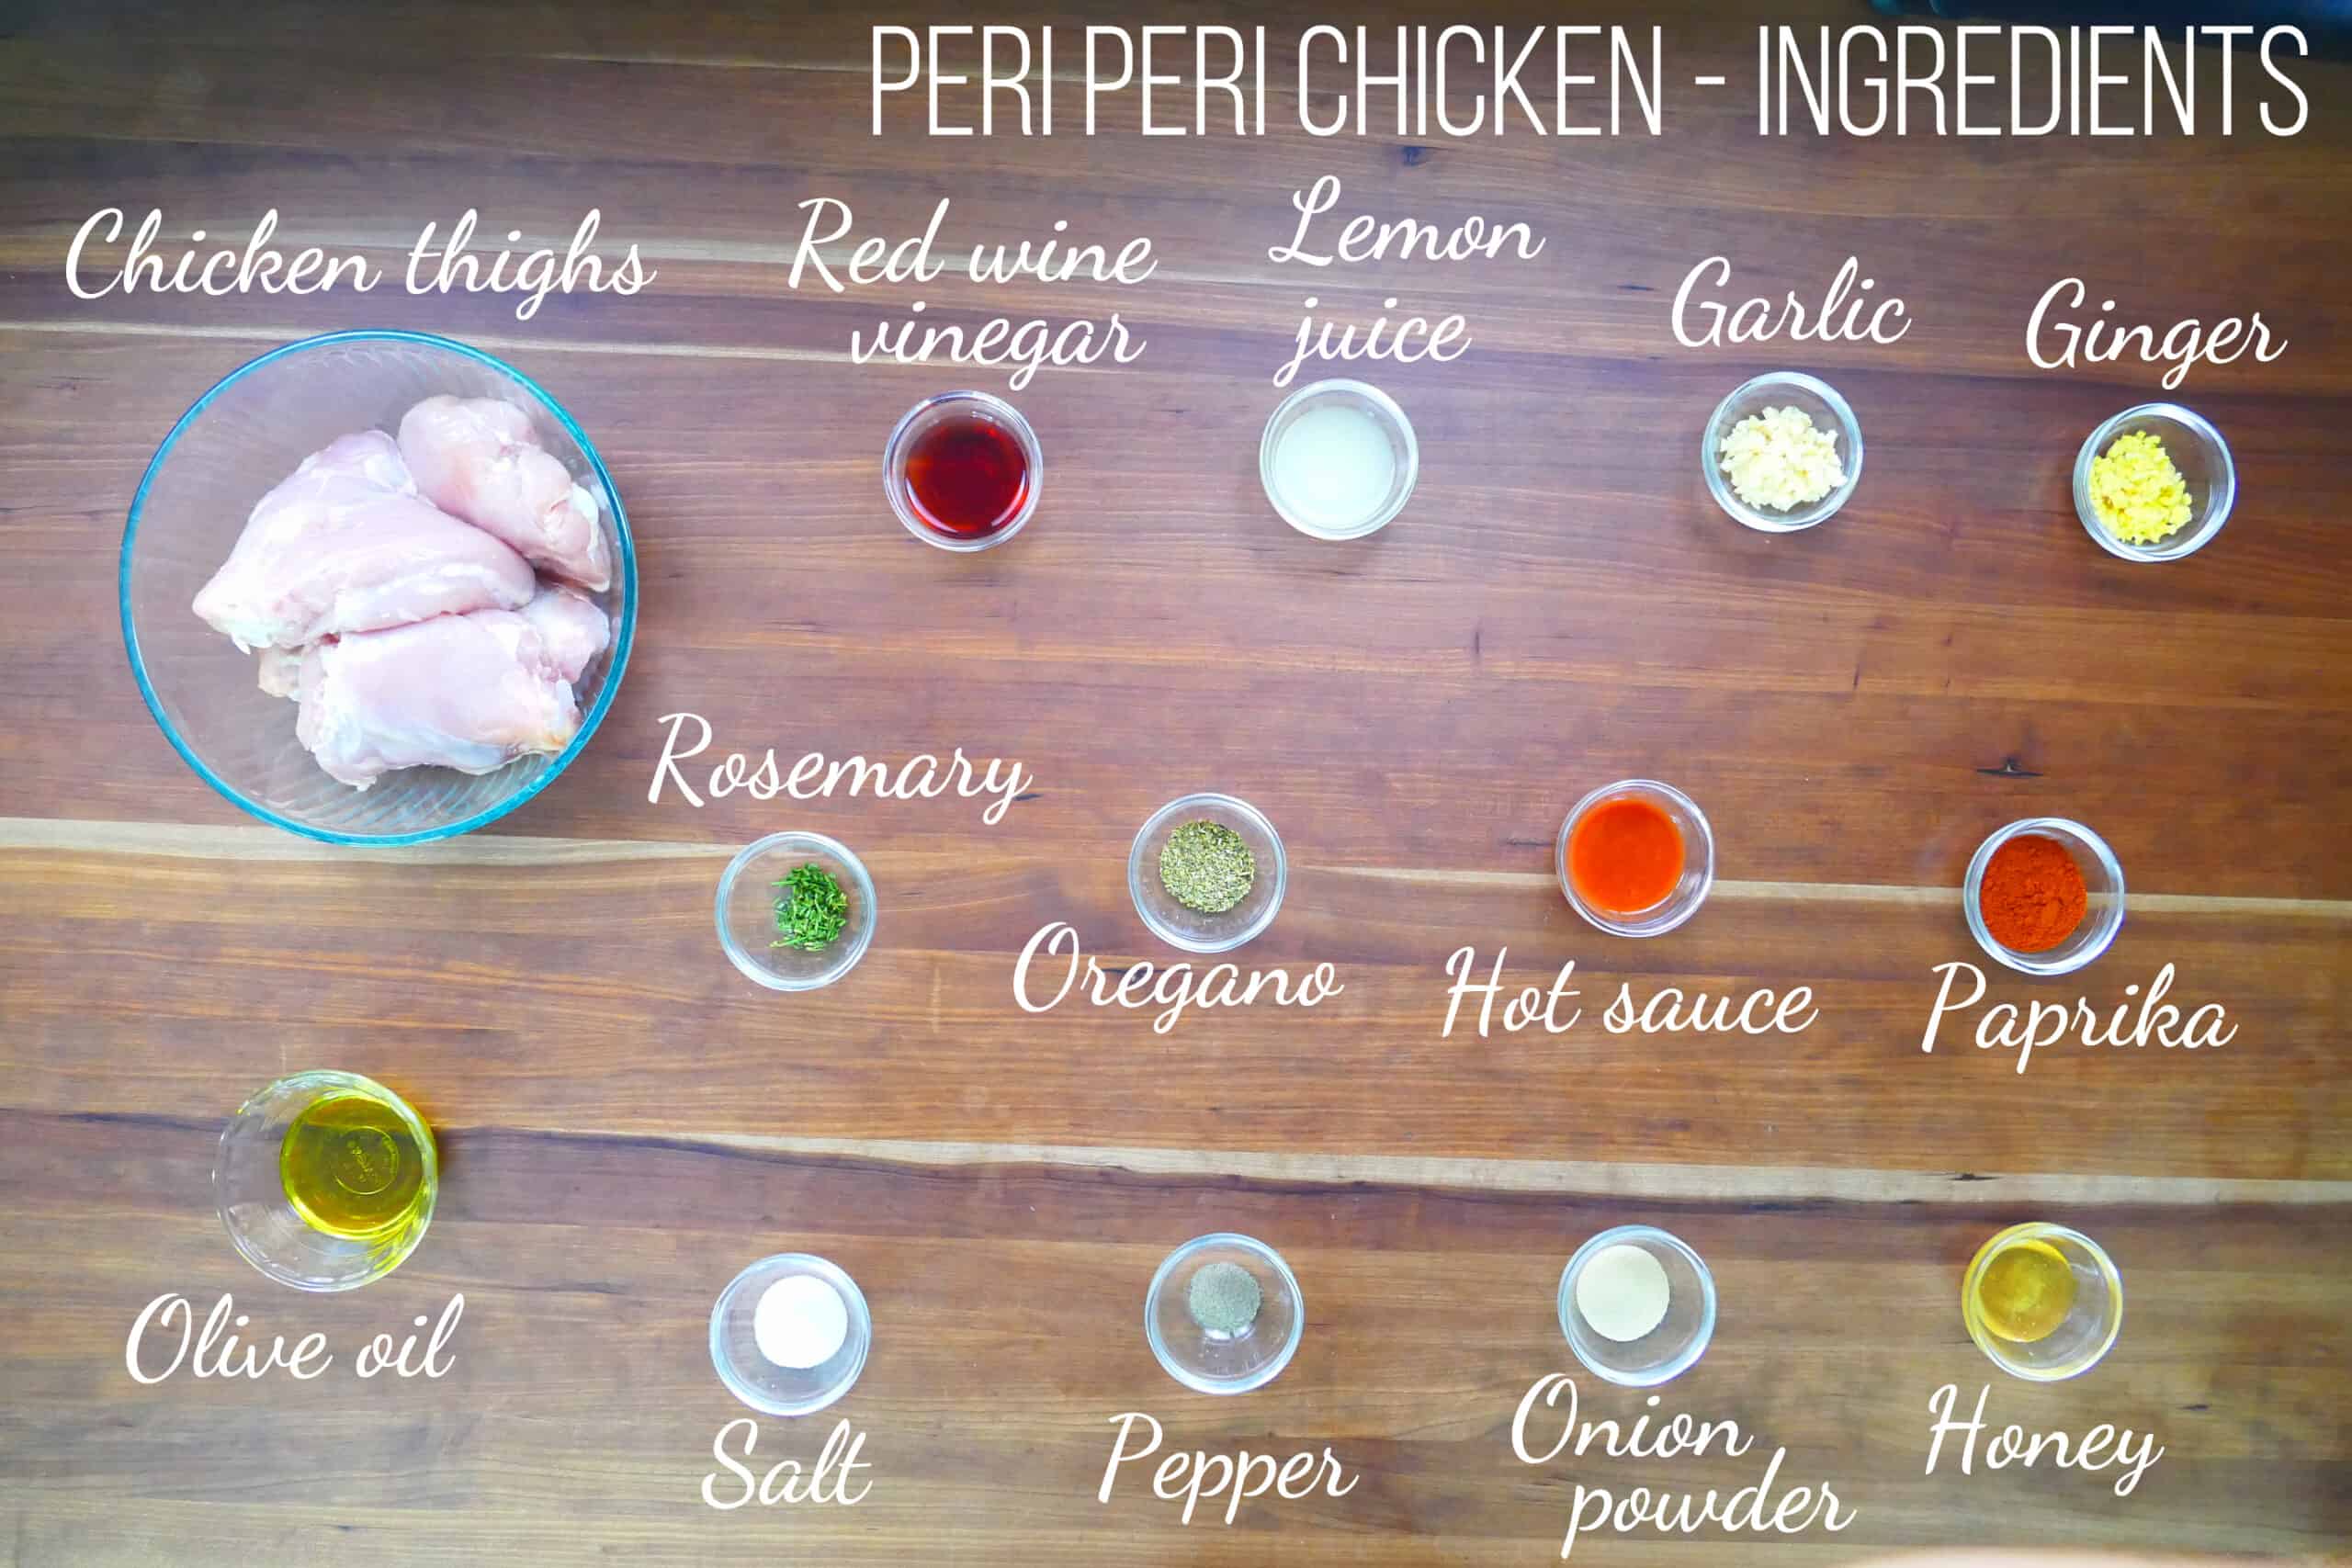
- Chicken
- Red wine vinegar
- Lemon juice
- Garlic
- Ginger
- Rosemary
- Oregano
- Hot sauce
- Paprika
- Olive oil
- Salt
- Pepper
- Onion powder
- Honey
More details in the recipe card at the bottom of this post
How to Make Instant Pot Peri Peri Chicken (Step by Step Instructions)
- Marinate the chicken
- Add water and chicken to Instant Pot
- Pressure cook
- Release pressure
- Transfer chicken to plate
- Grill chicken
Marinate the chicken

- For the peri peri chicken marinade, combine olive oil, red wine vinegar, lemon juice, hot sauce, honey, ginger, garlic, onion powder, black pepper, salt, paprika, and oregano in a blender jar.
- Blend until the marinade is smooth.
- Add marinade to chicken thighs in a large bowl. Marinate for at least 30 minutes, preferably 8 hours to overnight.
Add water and chicken to Instant Pot

- Add water or broth to the inner pot.
- Transfer chicken pieces to the inner pot.
- Empty all the marinade onto the chicken, scraping the bowl clean with a silicone spatula.
Instant Pot Duo Pressure Cook 9 minutes

- Close the lid and make sure the steam release handle is in Sealing position.
- Press Manual (or Pressure Cook) and + or – until the display reads 9 (9 minutes).
Instant Pot Ultra Pressure Cook 9 minutes

- Close the lid.
- Select Pressure Cook mode and adjust the time to 9 minutes (00:09).
- Press Start.
Pressure Cooking Process (Duo and Ultra)
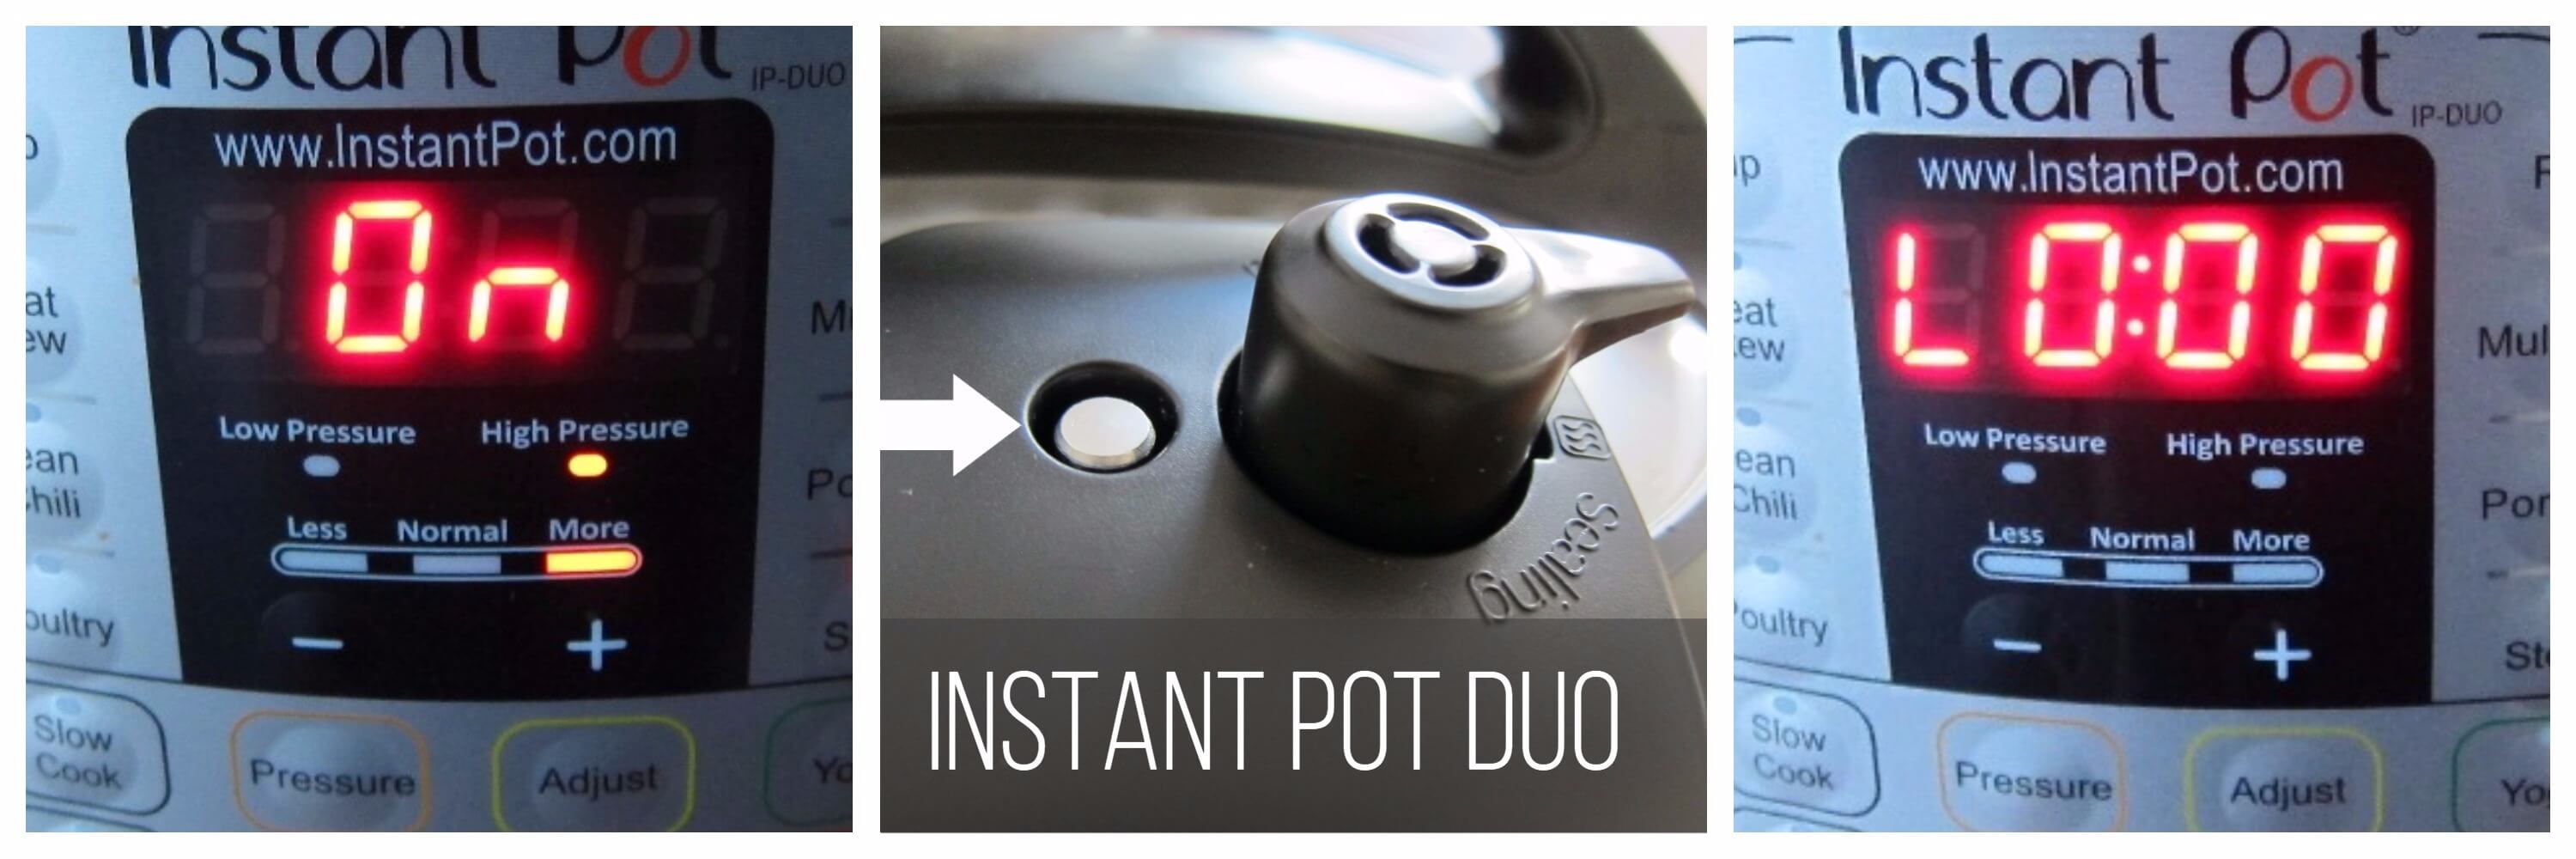

- Instant Pot display will change to On.
- Once the Instant Pot is pressurized, the float valve will go up.
- The display will count down to 0; it will then switch to Keep Warm mode and display L0:00 or 00 00 and begin to count up the number of minutes since pressure cooking completed.
How to Naturally Release Pressure (NPR) on the DUO and ULTRA
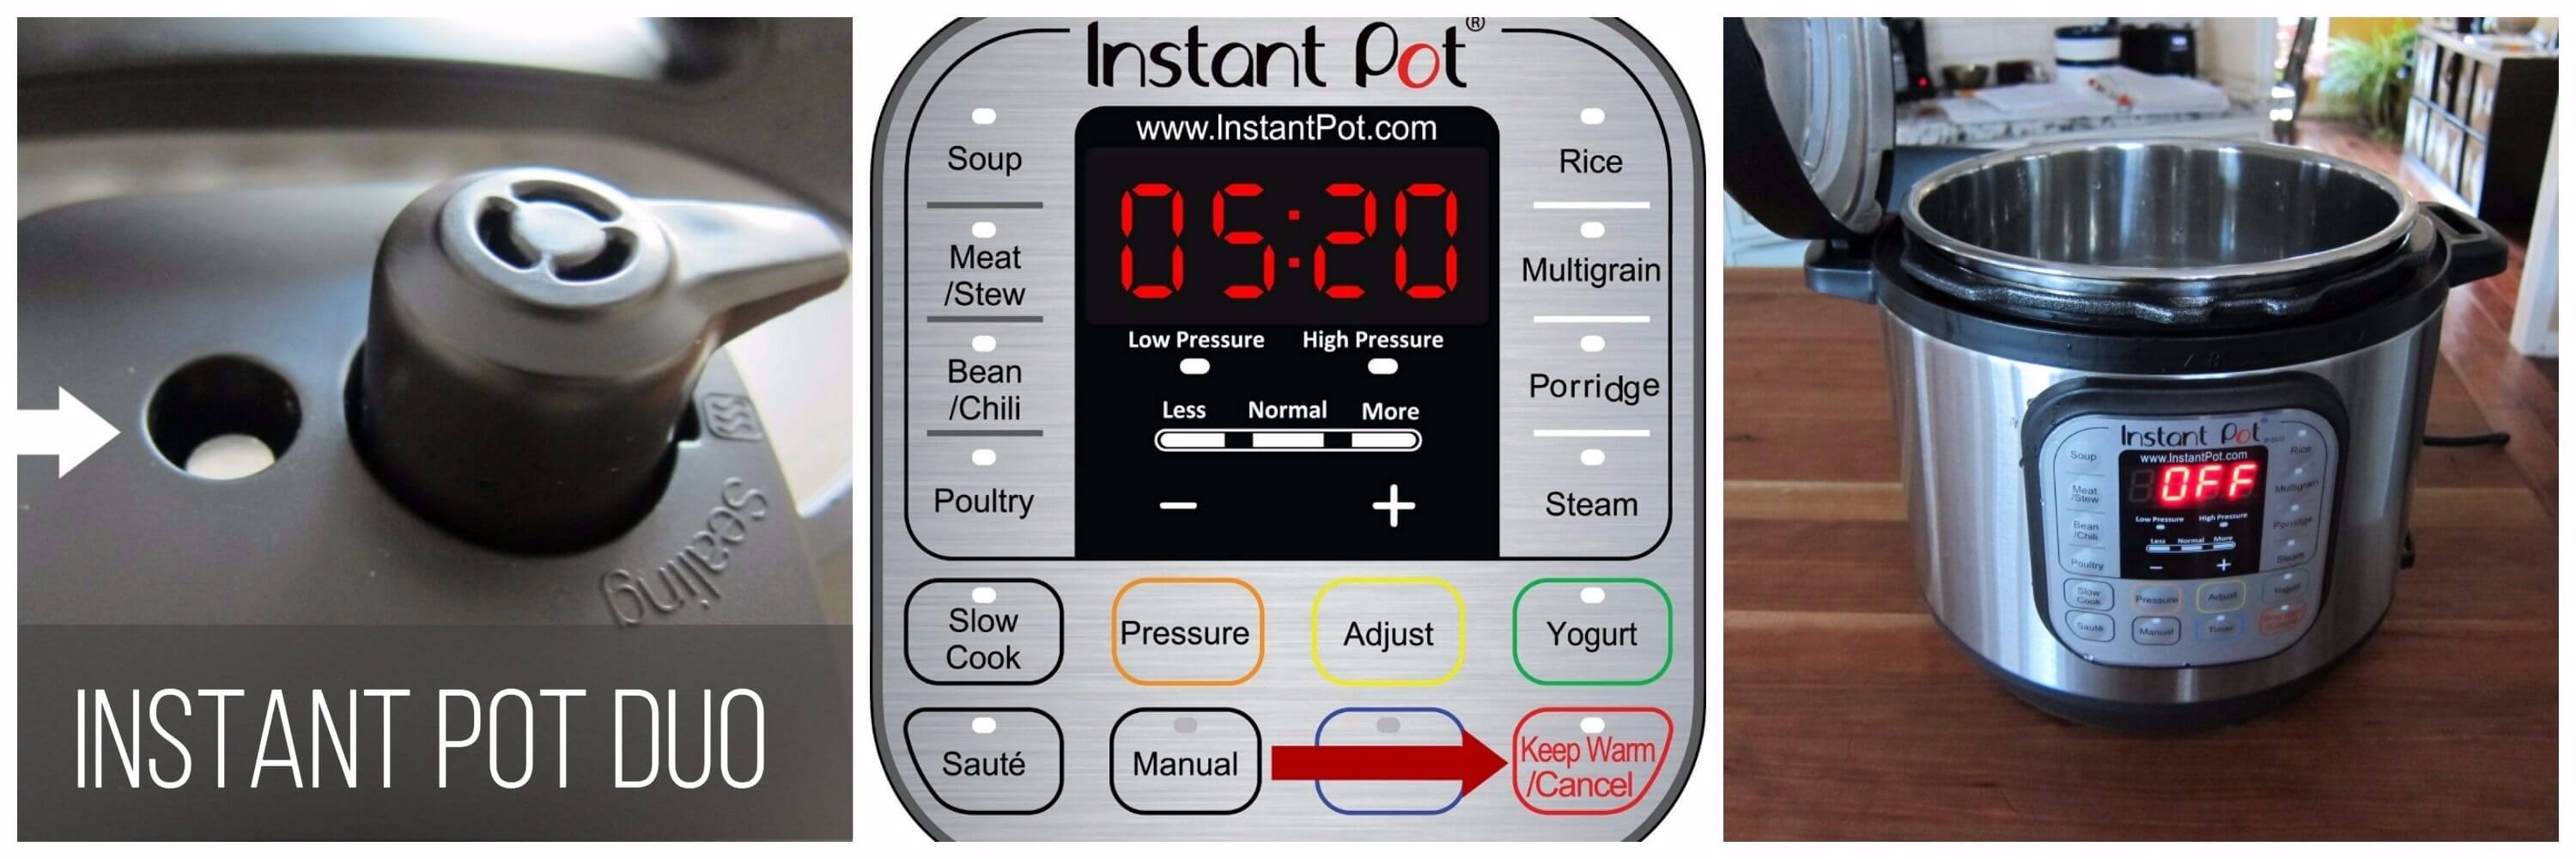
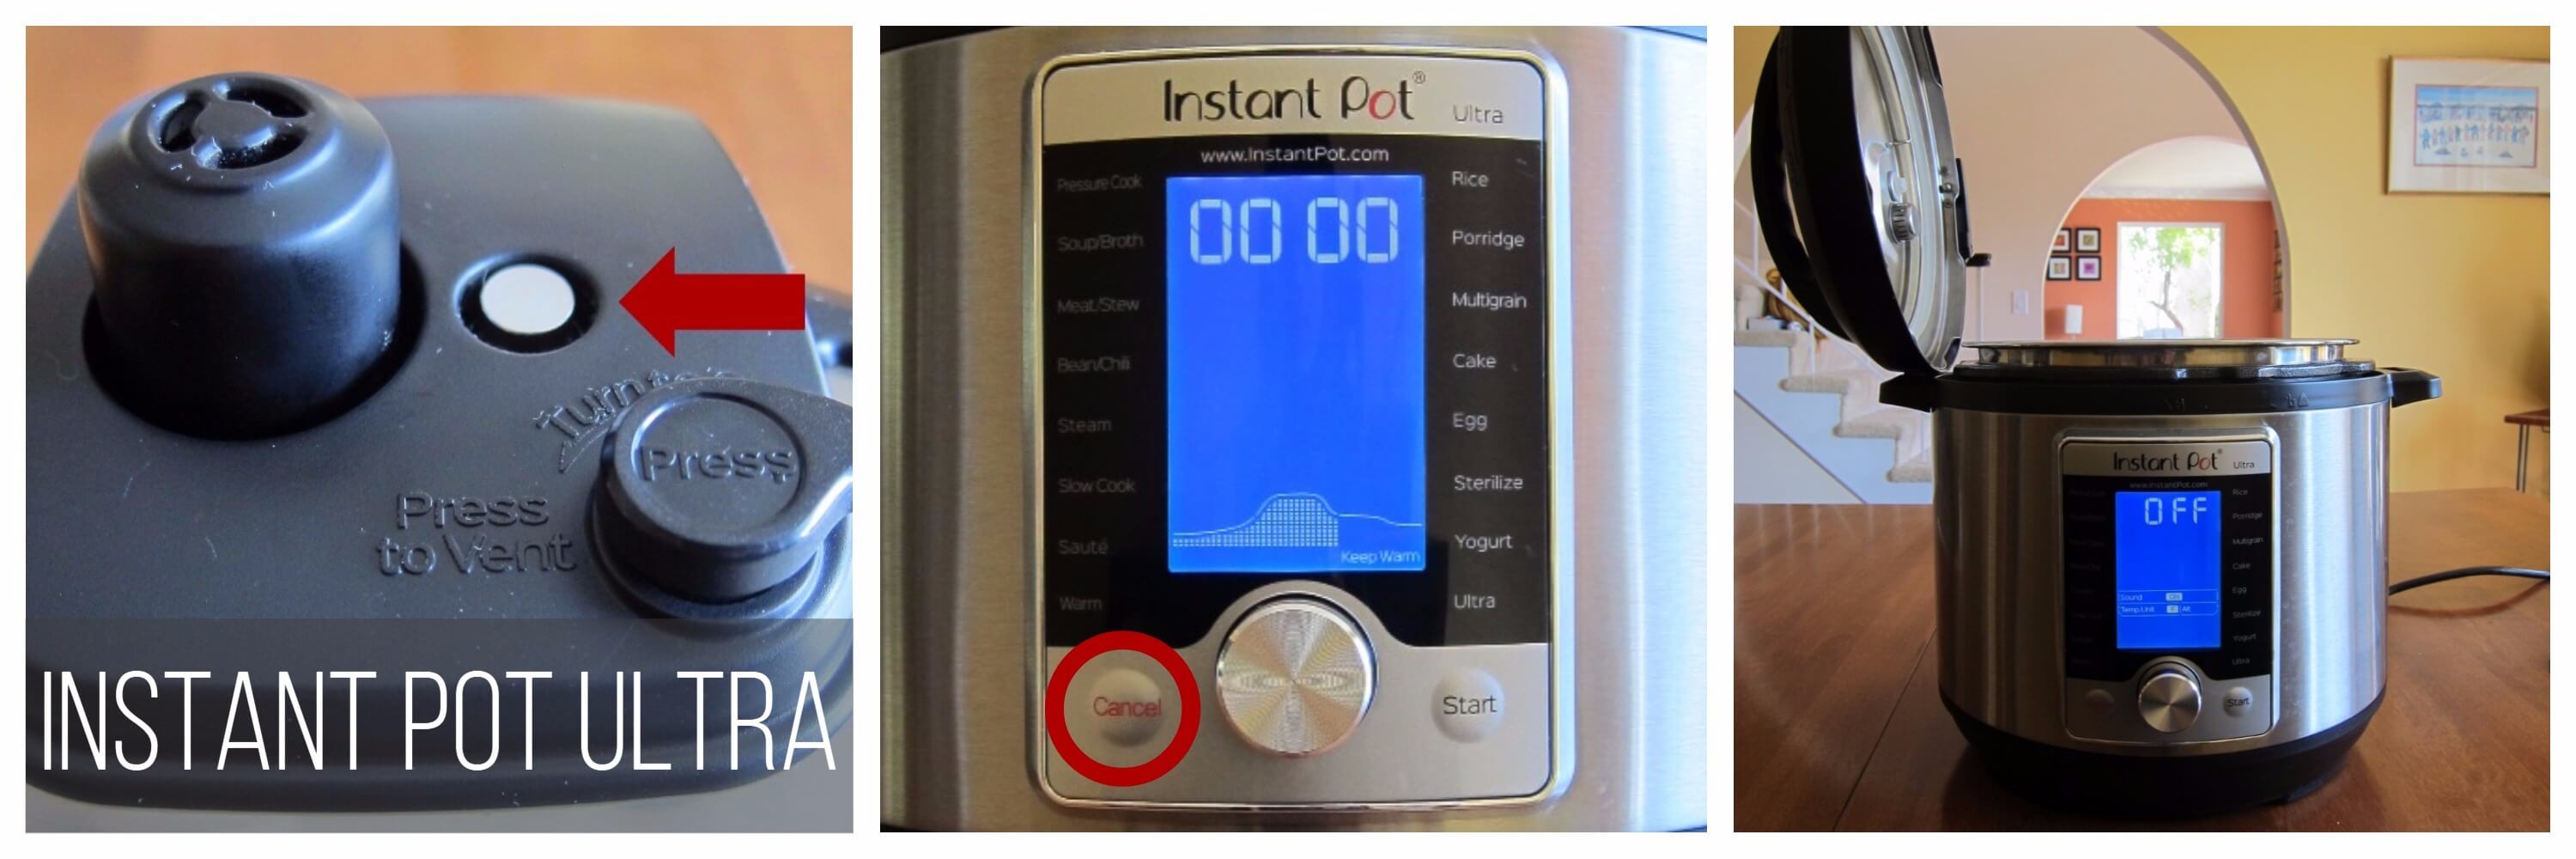
- Allow the pressure to release naturally (NPR). The float valve will be in the down position. This may take 15 to 30 minutes. [Find out more about the pressure release methods and how and when to use them. ]
- Press Cancel and open the Instant Pot.
Transfer chicken to plate

- Transfer chicken from Instant Pot to a large plate with tongs or a slotted spoon.
- Turn on Saute mode and allow the sauce to reduce until thickened.
Grill chicken

- If you choose to grill the chicken after pressure cooking, preheat the grill to 350 degrees Fahrenheit.
- Grill chicken for just enough time to get sear marks on both sides and to give it a grilled look and flavor, about 2 to 4 minutes per side.
- Transfer grilled chicken to a serving dish and serve sauce on the side. Feel free to bake the chicken with the sauce.
- Peri peri chicken would taste great with a refreshing, sweet and hot peach mango salsa on a summer day.
How to Make Peri Peri Chicken on the Grill or in the Oven or Air Fryer
For grilling or baking the chicken without pressure cooking, you can use bone-in, skin-on chicken thighs.
- Make the marinade.
- Marinate the chicken.
To make this recipe on the grill:
- Preheat the grill on medium high (about 400 degrees Fahrenheit).
- Grill chicken for about 20 to 25 minutes, turning every 5 minutes.
- Remove from grill when temperature reaches 170 degrees Fahrenheit.
To make this recipe in the oven:
- Preheat the oven to 400 degrees Fahrenheit.
- Line a baking sheet with foil.
- Rub the foil with cooking oil.
- Arrange the chicken skin side up on the foil.
- Bake the chicken for about 35 to 45 minutes or until the internal temperature reaches 170 degrees Fahrenheit.
To make this recipe in the air fryer:
- Coat the air fryer basket with cooking spray.
- Place chicken in the air fryer skin side down.
- Air fry the chicken at 400 degrees for 15 minutes.
- Turn and air fry on the other side for 7 to 10 minutes or until the internal temperature reaches 170 degrees Fahrenheit.
[Find out how to use the Instant Pot Duo Crisp Air Fryer Lid]
See the recipe card below for detailed instructions.

Peri Peri Chicken
Equipment
Ingredients
- 3 tablespoon olive oil
- 2 tablespoon red wine vinegar
- 2 tablespoon lemon juice
- 2 tablespoon hot sauce
- 1 tablespoon honey
- 2 tablespoon ginger coarsely chopped
- 2 tablespoon garlic coarsely chopped
- 2 teaspoon onion powder
- ½ teaspoon black pepper
- 1 ½ teaspoon salt
- 2 tablespoon paprika
- 1 tablespoon dried oregano
- 1 cup water or chicken broth (for Instant Pot pressure cooking)
- 6 chicken thighs bone-in
Instructions
- For the peri peri marinade, combine olive oil, red wine vinegar, lemon juice, hot sauce, honey, ginger, garlic, onion powder, black pepper, salt, paprika, and oregano in a blender jar. Blend until the marinade is smooth.
- Place chicken thighs in a large bowl and pour in the marinade. Scrape the blender jar with a silicone spatula to get all the marinade.
- Marinate the chicken for 8 hours to overnight. If you're really short on time, try for 30 minutes at least.
Instant Pot + Grill Instructions
- Add water to the Instant Pot. Transfer chicken and marinade to the Instant Pot. Be sure to scrape the bowl with a silicone spatula to get all the marinade into the inner pot.
- Pressure cook for 9 minutes on High Pressure.
- Do a natural release of pressure (QR). If short on time, you can do a 10 or 15 minute natural release. [Read More: The Different Pressure Release Methods]
- Using a slotted spoon or tongs, transfer chicken from Instant Pot to a large plate or bowl.
- In Saute mode, heat the sauce until reduced and thickened, about 10 to 15 minutes.
- Let the chicken thighs rest while you prepare your grill.
- Preheat the grill to 350 degrees Fahrenheit.
- Grill chicken for just enough time to get sear marks on both sides, and to give it a grilled look and flavor, about 2 to 4 minutes per side.
Grill-only Instructions
- Preheat grill to medium-high temperature (400 degrees Fahrenheit).
- Remove chicken from marinade using tongs or a slotted spoon and discard marinade.
- Grill chicken thighs until internal temperature reads 170 degrees Fahrenheit, flipping the chicken every 5 minutes, for a total of about 20 minutes.
Notes
- Prep time does not include marination time.
- If you’re not planning on grilling or broiling the chicken, you can increase the pressure cooking time by a couple of minutes, and do a Natural Pressure Release (NPR).
- See the blog post for more detailed recipe tips.
Nutrition
Thank you for visiting Paint the Kitchen Red. All photos and content are copyright protected. Please don’t use any content without prior written permission. If you’ve made this recipe and would like to share it with your friends, please link back to this recipe. Thank you!
I am not a certified nutritionist. I provide my best estimate of nutritional information merely as a courtesy to my readers. If you depend on nutritional information for dietary or health reasons, I suggest using your favorite online nutrition calculator to confirm the nutritional value of this recipe based on the actual ingredients that you use.
Did you know that the best way to support your favorite bloggers is to comment and rate recipes, and share on social media? If you loved this recipe, please comment and give it a five ⭐ rating in the comment section below. If you’re a pinner, pin this post using the Pin buttons at the top and bottom of this post and in the recipe card above. Thank you for your support!
More Chicken Recipes






Jill
This is a wonderful recipe. I love the combination of flavors and the chicken is so tender. Thank you so much for sharing. This is be a go to for our family !
Paint the Kitchen Red
Jill, I’m really glad you like the peri peri chicken recipe – thank you for sharing!
Paul and Jaci
Very aromatic, colourful and tastes great. Thank you for the recipe. We served this with some vegetable curry and a kale Mediterranean pasta salad. Again thank you.
Paint the Kitchen Red
Thanks for your comment. I’m thrilled that you tried the recipe and enjoyed it!
Dena
I love the thoroughness of the instructions.
Paint the Kitchen Red
Thank you, Dena!