

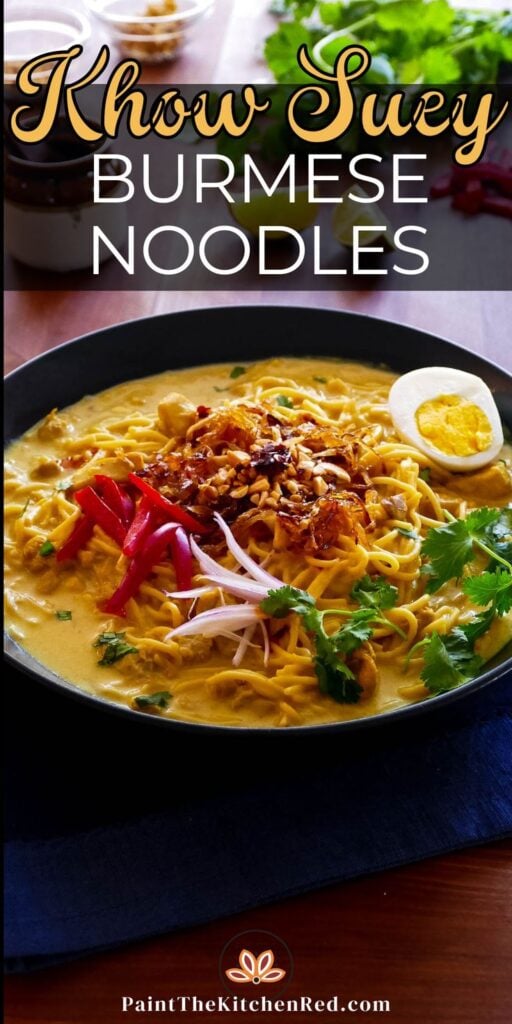
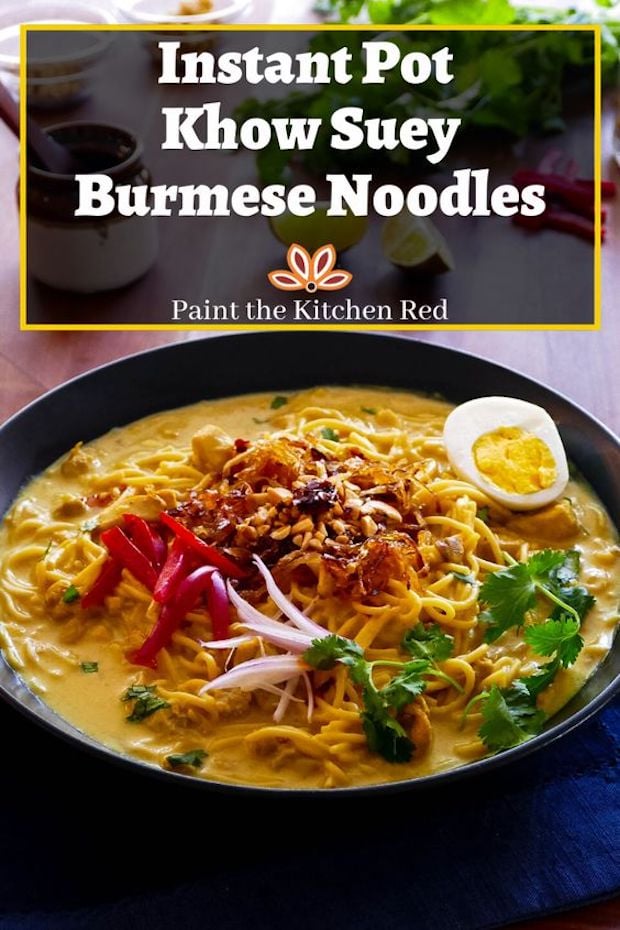
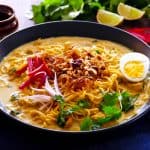
Khow Suey (khao suey) is the Burmese version of the popular Thai dish Khao Soi. This recipe is a one-pot easy version that has all the wonderful flavors of the original. A warm bowl of tender noodles and chicken cooked in creamy coconut curry broth makes this a hearty and comforting meal. It can be made in the Instant Pot or stovetop.
This post contains affiliate links. As an Amazon Associate, I earn from qualifying purchases. Please read the disclosure.
Table of Contents
Introduction
Khow suey or khao suey (pronounced cow sway) is an irresistible recipe with chicken and noodles in an aromatic coconut curry broth.
The recipe’s authentic Burmese name is ohn no khauk swe which means ‘coconut milk noodles’. Khow suey is very popular in India and Pakistan. It was brought to these countries by expatriates returning from Burma during the middle of the last century.
Some people complain about having to read long stories on food blogs. And I can understand the sentiment. But I hope you’ll indulge me here because I just have to share this recipe’s origins!
My Khao Suey recipe is adapted from my aunt Kumari’s family recipe. Her late husband Venu’s dad worked for a major Bollywood movie production company in Burma (now known as Myanmar) in the 1950’s.
Khow suey was one of Venu’s favorite foods when he was a boy growing up in Burma. He would buy it from street vendors outside his school at lunchtime. So his mom learned to make the dish at home.
The family fled Burma during civil unrest in the early 1960’s, leaving all their belongings behind. But the recipe for khow suey came back to India with them and eventually the recipe was passed down to the daughter-in-law, my aunt.
To this day, khow suey is one of her family’s favorite recipes. My aunt says she usually makes it on a Sunday, and it’s so hearty and filling that it’s the only meal of the day. Her recipe has quite a few steps and takes some time to prepare:
- Make the broth
- Cook the lentils (chana dal)
- Make the spice mix
- Cook the noodles
- Prepare the garnishes
My goal was to convert my aunt’s recipe to an Instant Pot recipe, but make it a one-pot meal. I feel I succeeded in simplifying the recipe, yet preserving the delicious flavor. I also provide stovetop directions.
Just like with pho and ramen, what completes this recipe are the accompaniments and garnishes, which I’ll cover in the tips section.
As a side note, if you’re a fan of the Thai recipe called Khao Soi, you may be interested to hear that it too has its roots in Burma! According to the Wall Street Journal, Thai Chiang Mai Noodles or Khao Soi came to Chiang Mai with Chinese Muslims from Yunnan in Burma who for centuries traveled in caravans through Burma, Thailand and Laos.
Here are some other Asian recipes you might like to try out!
– Instant Pot Thai Coconut Soup (Tom Kha Gai)
– Instant Pot Beef Curry
– Instant Pot Thai Peanut Noodles
– Instant Pot Lo Mein Noodles
Tips and Substitutions
Onions
There are a couple of places that you use onions in this recipe. The first is within the recipe and the second is as an optional garnish. Within the recipe, I’ve given instructions to saute the onions until they are lightly caramelized.
However, if you can take the time to saute the onions till they are a deep golden brown, you’ll get a ton more flavor. This can be time consuming and can take 15 minutes or more.
I speed up the process by setting the Saute temperature to medium high and deglazing periodically by adding a few teaspoons of broth or water to dissolve the brown bits.
You need to watch the onions closely and stir frequently if you’re using a higher Saute temperature because the onions will become bitter if they burn.
Onion and Garlic Garnishes (optional)
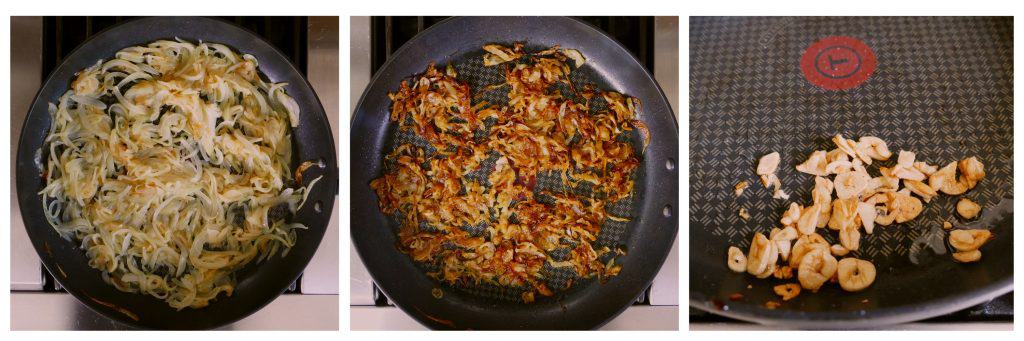
- In a frying pan on the stovetop, heat 2 tablespoons of oil and saute sliced onions on medium heat until golden brown. This can take up to 30 minutes.
- I start the process by covering the pan and letting the onions sweat for about 10 minutes. Then I remove the lid and stir periodically. Keep a close watch, especially towards the end because burnt onions taste bitter!
- Once the onions are a deep golden brown, transfer them to a paper towel-lined plate and set aside.
- In the same frying pan, saute sliced garlic until golden brown. Make sure they don’t burn; keep a close eye and stir constantly.
- Remove promptly and set aside.
Make Ahead Tip: Sometimes I saute a large batch of onions on the weekend, refrigerate them and then use them as needed when I’m making a recipe during the week.
Kashmiri Chili Powder
Kashmiri chili powder is a special kind of Indian chili powder that has a bright red color without being too spicy. I actually use more than is called for in the recipe, so if you like your curries on the spicy side, you can add more.
It can be found at Indian grocery stores or on amazon. If you can’t find Kashmiri chili powder, go ahead and substitute a smaller quantity of cayenne pepper.
The great thing about Indian dishes is that you can make them as mild as you like by adjusting the quantity of chili powder or substituting paprika for the chili powder. The recipe, as written, is not very spicy (by my Indian standards!)
You can serve chili oil or red pepper flakes on the side, which allows each person to customize the spiciness.
Broth
I use chicken broth to cook the chicken and noodles because it adds extra flavor. If you wish to use water instead of broth, that’s fine too.
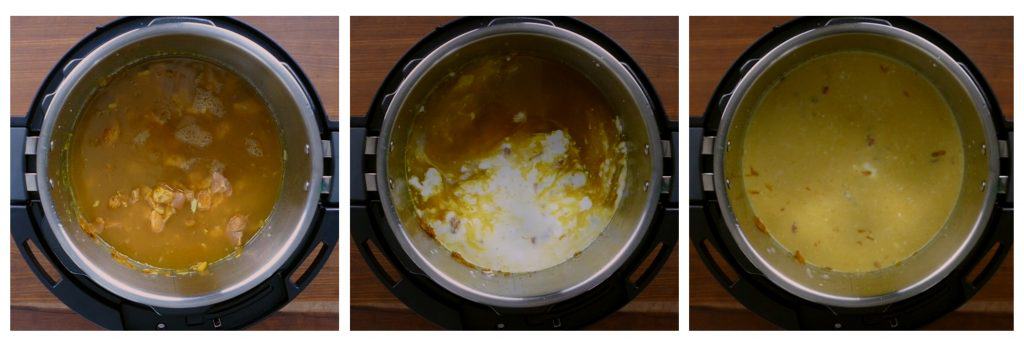
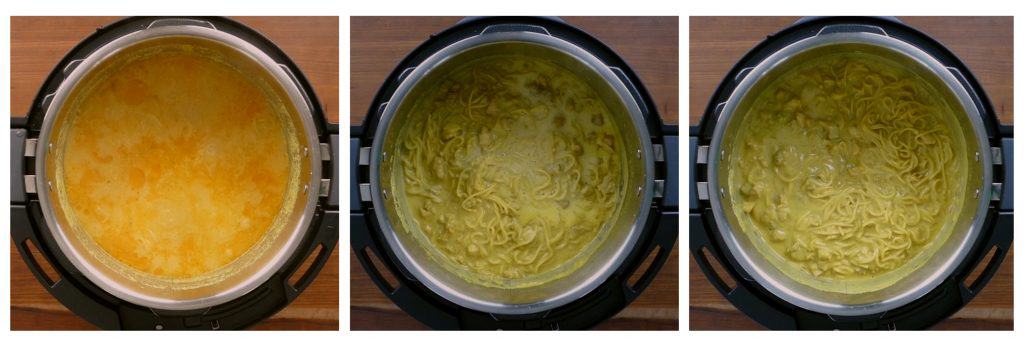
When you open the Instant Pot lid after pressure cooking, you’ll see that there’s quite a bit of liquid, but after you add the flour slurry and heat it in Saute mode, it’ll thicken up quite a bit.
My family prefers khow suey to be less liquidy. You can add a bit more coconut milk and/or broth if you’d like a more soupy consistency. Adjust the spices and sauces as needed if you’re increasing the liquid.
Fish Sauce
I really like the quality of Red Boat fish sauce which you can find at Asian grocery stores or on amazon. But it is more expensive than other fish sauce brands. Tiparos is another brand of fish sauce I’ve used – it’s more affordably priced.
There’s no substitute for fish sauce. It adds that depth of flavor, the umami, to dishes. I’ve had vegetarian readers recommend the Fysh brand of sauce. But I haven’t tried it. You may need to add a little extra.
Soy sauce is also a substitute for fish sauce, but there is a flavor difference.
Coconut Milk
I use full-fat coconut milk. I find some coconut milk brands don’t do well during pressure cooking, including some brands that are widely available at grocery stores. My two favorite brands are Aroy-D and Chaokoh. Some readers recommend Trader Joe’s brand coconut milk.
Vegetarian
To make vegetarian khow suey, substitute:
- chicken with 3 cups of your choice of vegetables
- chicken broth with vegetable broth
- fish sauce with soy sauce
If you like your vegetables to be crunchy, pressure cooking for 3 minutes may be too much. Add steamed vegetables to the khow suey after pressure cooking the noodles. Here are some vegetable ideas:
- green beans
- carrots
- baby corn
- mushrooms
- zucchini
- cauliflower
Noodles
The traditional recipe for khow suey uses egg noodles, which do not hold up well to pressure cooking. I’ve found angel hair pasta (very thin spaghetti) to be a great substitute.
If you add the pasta altogether in one bunch, there’s a chance that the pasta will stick together after pressure cooking. By fanning the pasta out and layering in a criss-cross manner, your pasta has less of a chance of clumping.
To avoid the Burn error message, don’t stir the noodles. Just push down on it with a spatula until it’s submerged in the liquid.
The pressure cooking time may need to be adjusted if you’re using a different type of pasta. I use Barilla angel hair pasta.
The rule of thumb for pasta cooking times is to take the cooking time on the box, divide by 2 and add 1. e.g. if the pasta stovetop cooking time is listed as 8 minutes, the Instant Pot cooking time for the pasta would be 5 minutes (8 divided by 2 = 4; 4 + 1 = 5).
Gram Flour
Gram flour is a commonly used Indian ingredient. It’s known as besan in Hindi.
The gram flour thickens the soup. If you can’t find gram flour, use chickpea flour, which is pretty similar. If you can’t find either, you can just omit the gram flour.
When you make a slurry with the gram flour and water, make sure that there are no lumps. Stir well and if there are lumps, use a fine mesh strainer to remove the lumps by pushing the mixture through the strainer with a spoon.
Option: you can add more flavor by lightly roasting the gram flour in a frying pan and letting it cool before mixing it with water.
Note: If you make this on the stovetop, there’s no need to make a slurry. Just saute the gram flour with the spices.
How to Release Pressure When Pressure Cooking Pasta
Doing a quick release (QR) of pressure while pressure cooking pasta can result in food particles spewing out of the steam release valve. When releasing pressure, do it in bursts.
This means you release steam for 1 second and stop. Repeat multiple times until the steam coming out is less forceful. At that point, you can release the remaining pressure in a steady stream.
[Read More: Instant Pot Natural Release or Quick Release?]
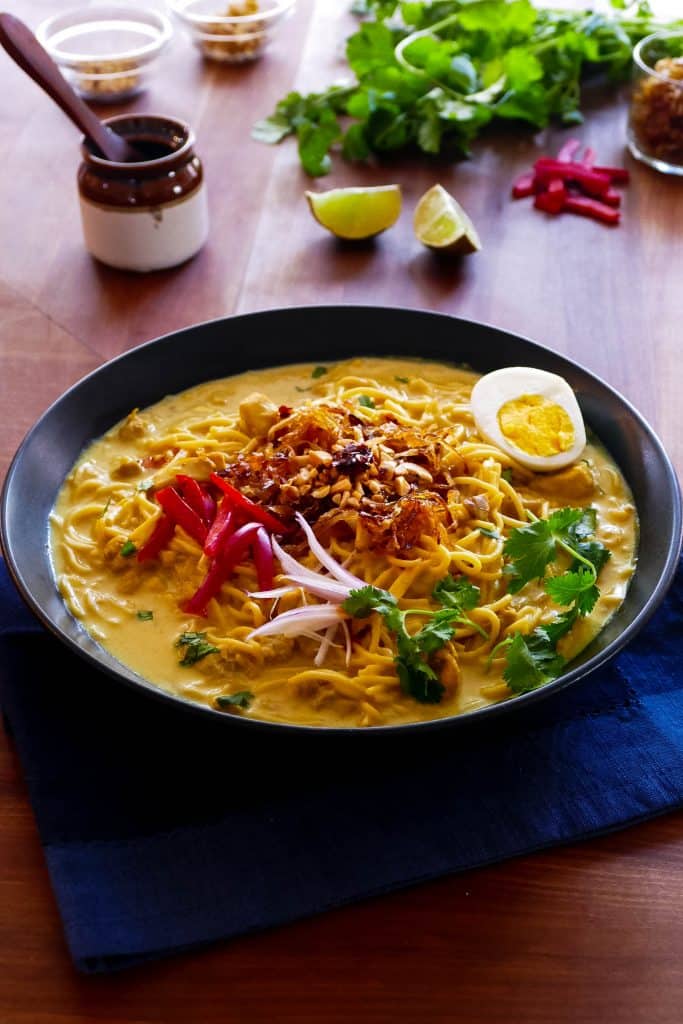
How to Serve Khow Suey (Garnishes)
Garnishes are very important to this recipe. Place each garnish in a separate bowl and allow each person to choose whichever garnish they would like to add. You can choose any of the following, or experiment and add your own take on the recipe:
- Lime or lemon wedges to squeeze on top (highly recommended)
- Spring onions, chopped
- Crushed red pepper chili flakes or chili oil
- Fried sliced onions (about 3 cups raw onions)
- Fried sliced garlic
- Boiled eggs, chopped or halved, or soft-boiled eggs, halved
- Cilantro, chopped
- Peanuts, chopped
- Strips of fried pappadum (lentil crisps) or fried wonton strips
If you’re new to the Instant Pot and aren’t familiar with how to use it, you might find it helpful to first read one of the following guides and then come back here to learn how to make this recipe.
- General Instant Pot Instructions for Beginners
- Instant Pot ULTRA Beginner’s Manual
- Instant Pot DUO EVO PLUS Beginner’s Manual
- Instant Pot DUO NOVA Beginner’s Manual
- Instant Pot DUO GOURMET Beginner’s Manual
- Instant Pot DUO CRISP Beginner’s Manual
- Instant Pot PRO Beginner’s Manual
- Instant Pot PRO CRISP Beginner’s Manual
Khao Suey – Ingredients
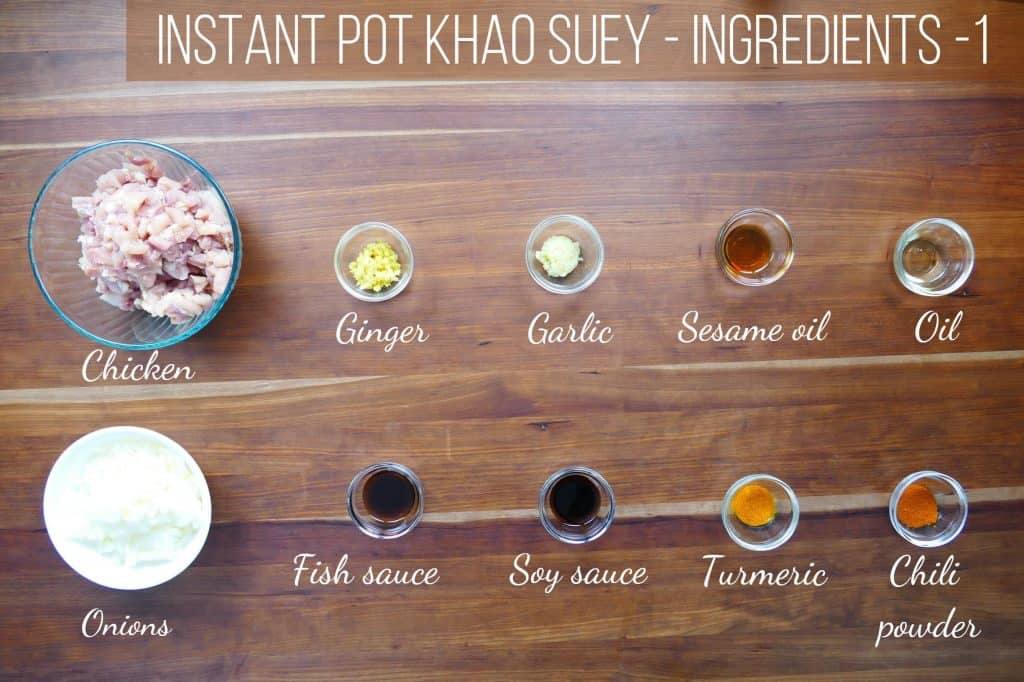
- Chicken
- Ginger
- Garlic
- Sesame oil
- Oil
- Onions
- Fish sauce
- Soy sauce
- Turmeric
- Chili powder
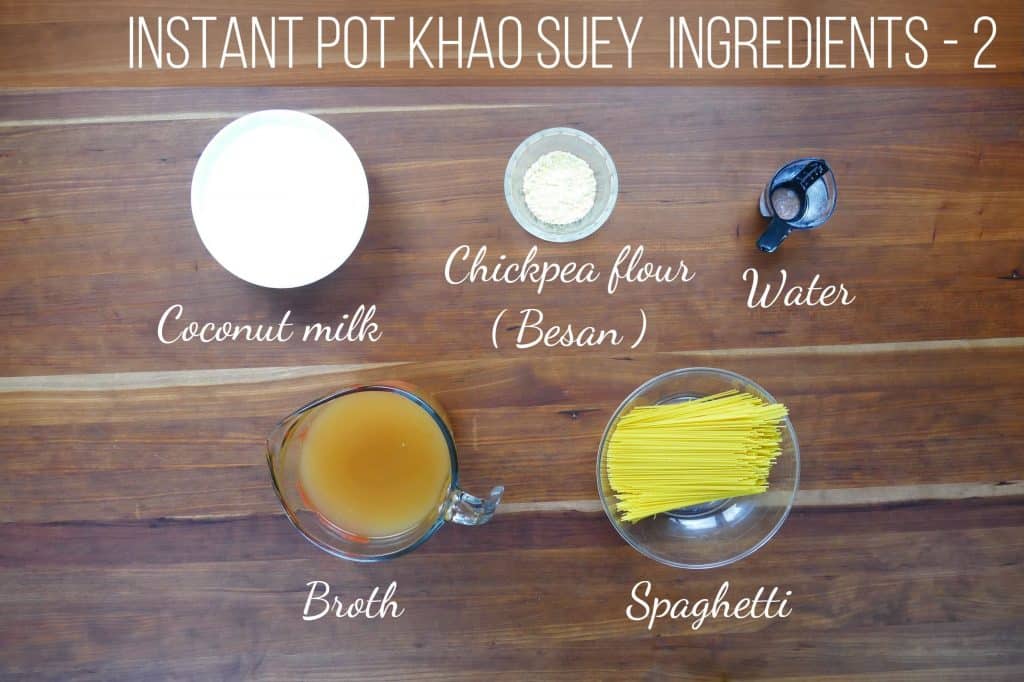
- Coconut milk
- Chickpea flour or gram flour
- Water
- Broth
- Thin spaghetti (angel hair pasta)
How to Make Khao Suey in the Instant Pot (Step by Step Instructions)
- Turn on Saute Mode
- Saute onion, garlic and ginger
- Saute spices and chicken
- Add liquids
- Add noodles
- Pressure cook
- Quick-release pressure
- Make chickpea flour paste
- Thicken noodle broth
How to Turn on Saute Mode

- Instant Pot DUO: Select the Saute function.
- Instant Pot ULTRA: Select the Saute function and press Start.
Saute Onions, Garlic and Ginger
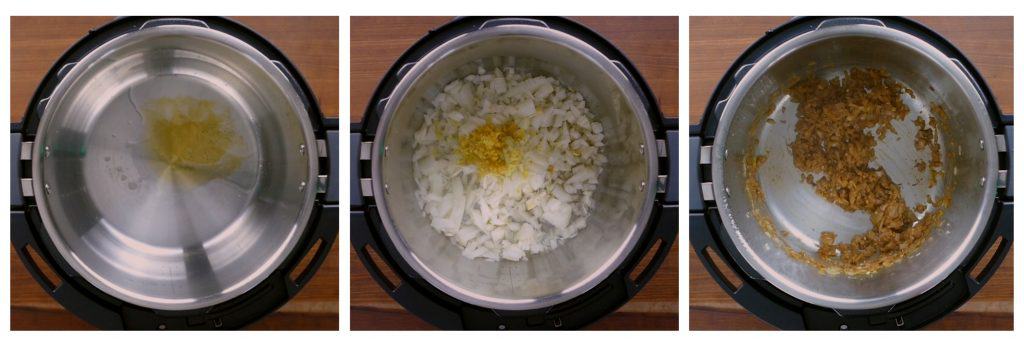
- Once the inner pot has preheated, add vegetable oil and sesame oil and let them heat up.
- Add onions, garlic, ginger and saute until the mixture is caramelized. *
- Press Cancel.
* If you have the time, saute the onions till they are a deep golden brown but be careful not to let them burn. If the onion mixture browns too quickly, press Cancel until the Instant Pot cools down a bit and press the Saute button again. Deglaze as needed with a tablespoon of broth as you go.
Saute Spices and Chicken
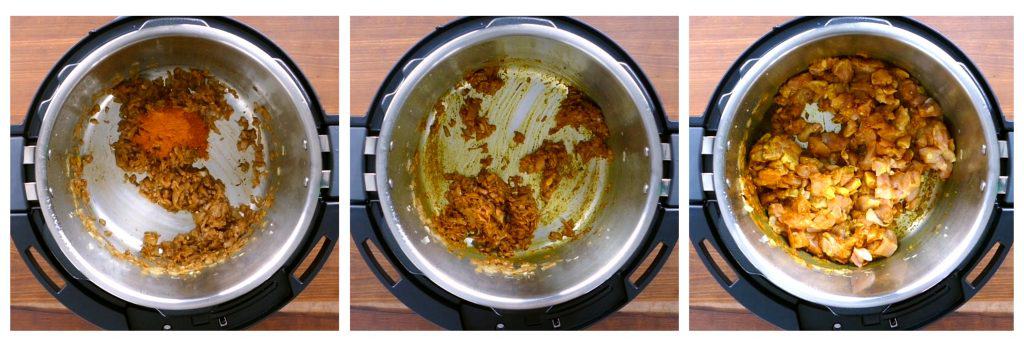
- Add chili powder and turmeric and stir constantly for 30 seconds to a minute. Deglaze as needed if the spices stick to the bottom.
- Add the chicken and stir to coat with the spices.
- If there’s anything stuck to the bottom of the inner pot, deglaze with one to two tablespoons of broth, scraping the bottom to loosen the brown bits.
Add Liquids
- Stir in broth, coconut milk, fish sauce and soy sauce.
Add Noodles

- Break the angel hair pasta strands in half.
- Add the noodles in 4 batches, alternating the rows in a criss-cross pattern. Push down with a spatula after each addition.
Instant Pot Duo Pressure Cook 3 minutes
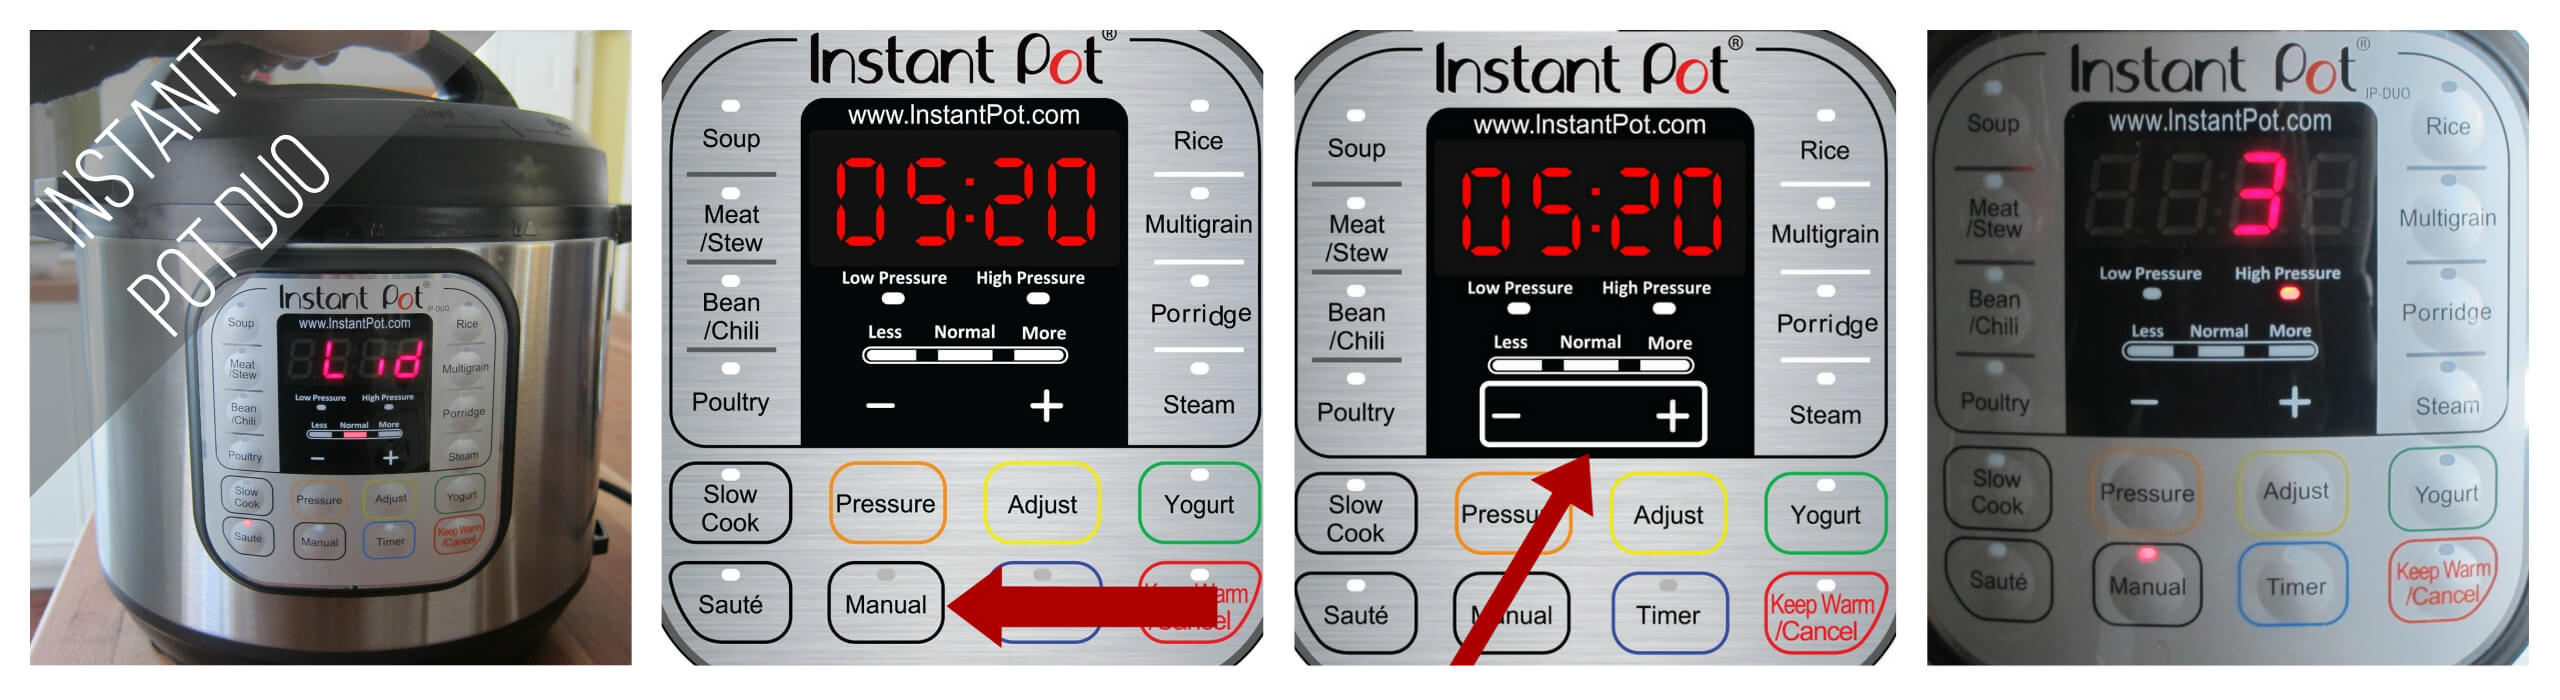
- Close the lid and make sure steam release handle is in Sealing position
- Press Manual (or Pressure Cook) and + or – until the display reads 3 (3 minutes).
Instant Pot Ultra Pressure Cook 3 minutes
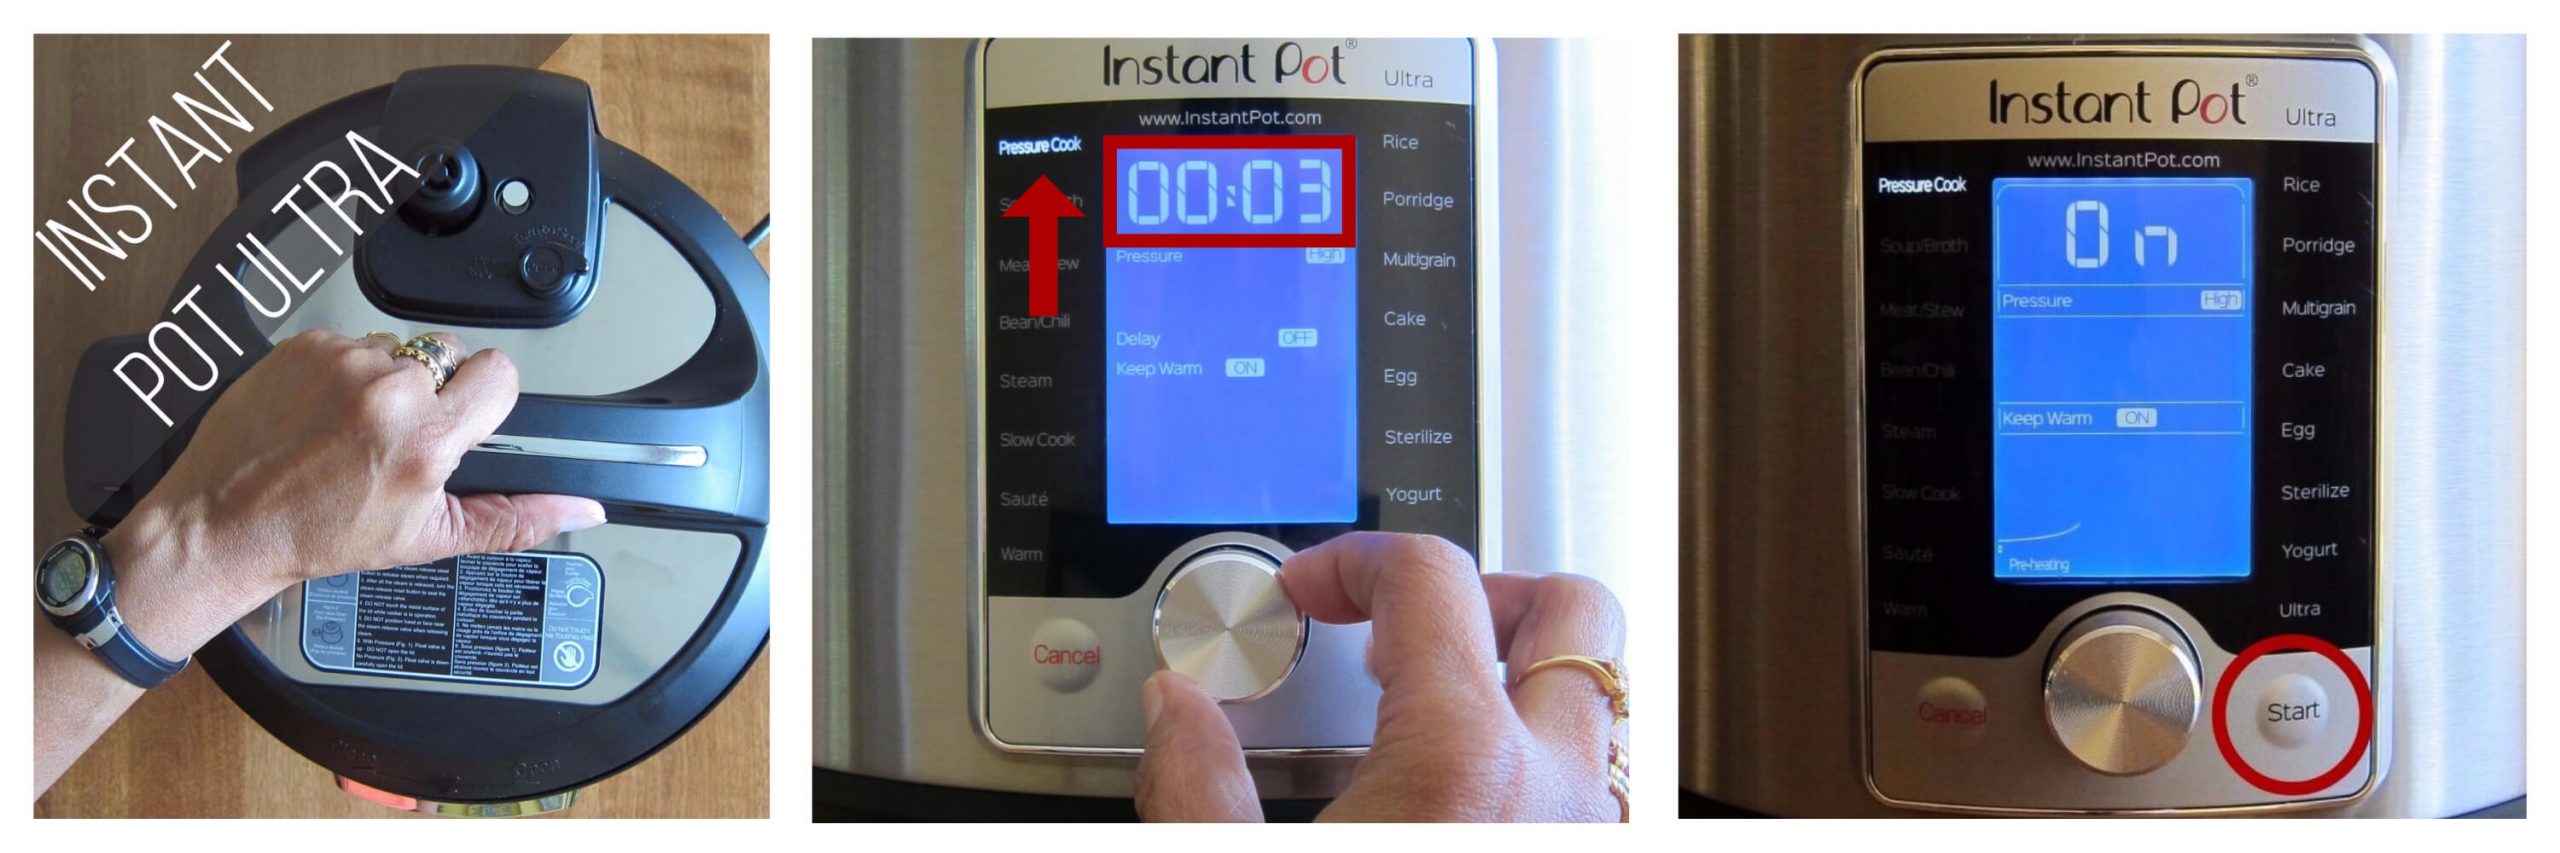
- Close the lid.
- Select Pressure Cook mode and adjust the time to 3 minutes (00:03).
Press Start.
Pressure Cooking Process (Duo and Ultra)

- Instant Pot display will change to On.
- Once the Instant Pot is pressurized, the float valve will go up.
- The display will count down to 0; it will then switch to Keep Warm mode and display L0:00 or 00 00 and begin to count up the number of minutes since pressure cooking completed.
How to Quick Release Pressure (QR) on the DUO

- Move the steam release handle to Venting. Steam will come out of the steam release handle.
- When your Instant Pot is depressurized, the float valve will be in the down position.
- Press Cancel and open the Instant Pot.
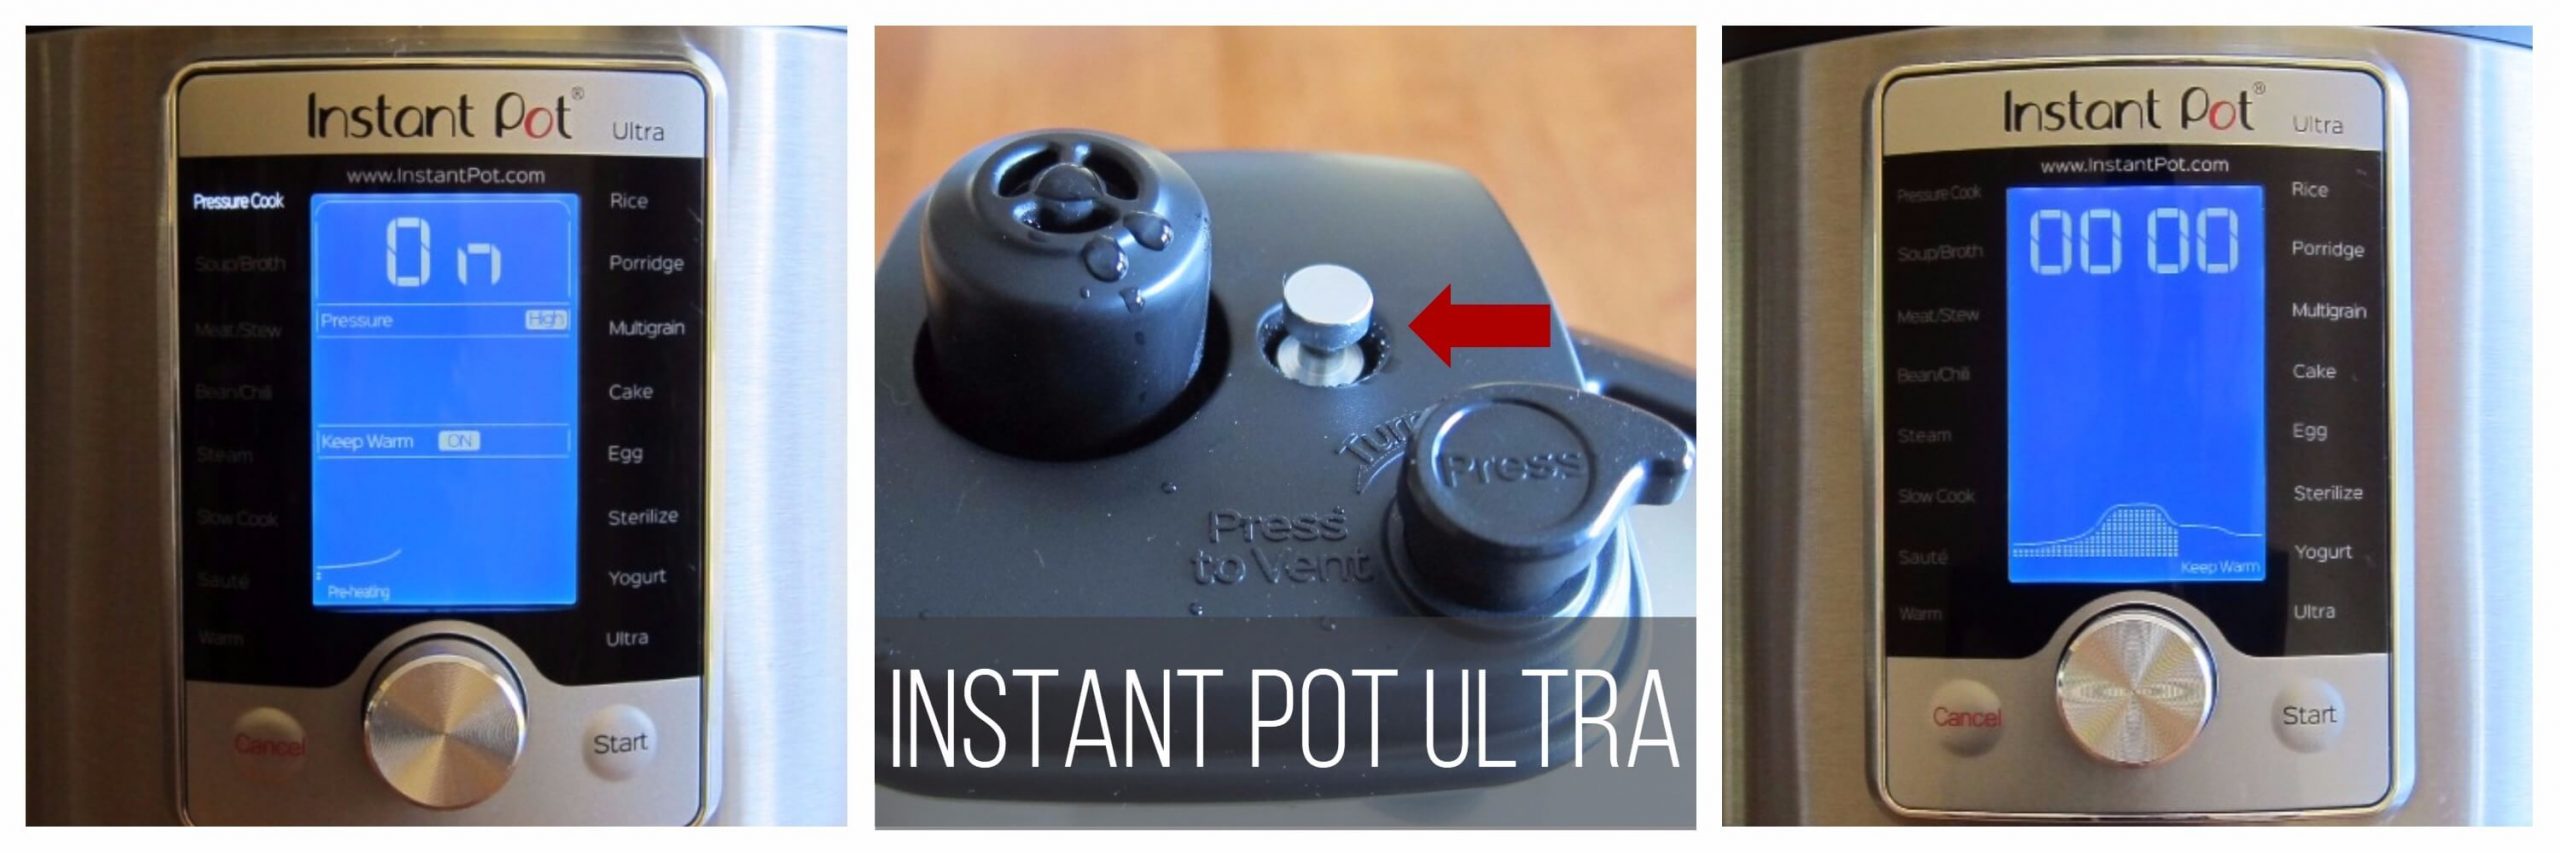
How to Quick Release Pressure (QR) on the ULTRA

- Press down on the Steam Release Button until it locks into place, and steam begins to come out of the Steam Release Valve.
- When your Instant Pot is depressurized, the float valve will be in the down position.
- Press Cancel and open the Instant Pot.
[Find out more about the pressure release methods and how and when to use them. ]
✏️ Pro Tip for Releasing Pressure in Small Bursts
- For some foods such as noodles, I find it helpful to release the steam in small bursts: less than 1-second intervals. Once the steam coming out is less forceful, release the remaining pressure in a steady stream. Read more about the different pressure release methods.
Make a Chickpea Flour Paste

- In a small bowl, mix together water and gram flour.
- Stir until a smooth paste forms, with minimal lumps.
- If needed, strain through a small strainer to remove lumps.
Thicken Noodle Broth
- Add gram flour mixture to the Instant Pot.
- Stir until combined.
- Heat on Saute mode until the gram flour has lost its raw taste and the mixture has thickened slightly. It will thicken more while it rests.
- Add more coconut milk and/or broth if you find that the soup is too thick.
- Serve with your choice of garnishes. See tips.
Stovetop Directions for Khow Suey
To make this recipe on the stovetop:
- Saute the onions, garlic, and ginger.
- Stir in the spices and gram flour.
- Stir in the chicken and saute.
- Stir in all liquids and bring to a boil.
- Add in the noodles and boil until the noodles are cooked.
- Cook through until the soup has thickened.
See the recipe card below for detailed instructions.
Khow Suey – Burmese Noodles
Ingredients
- 1 tablespoon vegetable oil
- 2 teaspoon sesame oil
- 2 cups onions
- 1 tablespoon garlic minced
- 1 tablespoon ginger minced
- 1 teaspoon Kashmiri chili powder more to taste
- ¾ teaspoon turmeric powder
- 1 ½ lbs boneless skinless chicken thighs (⅔ kg) cut into bite-size pieces
- 5 cups low sodium chicken broth plus more to deglaze
- 13.5 oz. coconut milk (400 ml) preferably Aroy D or Chaokoh brand
- 1 ½ tablespoon fish sauce
- 1 tablespoon soy sauce
- 8 oz. angel hair pasta (226 grams) strands broken in half **
- 3 tablespoon gram flour or chickpea flour
- ¼ cup cold water omit for stovetop
Garnishes (your choice of the following)
- Fresh lime wedges
- onions thinly sliced, fried to golden brown
- whole garlic thinly sliced, fried to golden brown
- cilantro chopped
- roasted peanuts chopped
- green onions chopped
- crushed red pepper
- eggs hard-boiled or soft-boiled
- pappadum cut into strips and fried, or fried wonton strips
Instructions
Stovetop Instructions
- Heat a large dutch oven over medium-high heat. Heat vegetable oil and sesame oil.
- Saute the onions, garlic, and ginger until the onions are caramelized and turn golden brown. Turn the heat down to medium.
- Add in the chili powder, turmeric, and gram flour and stir constantly for 30 seconds to 1 minute, until fragrant. Add a bit of oil if needed. If it sticks to the bottom, deglaze by adding a couple of teaspoons of broth or water to release the brown bits.
- Add the chicken and stir to coat with the spice mixture. Saute chicken until no longer pink.
- Stir in broth, coconut milk, fish sauce and soy sauce and bring to a boil.
- Stir in the pasta and boil until the noodles are cooked to your desired consistency, about 10 minutes.
- Cook through until the soup has thickened.
Instant Pot Instructions
- Select the Saute function and pre-heat the Instant Pot.
- Add vegetable oil and sesame oil to the inner pot and allow them to heat up.
- Saute the onions, garlic and ginger for 3 to 5 minutes, until the onions are lightly caramelized. *
- Press Cancel.
- Add in the chili powder and turmeric and stir constantly for 30 seconds to 1 minute, until fragrant.
- Add the chicken and stir to coat with spice mixture. If there are brown bits stuck to the bottom of the inner pot, deglaze with one or two tablespoons of broth or water and scrape with a spatula to dissolve the brown bits.
- Stir in broth, coconut milk, fish sauce and soy sauce.
- Divide angel hair pasta into four batches. Add the pasta to the inner pot in a criss-cross pattern: add one-fourth of pasta into the broth, spreading it out from the back of the inner pot towards the front. Push down with a spatula to submerge the pasta. Add the next one-fourth of noodles, spreading out right to left. Repeat with the remaining two batches. (See the step by step instructions on the blog post for photos if you need clarification.)
- Using a spatula, push down on the pasta until all of it is submerged in the broth.
- Close the lid and pressure cook on High Pressure for 3 minutes.
- Do a quick release in bursts: release pressure a little at a time until the steam is less forceful and then release any remaining pressure. [Read More: The Different Pressure Release Methods]
- Press Cancel, open the lid and stir the noodles. If there are any strands of noodles stuck together, use a fork to separate the strands.
- In a small bowl, combine gram flour and water. Stir until smooth, with minimal lumps. Strain through a strainer to remove the lumps, if necessary.
- Stir gram flour mixture into the noodles.
- Select the Saute function and heat the noodles to cook through and for the contents to thicken.
Garnish
- Serve in individual bowls with lime wedges and garnish with your choice of garnishes.
Notes
- * If you have the time, saute the onions till they are a rich golden brown color. The longer you saute the onions, the better the flavor. To make sure they don’t burn, periodically deglaze the inner pot with a tablespoon of broth or water, scraping up the brown bits.
- ** If making this recipe on the stovetop, you have the option of using rice noodles or egg noodles. Cook the rice or egg noodles separately, and pour the soup over the noodles in individual serving bowls. If you use this option, you can reduce the quantity of broth to 3 cups and add more broth as needed, to your desired consistency.
- Prep time will increase if you choose to make the fried onion garnish. It takes about 30 minutes to prepare; making it ahead of time is a great option.
- Using a different type of pasta may require a different cooking time in the Instant Pot.
Nutrition
Thank you for visiting Paint the Kitchen Red. All photos and content are copyright protected. Please don’t use any content without prior written permission. If you’ve made this recipe and would like to share it with your friends, please link back to this recipe. Thank you!
I am not a certified nutritionist. I provide my best estimate of nutritional information merely as a courtesy to my readers. If you depend on nutritional information for dietary or health reasons, I suggest using your favorite online nutrition calculator to confirm the nutritional value of this recipe based on the actual ingredients that you use.
Did you know that the best way to support your favorite bloggers is to comment and rate recipes, and share on social media? If you loved this recipe, please comment and give it a five ⭐ rating in the comment section below. If you’re a pinner, pin this post using the Pin buttons at the top and bottom of this post and in the recipe card above. Thank you for your support!
Recipes you Might Also Like!


Mikey says
This was, with very little doubt, one of the biggest home runs I have scored in quite a while. All of it was down to things falling in place, and figuring out which recipes could be done at a fairly short notice. For many years, there has been a back-catalogue on my bookmarks for recipes which I intend to cook down the line; finally, one of them can get off that back-catalogue and into the rightful place in the bookmarks. But it wasn’t that it was so good that makes this instant so special; it was that a neighbour could come over at short notice to experience my cooking.
I have had a bit of experience with Burmese cooking before, having known a Burmese lady in my youth and tried out a recent restaurant. It is a lovely cuisine, just think of a less explosive Thai with a hint of Malayisan – Burmese is at that crossroads. It still appreciates flavour and spice.
Nevertheless, this recipe is a surefire winner and I would amazed in getting it at a restaurant. It reminded me of something you might get at a hawker store, with every ingredient being vibrant and the textures being soothing and smooth. This was not unlike a laksa, or a spicer version of ramen – khow suey deserves its place among those greats. I used to stovetop version, sourced good quality chicken from an independent butcher, and used ramen noodles instead of angel hair pasta – I figured the latter would be similar enough. For garnishes, my dad toasted some cashews and cut up some corriander; both were good additions, and I would certainly experiment with others down the line.
Unlike many spicy and flavourful dishes, this one allowed the components – the garlic, the chilli, the ginger, and even the onion – to have their turn dancing on the tastebuds. The spiciness engulfing itself into the smoothness of the coconut milk is one thing I always enjoy in a good soup. The chicken was tender and delicious, plus hints of both soy and fish sauce were really welcome.
I have cooked a lot over the years, but have not had that much experience with East Asia. Dishes like this give me the fire and desire to try that region out much further in the kitchen. While there was a lot of washing up to do with the preparation, it turned out to be a great and warming meal. This is especially welcome with it being winter where I am. And a big batch meal like this is something that has me find a happy place – both in preparing every component, and in eating it at the table.
I knew that inviting the guest over was the right move, and it was the component that pushed this from being merely another good meal I have done, to one to truly appreciate. It is the scene behind the food that does the difference.
Neena Panicker says
What a thoughtful comment, thank you so much for sharing. I’m thrilled that you chose to try my khow Suey recipe!
Barbara says
From what I can see on the picture, these are not angel hair pasta; they look more like spaghetti. But anyway, I’m looking forward to try your recipe, it looks delish!
Paint the Kitchen Red says
Hi Barbara, it is Barilla angel hair pasta, maybe other brands other thinner, I’m not sure. Hope you enjoy the recipe!
Denise Feldman says
This is incredible. This is my go to at every Thai restaurant. Bummer for them. I did add a round of palm sugar before adding the veg and pasta. I thought the curry needed it. It didn’t add sweetness, just rounded out the curry. I also added the veggies just as the sauce began to boil because I knew it would lower the temperature of the curry. I then brought the broth back to a boil and added the pasta. Thank you for making this with a vegetarian option. I clean out my vegetable bins in the refrigerator. Thank you!
Paint the Kitchen Red says
Thank you so much, Denise!
Sunil De Silva says
Loved the recipe one of the several that I have made
Thank you
Paint the Kitchen Red says
Sunil, I remember your name from another recipe – maybe vindaloo? Thanks for commenting and I’m thrilled you liked the recipe 🙂
Sucharita Iyer says
Loved this easy, simple yet flavorful recipe. Thank you for giving substitution tips for vegetarians. I’m vegetarian so added veggies and tofu instead of meat. I kept soy sauce amount the same and simply skipped fish sauce. Added red chilli paste and black pepper powder besides the red chilli powder and turmeric. Family loved it!
I’m unable to click on the stars to rate this recipe here – it is clearly earns 5 stars from me!
Paint the Kitchen Red says
Hi Sucharita, thank you so much for taking the time to comment. I will go ahead and put the star rating here in my reply. Thanks for letting me know that you like the recipe and that you weren’t able to rate the recipe – not sure why that is….
Jen says
I made this recipe tonight, and it was SO good! My whole family (teens + husband) loved it and said it was a keeper. We topped with lime, cilantro, green onions, hard boiled eggs, wonton strips, and crushed red pepper. (I subbed pot-sized thin spaghetti instead of angle hair [store was out] and bumped the cook time to 4 minutes. Everything was perfectly cooked! I also used corn starch [3 T.] and water as the thickener instead of chickpea flour.) Thank you for an awesome dish, Neena Panicker! So good!
Paint the Kitchen Red says
Thanks for your great message, Jen. I’m so excited that you liked the recipe especially because it’s a new one and I love it when my new recipes get tried!
Jayson says
Don’t know if this is true, but my parents once told me Khao Soi was actually “created” when a part of Thailand was taken over by the Burmese. The Burmese evolved this dish further, but so did the Thai. They both branched off into 2 dishes with the same/similar name, with one ending up much more popular than the other.
Paint the Kitchen Red says
Thanks for sharing that, Jayson! I’m sure that there’s truth to it. Interesting that in India, the Burmese version is super popular and in the west, the Thai version seems more popular. I hope you get to try the recipe out.
Ziya Tarapore says
I believe Khao soi has no coconut milk
Paint the Kitchen Red says
Ziya, interesting! I’ve had it at restaurants with coconut milk. Not sure which is more authentic?
Denise Feldman says
This was so delicious. I will make it again, but I will cook my noodles separately and use them as a base to pour the sauce over. This is only because we love leftovers and the noodles didn’t survive their integrity the following day. The next time I make this dish, I’ll add carrots, zucchini, celery, and either green beans or asparagus. That will eliminate the need to make a salad.
Paint the Kitchen Red says
Thank you Denise, that’s so kind of you to take the time to comment – I appreciate it!
Stephen says
That’s a great idea. Cooking the noodle separately will allow the use of egg noodles and the left-over for the next meals or day.
Stephen says
By the way, I was born in Burma. This noodle Khow Suey and Mok hin gha ( fish soup and rice noodle) are the two breakfasts I will never forget!
Paint the Kitchen Red says
I know this reply is long overdue, but somehow I never saw your comment when it was posted. Thank you for trying the recipe and since you were born in Burma, I value your opinion all the more!
Amanda says
Hi Neena!
I’m so happy to see a Burmese recipe on your blog!!! I’m Burmese myself and can’t wait to try out this recipe when I get the chance.
Paint the Kitchen Red says
That’s so great to hear, Amanda – I sure hope you get to try it and do let me know what you think!
Yoav M. says
Thank you Neena!!! Everything I have made from your site has been mind-blowing so I jumped on this as soon as I got the email. Took me a little bit to get time and stock up on a few things i was low on but tried it tonight and it did not disappoint. SO good!!! I must admit that I made some mods to make it more friendly for my dietary restrictions (lite coconut milk and a few mods to make it GF) and that I skimped on the garnishes but it was still FANTASTIC. Thanks as always!
Paint the Kitchen Red says
Oh wow, thanks so much Yoav! Your comment really made my day. I’m excited you liked the recipe and the first comment and rating is always special because I get affirmation that others like a recipe as much as I do!
Sewitwell says
I am so delighted to see this recipe, thank you very much!
Paint the Kitchen Red says
You’re very welcome. By the way, I hid your email address since you had put that as your name.