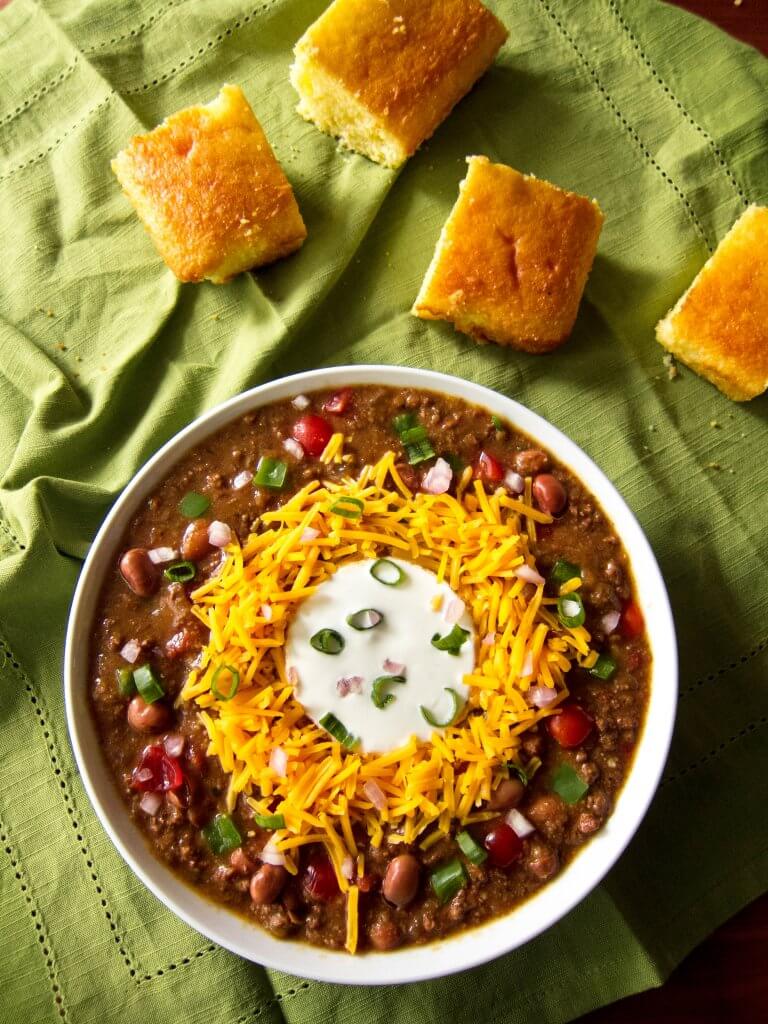
Homemade Instant Pot Chili with dry beans, made using ground beef and dried unsoaked beans, is the perfect comfort food for a fall or wintry evening. It’s also a great dish to feed a crowd, or for game day. The addition of Masa Harina (cornmeal) in this chili recipe thickens the chili and gives it a corn flavor. Add your choice of toppings to take this homemade Instant Pot chili recipe over the top!
This post contains affiliate links. As an Amazon Associate, I earn from qualifying purchases. Please read the disclosure.
Table of Contents
Introduction
Did you know that October is National Chili Month? It’s not yet October, but the leaves are changing color, the weather’s turning cooler and I’m starting to make soups, stews, and other comfort foods. I love the advent of fall and I thought it would be appropriate to post an Instant Pot Chili recipe to observe this occasion!
Chili is derived from Chili con Carne (translated as ‘chili with meat’ in Spanish), which originated in Texas. During the Chicago World’s Fair in 1893, the San Antonio Chili Stand helped popularize Texas chili to other parts of the United States. What’s Cooking America has a fascinating article about the origins of chili, in case you’d like to find out more!
Chili purists might say that chili should not include beans and/or tomatoes. Well, my recipe for Instant Pot Chili has both beans and tomatoes. Because I happen to like both in my chili.
You might be tempted to use canned beans because they’re convenient: no pre-soaking, no long cook times, just open the can and pour. But the Instant Pot allows you to use dried beans without the inconveniences.
The hands-on time for this Instant Pot Chili with dried beans recipe is about 10 minutes. For the rest of the time, the Instant Pot is doing the cooking while you get other important things done!
TIPS AND SUBSTITUTIONS
Beans
This recipe uses dried beans instead of canned beans. Dried beans are much more economical and don’t have added salt and preservatives.
The dried beans should be pre-soaked, but I’m going to show you a shortcut. I sometimes (always!) forget to soak my beans, so here’s a tip for you that works like a charm with any recipe that uses pre-soaked dried beans. Do a quick Instant Pot pre-soak while you’re cutting up the vegetables and preparing your ingredients.
Masa Harina (Corn Flour)
This recipe calls for masa harina (pronounced ‘maasa areena’) which is a finely ground Mexican corn flour used to make tortillas. Added to the chili after pressure cooking, the masa harina will thicken the Instant Pot chili and give it a slight corn flavor.
Please keep in mind that the recipe needs a certain amount of liquid to avoid sealing issues and the burn message. If you choose not to use the masa harina, the chili may be runny or thinner than you want.
Masa Harina can be found in the Latin/Mexican section of your grocery store or at a Latin grocery store. If you can’t find it, you can either substitute corn meal or take a few corn tortillas and powder them in a mini food processor.
Chili Powder
If you’ve never cooked homemade chili before, it’s important to note that the chili powder called for in this Instant Pot Chili recipe is Mexican chili powder commonly available in American grocery stores which is a mixture of different spices including cumin and garlic.
Please don’t use cayenne pepper or ground chili pepper that you get from Asian, Indian, Mexican, and ethnic markets – you won’t be able to eat this chili; it’ll be too spicy! So be sure to check the ingredient list. I like to use McCormick chili powder.
Toppings
Ladle the cooked Instant Pot Chili into bowls and serve with your choice of the following toppings:
- sour cream
- shredded cheddar cheese
- diced shallots or red onions or green onions
- sliced jalapenos
- hot sauce
- cilantro
- cornbread to crumble over the top
- my personal favorite: Fritos corn chips!
If you’re new to the Instant Pot and aren’t familiar with how to use it, you might find it helpful to first read one of the following guides and then come back here to learn how to make this recipe.
- General Instant Pot Instructions for Beginners
- Instant Pot ULTRA Beginner’s Manual
- Instant Pot DUO EVO PLUS Beginner’s Manual
- Instant Pot DUO NOVA Beginner’s Manual
- Instant Pot DUO GOURMET Beginner’s Manual
- Instant Pot DUO CRISP Beginner’s Manual
- Instant Pot PRO Beginner’s Manual
- Instant Pot PRO CRISP Beginner’s Manual
Instant Pot Chili with Dried Beans – Ingredients
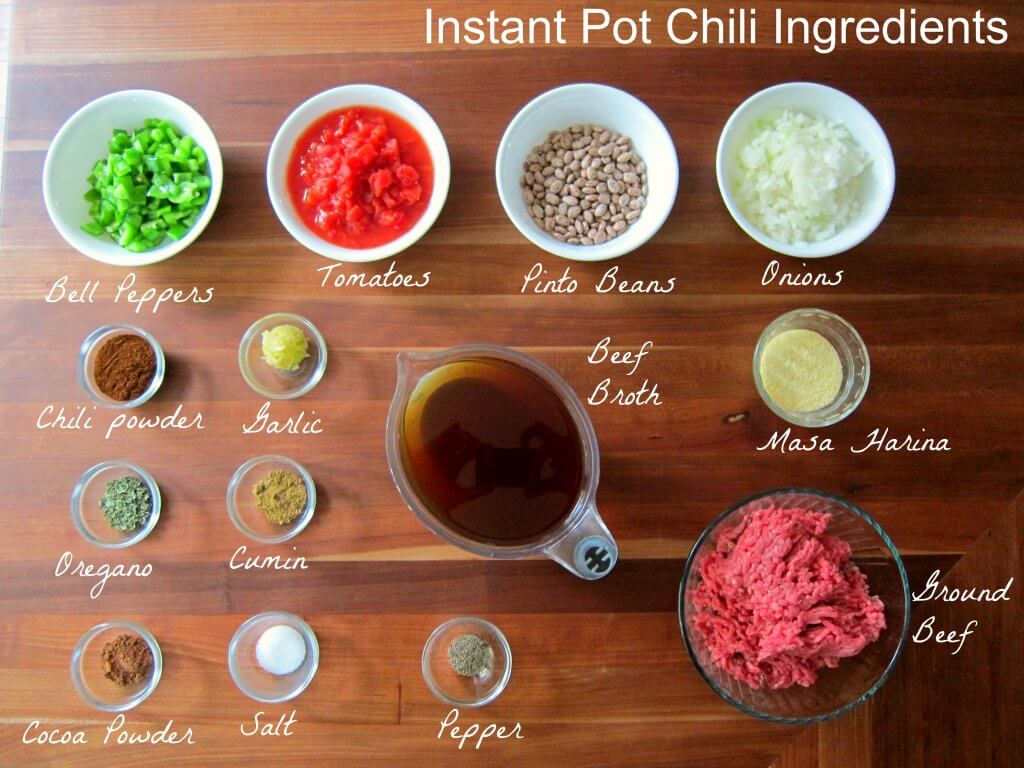
- Bell peppers
- Tomatoes
- Pinto beans
- Onions
- Chili powder
- Garlic
- Beef broth
- Masa harina
- Oregano
- Cumin
- Cocoa powder
- Salt
- Pepper
- Ground beef
How to Make Chili using Dried Beans in the Instant Pot (Step by Step Instructions)
- Soak Beans
- Turn on Saute Mode
- Saute beef
- Saute vegetables
- Add spices, broth
- Pressure cook
- Do a natural release of pressure
- Stir in masa harina
- Serve with your choice of toppings
Soak Beans
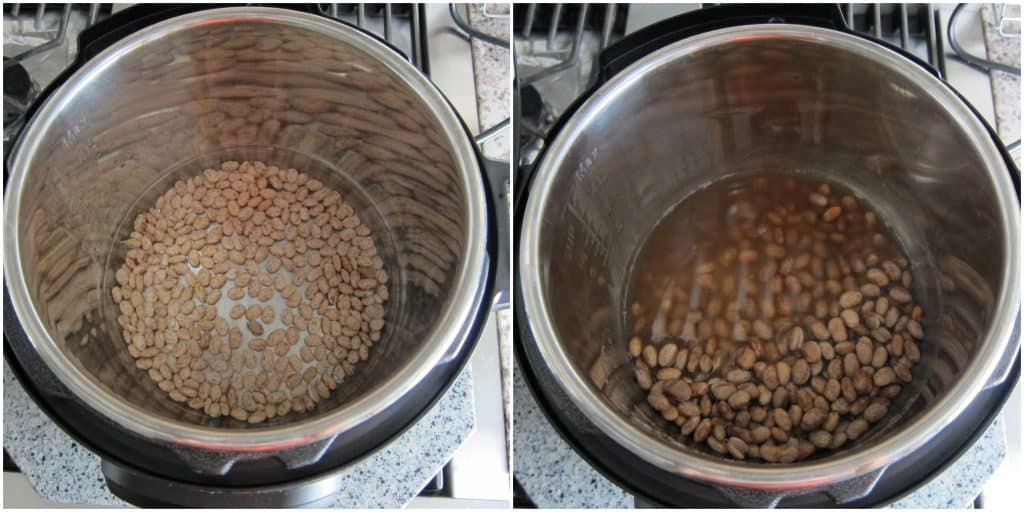
- Soak dried beans for 4 to 8 hours or use my preferred method: Instant Pot Quick Soak Beans.
How to Turn on Saute Mode
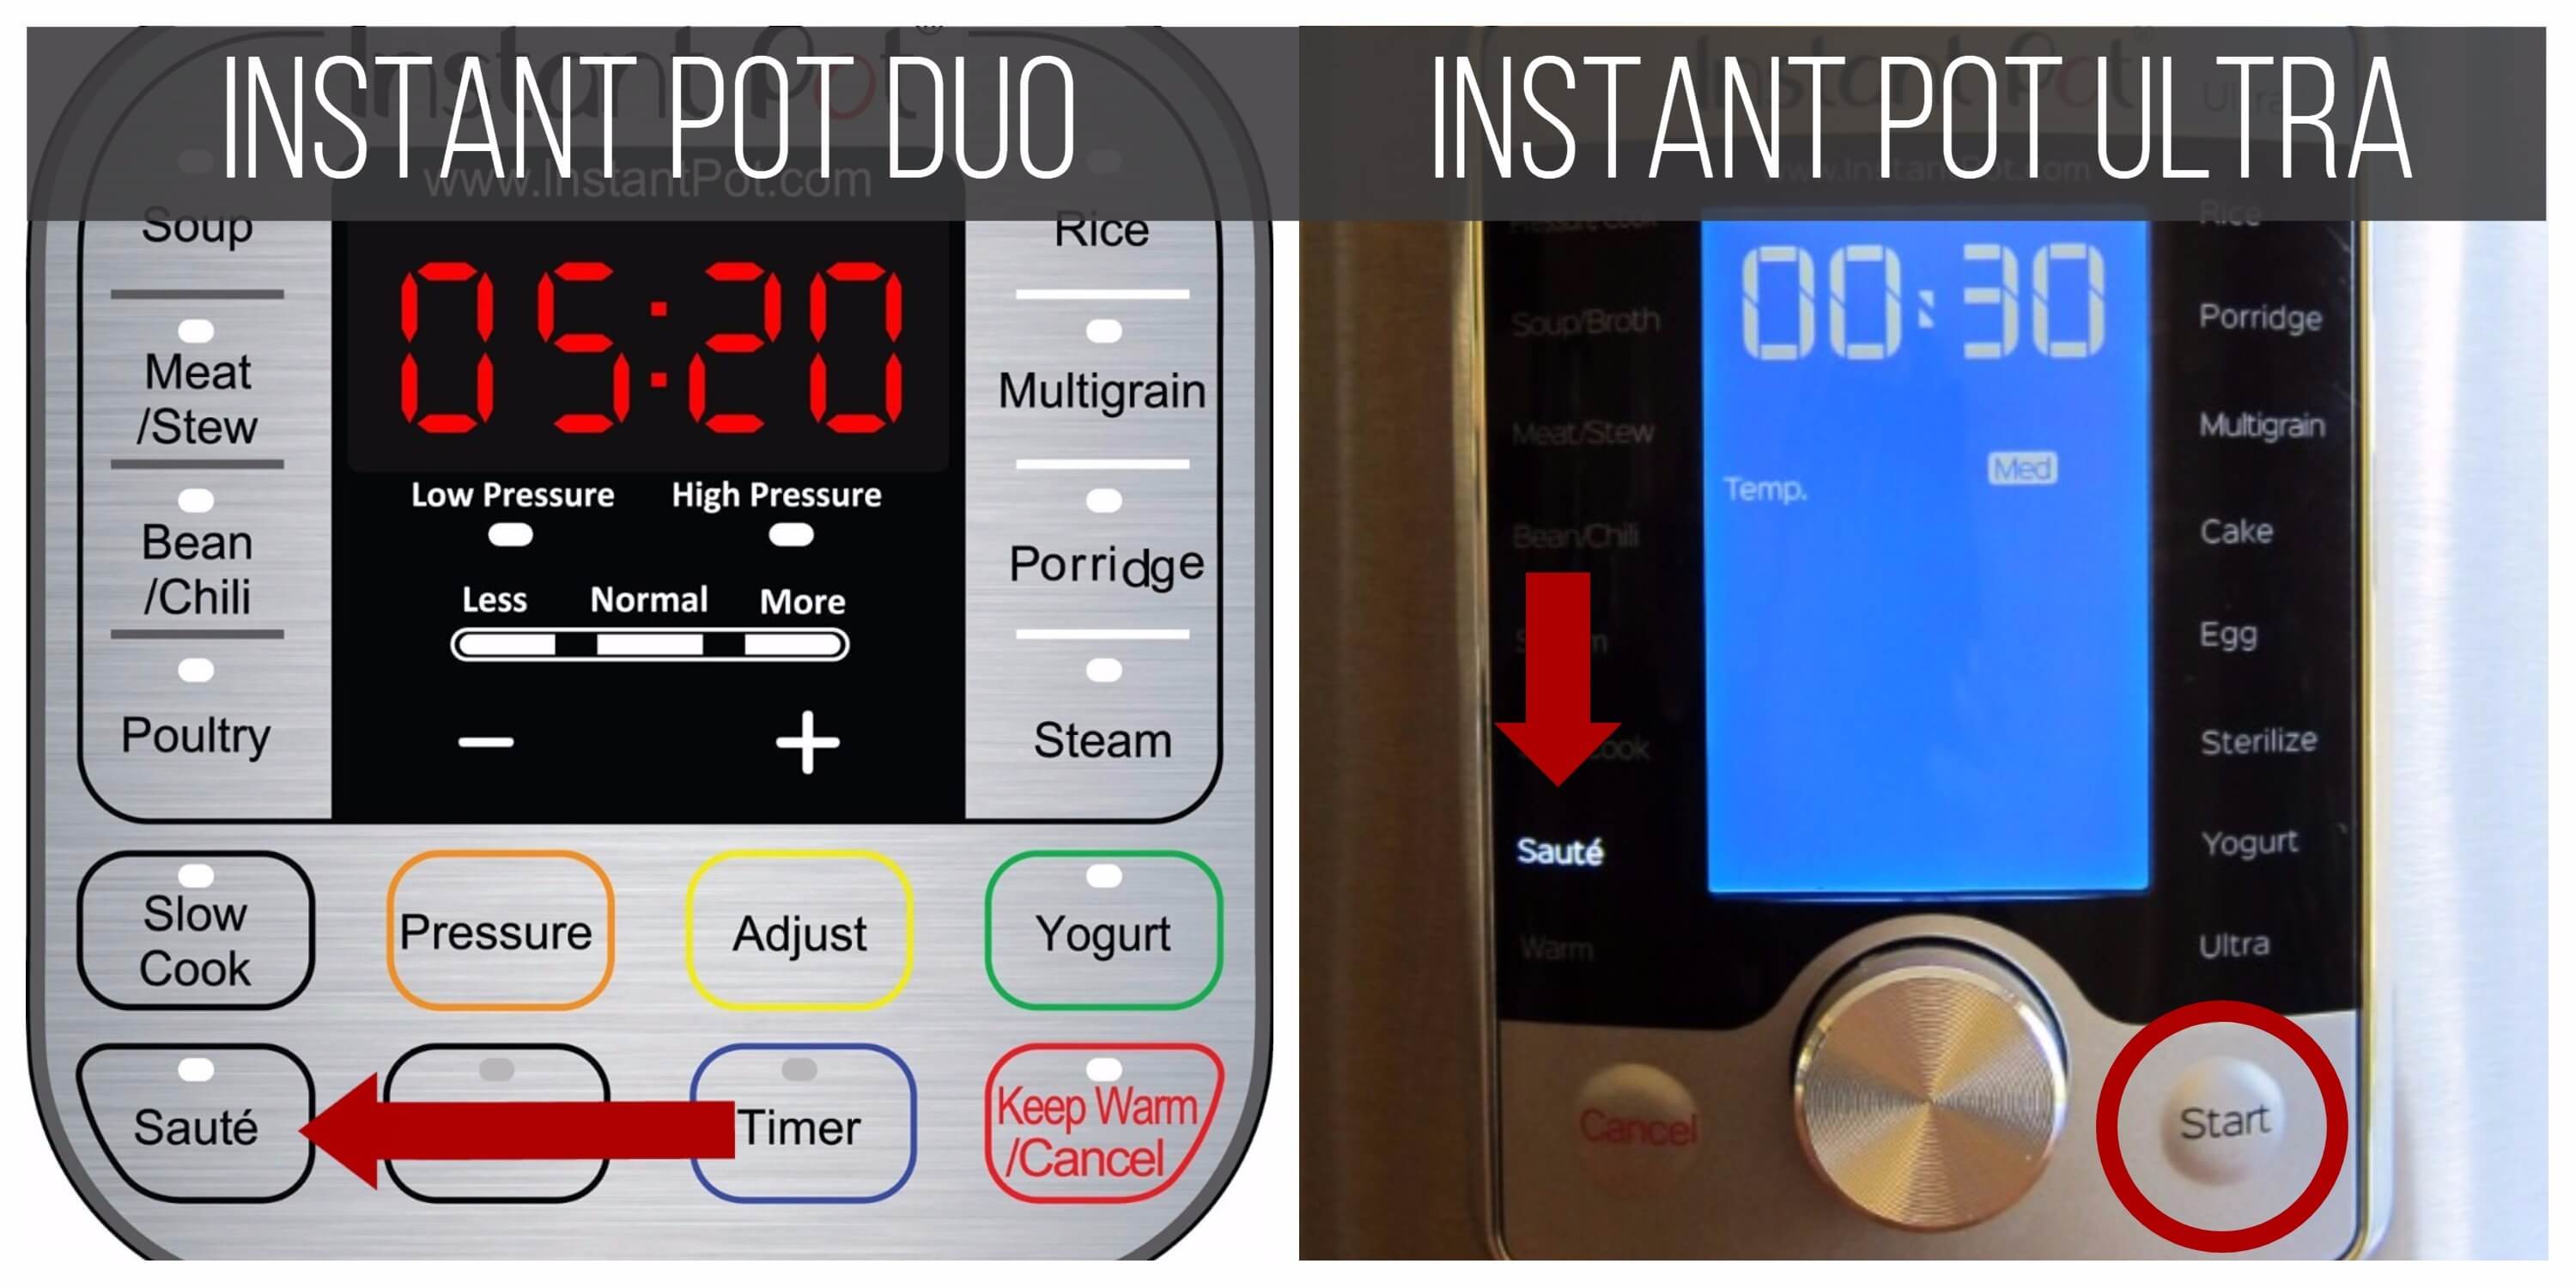
- Instant Pot DUO: Select the Saute function.
- Instant Pot ULTRA: Select the Saute function and press Start.
Saute Beef

- Once Instant Pot is hot, add vegetable oil to the inner pot.
- Add ground beef to the inner pot.
- Stir with a wooden spoon to break up the meat into smaller pieces and saute until meat is browned, about 3 minutes.
Saute Vegetables

- Add onions to beef and saute until soft, about 2 minutes.
- Stir in bell peppers.
- Stir in garlic.
Add Spices, Broth

- Add chili powder, oregano, cumin powder, cocoa powder, salt, black pepper and cayenne pepper.
- Stir well and cook until fragrant, about 1 minute.
- Add beef broth, tomatoes and pre-soaked dried beans (whether using quick Instant Pot pre-soak or countertop pre-soak).
Instant Pot Duo Pressure Cook 20 minutes

- Close the lid and make sure steam release handle is in ‘Sealing’ position
- Press Manual (or Pressure Cook) and ‘+’ or ‘-‘ until the display reads ‘20′ (20 minutes).
Instant Pot Ultra Pressure Cook 20 minutes

- Close the lid.
- Select Pressure Cook mode and adjust the time to 20 minutes (00:20).
- Press Start.
Pressure Cooking Process (Duo and Ultra)
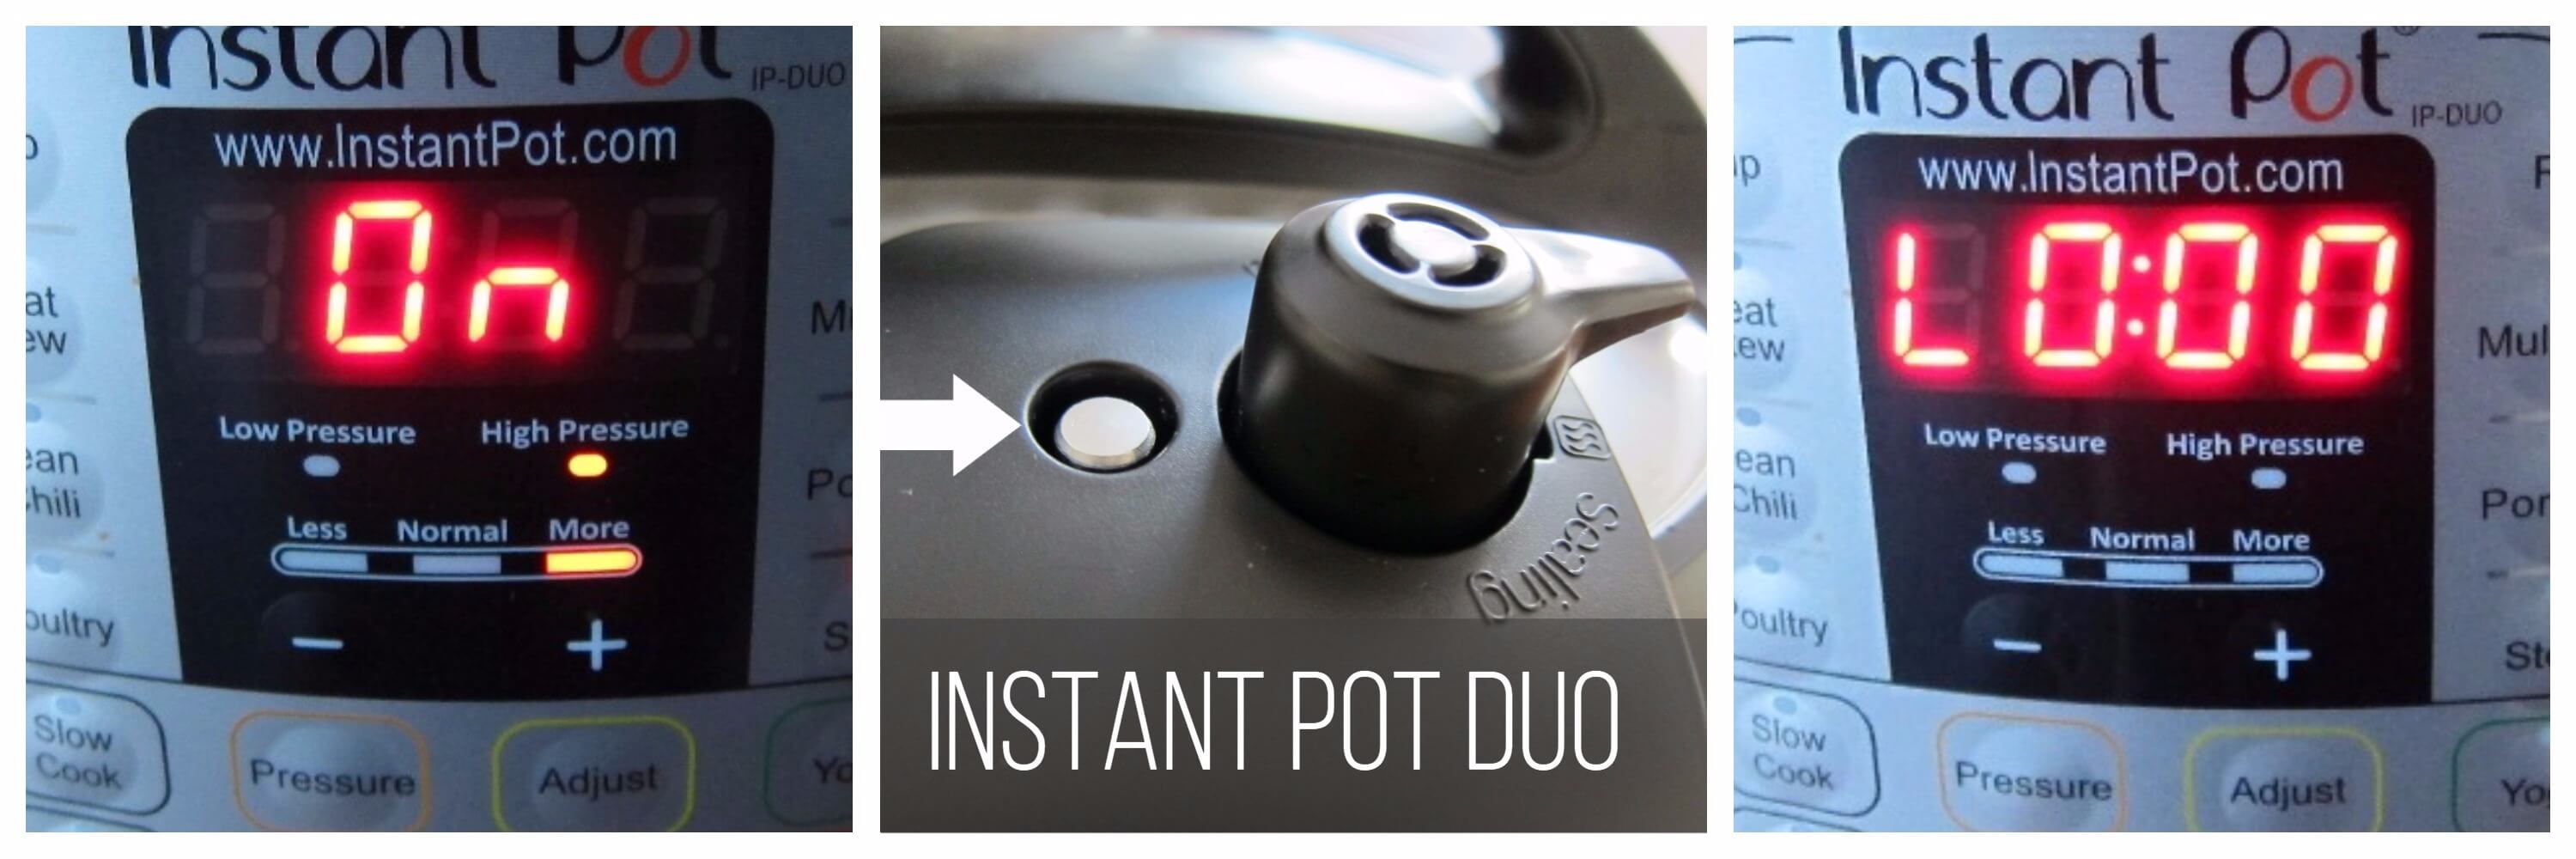

- Instant Pot display will change to On.
- Once the Instant Pot is pressurized, the float valve will go up.
- The display will count down to 0; it will then switch to Keep Warm mode and display L0:00 or 00 00 and begin to count up the number of minutes since pressure cooking completed.
How to Naturally Release Pressure (NPR) on the DUO and ULTRA
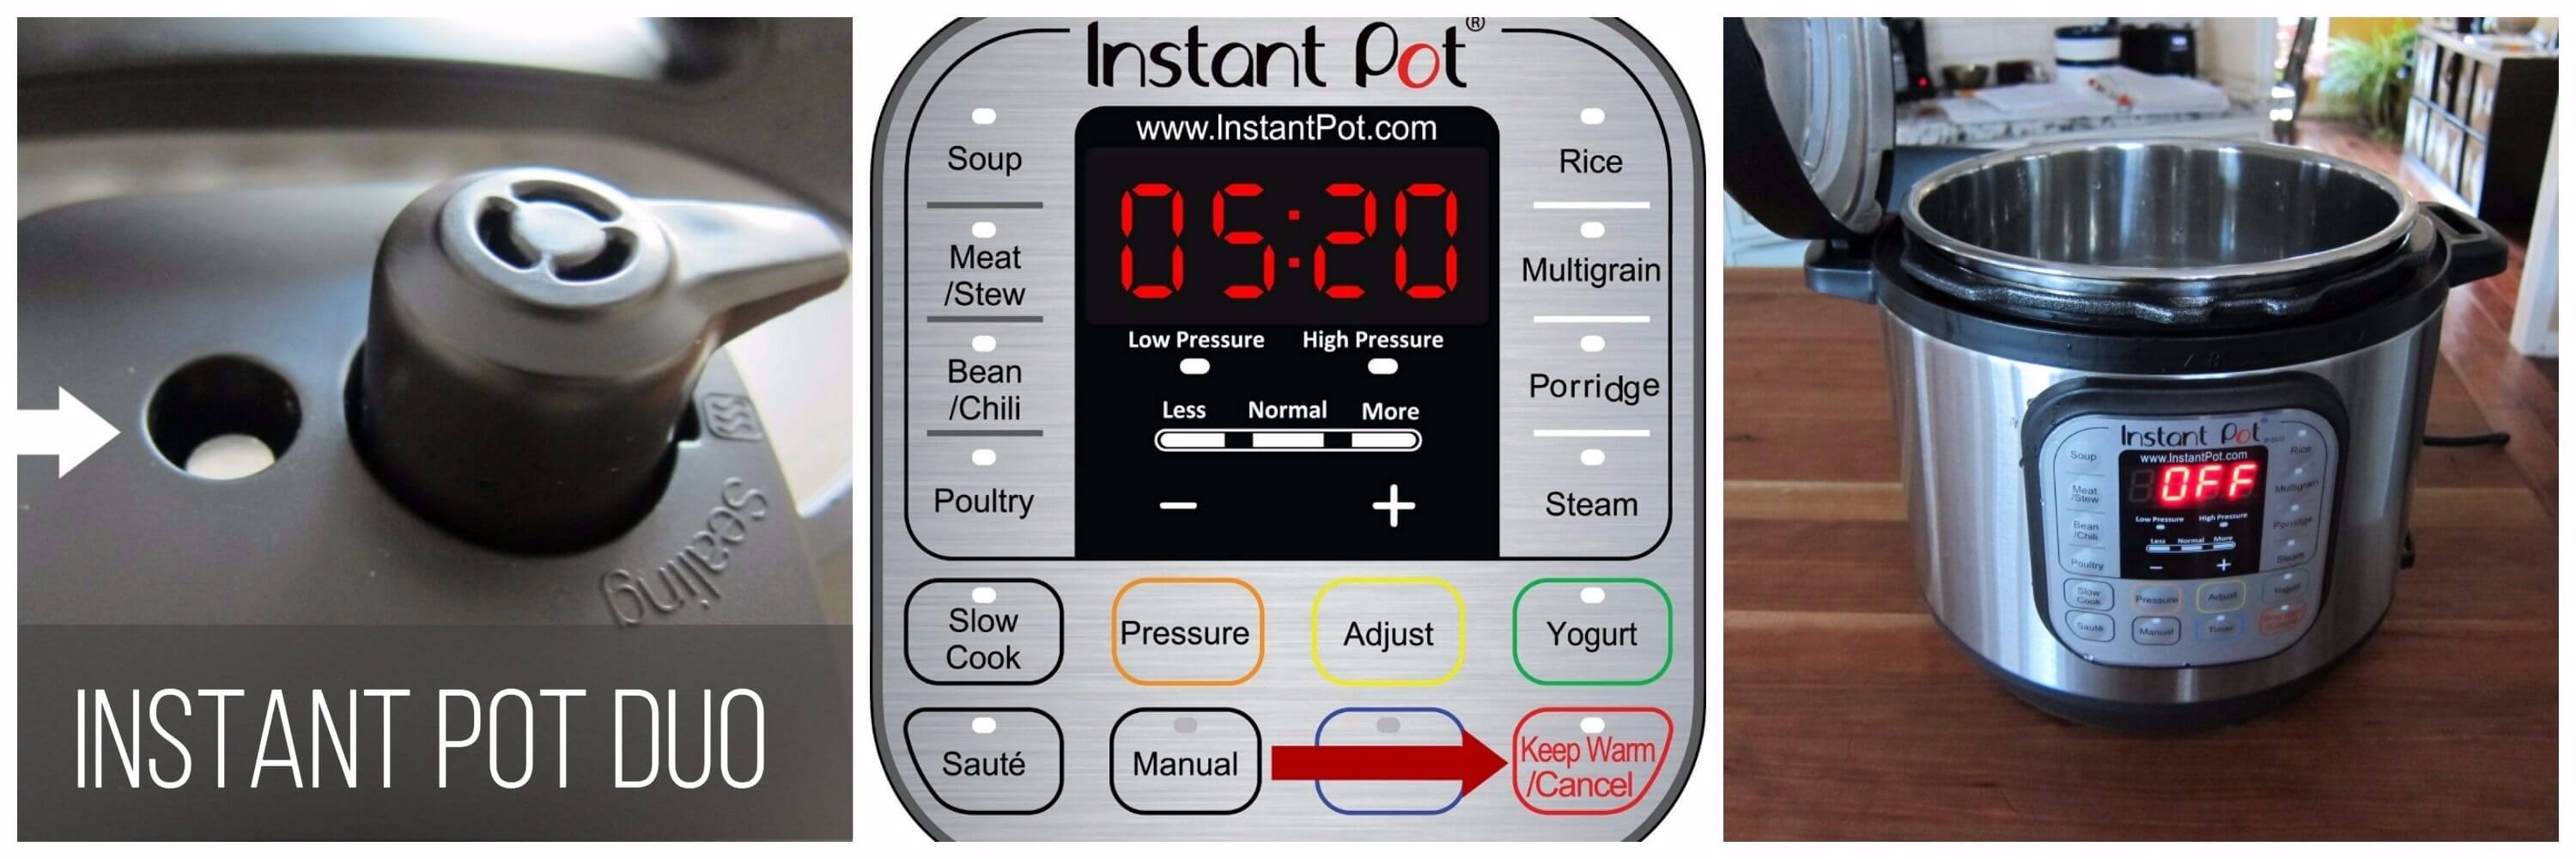
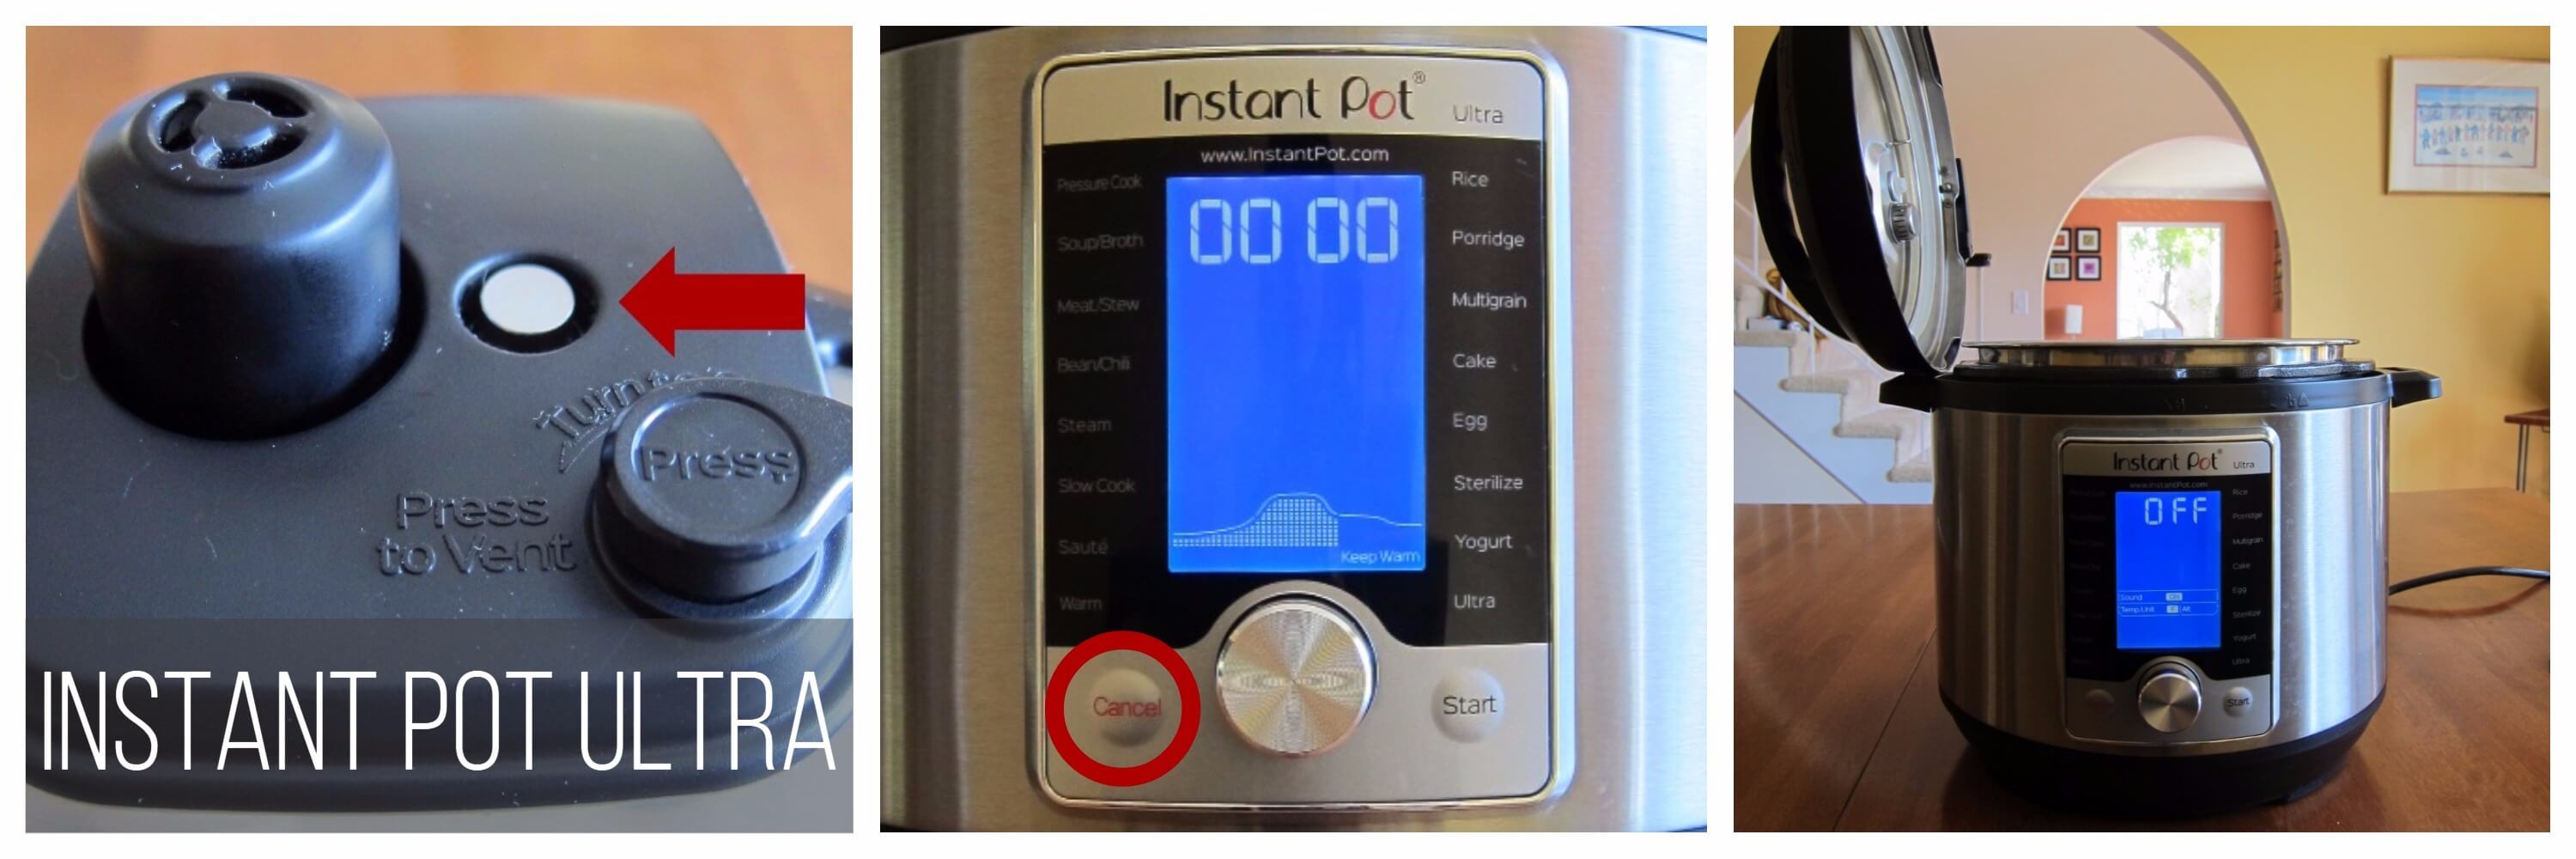
- Allow the pressure to release naturally (NPR). The float valve will be in the down position. This may take 15 to 30 minutes. [Find out more about the pressure release methods and how and when to use them. ]
- Press Cancel and open the Instant Pot.
* After 15 minutes, if you wish to, you can release the remaining pressure by moving the pressure release to the venting position.
Stir in Masa Harina and Add Toppings

- Select Saute mode.
- Stir in masa harina.
- Cook until chili is thickened, about 5 minutes.
- Press Cancel.
- Allow the Instant Pot chili to rest for 5 more minutes before serving; it will thicken some more.
- Ladle chili into serving bowls and serve with your choice of toppings: sour cream, shredded cheddar cheese, chopped red onions, shallots or green onions, sliced jalapenos, hot sauce, diced avocado, or Fritos chips (not the healthiest, but my favorite!)

Homemade Instant Pot Chili (with dried beans)
Ingredients
- 1 ½ cups dried pinto beans
- 2 tablespoon vegetable oil
- 1 ½ lbs ground beef (⅔ kg)
- 2 cups onion chopped
- 1 cup bell pepper chopped
- 2 tablespoon garlic minced
- 3 tablespoon Mexican chili powder
- 1 tablespoon dried oregano
- 2 teaspoon cumin powder
- 2 teaspoon cocoa powder
- 1 teaspoon salt or to taste
- ½ teaspoon black pepper powder
- ¼ teaspoon cayenne pepper or to taste
- 4 cups beef broth
- 14.5 oz diced tomatoes (1 can or 411 grams) or 2 cups fresh tomatoes, chopped
- ¼ cup masa harina e.g. Bob’s Red Mill brand
- Your choice of toppings sour cream, shredded cheddar cheese, chopped red onions, shallots or green onions, sliced jalapenos, hot sauce, diced avocado, or Fritos chips
Instructions
To pre-soak pinto beans in the traditional way in a bowl:
- Rinse pinto beans and drain.
- Place beans in a medium bowl and add enough water to be 1 inch above the level of the beans.
- Let bowl sit on countertop for 4 to 8 hours.
- Drain and set aside.
To do a quick pre-soak of pinto beans in Instant Pot:
- Rinse pinto beans and drain.
- Add pinto beans to inner pot of Instant Pot and pour in enough water to be 1 inch above the level of the beans.
- Close the lid and pressure cook on High Pressure for 5 minutes.
- Do a Natural Pressure Release (NPR), about 12 minutes. [Read More: The Different Pressure Release Methods]
- Press Cancel and open the Instant Pot; drain the beans and set aside.
Instant Pot Chili Instructions:
- Select Saute mode.
- Once the Instant Pot is hot, add oil to inner pot.
- Add ground beef to inner pot.
- Stir with a wooden spatula to break up the meat into smaller pieces and saute until meat is browned, about 3 minutes.
- Stir in onions and saute until soft, about 2 minutes.
- Stir in bell peppers and garlic.
- Add chili powder, dried oregano, cumin powder, cocoa powder, salt, black pepper, cayenne pepper and stir until fragrant, about 1 minute.
- Stir in beef broth, tomatoes and pre-soaked pinto beans (use either countertop or Instant Pot quick pre-soak method from above).
- Close Instant Pot lid and pressure cook on High Pressure for 20 minutes.
- Do a Natural Pressure Release (NPR), about 15 to 18 minutes. ** [Read More: The Different Pressure Release Methods]
- Press Cancel and open the Instant Pot.
- Select Saute mode
- Stir in masa harina.
- Cook until chili has thickened, stirring frequently, about 5 minutes.
- Press ‘Cancel’.
- Allow the Instant Pot Chili to rest for 5 more minutes before serving, it will thicken some more.
- Ladle chili into serving bowls and serve with your choice of toppings: sour cream, shredded cheddar cheese, chopped red onions, shallots or green onions, sliced jalapenos, hot sauce, diced avocado, or Fritos chips (my favorite!)
Notes
- Prep time does not include steps that are already accounted for in the ingredient list, e.g. chopped onions, minced garlic, cut vegetables, etc.
- If you choose not to thicken the chili with masa harina, your chili will be soupy. Please keep that in mind before you omit the ingredient.
- * The chili powder called for in this dish is Mexican chili powder which is a mixture of spices including cayenne and garlic. Don’t use ground chili pepper!
- ** After 15 minutes, if you wish to, you can release the remaining pressure by moving the pressure release handle to venting position.
- See the blog post for more detailed recipe tips. You don’t want to miss any!
Nutrition
Thank you for visiting Paint the Kitchen Red. All photos and content are copyright protected. Please don’t use any content without prior written permission. If you’ve made this recipe and would like to share it with your friends, please link back to this recipe. Thank you!
I am not a certified nutritionist. I provide my best estimate of nutritional information merely as a courtesy to my readers. If you depend on nutritional information for dietary or health reasons, I suggest using your favorite online nutrition calculator to confirm the nutritional value of this recipe based on the actual ingredients that you use.
Did you know that the best way to support your favorite bloggers is to comment and rate recipes, and share on social media? If you loved this recipe, please comment and give it a five ⭐ rating in the comment section below. If you’re a pinner, pin this post using the Pin buttons at the top and bottom of this post and in the recipe card above. Thank you for your support!
Recipes you Might Also Like!






Butch Dale says
I (we?) reviewed several recipes, and my wife and I settled on trying out yours. It looks simple to do for simple people like myself, and has all the extra ingredients we love.
Paint the Kitchen Red says
Hope you enjoy it – thank you for trying it.
Mama walker says
I want to thicken this but I do t have Masa Harina on hand. Can I use something else?
Paint the Kitchen Red says
You could add some ground up corn tortillas.
Kathy Lemmon says
I haven’t made this yet, but am planning on doing so this weekend. Since you are in Salt Lake City, is the recipe already timed for High Altitude? I live in the Denver area, and usually have to add a few extra minutes to compensat.
Paint the Kitchen Red says
Hi Kathy, I make the recipe as-is with no adjustment to the time. Hope you enjoy it.
Laura says
Great recipe!
Living at high altitude (over 7,000 ft) we find cooking dried beans requires significantly more time.
Paint the Kitchen Red says
Laura, thanks for your tip!
ee says
Yummmm!
Thanks for the great recipe and instructions.
Paint the Kitchen Red says
Thank you for taking the time to comment!
Christine Powell says
Tried and true favorite with the family, getting ready to make a batch this weekend! Debating on doubling quantities as I want leftovers, but never have any lol
Paint the Kitchen Red says
Christine, thank you for taking the time to comment. I’m thrilled to hear that this is a favorite for you!
JamaGG says
I didn’t have the ingredients to follow the recipe exactly, my spices are likely past their prime, so the result was a little flat for my taste… not the recipe’s fault! The recipe deserves the five stars, for sure. Thank goodness for the table of contents because there is a lot of stuff between that and the recipe itself! Having never used masa harina before meant that I had to work to avoid having corn “dumplings” instead of thickened chili! It eventually worked. I think in future I’ll add a bit of tomato paste and less oregano, less water and no masa harina. I had a bowl for dinner and the rest goes in the freezer. Thanks.
Paint the Kitchen Red says
Thanks for the feedback and I’m glad the recipe eventually worked out for you!
Kaitlin says
This is my favorite chili recipe and love that it uses dried beans! Also the instant pot does something wonderful to ground beef that makes it so tender and flavorful. I can’t count how many times I’ve made this and how many rave reviews I’ve gotten. Oh, I always use chicken broth because it’s what I have on hand.
Paint the Kitchen Red says
That’s wonderful to hear – thank you for taking the time to comment and share your experience!
Stephanie Grissom says
quick question im making this tomorrow But I want to do the biggest amount is the cook time still the same?
Paint the Kitchen Red says
Hey Stephanie, yes the cook time will be the same. Hope you enjoy it.
NormL says
I just made this recipe for the second time and as you requested, here is how that went:
Because my dear wife sprung the request for chili on me, I did not have quite all of the ingredients. I needed half of a pound more meat so I subbed in two already cooked dinner sausages ground up like the hamburger. Also, because there is plenty of “heat” in the black pepper and the chili powder to suit our pallets, I left out the Cayan. Then, the real test of the instant pot’s tolerance for independent thought: I reduced the amount of stock to three cups – and got away with it!! Sorry, no happy dance, my arthritic bones don’t allow those so I thought a few happy thoughts instead. Bottom line – another great pot of chili!!
Paint the Kitchen Red says
Haha, you’re funny 🙂 Glad the recipe modifications worked out for you!
Miff’d says
Seemed very bland and definitely had food burn warning after sautéed to pressure cook settings.
Paint the Kitchen Red says
If you didn’t deglaze after sauteing you would get the burn message. There’s enough liquid in the recipe that you shouldn’t get the burn error.
Jill Mansanares says
My family of 4, with 2 teenagers, really enjoyed this recipe. I had soaked my kidney beans overnight, and did not add the corn flour. Set my electric pressure cooker to manual time 28 min. and left it for a couple of hours (i.e. it did a natural pressure release) Great flavor. Easy to follow recipe card.
Paint the Kitchen Red says
Thank you, Jill. I’m so glad to hear you liked the recipe.
Laich says
Do you use corn meal or corn flour(masa harina). You say cornmeal in the recipe, but link to corn flour. Just curious as they are not the same thing.. or do you think they work the same in this recipe?
Paint the Kitchen Red says
I use masa harina which does say corn flour in parentheses. If I don’t have masa harina, I substitute corn meal. You can substitute corn flour instead. The difference between the two is that corn flour is finely ground and corn meal is coarse.
John Richardson says
Excellent Chili! I followed the recipe (almost) exactly but used a can of fire-roasted diced tomatoes and a can of original Ro-Tel because they are what I had, and I like my chili a little hotter than most.
I believe there is another difference between corn flour and masa harina in that masa harina is treated with hydrated lime.
I’ve now got a new go-to chili recipe!
Paint the Kitchen Red says
Thanks, John! Ahh, interesting – didn’t realize that about corn flour vs masa harina – thank you for sharing.
Carmen says
This my second time making this recipe. I followed it exactly first time around and it was too soupy. Second time around I made a few modifications. I did on stove top and reduced the chili powder amount by 1/2, used only 2 cups of beef stock, mixed the harina masa in water separately before adding and used double the meat instead. Finally added a bit of Worcestershire sauce.
Neena Panicker says
Carmen, thank you for sharing your modifications.
ALICE TOTH says
I have been searching for a banger chili recipe for a couple years now, this comes the closest I’ve found! Our family is VEGAN so I omitted the beef, instead used 16oz dried Rancho Gordo Vaquero beans, soaked. Also substituted beef broth for one Not-Chick’n Bouillon cube dissolved into 3 1/2 cups water. I used Trader Joe’s chili seasoning blend and 12oz jar of Trader Joe’s fire roasted red peppers in place of the fresh bell pepper. I increased the garlic because our family loves garlic. Adding the 1/4 cup masa de maiz and slightly reducing the broth made for the perfect consistency, not to thick or runny. I also used the CHILI setting on my Duo Evo Plus Instant Pot. I would definitely make again!
Paint the Kitchen Red says
Oh wow, thank you for the details on how you made vegan chili with this recipe – I love it!
Ric says
Thanks for sharing this method. I typically spend hours agonizing over chili and I’m usually too Shipwrecked when it’s done to actually enjoy it. This is a real morale saver!
By the way, the morning after one of my chili making debacles my wife will usually be greeted by a good portion of the kitchen painted red XD
Paint the Kitchen Red says
Lol, Ric 🙂 Thanks for your comment, I’m thrilled that you liked the recipe.
NormL says
I made this yesterday and it turned out very well. As indicated, the chili was on the thin side and the addition of the corn meal thickened it somewhat. I prefer my chili just a bit thicker but I’m wondering whether there are options to simply adding more corn meal. Would scaling back on the beef broth by a cup or cup and a half set off the burn warning? I plan to make again in a couple of weeks so I’ll check back for any advice you may have to offer. Thanks!
Paint the Kitchen Red says
Hi Norm, great question. I think reducing the liquid by that much might give you the burn error but you might be able to get away with 3 cups. You could try and reduce it and see what happens. I am able to get away with less liquid on my recipes than some of my readers because some people have finicky Instant Pots. And so I always err on the safe side when I publish my recipes. As it comes to pressure, keep an eye on it and do a happy dance when the float valve comes up 🙂 I’d love it if you could give us an update.
Deborah says
Thank you for this wonderful recipe! I particularly appreciated the clear explanations regarding types of pressure release and soaking dry beans. The chili was delicious, but I also learned a lot!
Paint the Kitchen Red says
Deborah, I’m thrilled that you liked the recipe. I just made this a few days ago 🙂
Geno McKenna says
Such an easy recipe to follow and it was delicious. I always print your recipes ahead of time so I can look it over a few times before I cook. I look forward to making this one again.
Paint the Kitchen Red says
Thank you so much, Geno. I’m happy you like some of my most favorite recipes. I’m making this one this weekend 🙂
Lorraine says
I don’t have cocoa powder can I make this without the cocoa powder?
Paint the Kitchen Red says
Lorraine, yes you sure can! Hope you like the recipe.
Anna says
Hi! I don’t have access to cornmeal, could a gluten free flour or cornstarch be used in its place?
Paint the Kitchen Red says
Anna, you could try cornstarch. Another option is the take 1/2 cup of cooked beans and puree them and add them to thicken the chili.
MsSteve says
I kind of agree with the person about the instructions. It’s not that it was written so that you couldn’t follow them, but finding them was a constant nightmare. Maybe because I use my phone, but I keep scrolling through a bunch of text and pictures and I thought there was no ingredient list or instructions. Very very confusing. HOWEVER, it was a fabulous recipe once I sorted out how the page works.
Paint the Kitchen Red says
Thanks for your input. Regarding the layout of my recipes, they’re all the same: tips, ingredients, step by step instructions and finally, the recipe card, so that would be hard for me to change. Please note that I do have a table of contents right at the top. However, I will look at the recipe card to make sure it’s easier to understand. I’m happy to hear you liked the recipe, though 🙂
Emma Brown says
I thought the instructions were great, keep it up! (They may have been edited since the last comment, if so good improvements!)
Bert says
The recipe looks great but the instructions are all over the pace
Paint the Kitchen Red says
Hi Bert, I’m sorry the instructions weren’t clear to you. I pride myself on the detail and clarity of my recipes and so this is like the worst thing someone could say to me, haha! It would be very helpful to other readers if you can let me know what exactly you found confusing and I can correct the issue. Thanks for your feedback.