

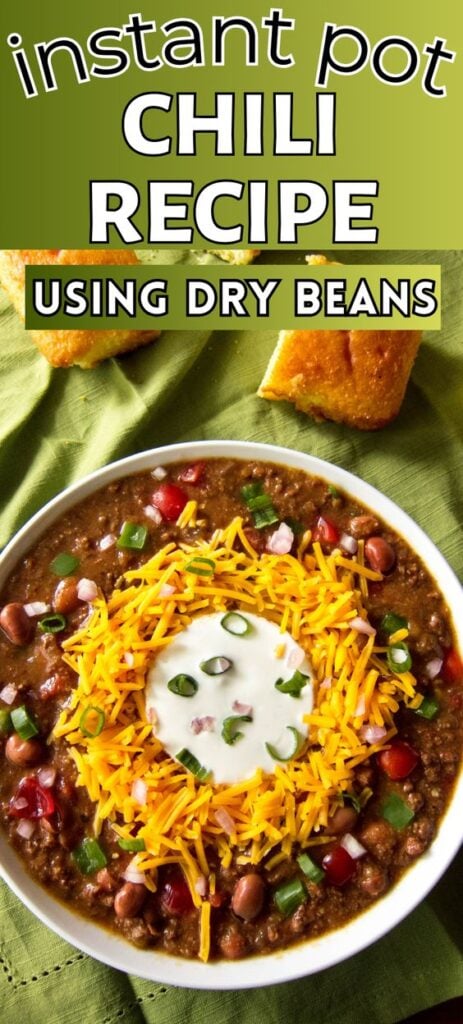

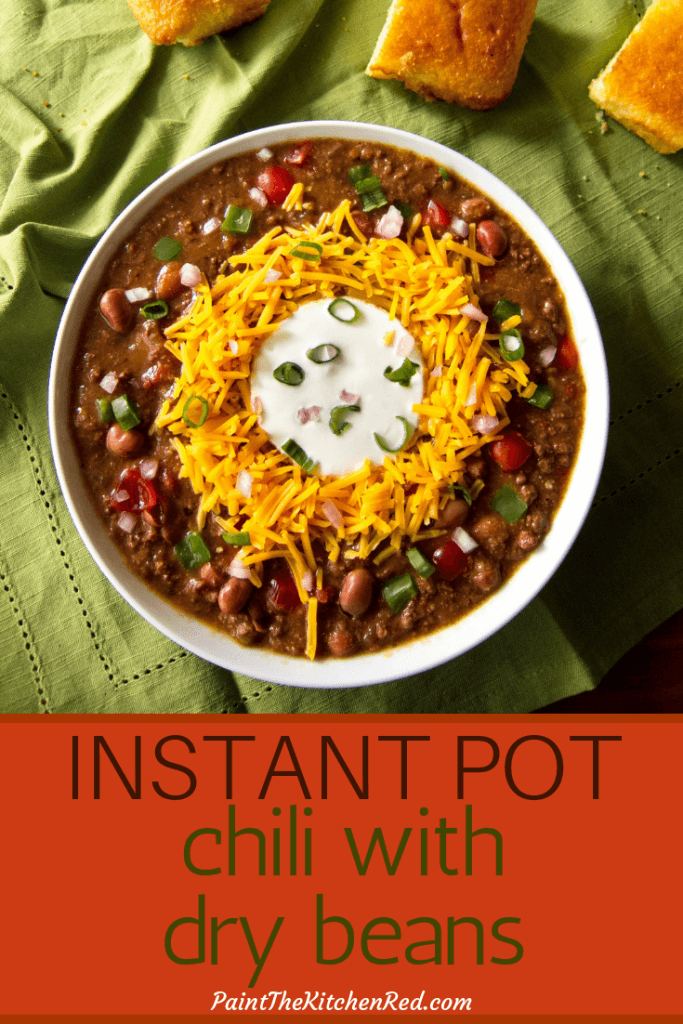
Homemade Instant Pot Chili with dry beans, made using ground beef and dried unsoaked beans, is the perfect comfort food for a fall or wintry evening. It’s also a great dish to feed a crowd, or for game day. The addition of Masa Harina (cornmeal) in this chili recipe thickens the chili and gives it a corn flavor. Add your choice of toppings to take this homemade Instant Pot chili recipe over the top!
This post contains affiliate links. As an Amazon Associate, I earn from qualifying purchases. Please read the disclosure.
Table of Contents
Introduction
Did you know that October is National Chili Month? It’s not yet October, but the leaves are changing color, the weather’s turning cooler and I’m starting to make soups, stews, and other comfort foods. I love the advent of fall and I thought it would be appropriate to post an Instant Pot Chili recipe to observe this occasion!
Chili is derived from Chili con Carne (translated as ‘chili with meat’ in Spanish), which originated in Texas. During the Chicago World’s Fair in 1893, the San Antonio Chili Stand helped popularize Texas chili to other parts of the United States. What’s Cooking America has a fascinating article about the origins of chili, in case you’d like to find out more!
Chili purists might say that chili should not include beans and/or tomatoes. Well, my recipe for Instant Pot Chili has both beans and tomatoes. Because I happen to like both in my chili.
You might be tempted to use canned beans because they’re convenient: no pre-soaking, no long cook times, just open the can and pour. But the Instant Pot allows you to use dried beans without the inconveniences.
The hands-on time for this Instant Pot Chili with dried beans recipe is about 10 minutes. For the rest of the time, the Instant Pot is doing the cooking while you get other important things done!
TIPS AND SUBSTITUTIONS
Beans
This recipe uses dried beans instead of canned beans. Dried beans are much more economical and don’t have added salt and preservatives.
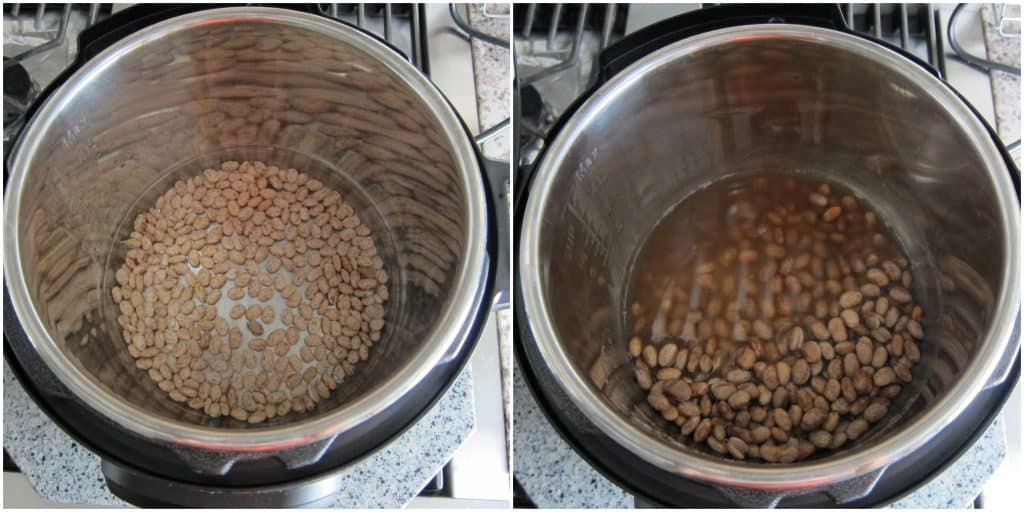
The dried beans should be pre-soaked, but I’m going to show you a shortcut. I sometimes (always!) forget to soak my beans, so here’s a tip for you that works like a charm with any recipe that uses pre-soaked dried beans. Do a quick Instant Pot pre-soak while you’re cutting up the vegetables and preparing your ingredients.
Masa Harina (Corn Flour)
This recipe calls for masa harina (pronounced ‘maasa areena’) which is a finely ground Mexican corn flour used to make tortillas. Added to the chili after pressure cooking, the masa harina will thicken the Instant Pot chili and give it a slight corn flavor.
Please keep in mind that the recipe needs a certain amount of liquid to avoid sealing issues and the burn message. If you choose not to use the masa harina, the chili may be runny or thinner than you want.
Masa Harina can be found in the Latin/Mexican section of your grocery store or at a Latin grocery store. If you can’t find it, you can either substitute corn meal or take a few corn tortillas and powder them in a mini food processor.
Chili Powder
If you’ve never cooked homemade chili before, it’s important to note that the chili powder called for in this Instant Pot Chili recipe is Mexican chili powder commonly available in American grocery stores which is a mixture of different spices including cumin and garlic.
Please don’t use cayenne pepper or ground chili pepper that you get from Asian, Indian, Mexican, and ethnic markets – you won’t be able to eat this chili; it’ll be too spicy! So be sure to check the ingredient list. I like to use McCormick chili powder.
Toppings
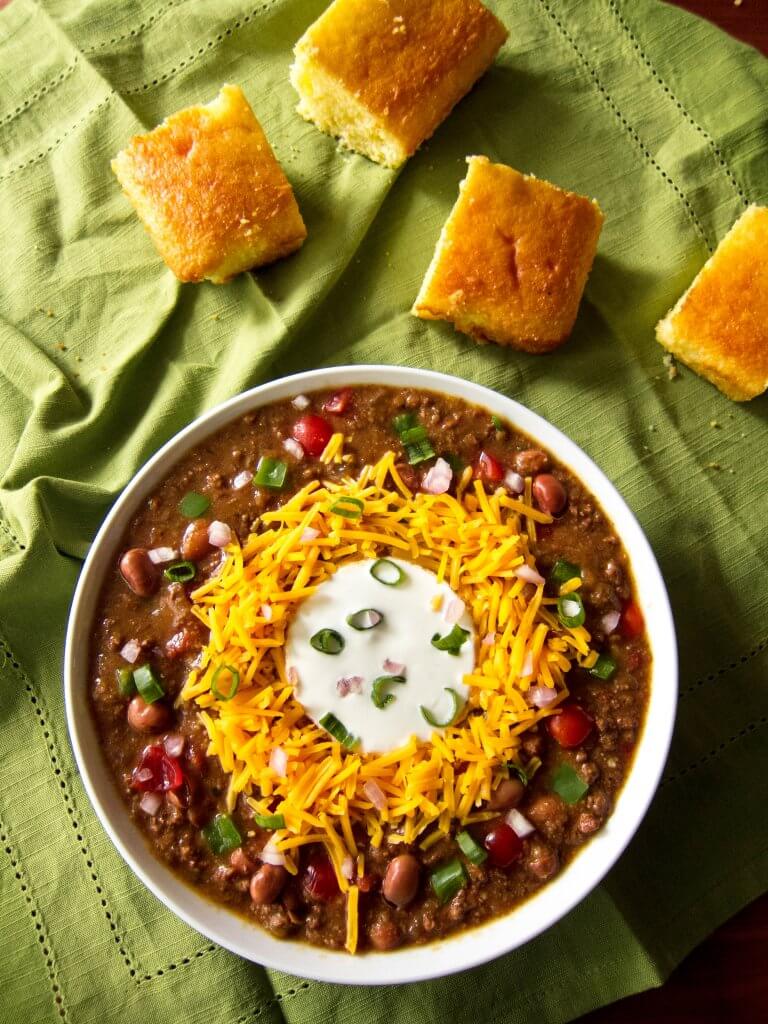
Ladle the cooked Instant Pot Chili into bowls and serve with your choice of the following toppings:
- sour cream
- shredded cheddar cheese
- diced shallots or red onions or green onions
- sliced jalapenos
- hot sauce
- cilantro
- cornbread to crumble over the top
- my personal favorite: Fritos corn chips!
If you’re new to the Instant Pot and aren’t familiar with how to use it, you might find it helpful to first read one of the following guides and then come back here to learn how to make this recipe.
- General Instant Pot Instructions for Beginners
- Instant Pot ULTRA Beginner’s Manual
- Instant Pot DUO EVO PLUS Beginner’s Manual
- Instant Pot DUO NOVA Beginner’s Manual
- Instant Pot DUO GOURMET Beginner’s Manual
- Instant Pot DUO CRISP Beginner’s Manual
- Instant Pot PRO Beginner’s Manual
- Instant Pot PRO CRISP Beginner’s Manual
Instant Pot Chili with Dried Beans – Ingredients
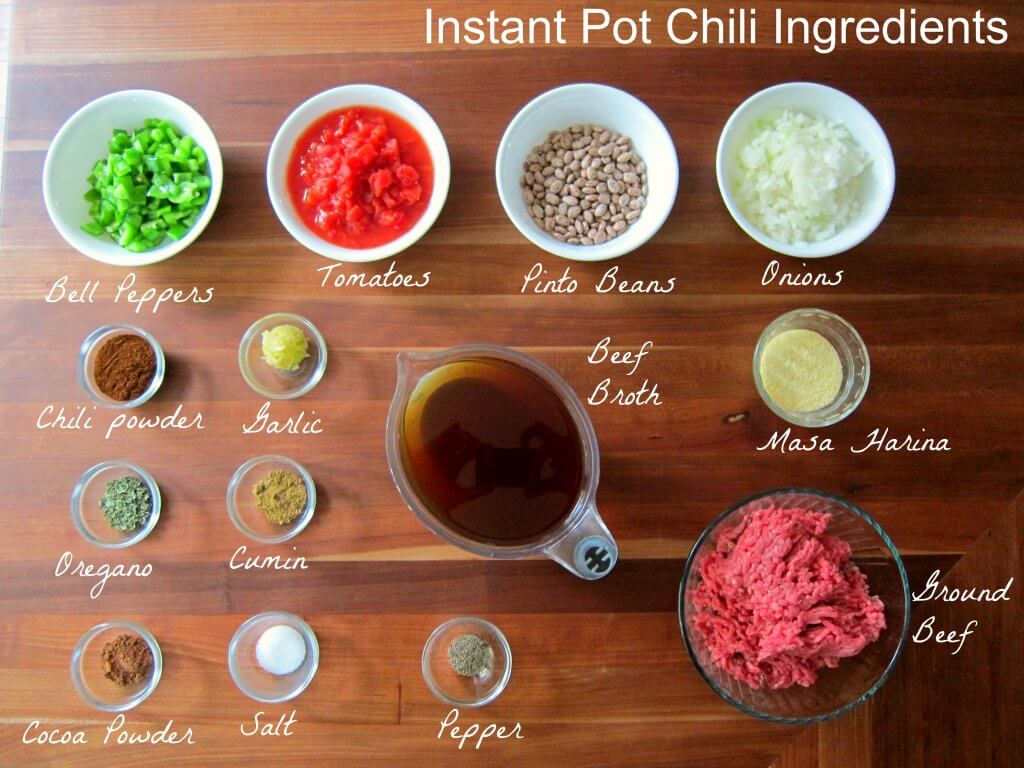
- Bell peppers
- Tomatoes
- Pinto beans
- Onions
- Chili powder
- Garlic
- Beef broth
- Masa harina
- Oregano
- Cumin
- Cocoa powder
- Salt
- Pepper
- Ground beef
How to Make Chili using Dried Beans in the Instant Pot (Step by Step Instructions)
- Soak Beans
- Turn on Saute Mode
- Saute beef
- Saute vegetables
- Add spices, broth
- Pressure cook
- Do a natural release of pressure
- Stir in masa harina
- Serve with your choice of toppings
Soak Beans
- Soak dried beans for 4 to 8 hours or use my preferred method: Instant Pot Quick Soak Beans.
How to Turn on Saute Mode
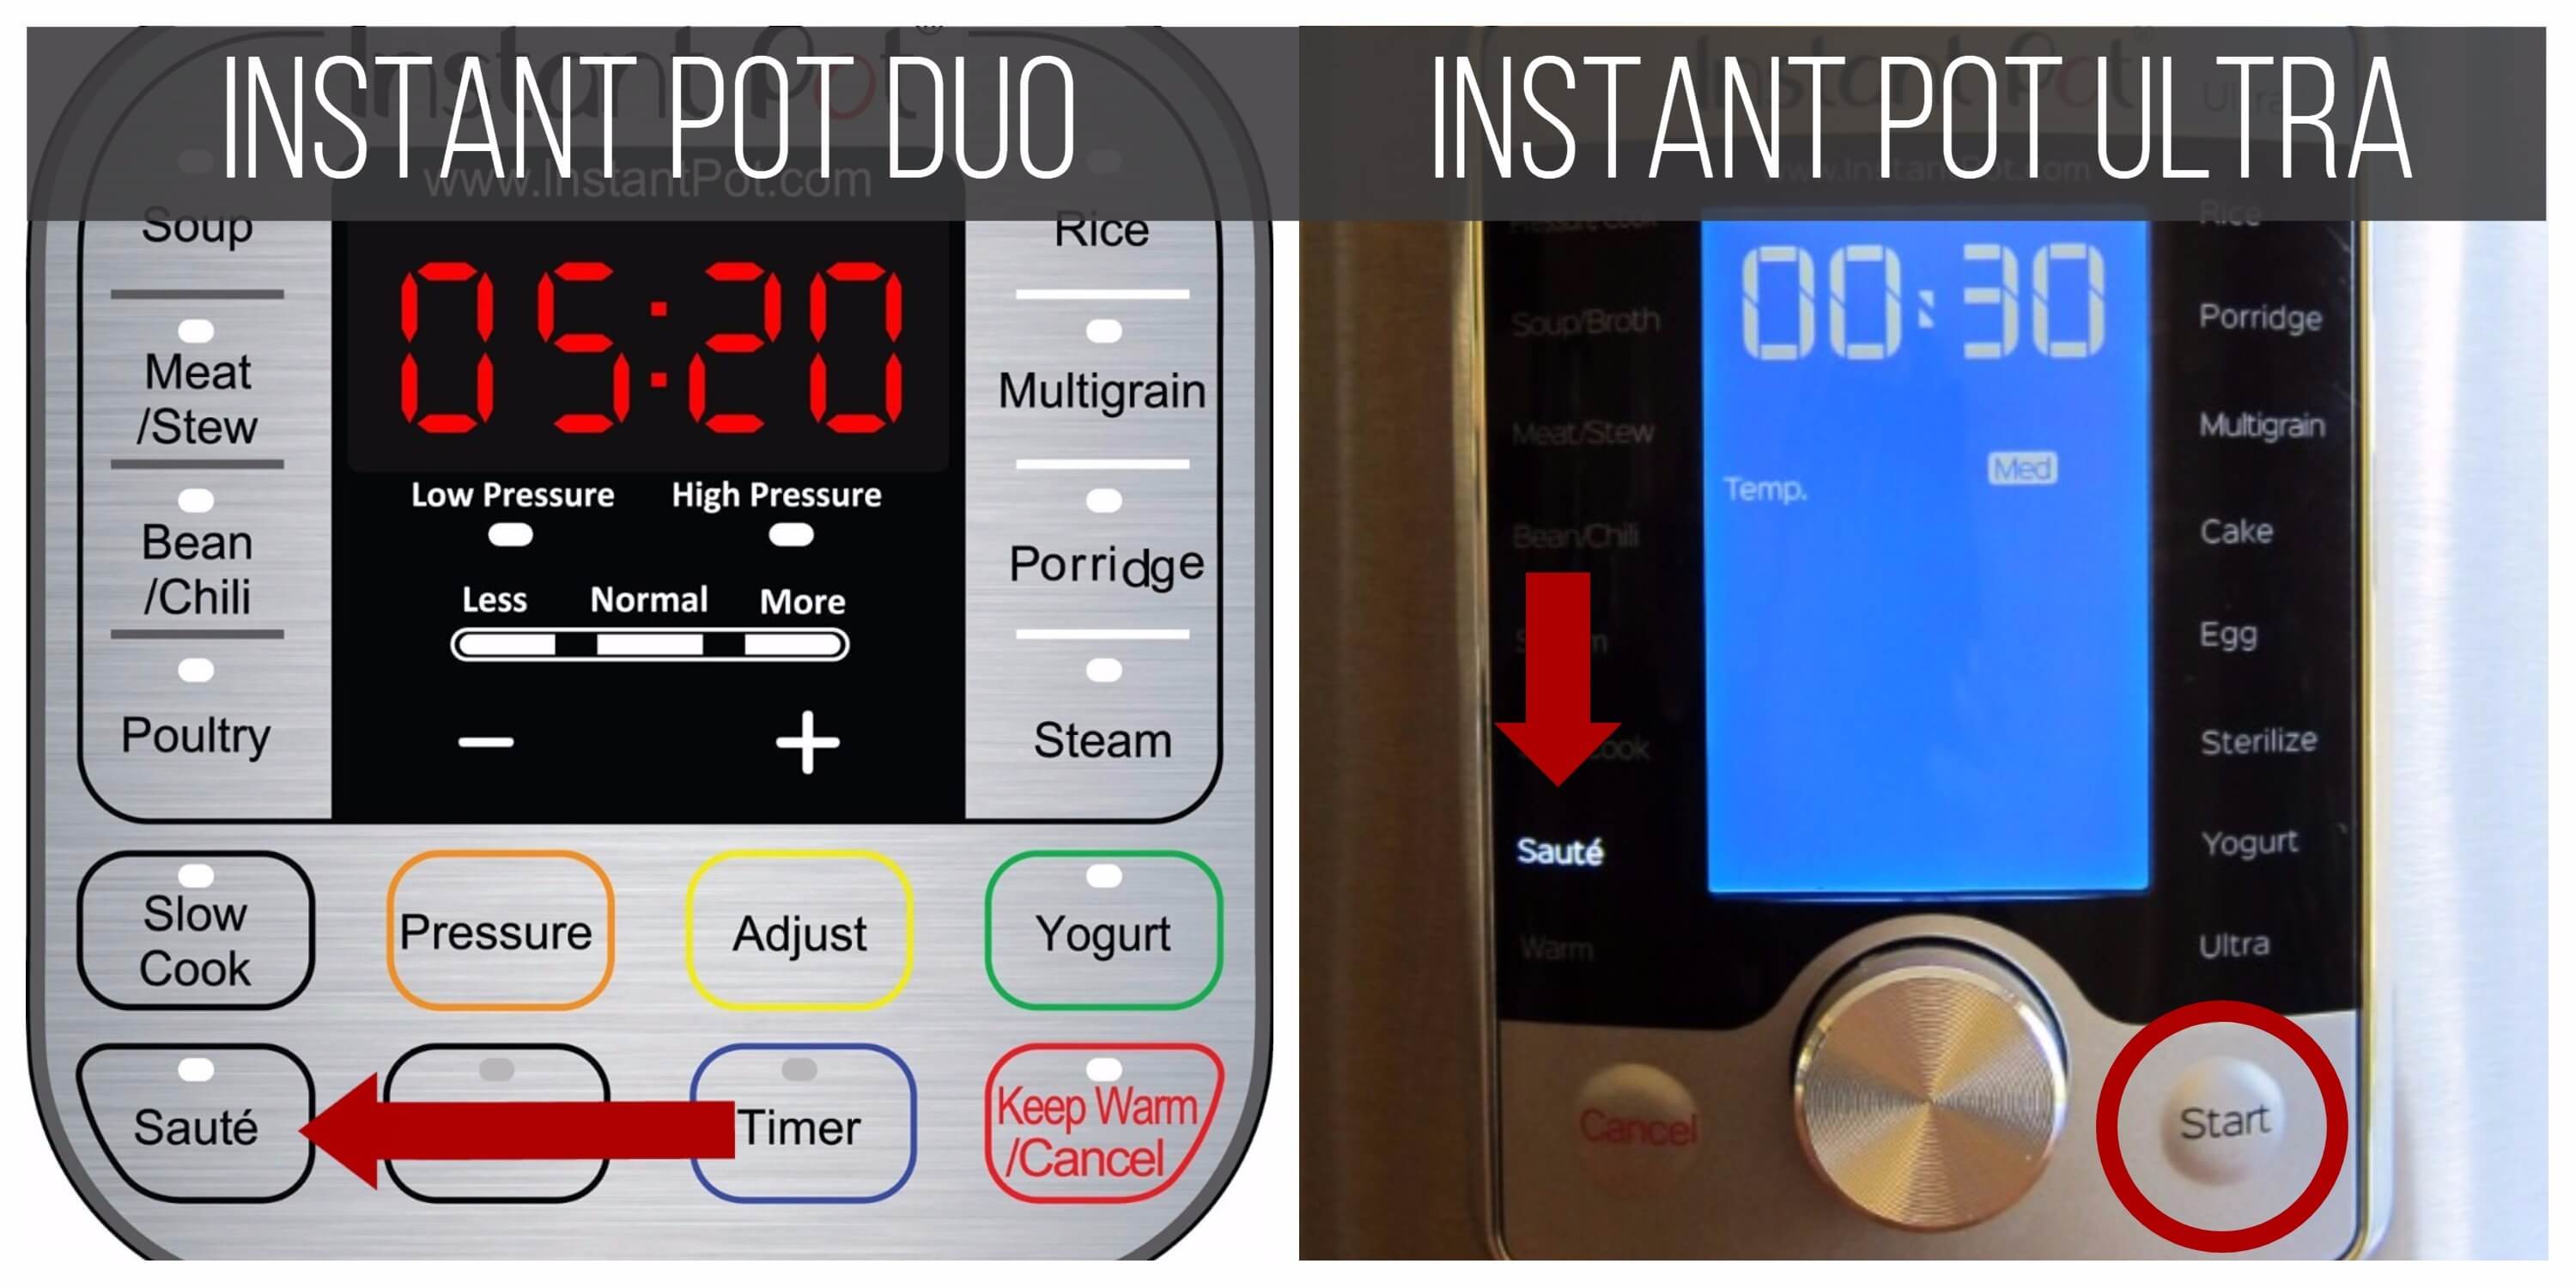
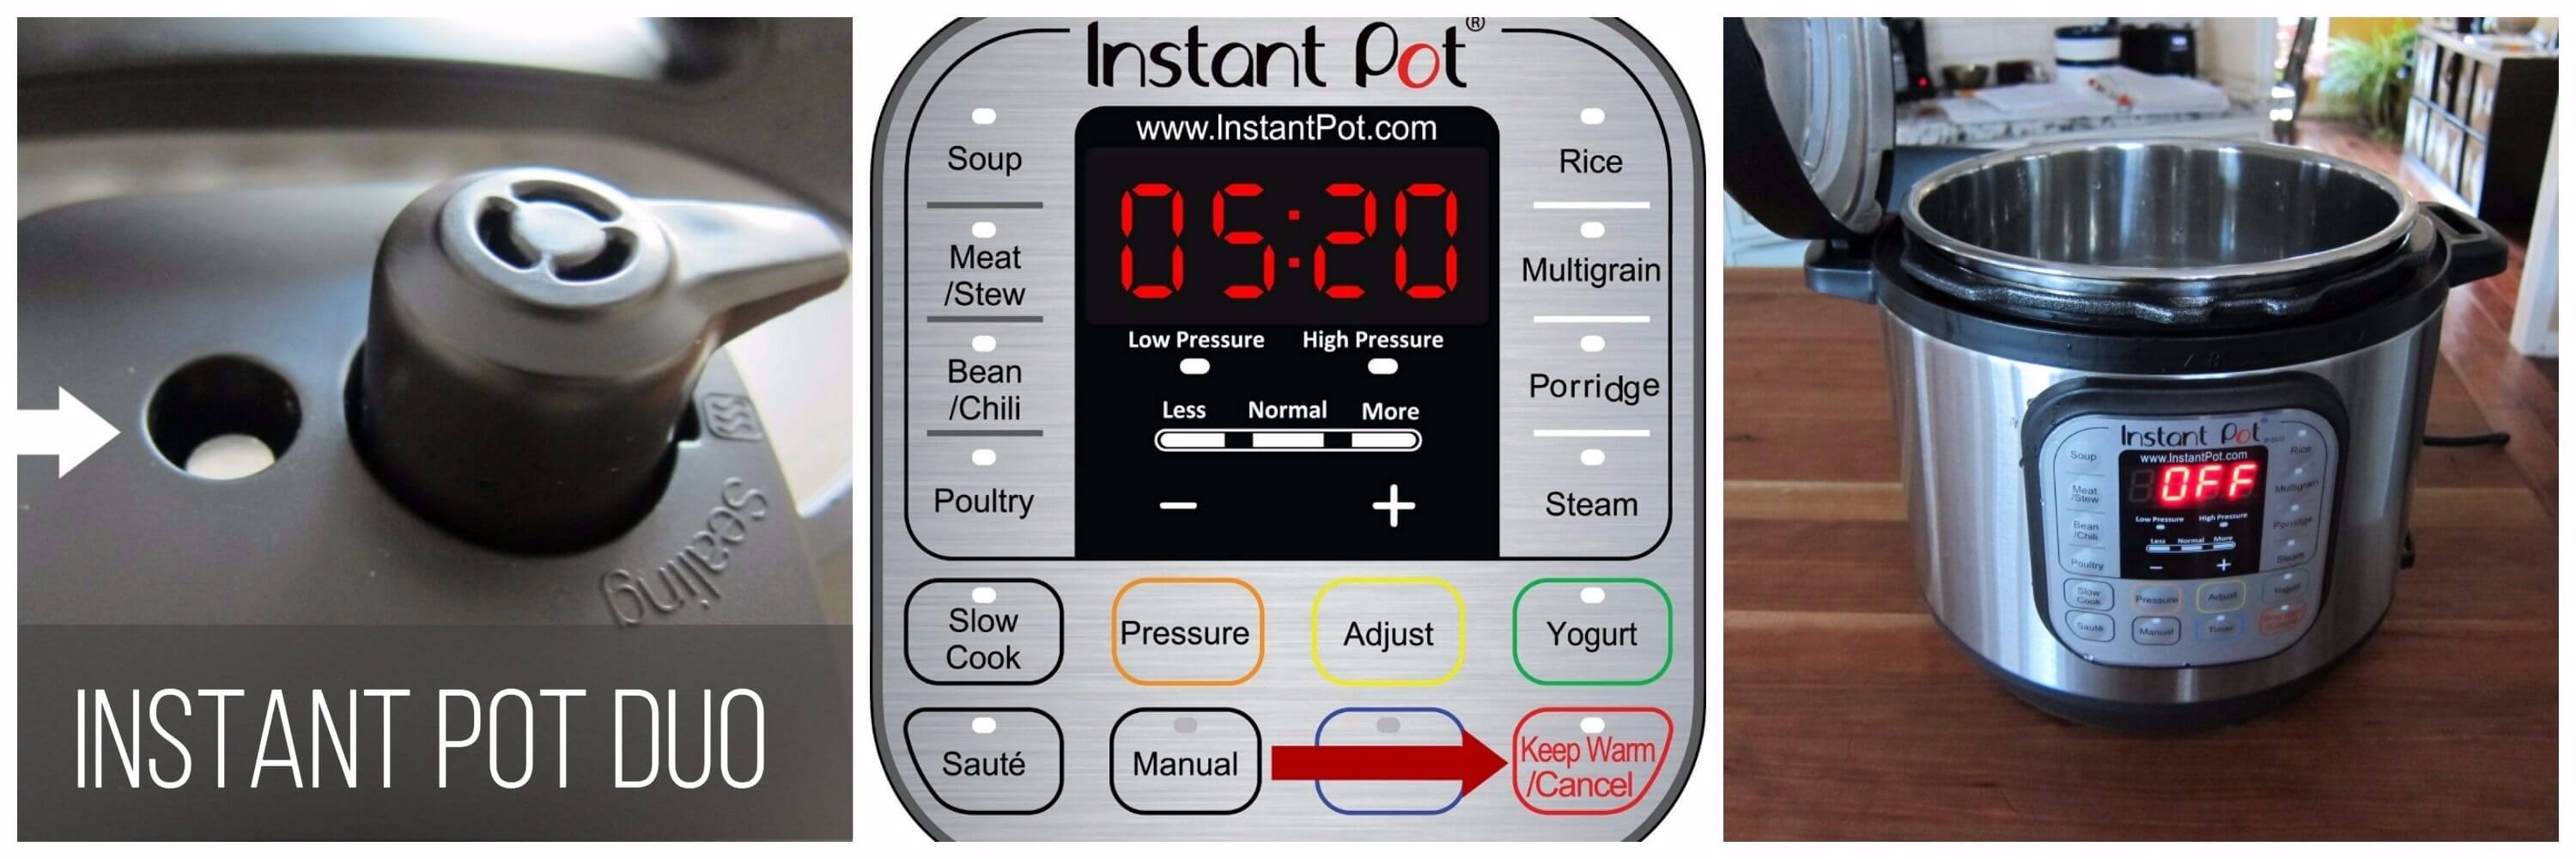
- Instant Pot DUO: Select the Saute function.
- Instant Pot ULTRA: Select the Saute function and press Start.
Saute Beef
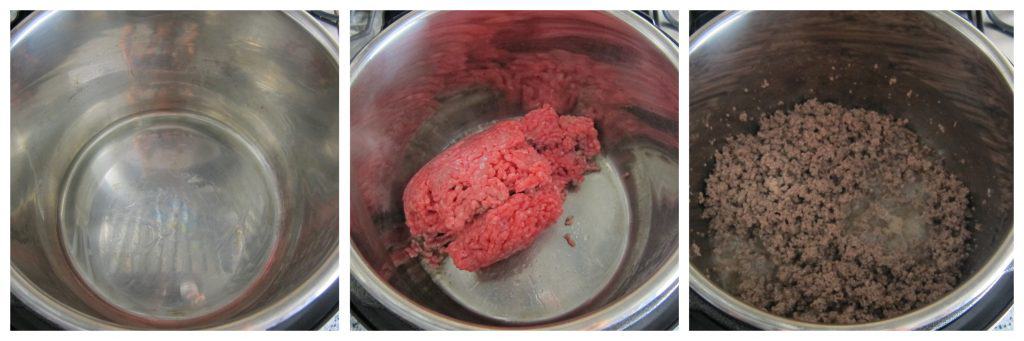
- Once Instant Pot is hot, add vegetable oil to the inner pot.
- Add ground beef to the inner pot.
- Stir with a wooden spoon to break up the meat into smaller pieces and saute until meat is browned, about 3 minutes.
Saute Vegetables
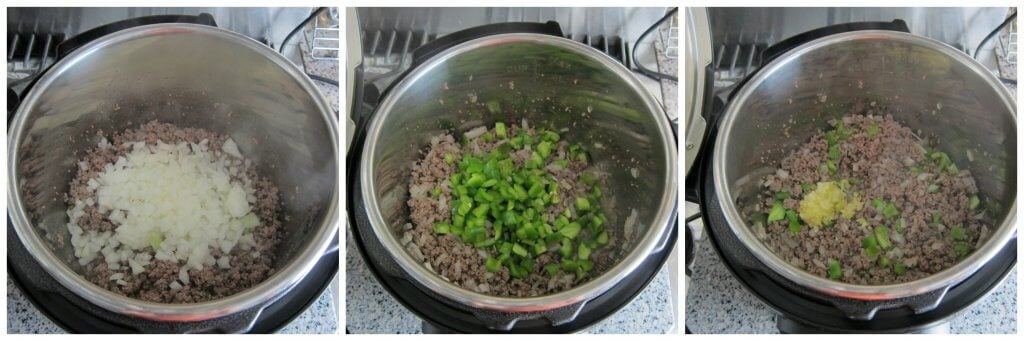
- Add onions to beef and saute until soft, about 2 minutes.
- Stir in bell peppers.
- Stir in garlic.
Add Spices, Broth
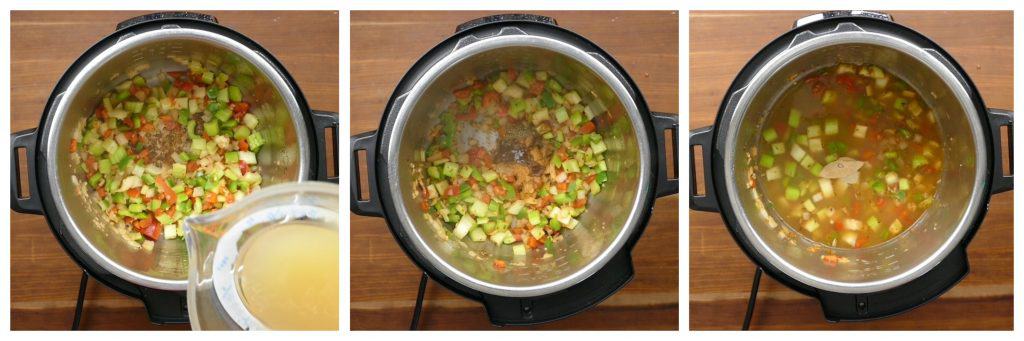
- Add chili powder, oregano, cumin powder, cocoa powder, salt, black pepper and cayenne pepper.
- Stir well and cook until fragrant, about 1 minute.
- Add beef broth, tomatoes and pre-soaked dried beans (whether using quick Instant Pot pre-soak or countertop pre-soak).
Instant Pot Duo Pressure Cook 20 minutes
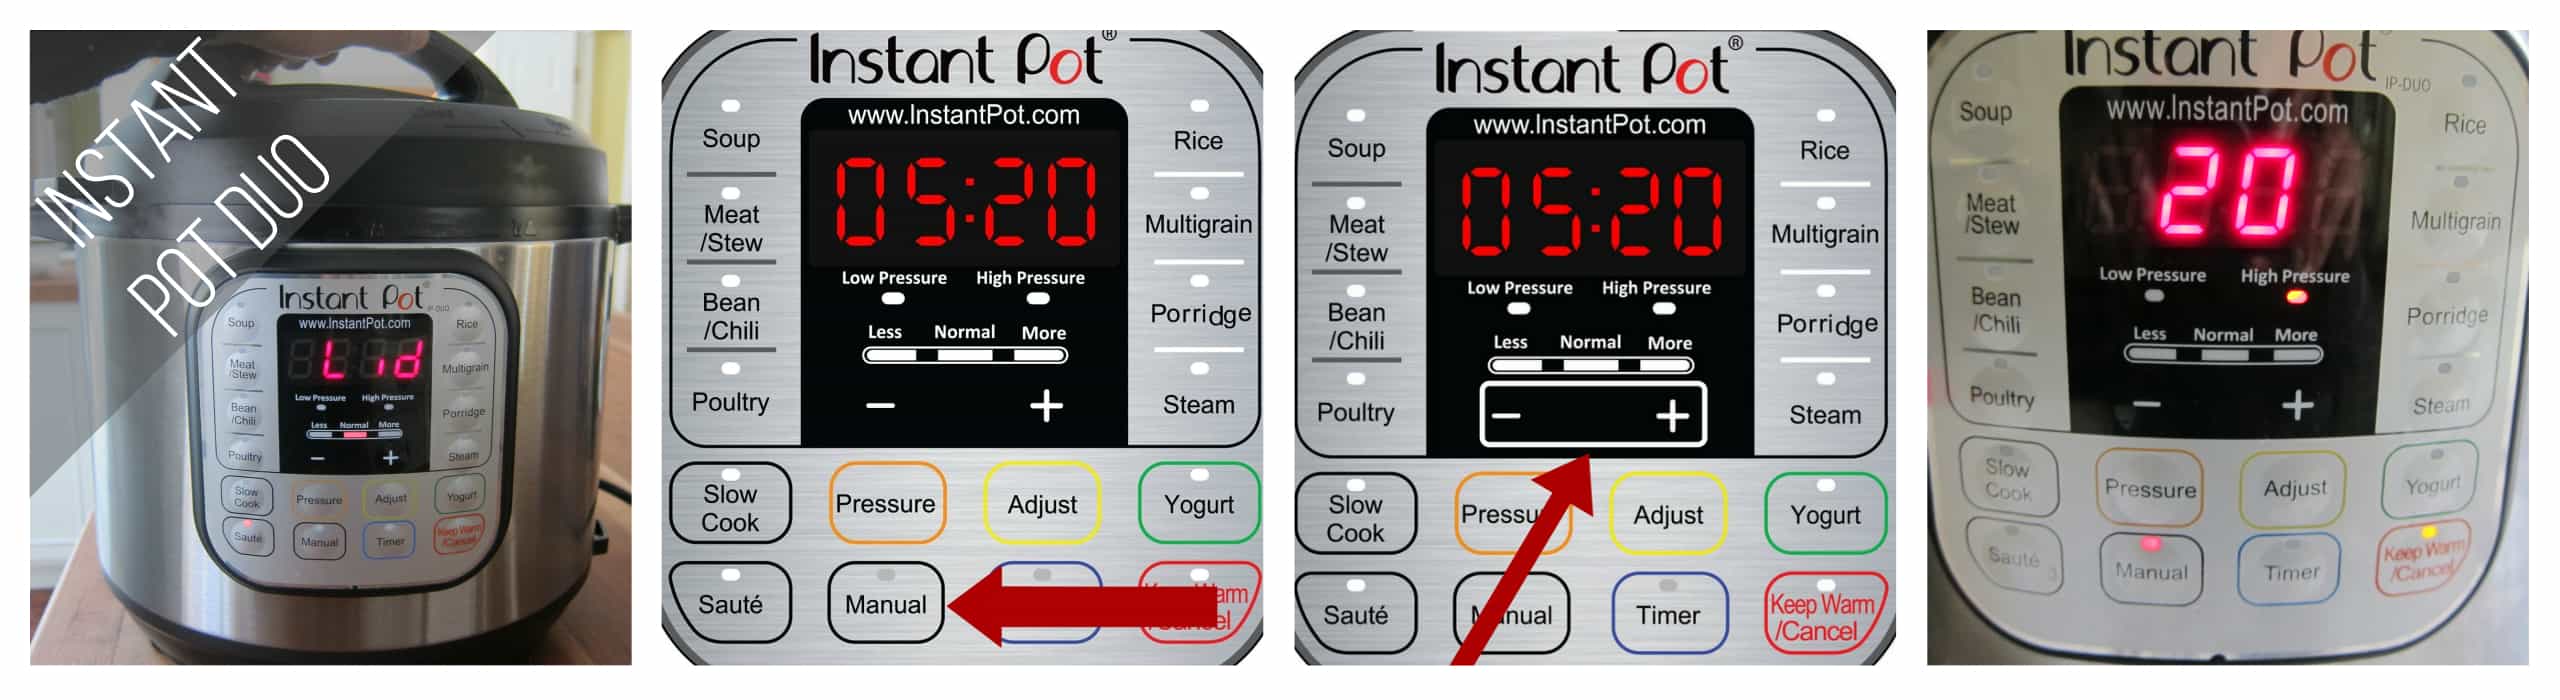
- Close the lid and make sure steam release handle is in ‘Sealing’ position
- Press Manual (or Pressure Cook) and ‘+’ or ‘-‘ until the display reads ‘20′ (20 minutes).
Instant Pot Ultra Pressure Cook 20 minutes
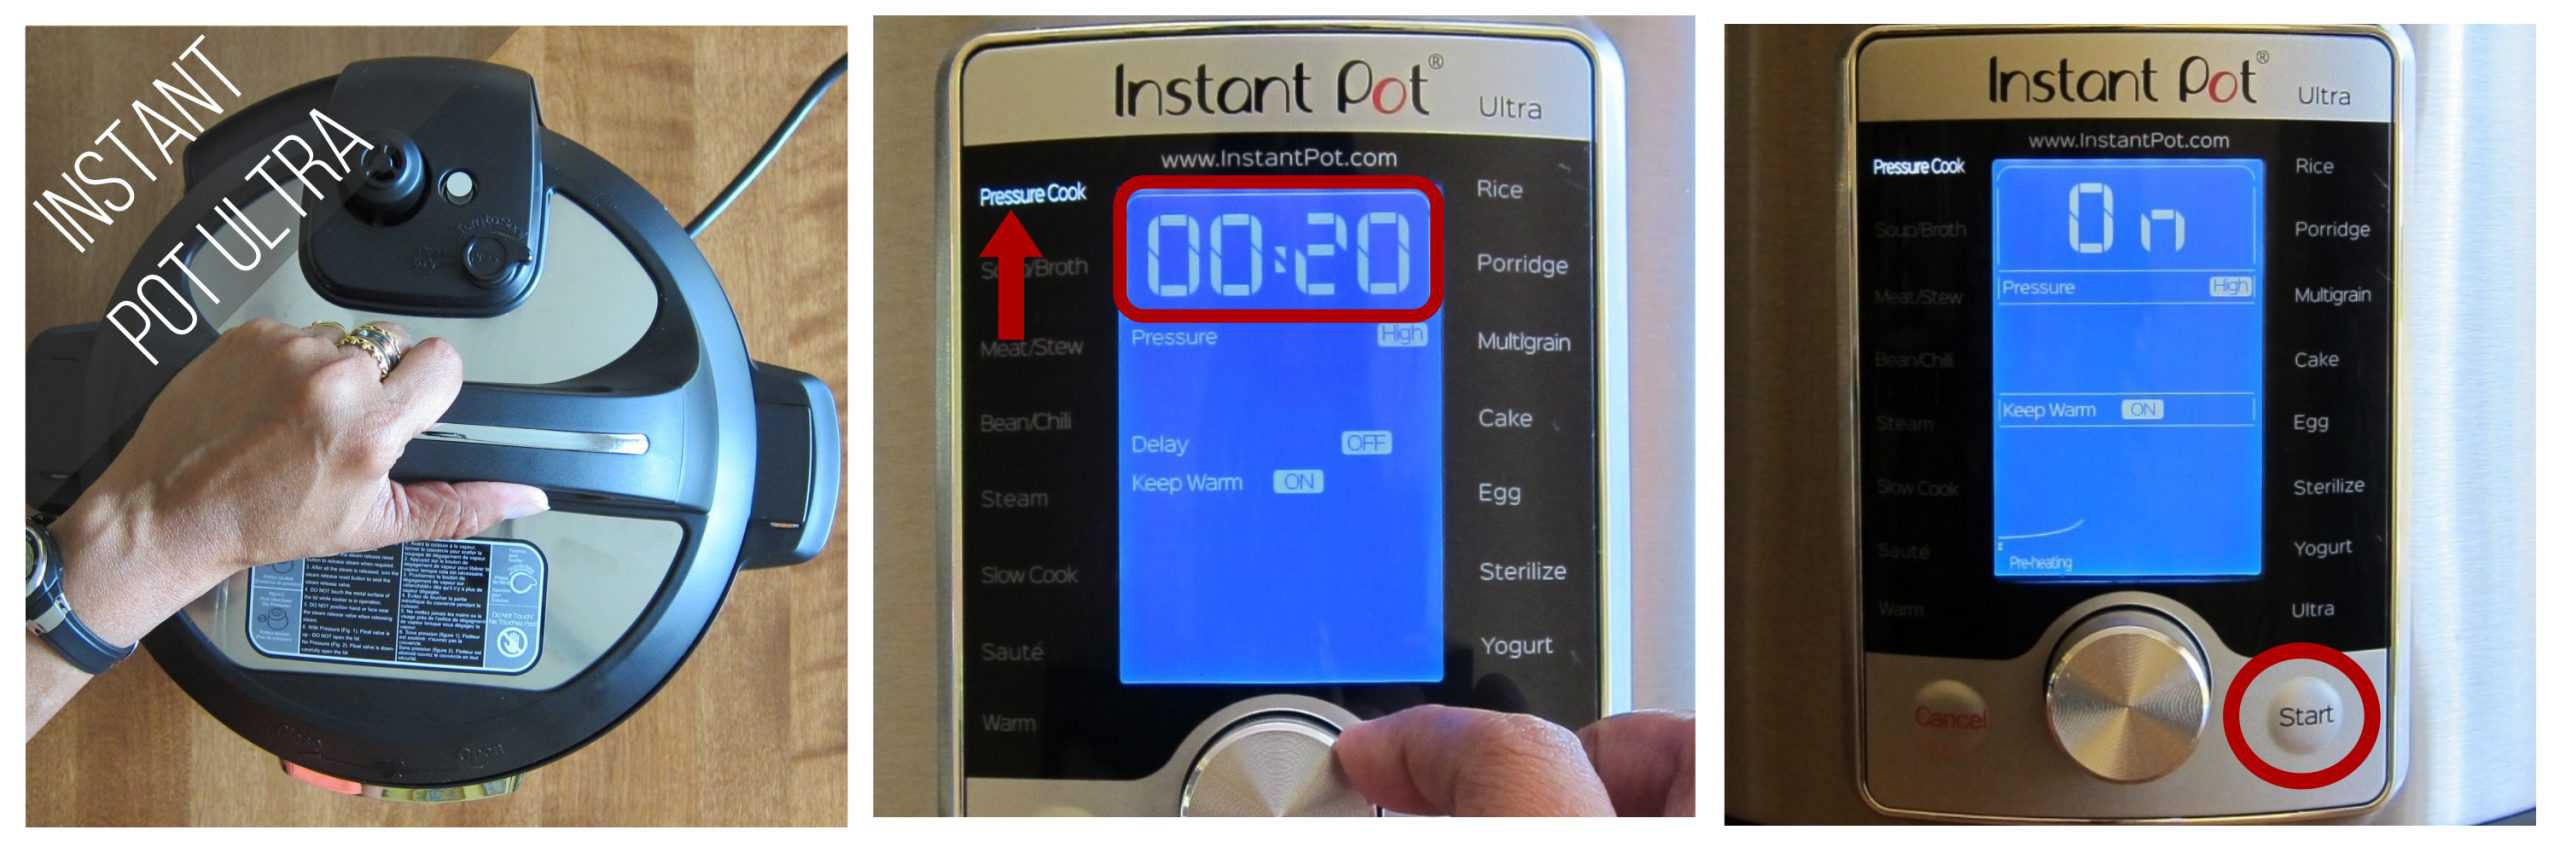
- Close the lid.
- Select Pressure Cook mode and adjust the time to 20 minutes (00:20).
- Press Start.
Pressure Cooking Process (Duo and Ultra)

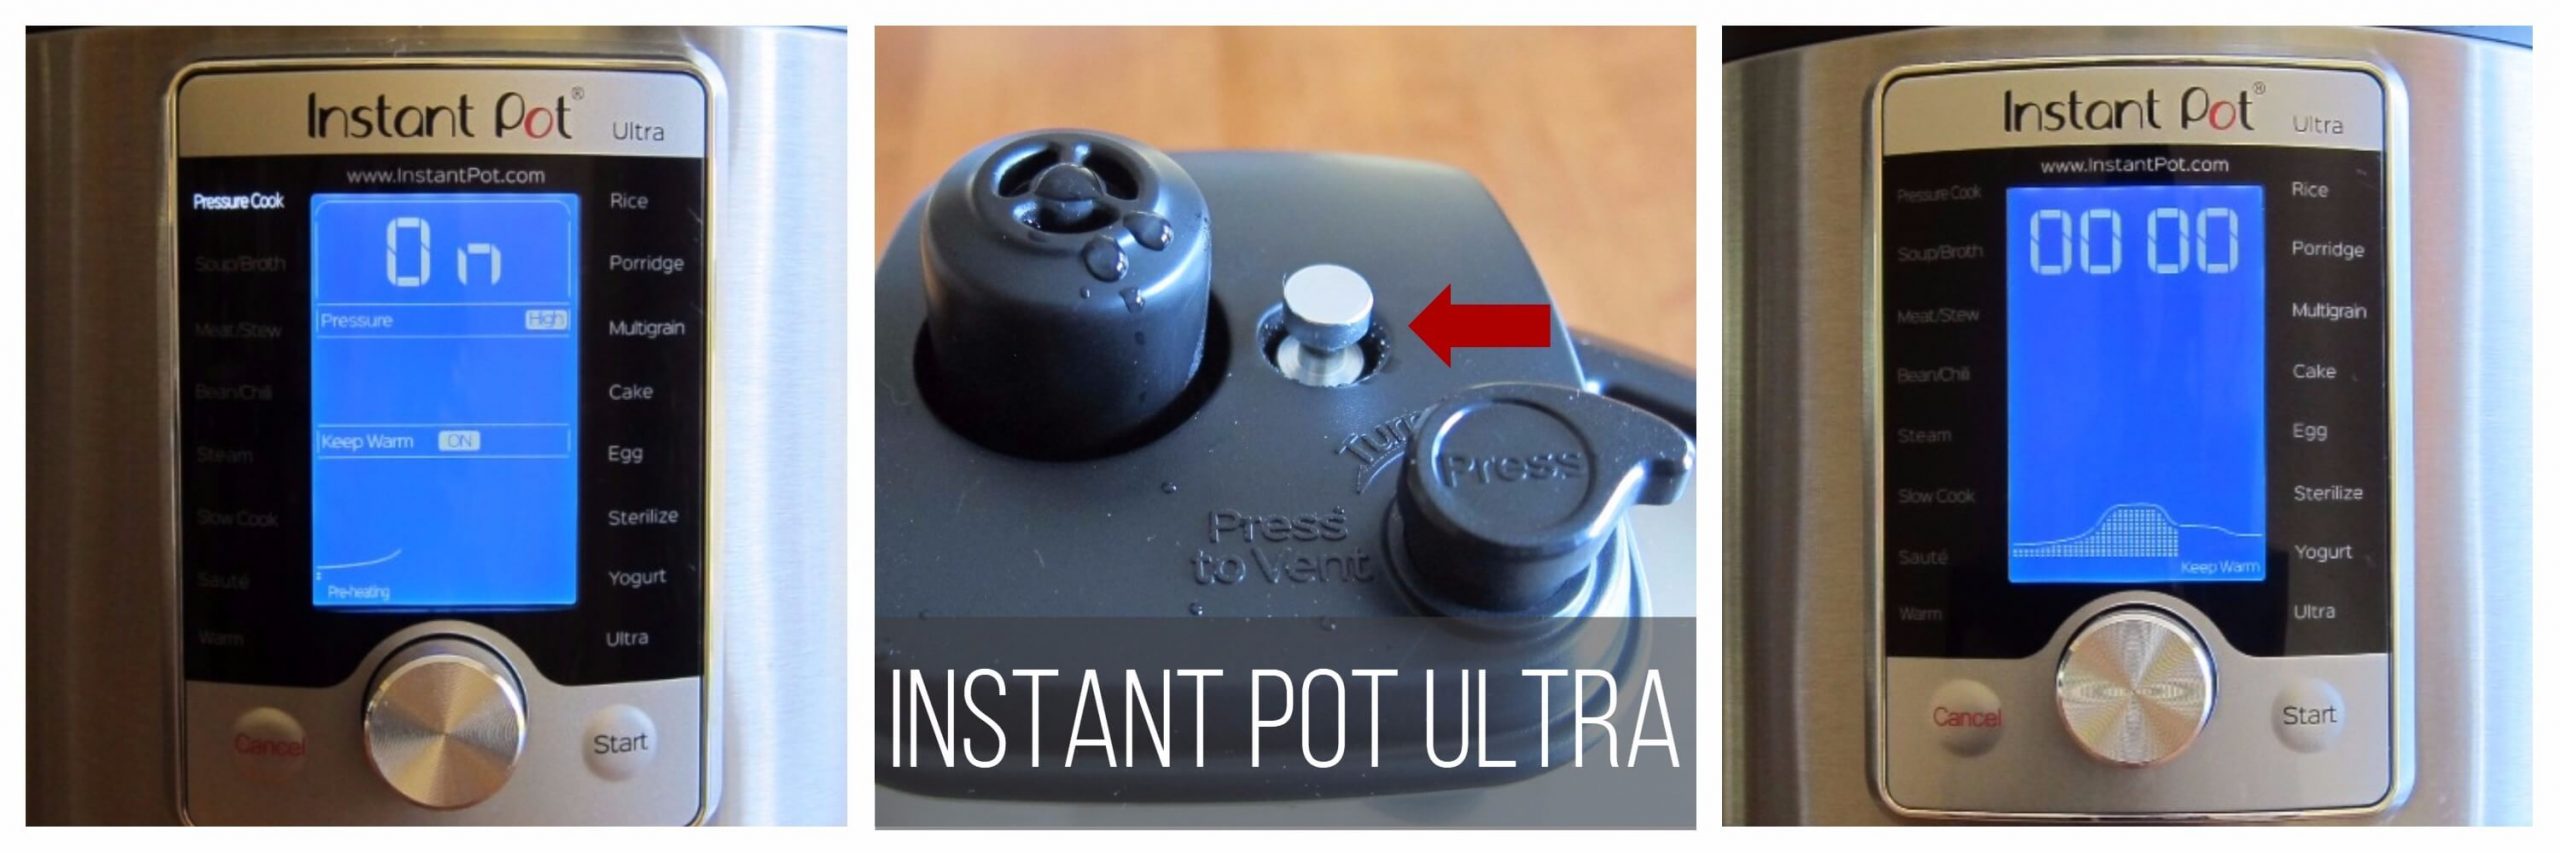
- Instant Pot display will change to On.
- Once the Instant Pot is pressurized, the float valve will go up.
- The display will count down to 0; it will then switch to Keep Warm mode and display L0:00 or 00 00 and begin to count up the number of minutes since pressure cooking completed.
How to Naturally Release Pressure (NPR) on the DUO and ULTRA
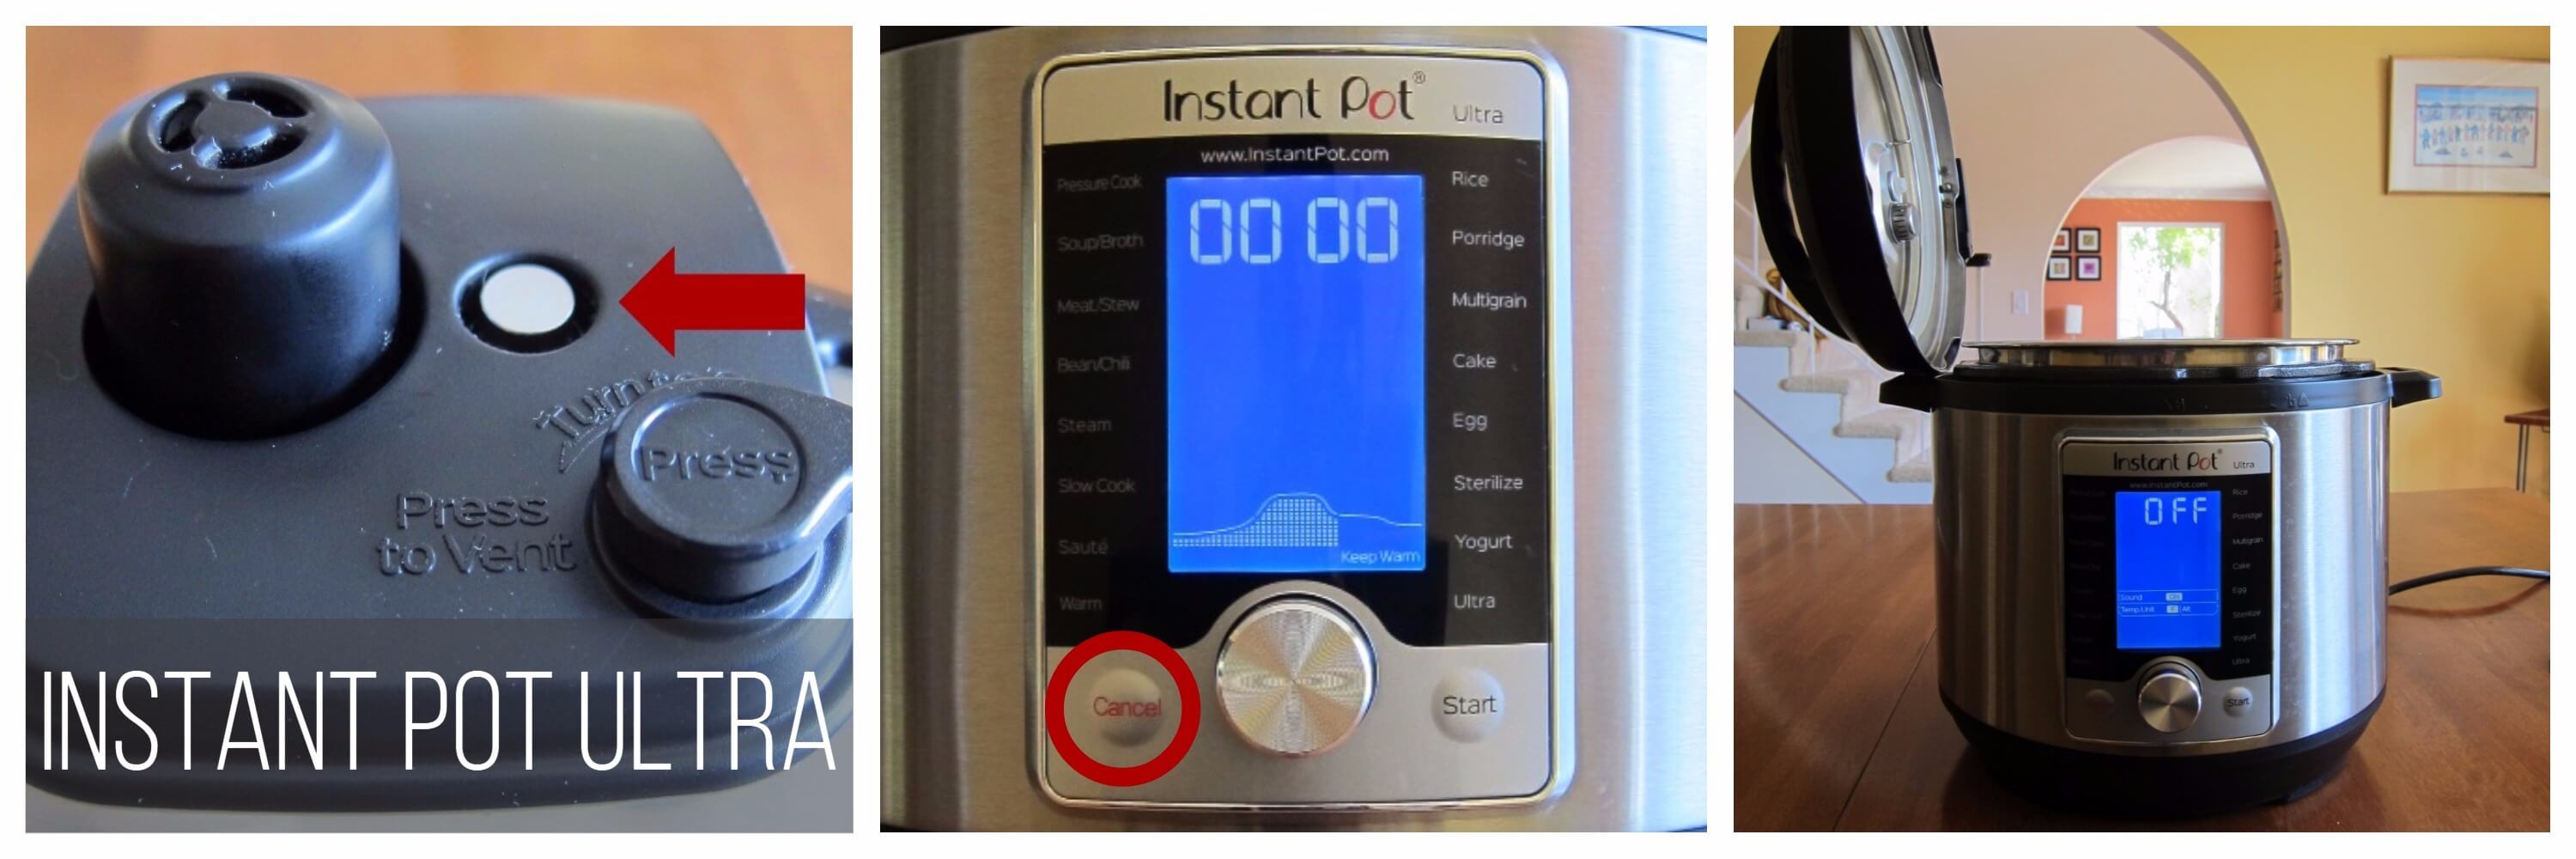
- Allow the pressure to release naturally (NPR). The float valve will be in the down position. This may take 15 to 30 minutes. [Find out more about the pressure release methods and how and when to use them. ]
- Press Cancel and open the Instant Pot.
* After 15 minutes, if you wish to, you can release the remaining pressure by moving the pressure release to the venting position.
Stir in Masa Harina and Add Toppings
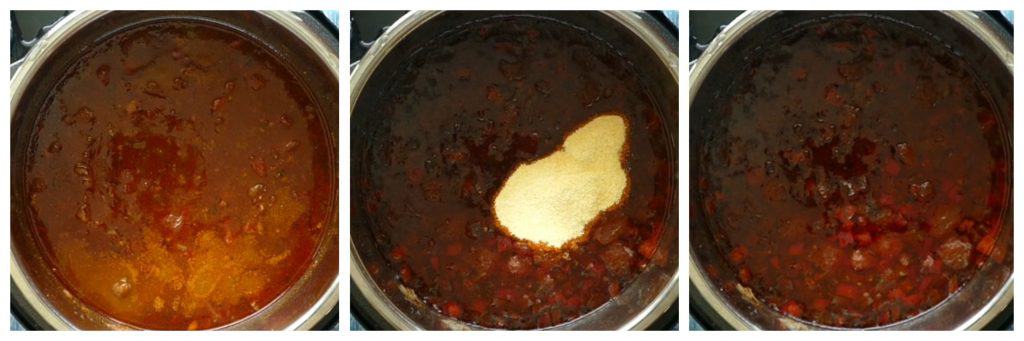
- Select Saute mode.
- Stir in masa harina.
- Cook until chili is thickened, about 5 minutes.
- Press Cancel.
- Allow the Instant Pot chili to rest for 5 more minutes before serving; it will thicken some more.
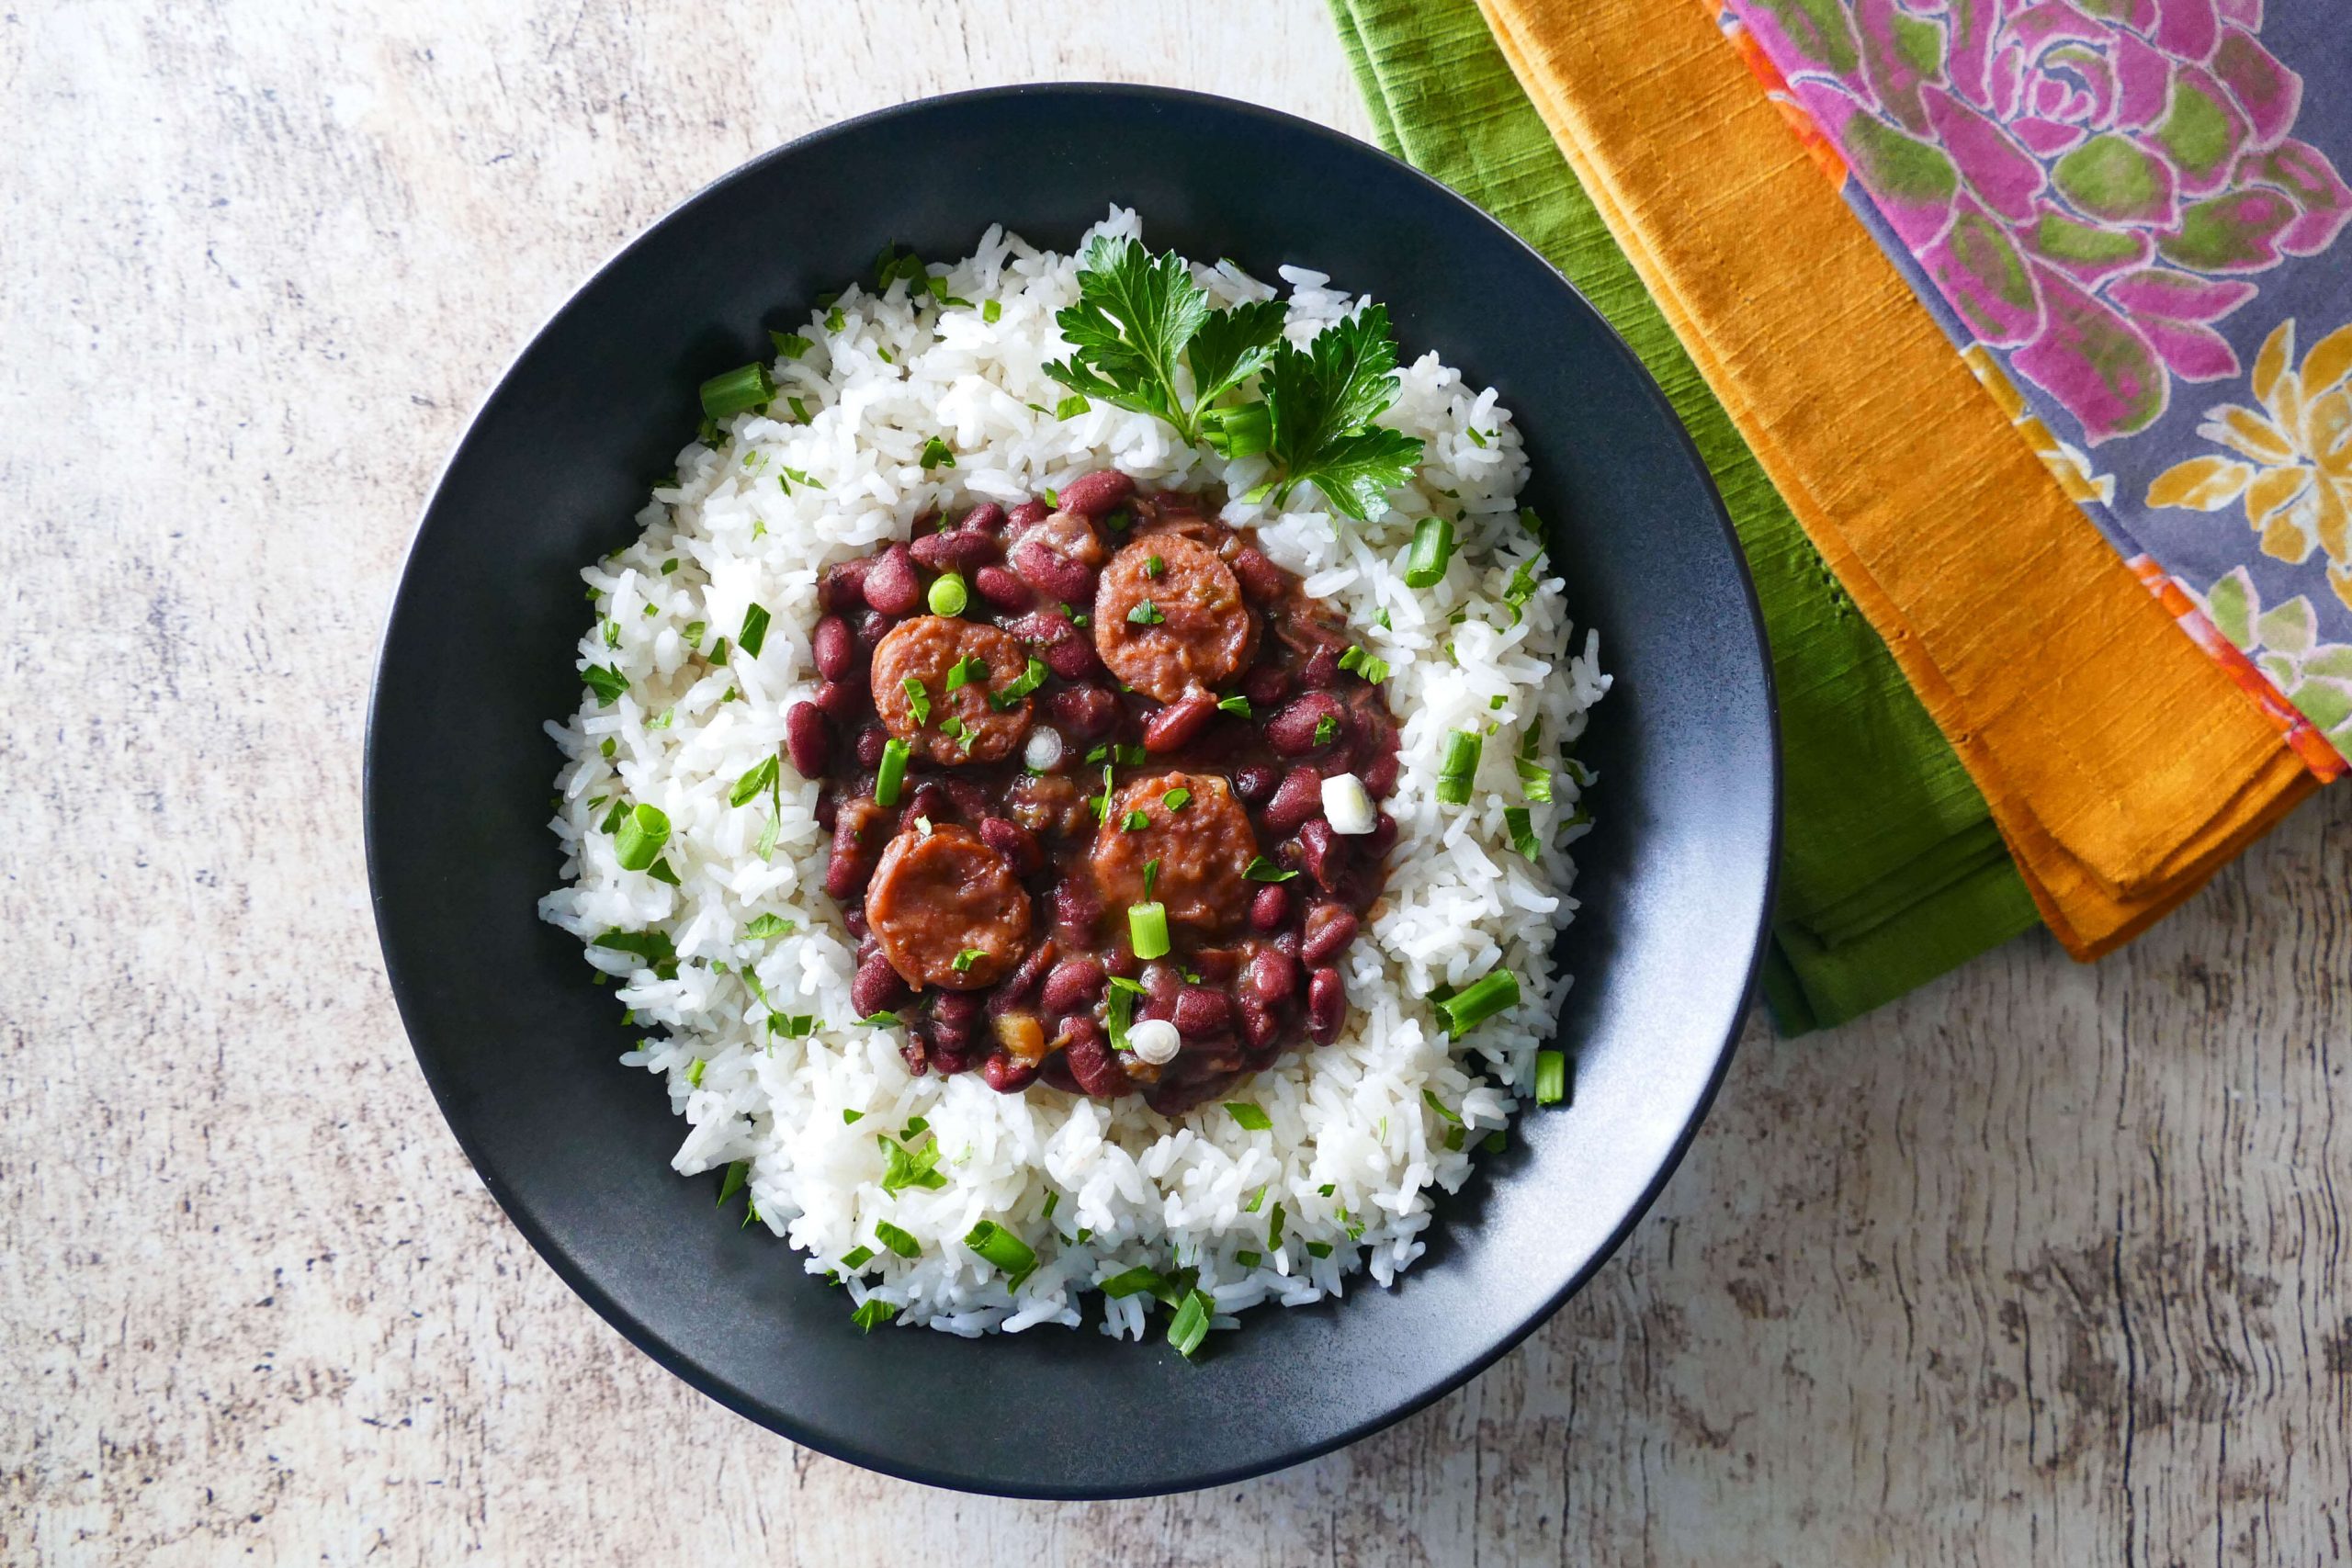
- Ladle chili into serving bowls and serve with your choice of toppings: sour cream, shredded cheddar cheese, chopped red onions, shallots or green onions, sliced jalapenos, hot sauce, diced avocado, or Fritos chips (not the healthiest, but my favorite!)

Homemade Instant Pot Chili (with dried beans)
Ingredients
- 1 ½ cups dried pinto beans
- 2 tablespoon vegetable oil
- 1 ½ lbs ground beef (⅔ kg)
- 2 cups onion chopped
- 1 cup bell pepper chopped
- 2 tablespoon garlic minced
- 3 tablespoon Mexican chili powder
- 1 tablespoon dried oregano
- 2 teaspoon cumin powder
- 2 teaspoon cocoa powder
- 1 teaspoon salt or to taste
- ½ teaspoon black pepper powder
- ¼ teaspoon cayenne pepper or to taste
- 4 cups beef broth
- 14.5 oz diced tomatoes (1 can or 411 grams) or 2 cups fresh tomatoes, chopped
- ¼ cup masa harina e.g. Bob’s Red Mill brand
- Your choice of toppings sour cream, shredded cheddar cheese, chopped red onions, shallots or green onions, sliced jalapenos, hot sauce, diced avocado, or Fritos chips
Instructions
To pre-soak pinto beans in the traditional way in a bowl:
- Rinse pinto beans and drain.
- Place beans in a medium bowl and add enough water to be 1 inch above the level of the beans.
- Let bowl sit on countertop for 4 to 8 hours.
- Drain and set aside.
To do a quick pre-soak of pinto beans in Instant Pot:
- Rinse pinto beans and drain.
- Add pinto beans to inner pot of Instant Pot and pour in enough water to be 1 inch above the level of the beans.
- Close the lid and pressure cook on High Pressure for 5 minutes.
- Do a Natural Pressure Release (NPR), about 12 minutes. [Read More: The Different Pressure Release Methods]
- Press Cancel and open the Instant Pot; drain the beans and set aside.
Instant Pot Chili Instructions:
- Select Saute mode.
- Once the Instant Pot is hot, add oil to inner pot.
- Add ground beef to inner pot.
- Stir with a wooden spatula to break up the meat into smaller pieces and saute until meat is browned, about 3 minutes.
- Stir in onions and saute until soft, about 2 minutes.
- Stir in bell peppers and garlic.
- Add chili powder, dried oregano, cumin powder, cocoa powder, salt, black pepper, cayenne pepper and stir until fragrant, about 1 minute.
- Stir in beef broth, tomatoes and pre-soaked pinto beans (use either countertop or Instant Pot quick pre-soak method from above).
- Close Instant Pot lid and pressure cook on High Pressure for 20 minutes.
- Do a Natural Pressure Release (NPR), about 15 to 18 minutes. ** [Read More: The Different Pressure Release Methods]
- Press Cancel and open the Instant Pot.
- Select Saute mode
- Stir in masa harina.
- Cook until chili has thickened, stirring frequently, about 5 minutes.
- Press ‘Cancel’.
- Allow the Instant Pot Chili to rest for 5 more minutes before serving, it will thicken some more.
- Ladle chili into serving bowls and serve with your choice of toppings: sour cream, shredded cheddar cheese, chopped red onions, shallots or green onions, sliced jalapenos, hot sauce, diced avocado, or Fritos chips (my favorite!)
Notes
- Prep time does not include steps that are already accounted for in the ingredient list, e.g. chopped onions, minced garlic, cut vegetables, etc.
- If you choose not to thicken the chili with masa harina, your chili will be soupy. Please keep that in mind before you omit the ingredient.
- * The chili powder called for in this dish is Mexican chili powder which is a mixture of spices including cayenne and garlic. Don’t use ground chili pepper!
- ** After 15 minutes, if you wish to, you can release the remaining pressure by moving the pressure release handle to venting position.
Nutrition
Thank you for visiting Paint the Kitchen Red. All photos and content are copyright protected. Please don’t use any content without prior written permission. If you’ve made this recipe and would like to share it with your friends, please link back to this recipe. Thank you!
I am not a certified nutritionist. I provide my best estimate of nutritional information merely as a courtesy to my readers. If you depend on nutritional information for dietary or health reasons, I suggest using your favorite online nutrition calculator to confirm the nutritional value of this recipe based on the actual ingredients that you use.
Did you know that the best way to support your favorite bloggers is to comment and rate recipes, and share on social media? If you loved this recipe, please comment and give it a five ⭐ rating in the comment section below. If you’re a pinner, pin this post using the Pin buttons at the top and bottom of this post and in the recipe card above. Thank you for your support!
Recipes you Might Also Like!


D sanders says
Outstanding, very, very detailed instructions on preparing this dish! I haven’t tried this dish yet but will tomorrow.
Ingredient list and process seems legit!
Oh and I was born and raised in Texas. Those that say beans and tomatoes don’t belong in Texas chili are contestants in a competition!
I was raised here eating chili my Mom made that included those two taboos! Chili ain’t chili without them!……..except at a Texas chili cook-off with their rules and stuff
Paint the Kitchen Red says
Hope you liked the recipe – yes, I’ve committed the ultimate Texas sin haven’t I? Thanks for your kind words.
Helen says
What would happen if I didn’t soak the beans and just cooked it longer instead? Would everything else in the chili be over cooked? How much longer would it take? Thanks!
Paint the Kitchen Red says
Helen, if you want to cook the beans from dry you can try and pressure cook for 40 minutes. Yes, the other ingredients might overcook but I think it’s worth a try. Please keep me posted 🙂
JoanS says
Love this recipe! Tasty, easy and quick.
Paint the Kitchen Red says
Thank you for your comment, Joan. I’m happy you liked the recipe.
Cheryl says
Great. Added Guiness for some of the broth and jalepenos and poblanos.
Paint the Kitchen Red says
Cheryl – oh, that’s a really interesting addition – I don’t think I’ve ever added beer to my chili before – I’ll have to give it a try!
Carol says
This is my all time favorite instant pot recipe… follow it exactly and you will have Chile that everyone raves about!
Paint the Kitchen Red says
Awww, thank you Carol, for your kind words! I love it that you’re making the recipe for others!
Felicia says
Very tasty. Alterations: 4 cups fresh tomatoes, regular corn meal, 1 lb ground turkey, 2 Tbl. Chili powder, a dash of red cayenne. I used Beef Better than bouillon. I would have made it with the amount of spice called for but Mom doesn’t like things too spicy. I think it’s the best chili recipe I’ve tried yet. The corn meal makes it interesting, I like it. Thanks!
Paint the Kitchen Red says
Thanks for the comment, Felicia, and for sharing your modifications – that’ll be useful to others.
Terence says
I’m a little confused about the chili powder. The TIPS section says “… it’s important to note that the chili powder called for in this Instant Pot Chili recipe is American chili powder …” but the recipe itself calls for “3 Tbsp Mexican chili powder.” Is American chili powder the same as Mexican chili powder? If not, which should I use?
Paint the Kitchen Red says
Hi Terence, in all this time you’re the first to mention this. Yes, that is confusing! I was trying to distinguish between Indian chili powder (since I have many Indian readers), and the Mexican chili powder found in the US. I will change the tips to be more clear. So to answer your question, it’s the Mexican chili powder 🙂 Thanks for your comment.
Terence says
Thanks! Sorry to be a pest, but just went to a Mexican supermarket. They had at least 4 kinds of chili powder (Chile Nuevo Mexico Molido, Chile California Molido, Chile Molido, and something like Pasillo Chile). Are all of these ok to use, or is there one that is preferable (or another that I didn’t list)?
Paint the Kitchen Red says
Terence, if you go into the recipe card and click on the chili powder link it will show you the kind I use for this recipe – it’s a regular grocery store ‘Mexican chili powder’.
The ones you’re talking about are straight up chili powders without the other spices, so the taste will be different and they all have different spice levels. Good luck 🙂
Jane M says
Wow, this is great! I just got my Instant Pot, and I’m not a cook — your instructions were so clear and made it easy. Thanks!!!
Paint the Kitchen Red says
Jane, I try to always remember that there are Instant Pot newcomers trying my recipes all the time so I try to make sure they are written for new and experienced owners. Thanks for the feedback.
Prabha JAcob says
Thank you for the wonderful easy recipe. My family loved it and enjoyed it until the last drop.
Paint the Kitchen Red says
Prabha, thanks for taking the time to comment and rate the recipe – I’m so happy that your family liked the recipe!
EllenS says
Made as written, very good and even rated a great alternative to Texas Chili by my snobby hubby! A high honor.
Paint the Kitchen Red says
I’ll take all the honors I can get, Ellen 🙂 Thanks so much for sharing your feedback.
Lisa says
This chili was easy to make and delicious. Great flavors.
Paint the Kitchen Red says
Thank you, Lisa – glad you liked it!
Rachelle says
There are WAY too much liquid in this! Not only that, it natural released for 40 minutes before I flipped the switch, so the times are very misleading! This seriously wasn’t much faster than cooking in the crock pot for me. It took me a little over 2 full hours to make this.
Paint the Kitchen Red says
Rachelle – I’m sorry to hear that the recipe didn’t meet your expectations. My natural release time was as stated in the recipe, but it’s possible yours took longer. Keep in mind that you can release pressure after 15 minutes and still get pretty good results, similar to full natural release. Sometimes the float valve gets stuck in the up position and if you gently touch it with a chopstick, it drops. The chili thickens up substantially with the masa harina and by allowing it to boil in ‘Saute’ mode.
Sandi says
Um was WAY too spicy.
Paint the Kitchen Red says
Sandi – I use McCormick’s Mexican style chili powder and I find the spice level to be very manageable. It’s possible that the brand of chili powder you used is a spicier one.
Jean Loran says
This chili is just about the best I’ve ever made! I’ve never used dried beans because I never have time for pre soaking when I decide I want to make chili, but the instant pot made it super easy and gave a much better texture than canned. I followed the recipe to the letter using yellow bell pepper and the heat level was perfect for sensitive eaters. I added a dollop of sriracha to individual servings for more intensity and that blended nicely with the other flavors. I did omit the masa harina because we used fritos to top and that did the same thickening job and made the leftovers perfect for chili dogs the next day. Not that there was much left! This is my new go to chili recipe. Thanks so much for sharing it!
Paint the Kitchen Red says
I love hearing this, Jean! I too have tried so many recipes and love this one the best. Thanks for taking a moment to comment and rate the recipe – I appreciate it!
Norma says
Found this recipe when I was in A pinch and it turned out perfect. I did the instant pot quick bean soak since I started this late in the day. The mixture of spices is perfect and so much better than a packet. Although I usually make my chili much hotter, we had a guest who is not fond of heat, so others added additional spice or heat to taste. I love the addition of bell pepper and I added celery as well. I will make this again!
Paint the Kitchen Red says
Thanks Norma! I have been awed by how many people really love this recipe as much as I do. Thanks for your comment and review – I appreciate it.
Jo says
This was perfect. Easy to follow and taste wonderful. Thanks
Paint the Kitchen Red says
Jo, thank you for taking the time to comment – I appreciate it 🙂
Joan Bitterman says
I love this recipe! I’ve made it several times already to universal acclaim.
Since there are a fair number of vegans among us, I use soy crumbles instead of beef, and I use minced jalapeños and some little peppers from our local Indian grocery instead of cayenne powder. At the end, after cooking, I add sauteed zucchini chunks and frozen corn. The masa harina not only thickens, but it also adds a lovely soft flavor. I use a large can of tomato sauce and Better Than Boullion vegetable flavor for the stock. Thanks for a great, crown pleasing, fun recipe.
Paint the Kitchen Red says
Thanks, Joan, for giving us your modifications to make the recipe vegan. Good to know that soy crumbles work well. I used soy crumbles in the stove-top version of this recipe sometimes but never have in the Instant Pot. Good to know.
Lance Mertz says
I really liked this recipe. I was making it for a large group at a potluck birthday party. I used a red bell pepper, a jalapeno and a carrot to add some veggies. The masa really thickened it up and had to pour a bottle of beer in to loosen it up and then some water when I reheated it. It was a hit all around. I cooked it in a pot for over 4 hours instead of the instant pot as my wife decided she needed the pot. it worked great.
Paint the Kitchen Red says
Thanks for your comment, Lance. The Instant Pot loses minimal liquid from evaporation. So when you cooked it on the stovetop, the final result before adding masa harina was probably already thicker than it would be after pressure cooking. Next time just add some more liquid during the initial cooking period.
Alicia says
I used my stovetop pressure cooker, & the chili was delicious! My husband said it was the best chili he’s ever had!
Paint the Kitchen Red says
Awesome, Alicia! I used to make this on the stovetop, but not pressure cooker. Glad you liked it, and that’s a great compliment from your husband!
Lorraine says
Great chili! So easy too, thanks
Lorraine says
Great chili! Thanks for sharing!
Gabrielle says
This was my first instant pot chili and really good. It had a kick, but all 4 of my kids still enjoyed it.
I only had dried kidney beans on hand and used those without changing anything and it came out great. Thanks for the recipe!
Paint the Kitchen Red says
Thanks, Gabrielle, for commenting, and for letting us know that regular kidney beans worked fine for you.