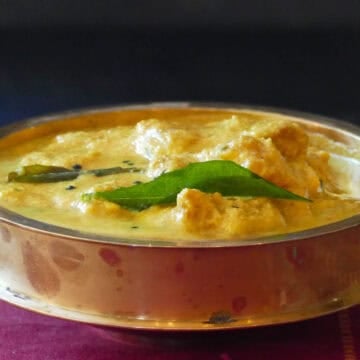
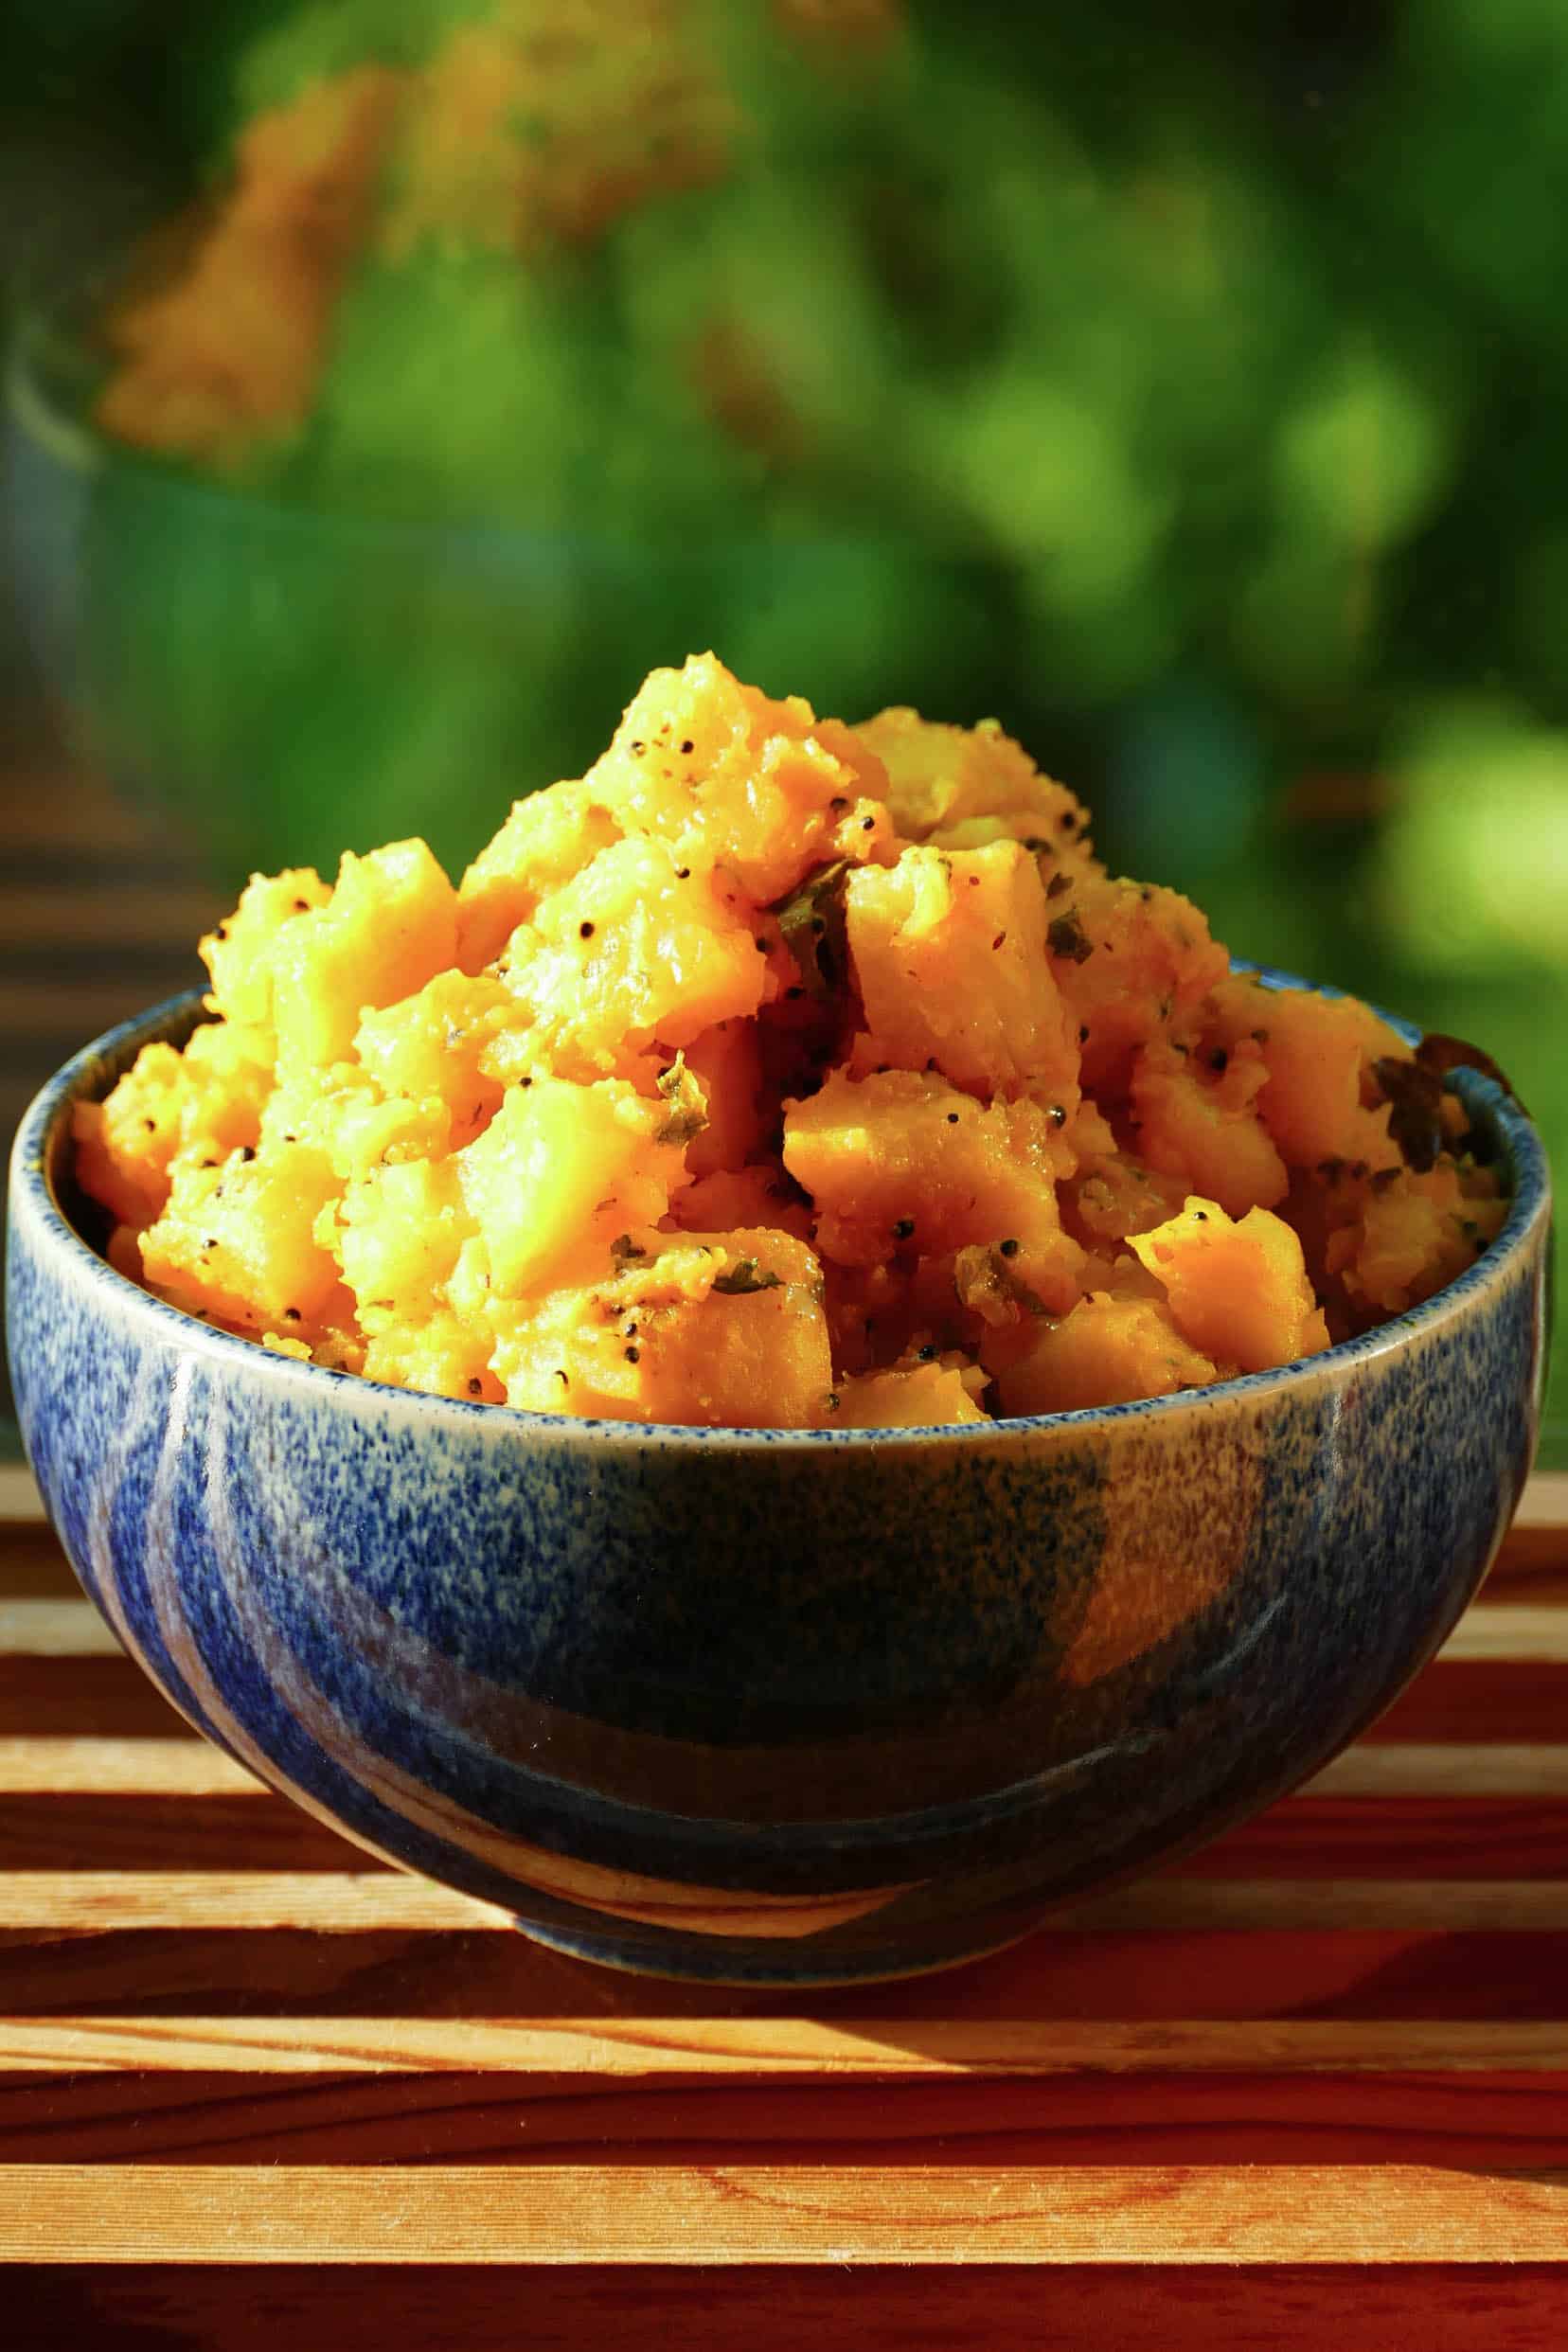
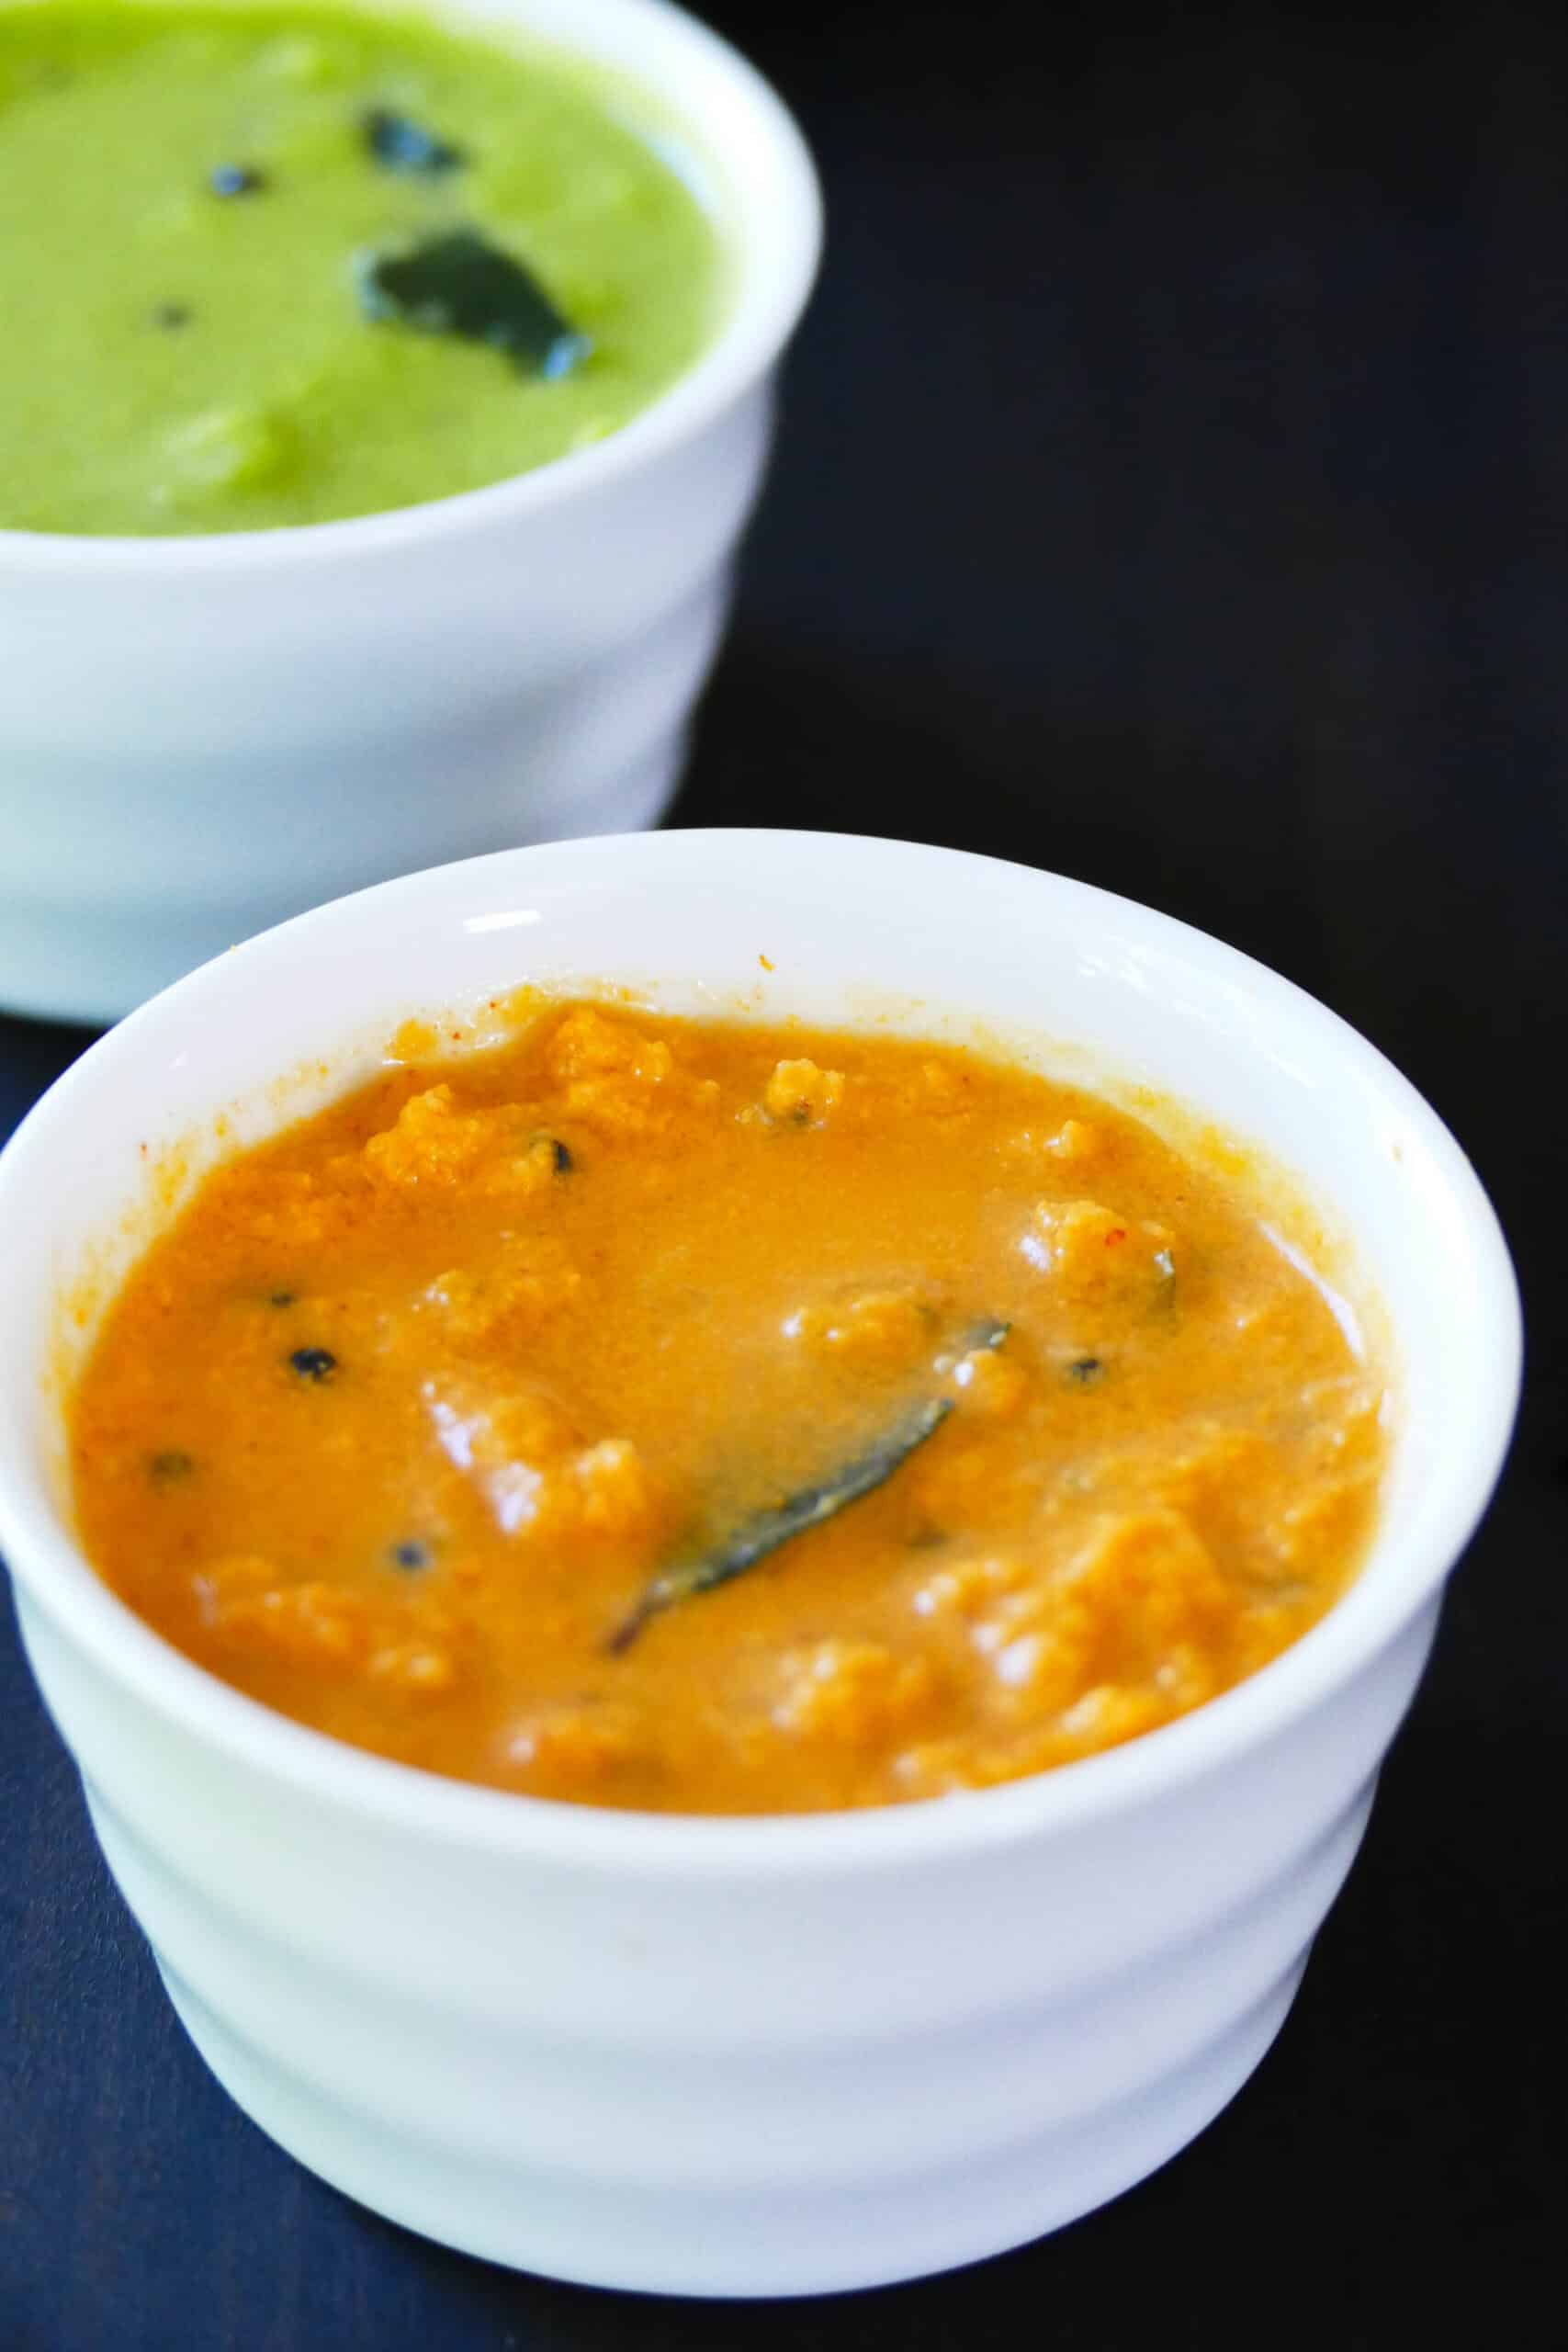
Cucumber pachadi is a popular vegetarian side dish that’s an important part of the traditional Kerala Onam Sadhya feast. This dish is also known as cucumber kichadi in many parts of Kerala. It’s a cooling vegetarian side dish that’s simple but flavorful. This recipe combines fresh cucumber with coconut, yogurt, and spices, creating a light and healthy side dish that goes well with rice.
This post contains affiliate links. As an Amazon Associate, I earn from qualifying purchases. Please read the disclosure.
➡ If you’re new to Kerala cooking, start with my Kerala Cooking Basics guide for ingredient tips, shopping advice, and more authentic recipes.
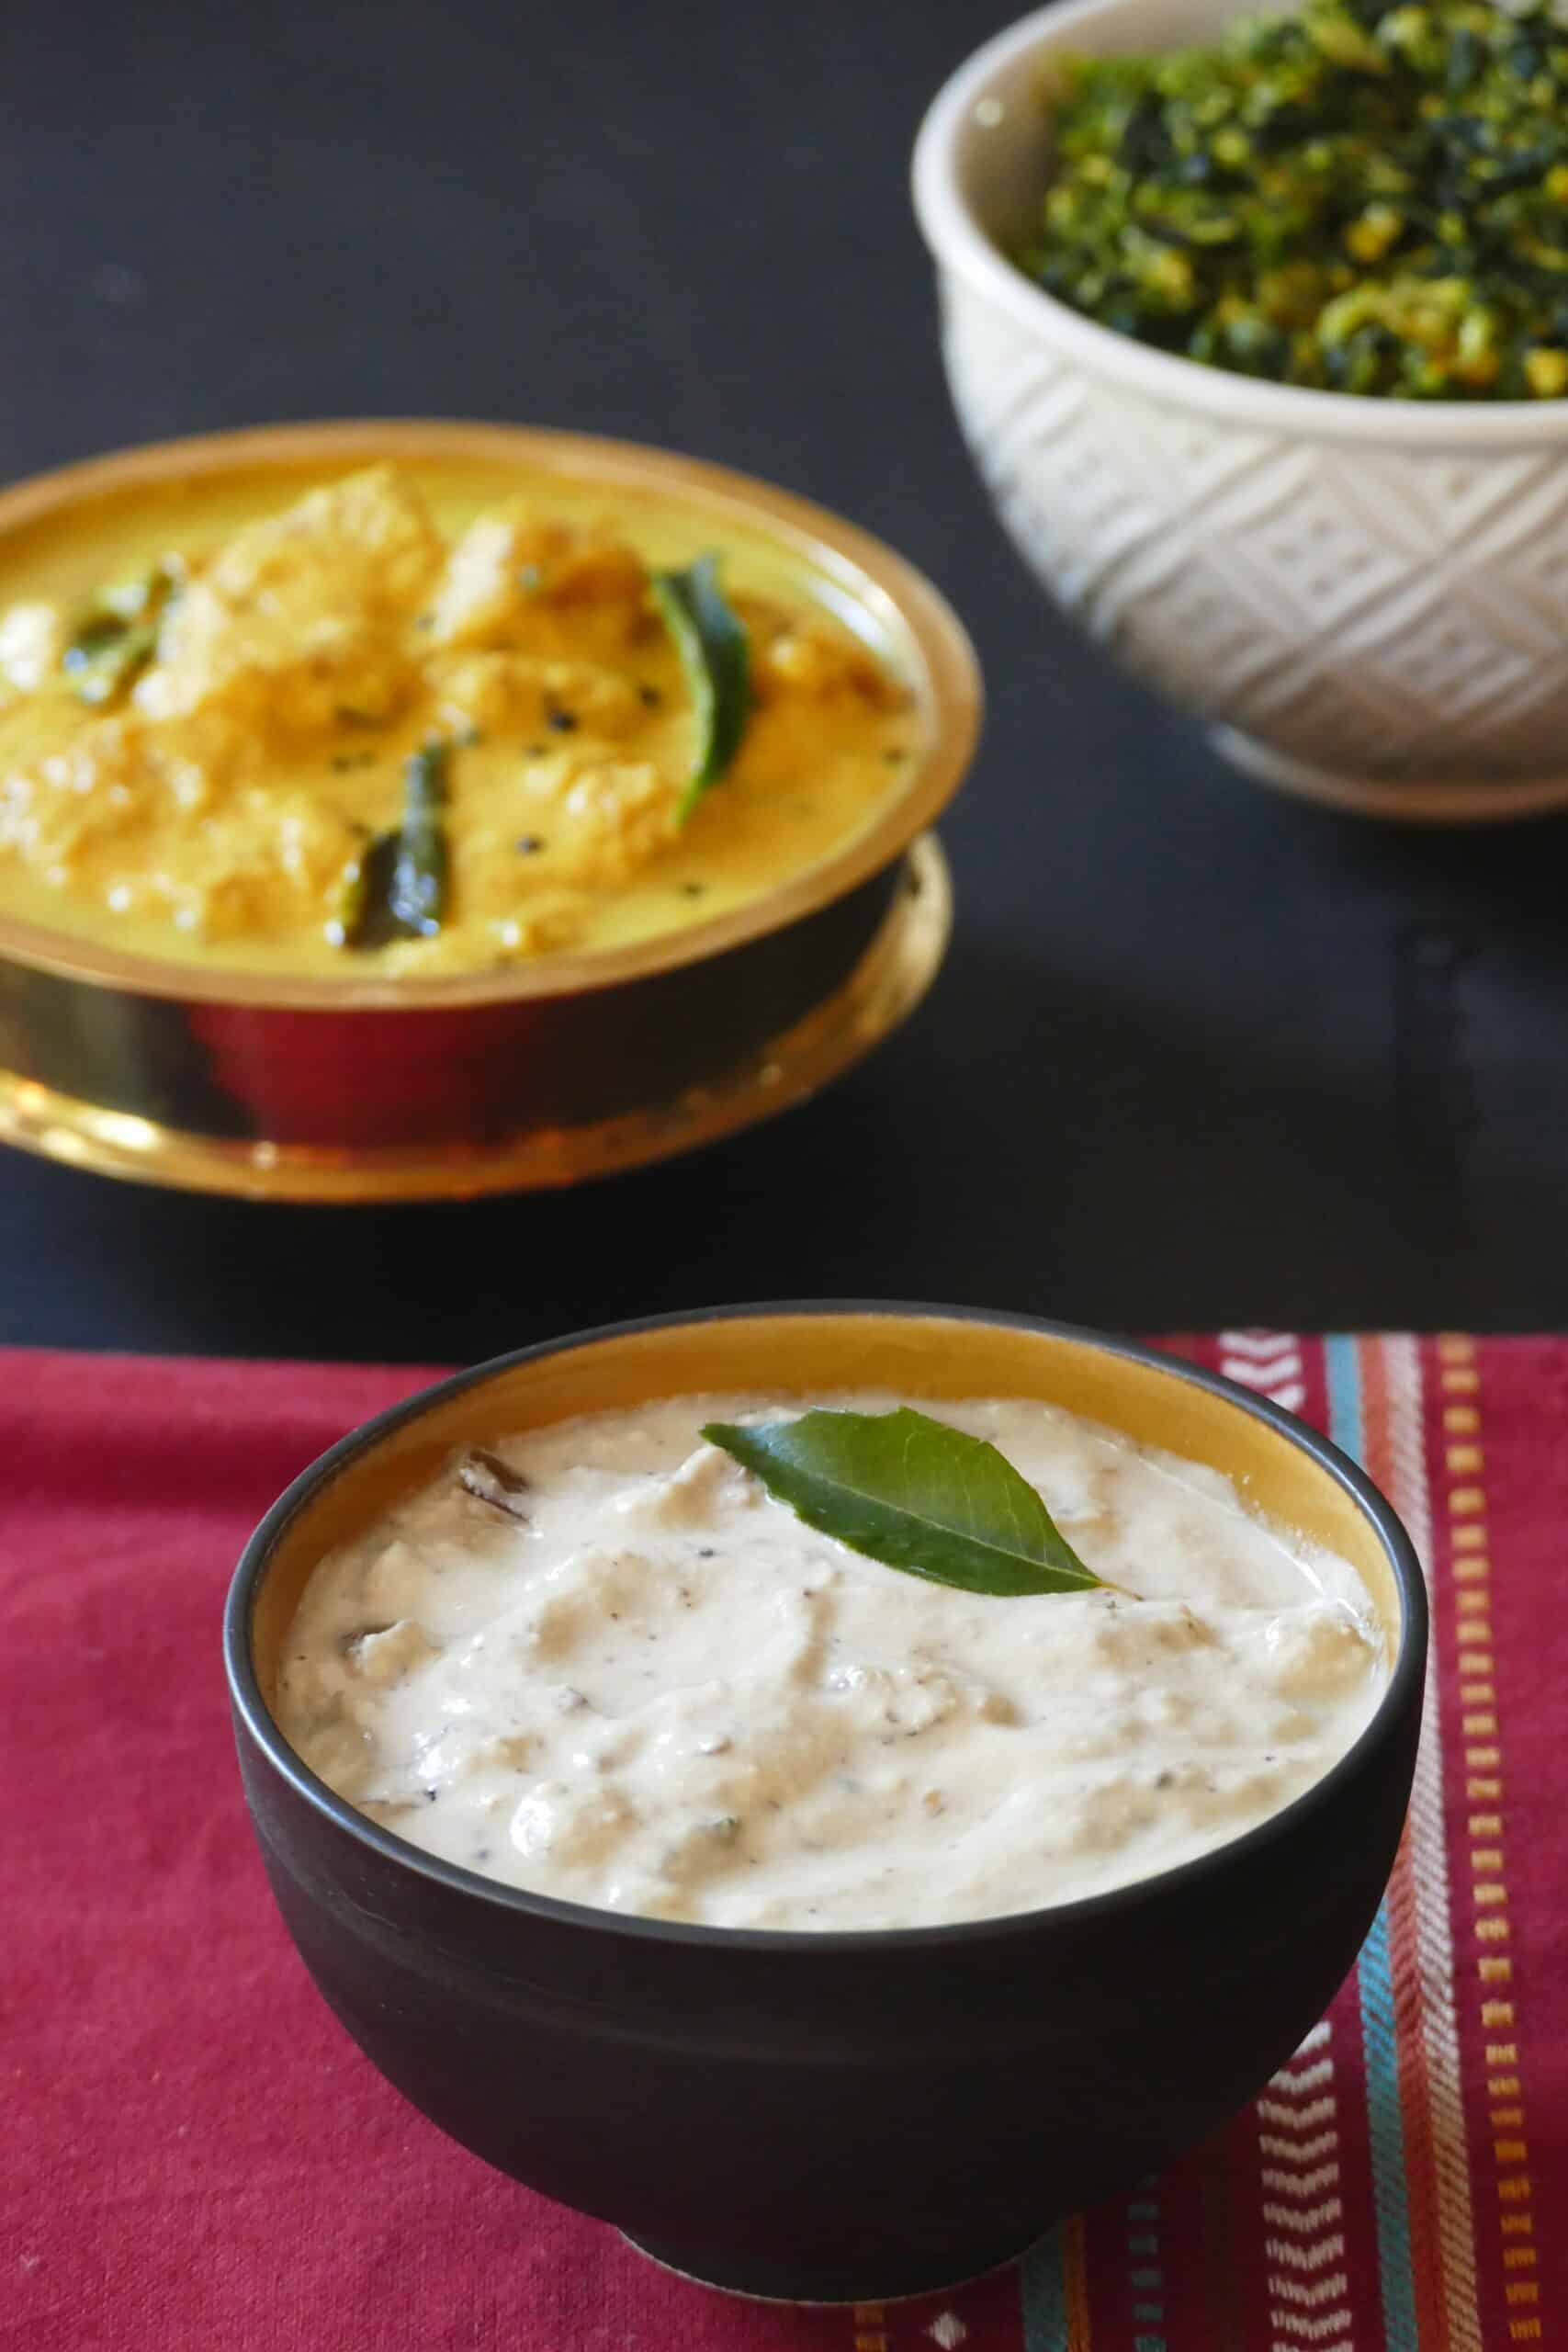
Cucumber pachadi is one of those typically Kerala dishes that works just as well for everyday meals as it does for special occasions like the Kerala feast called Onam sadhya (see image below).

It’s a cooling, refreshing side dish similar to North Indian raita that’s super simple to make and comes together in under 20 minutes!
In my family, sweeter versions of this type of recipe are called pachadi, and savory versions are called kichadi, so we refer to this dish as cucumber kichadi.
However, this recipe seems to be more commonly referred to as pachadi, so I will use that name to prevent any confusion.
You may have tried my mango pachadi, another Onam favorite. It’s made similarly to this cucumber (vellarikka) pachadi.
Some families make this pachadi recipe without coconut, but we like to add coconut.
➡ If you’re looking for more Onam Sadhya recipes, try Kerala parippu, mango pachadi, vegetable stew, potato stew (ishtu), kootu curry, carrot beans thoran, inji curry, sambar, and semiya payasam.
Ingredients and Tips
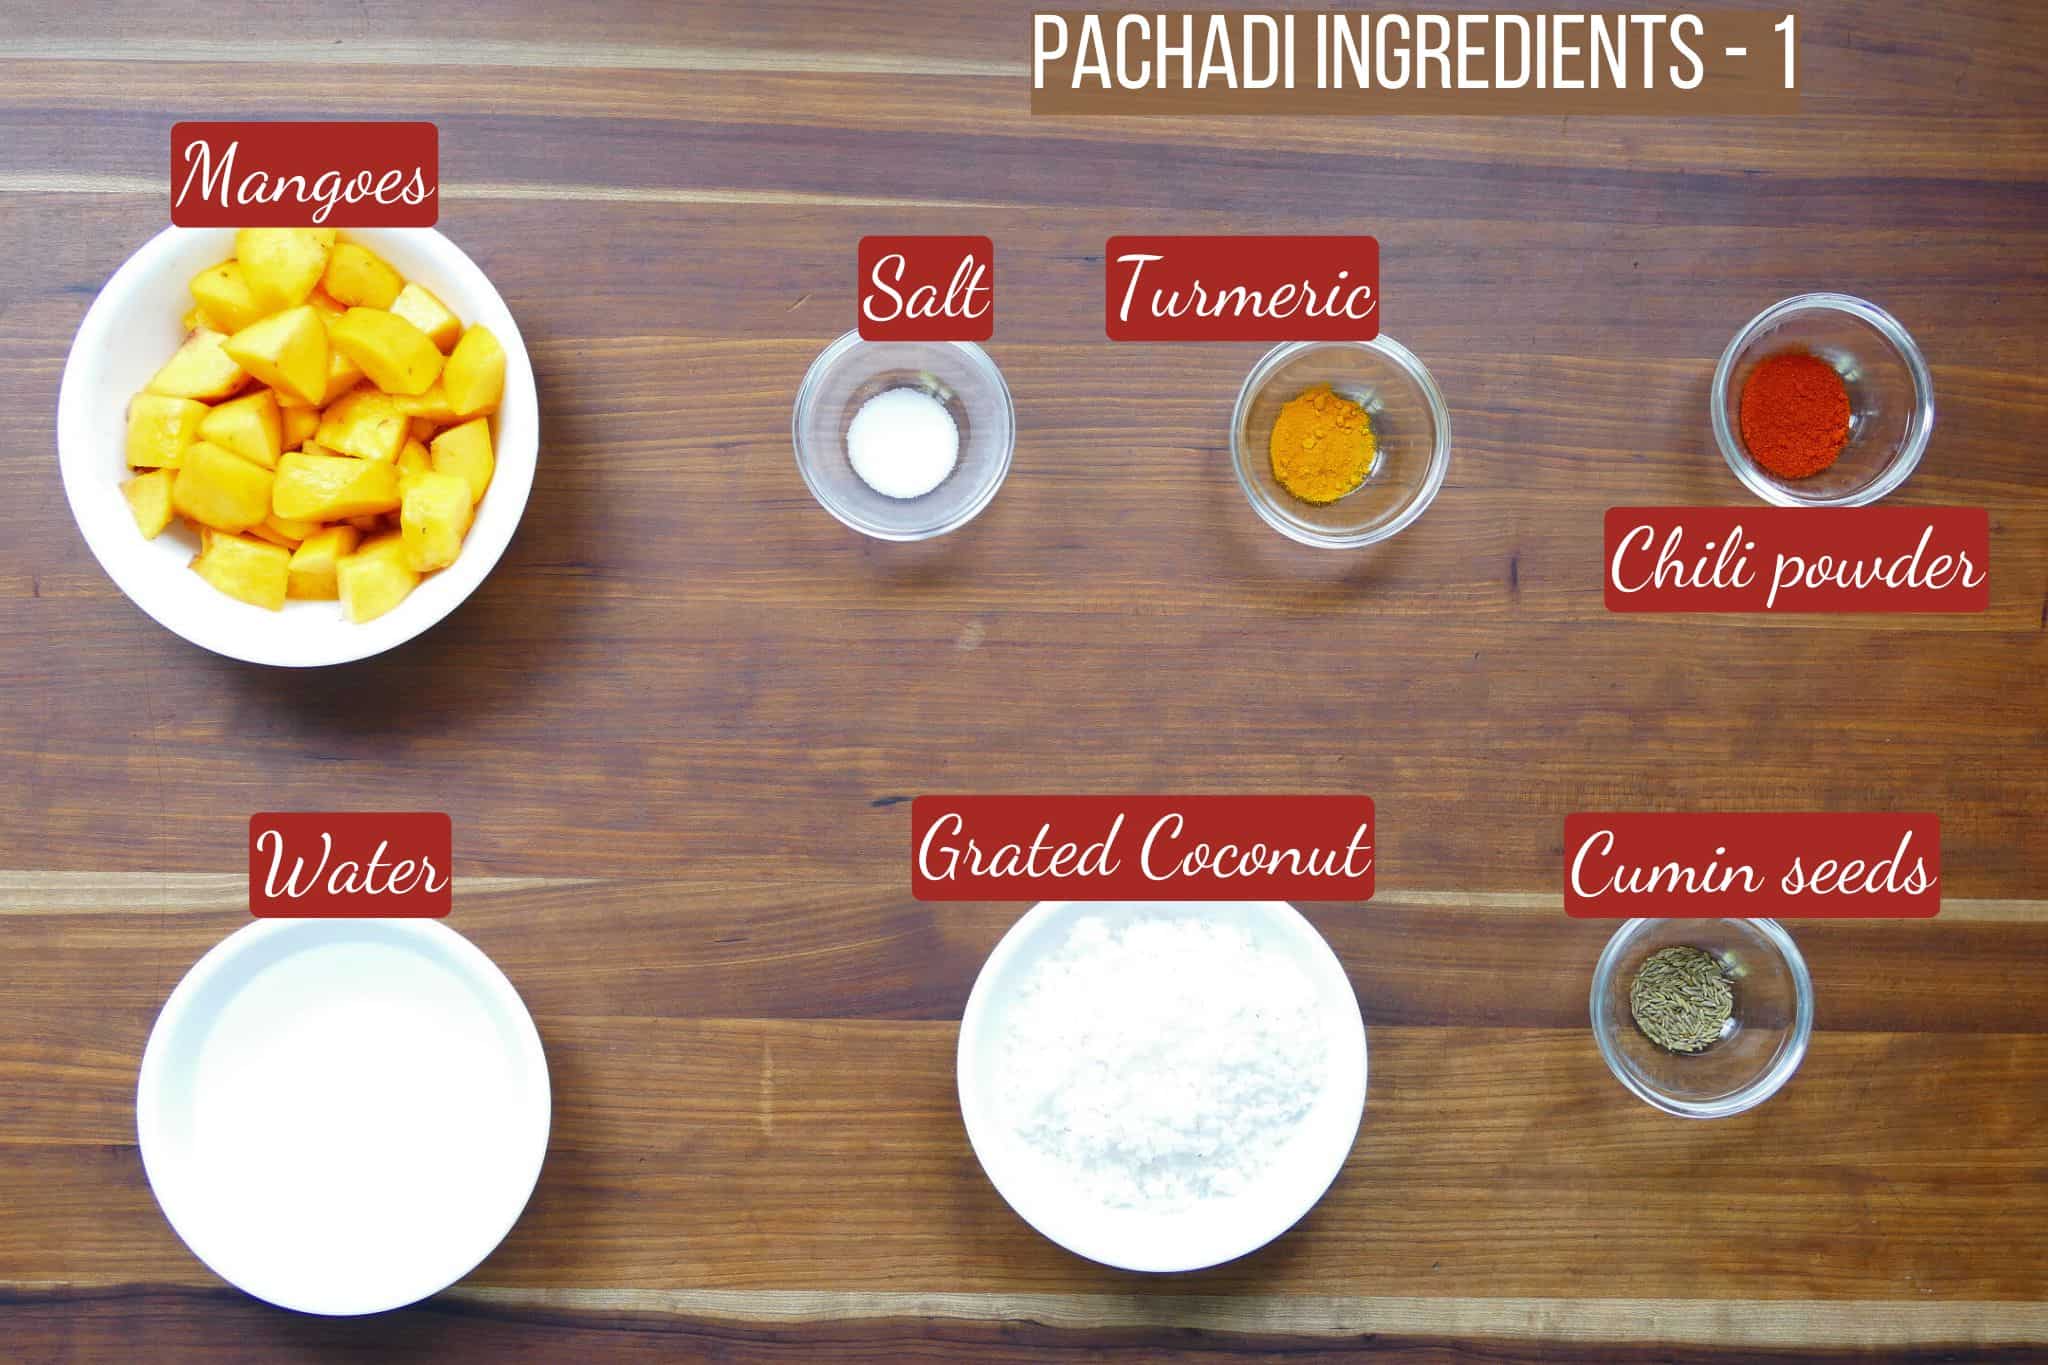
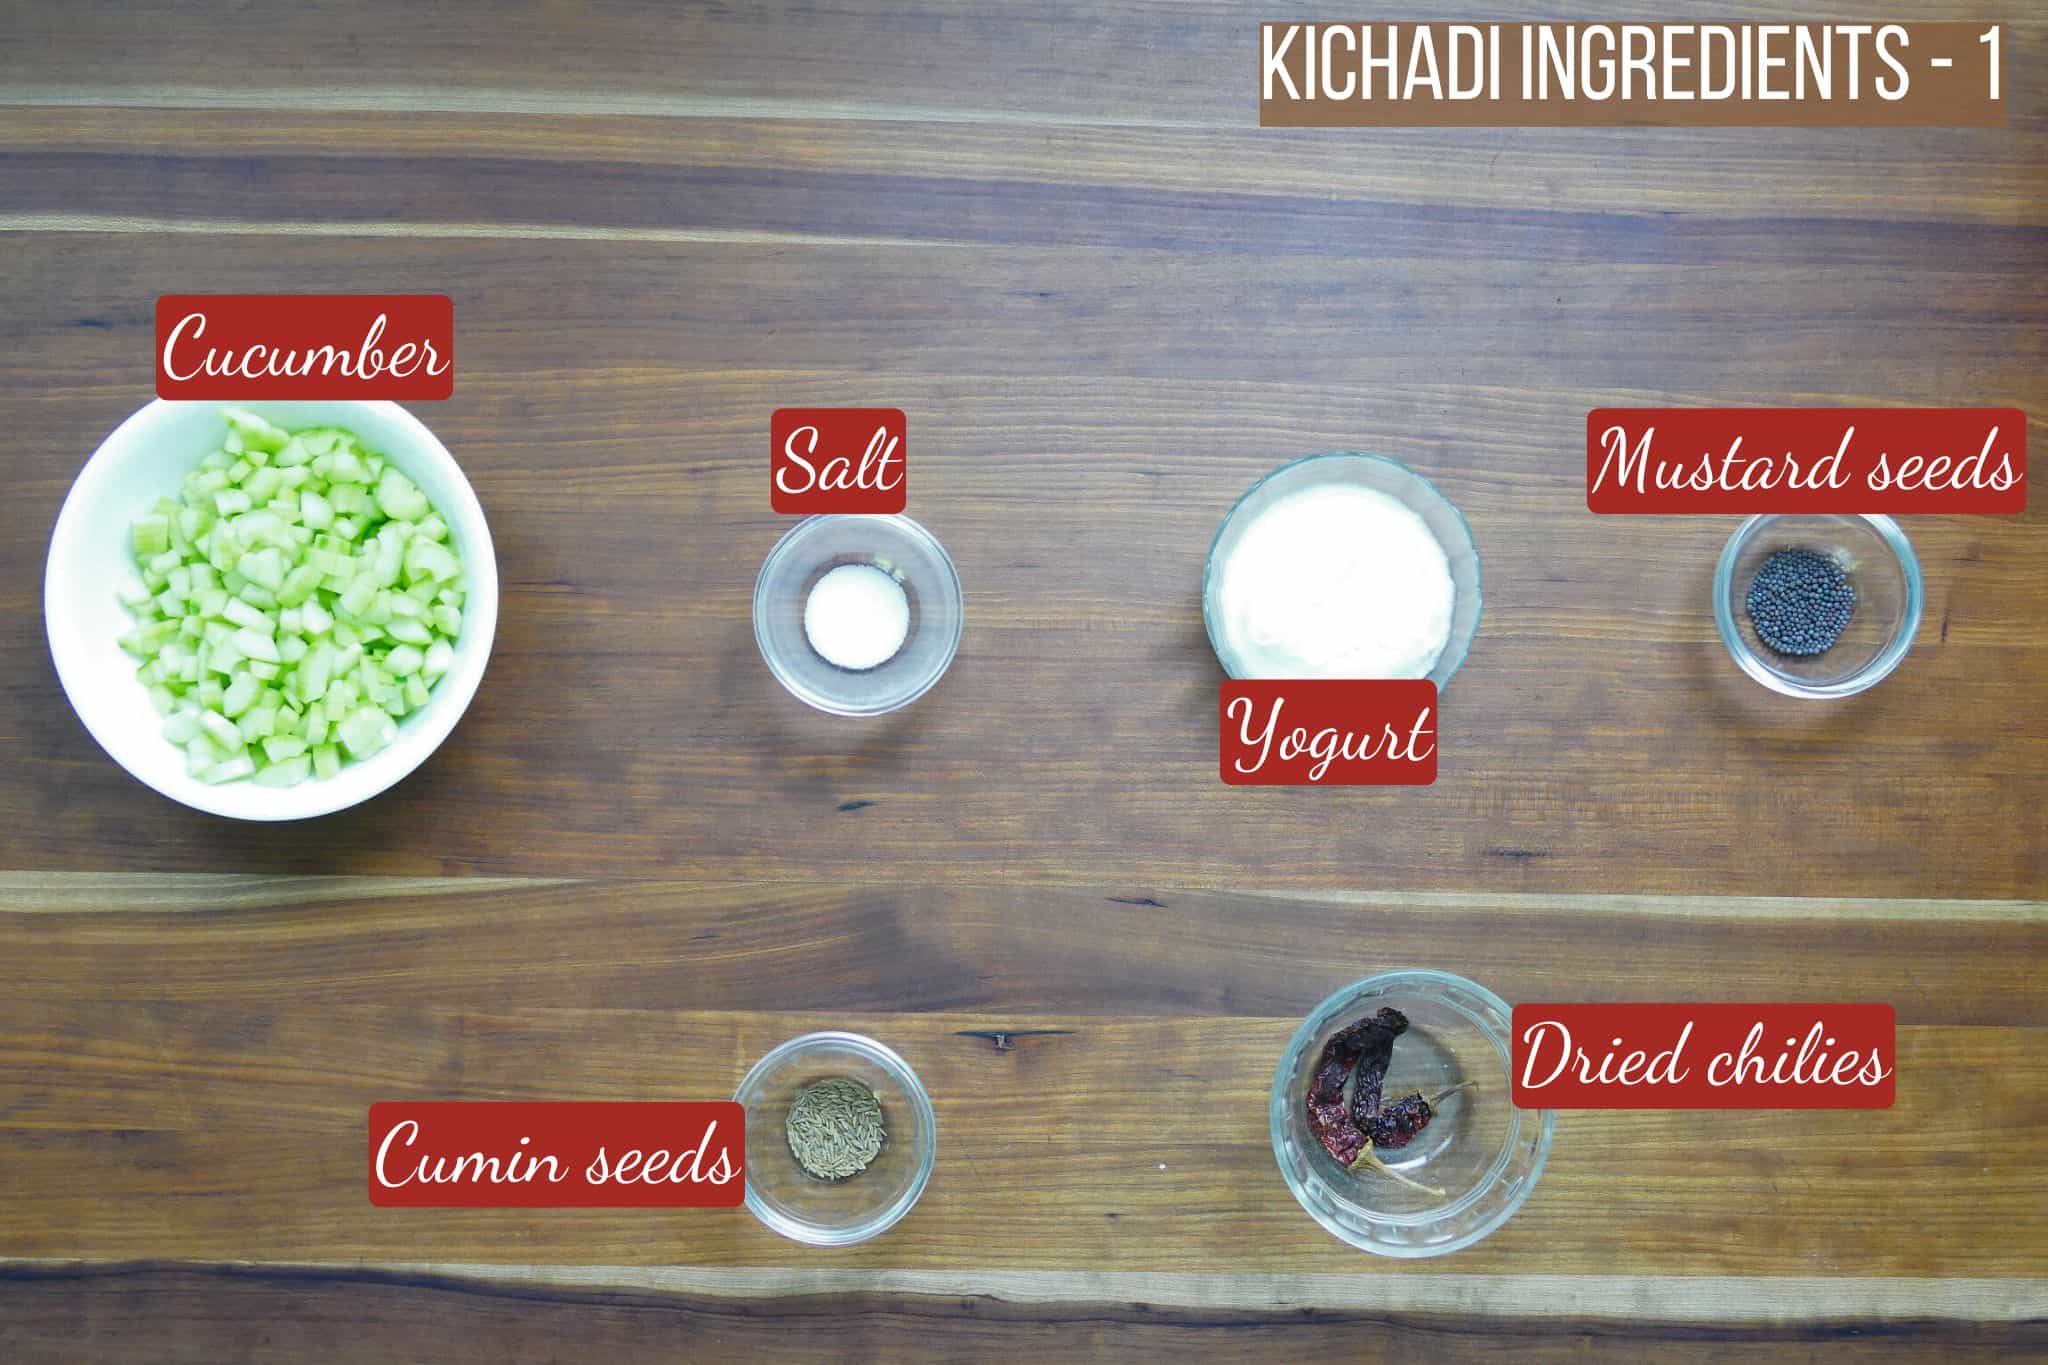
🧂 Ingredients for Cucumber Pachadi (Kichadi)

💡 Ingredient and Recipe Tips
🥥 Fresh Coconut: Use fresh or frozen coconut for the authentic flavor and texture. Desiccated coconut doesn’t work as well, but if that’s all you have, soak unsweetened dried coconut in enough hot water to cover it for 15-20 minutes (or longer) before using. The ground coconut needs to be smooth but still grainy, like pesto.
🌶️ Dried Chillies: I use Kashmiri dried chillies. Adjust the quantity according to your heat tolerance. I sometimes omit the dried chillies and just use green chillies, depending on my audience.
᠅ Mustard Seeds: For the ground mustard seeds, use a mortar and pestle or a spice grinder. I have a separate coffee grinder for spices.
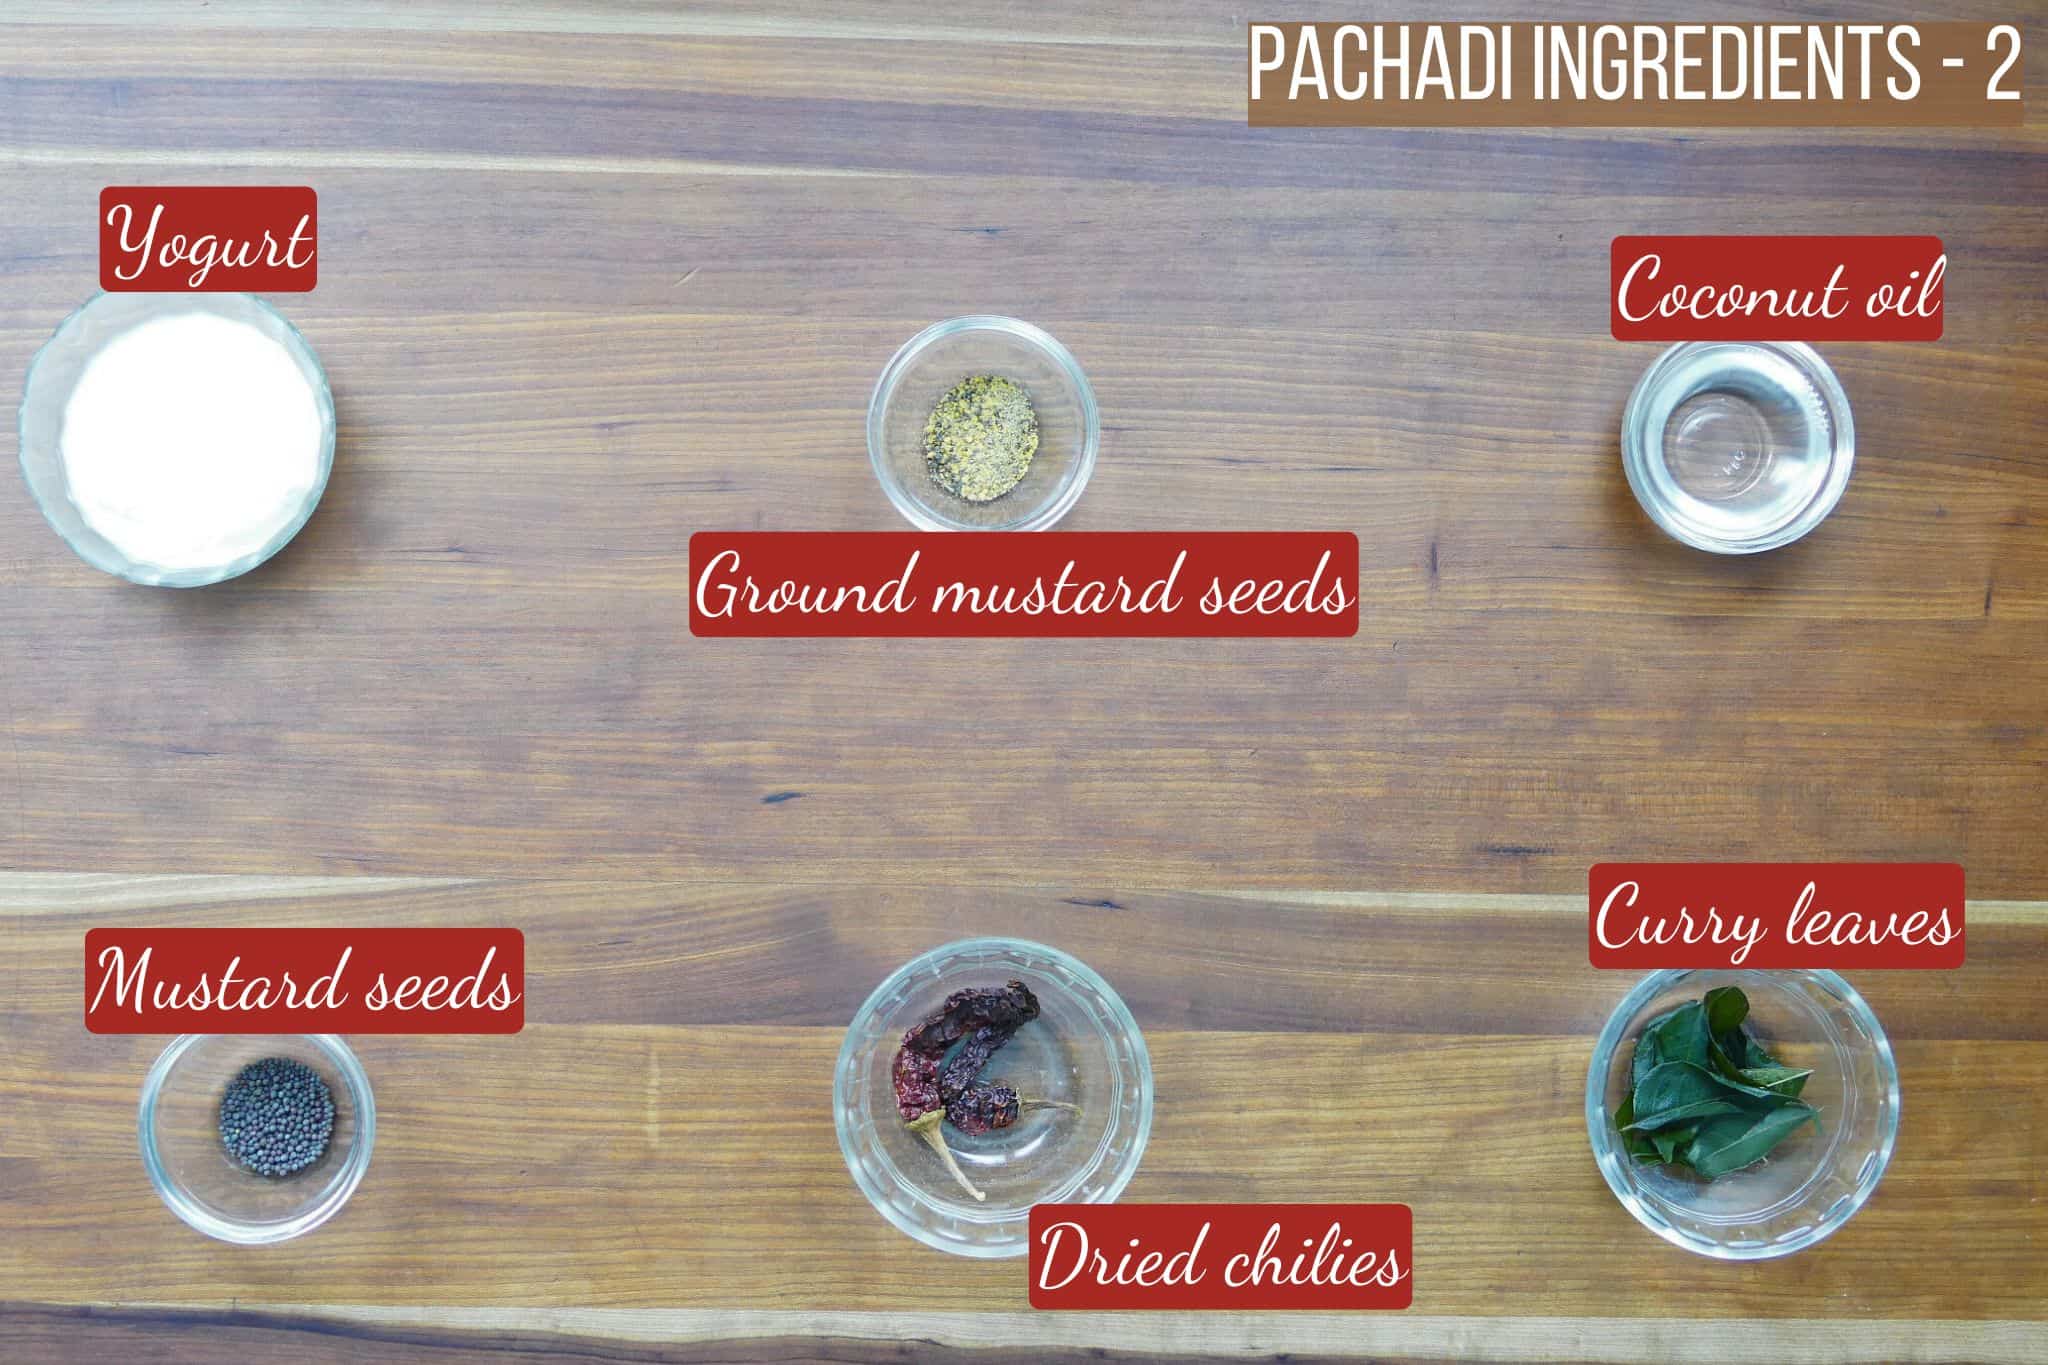
🌿 Curry Leaves: If you’re serious about cooking Kerala recipes, you need to get curry leaves, which are usually available in the refrigerated section of Indian grocery stores. They have an authentic flavor that just cannot be replicated. Many people grow their own curry plant for an endless supply of curry leaves!
🥛 Yogurt: Use thick, whole milk yogurt for the best creamy texture. Greek yogurt works well also, but you might need to thin it slightly with water.
❓ FAQS
This dish is served at room temperature, so you can make it a few hours ahead and let the flavors develop.
Although it tastes best the same day, you can refrigerate the kichadi for up to 3 days.
Yes, you can use okra (vendakka) or eggplant (vazhuthananga), but you’ll need to saute them first. Beetroot pachadi has a beautiful pink color. The beets should be cooked first.
🥭 How to Make Cucumber Pachadi
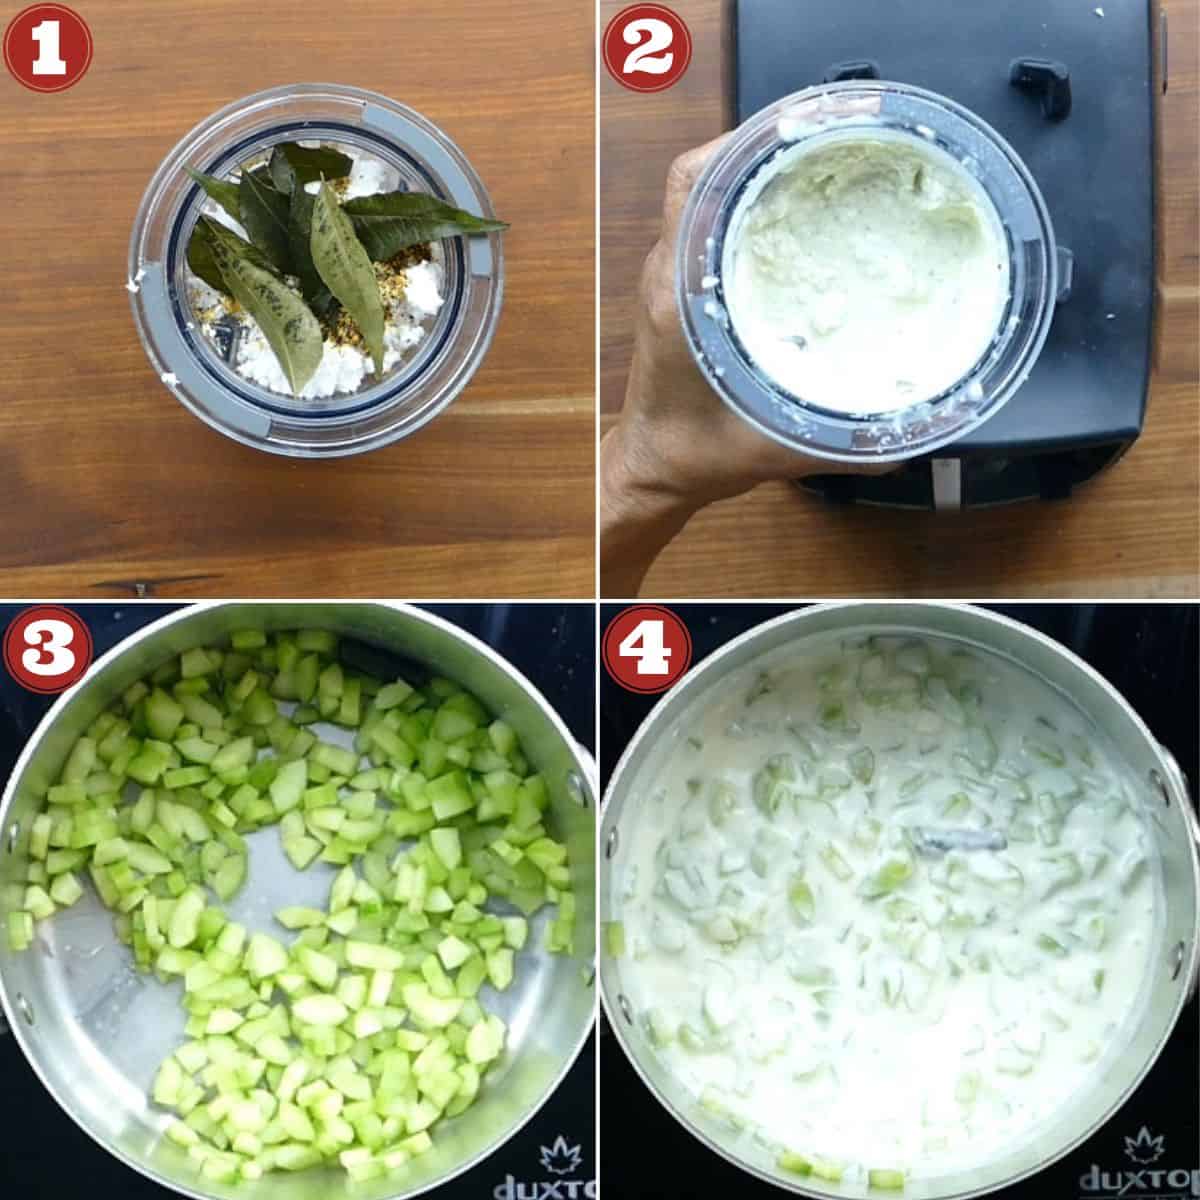
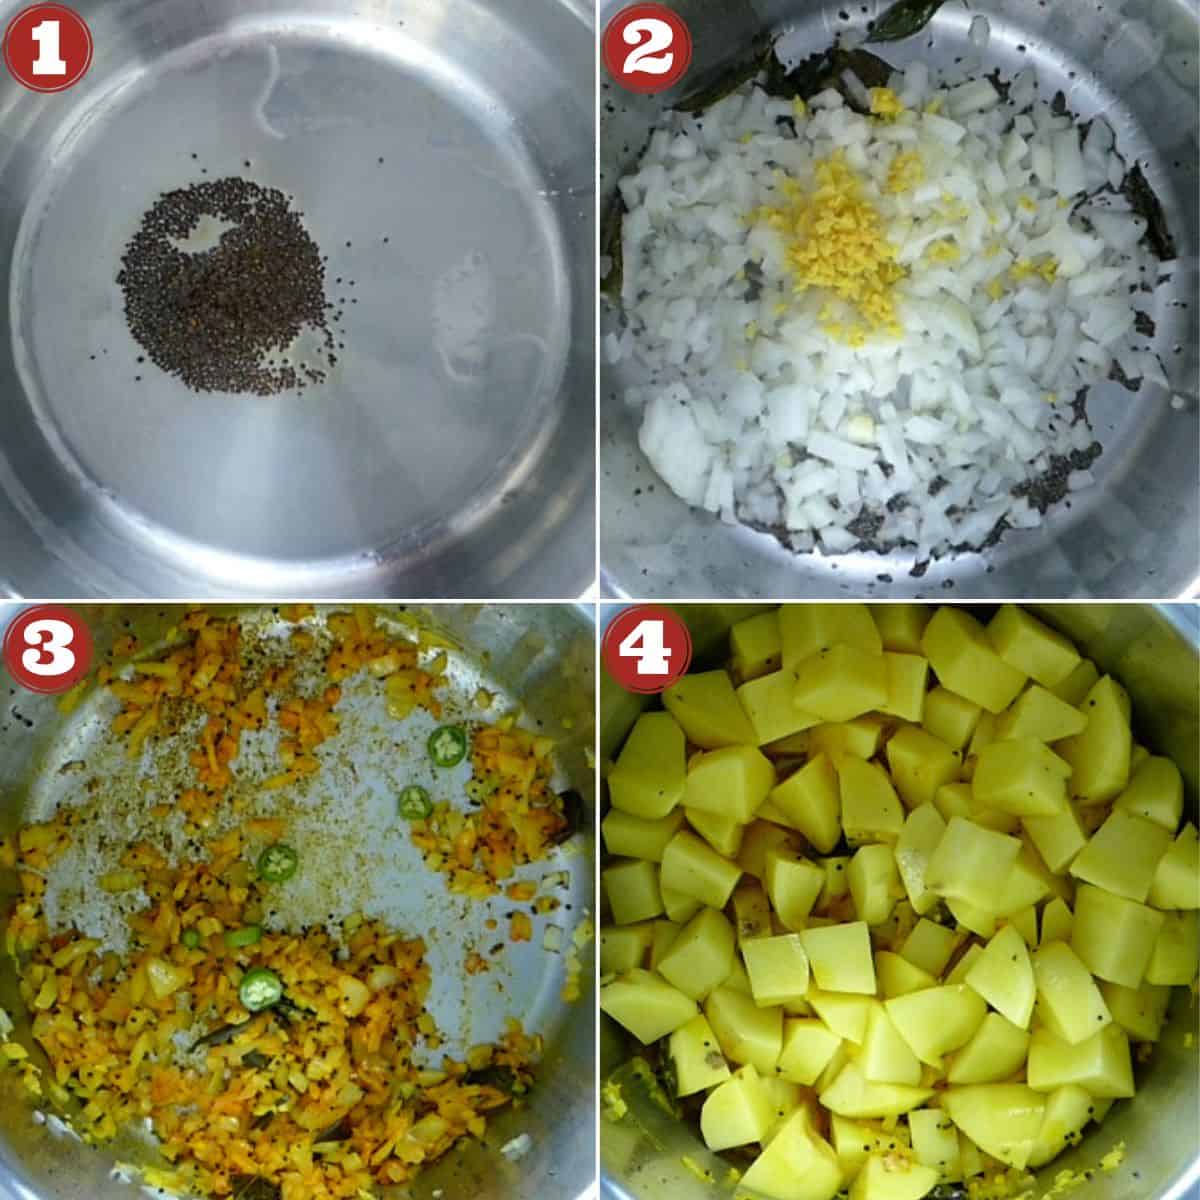
- In a blender, combine grated coconut, crushed mustard seeds, half the quantity of curry leaves, and green chillies with enough water to make a thick paste (about 3 to 4 tablespoons).
- Blend to a smooth paste that’s slightly grainy, about the consistency of pesto. Set aside.
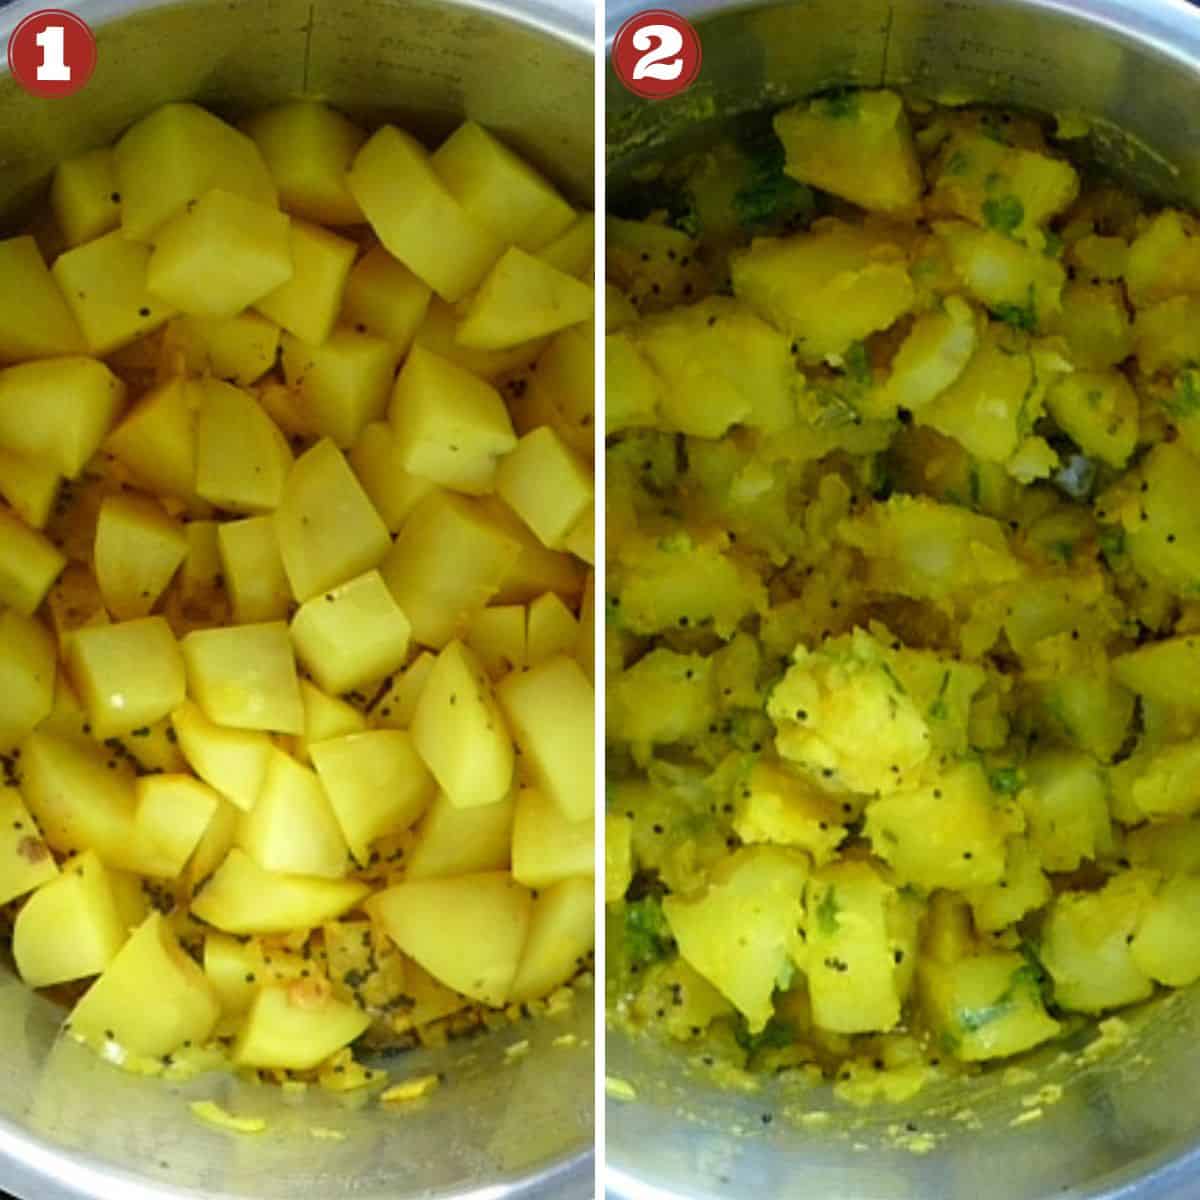
- In a medium saucepan, bring cucumber, salt, and water to a boil. Reduce the heat and simmer until the cucumber is cooked but not mushy (about 6 to 8 minutes).
- Add the coconut mixture and heat through, stirring gently. Turn off the heat, add the yogurt and mix thoroughly.

- In a small saucepan or frying pan, heat the coconut oil. Add the whole mustard seeds and cover. When they finish popping, add cumin, whole Kashmiri chillies (if using), and curry leaves.
- Pour the hot oil and aromatics into the cucumber mixture and stir gently to mix thoroughly. Taste and adjust flavors as needed.
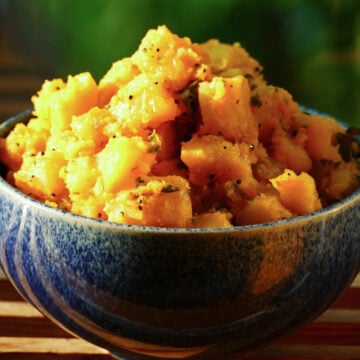
🥗 Okra Pachadi (Vendakka) Variation
This same recipe works really well with okra! Follow the same method, substituting 1 lb (½ kg) of fresh okra.
- Trim the okra and slice it into ⅛ inch rounds.
- Deep fry the okra until crisp OR
- Air fry the okra until crisp at 370 degrees F (188 degrees C) for about 20 to 25 minutes. Coat the okra with oil before air frying, and toss every 5 minutes while cooking.
- Sprinkle with salt and set aside.
- Add the okra to the coconut and yogurt mixture right before serving, to prevent sogginess.
🍆 Eggplant Pachadi (Vazhuthananga) Variation
To make eggplant pachadi, follow the same method, substituting ½ lb (¼ kg) of Japanese eggplant.
- Cut the eggplant into ¼ inch slices.
- Sauté the eggplant slices in batches in a nonstick frying pan until browned on both sides OR
- Air fry the eggplant until crisp at 370 degrees F (188 degrees C) for about 20 minutes. Coat the eggplant with oil before air frying.
- Drain the eggplant slices on a paper towel.
- Once the eggplant has been cooked, cut it into ¼ inch strips.
- Sprinkle with salt and set aside.
- Add the eggplant to the coconut and yogurt mixture right at the end.
See the recipe card below for detailed instructions.

Traditional Kerala Cucumber Pachadi Recipe | Cucumber Kichadi
Ingredients
- ¾ cup grated coconut [See Note 1]
- 1 green chilli
- ½ teaspoon black mustard seeds crushed
- 6 curry leaves
- 3 to 4 tablespoon water
- 2 cups English cucumber about 1 large [See Note 2]
- ¾ teaspoon salt or to taste
- 3 to 4 tablespoon water
- 1 cup yogurt preferably whole milk
For Tempering
- 1 T coconut oil
- ½ teaspoon black mustard seeds
- 6 curry leaves
- 2 whole Kashmiri chilies optional
- ½ teaspoon cumin seeds
Instructions
- Blend the ¾ cup grated coconut, 1 green chilli, crushed ½ teaspoon black mustard seeds, 6 curry leaves, and 3 to 4 tablespoon water in a blender or food processor until it's the consistency of smooth pesto. Set aside. Don't add too much water, or the coconut will not blend properly.
- In a medium saucepan, mix the 2 cups English cucumber, ¾ teaspoon salt, and 3 to 4 tablespoon water. Bring to a boil, reduce the heat and simmer over medium-low heat until the cucumber is cooked but not mushy, about 6 to 8 minutes.
- Stir in the reserved coconut mixture. Mix gently and cook until warmed through. Turn off the heat. Beat the 1 cup yogurt with a whisk and gently stir in.
Tempering
- Heat 1 T coconut oil in a frying pan and add ½ teaspoon black mustard seeds and cover. Once the mustard seeds have stopped popping, add 6 curry leaves, 2 whole Kashmiri chilies (if using), and ½ teaspoon cumin seeds. Pour the mixture over the cucumber curry and stir carefully.
Video
Notes
Nutrition
I am not a certified nutritionist. I provide my best estimate of nutritional information merely as a courtesy to my readers. If you depend on nutritional information for dietary or health reasons, I suggest using your favorite online nutrition calculator to confirm the nutritional value of this recipe based on the actual ingredients that you use.
Did you know that the best way to support your favorite bloggers is to comment and rate recipes, and share on social media? If you loved this recipe, please comment and give it a five ⭐ rating in the comment section below. If you’re a pinner, pin this post using the Pin buttons at the top and bottom of this post and in the recipe card above. Thank you for your support!