
The Instant Pot Food Burn message can be scary the first time you encounter it! The good news is that it’s a fairly common error, especially with new users. Find out why your Instant Pot says burn, what to do when you see the dreaded burn message, and how to avoid it in the future.
This post contains affiliate links. As an Amazon Associate, I earn from qualifying purchases. Please read the disclosure.
➡ Learn more about other Instant Pot error codes and how to solve them!
What does Food Burn Message Mean on my Instant Pot?
I’ve had my share of burn messages over the many years I’ve been using the Instant Pot. I rarely get them now, but they do happen occasionally!
The Instant Pot has over a dozen safety mechanisms and one of them is the burn-protection sensor that monitors the temperature.
You may see a burn notice when the Instant Pot has detected that the temperature inside the pot has gotten too hot.
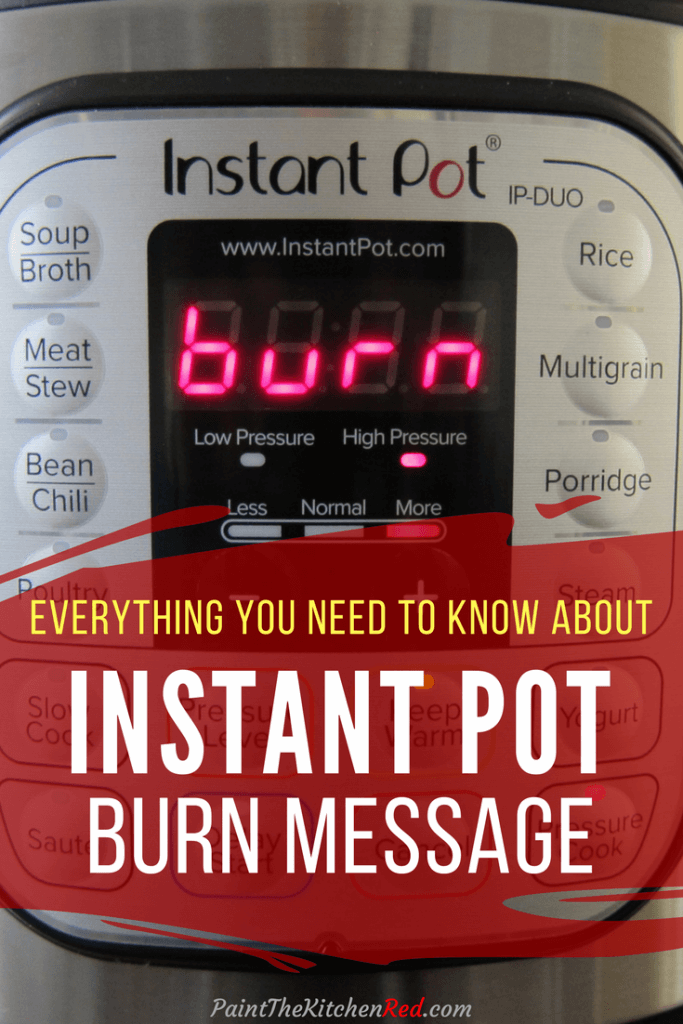
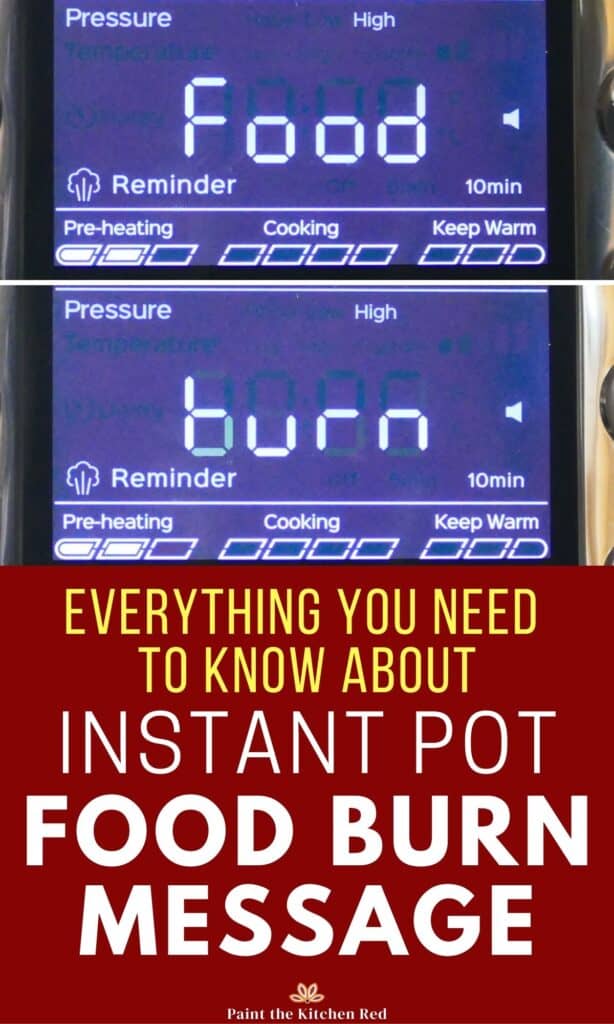
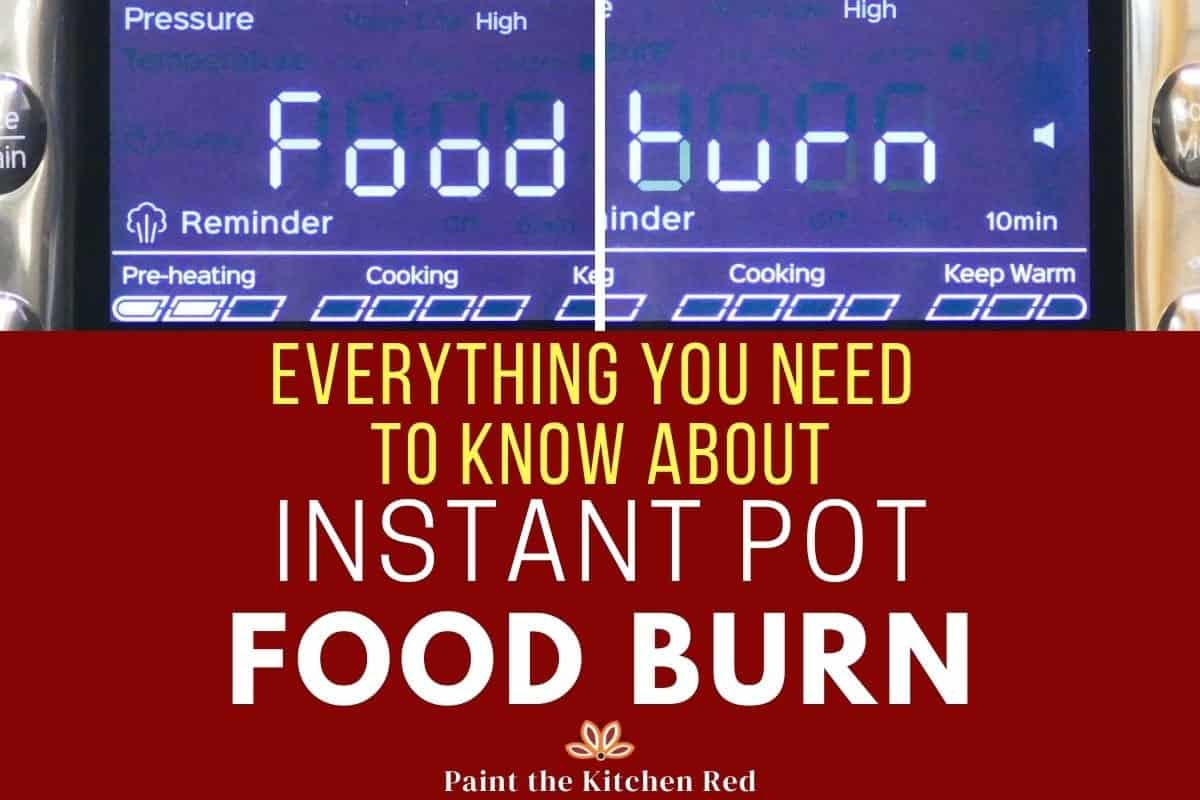
When you get the burn notice, the Instant Pot will not reach pressure i.e. the float valve will be in the down position. All the buttons will light up, there’ll be multiple beeps and the display will alternate between the words burn and food.
Although it might seem scary, this is a good thing. The Instant Pot burn notice is protecting you and your food. It stops cooking so you can fix the problem and continue!
Learn more about your Instant Pot…
- Natural or Quick Release: What is Instant Pot natural release vs quick release and when should you use them?
- Instant Pot Tips and FAQs: What are Instant Pot frequently asked questions?
- Instant Pot Not Sealing: Why is your Instant Pot not sealing and what can you do to fix it?
- Common Instant Pot Problems: This Instant Pot troubleshooting guide explains common problems and errors and how to solve them.
- Sous Vide Button: How to use sous vide Instant Pot function for perfectly cooked foods.
Why Does the Instant Pot Say Burn?
Let’s troubleshoot this Instant Pot message by going over the most common problems and how to solve them.
1. The sealing ring isn’t put in correctly
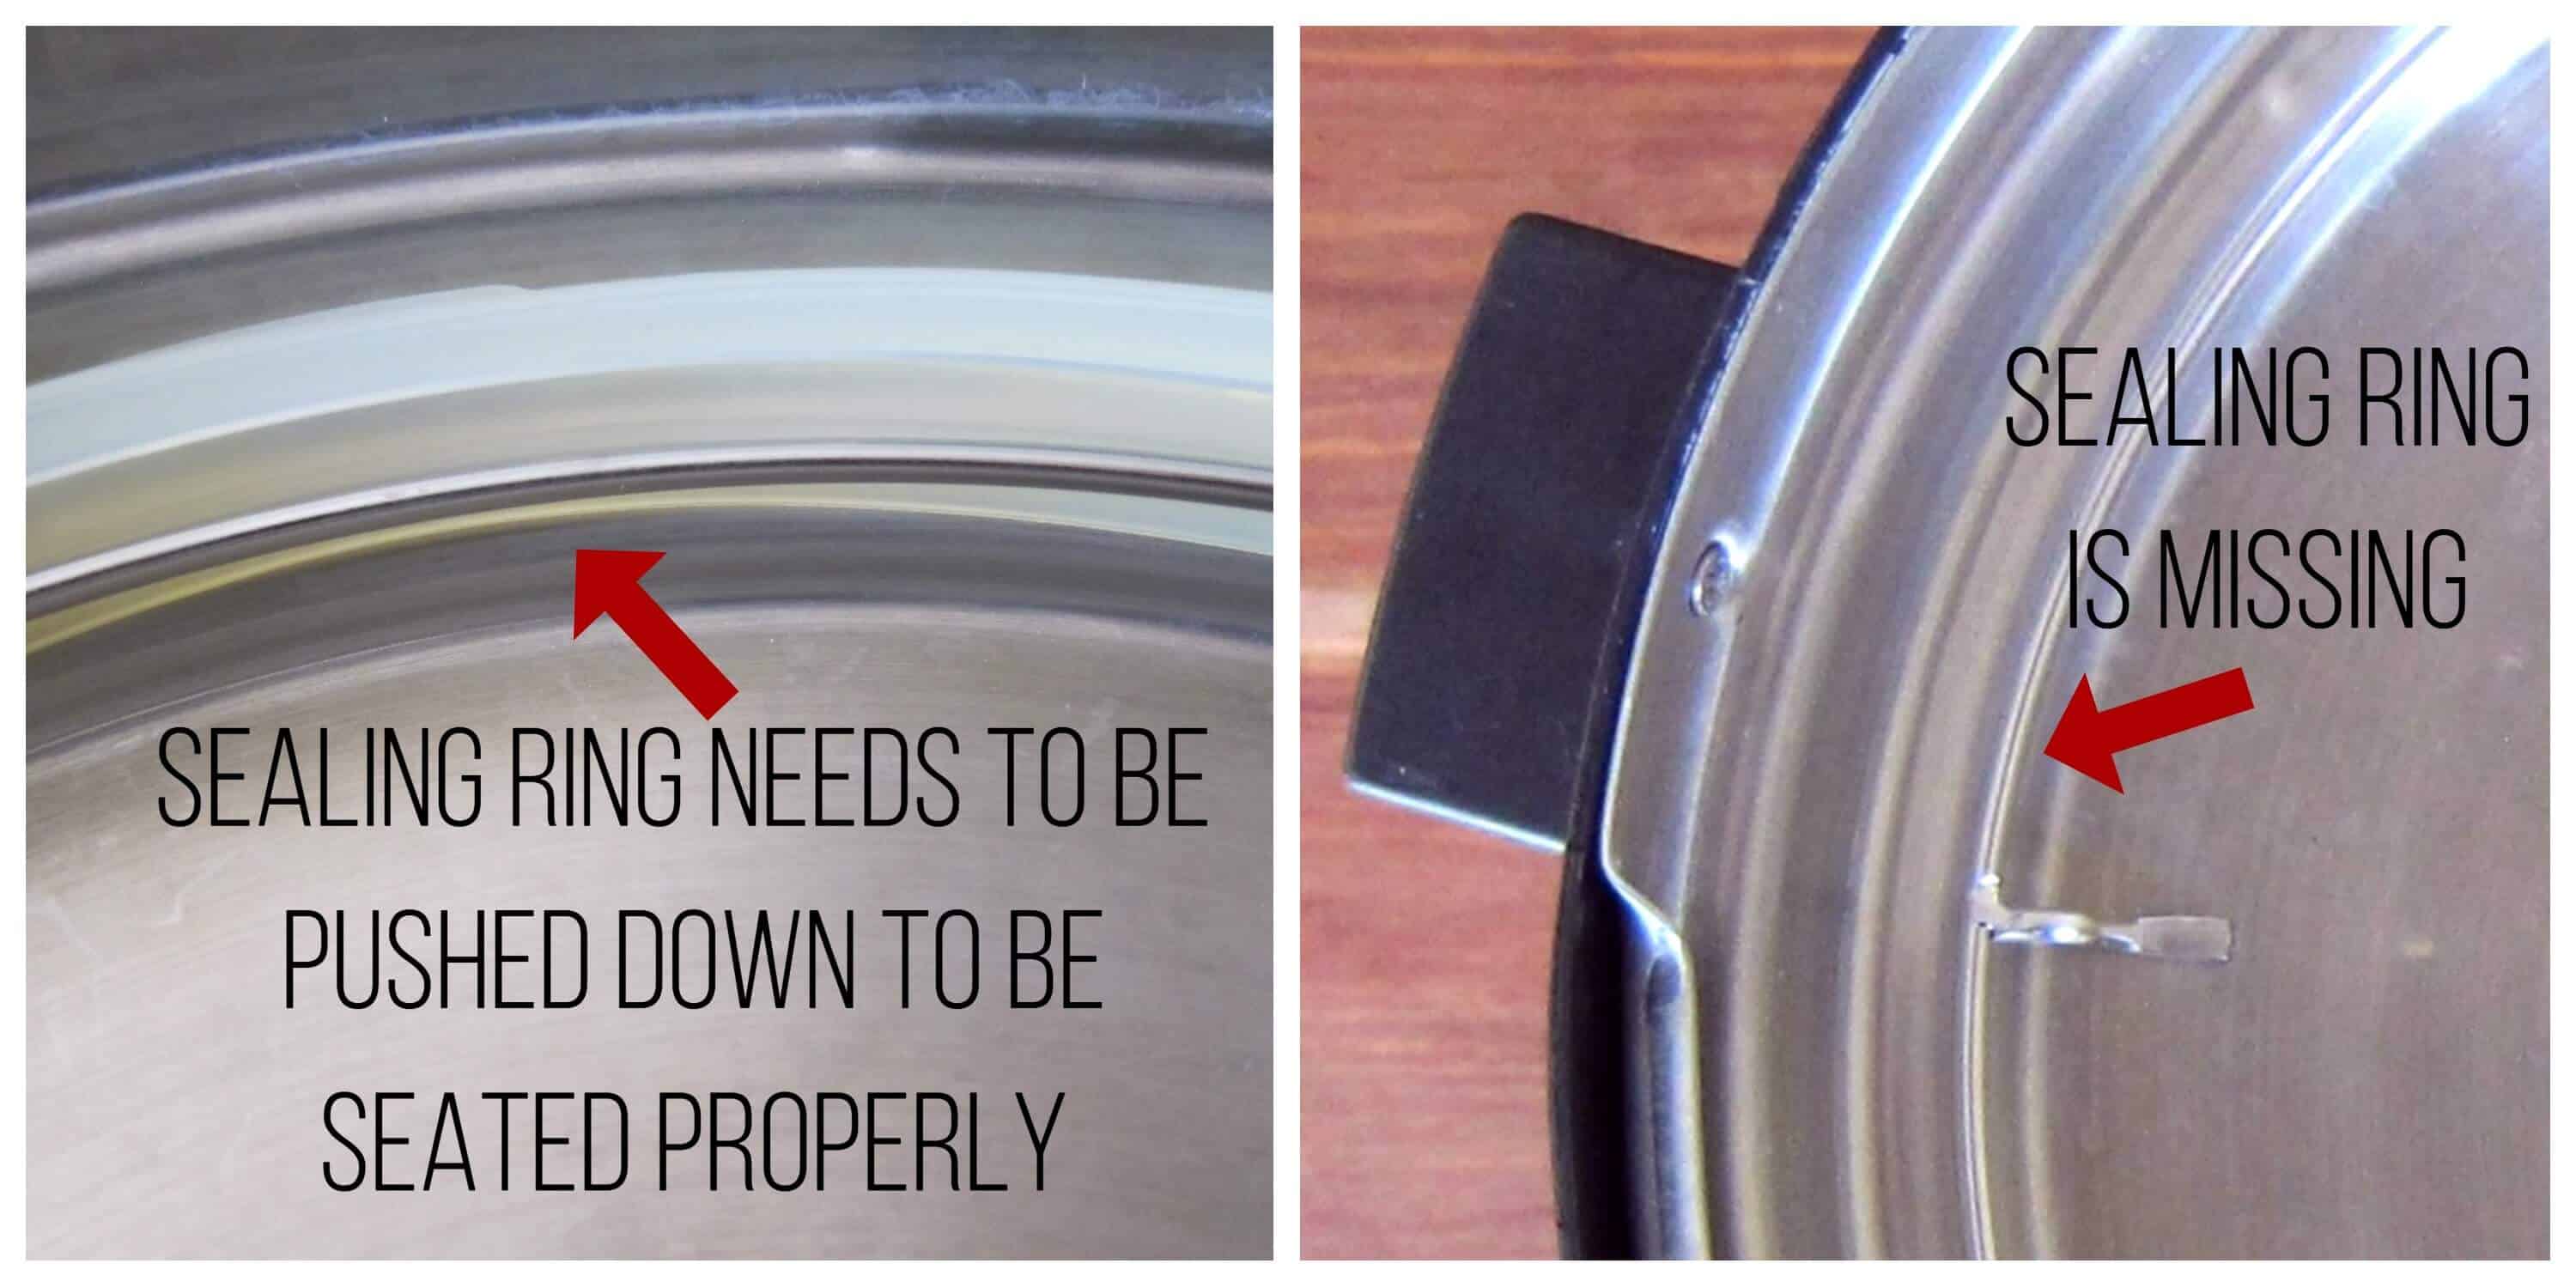
If your sealing ring is not installed properly or if it’s missing when you use your Instant Pot, your pressure cooker will leak steam, and that will cause the food at the bottom to scorch and your Instant Pot display will say burn.
💡 Solution: Make sure the sealing ring is in place and pushed in all the way every time you use your Instant Pot.
2. Steam release valve is in the venting position
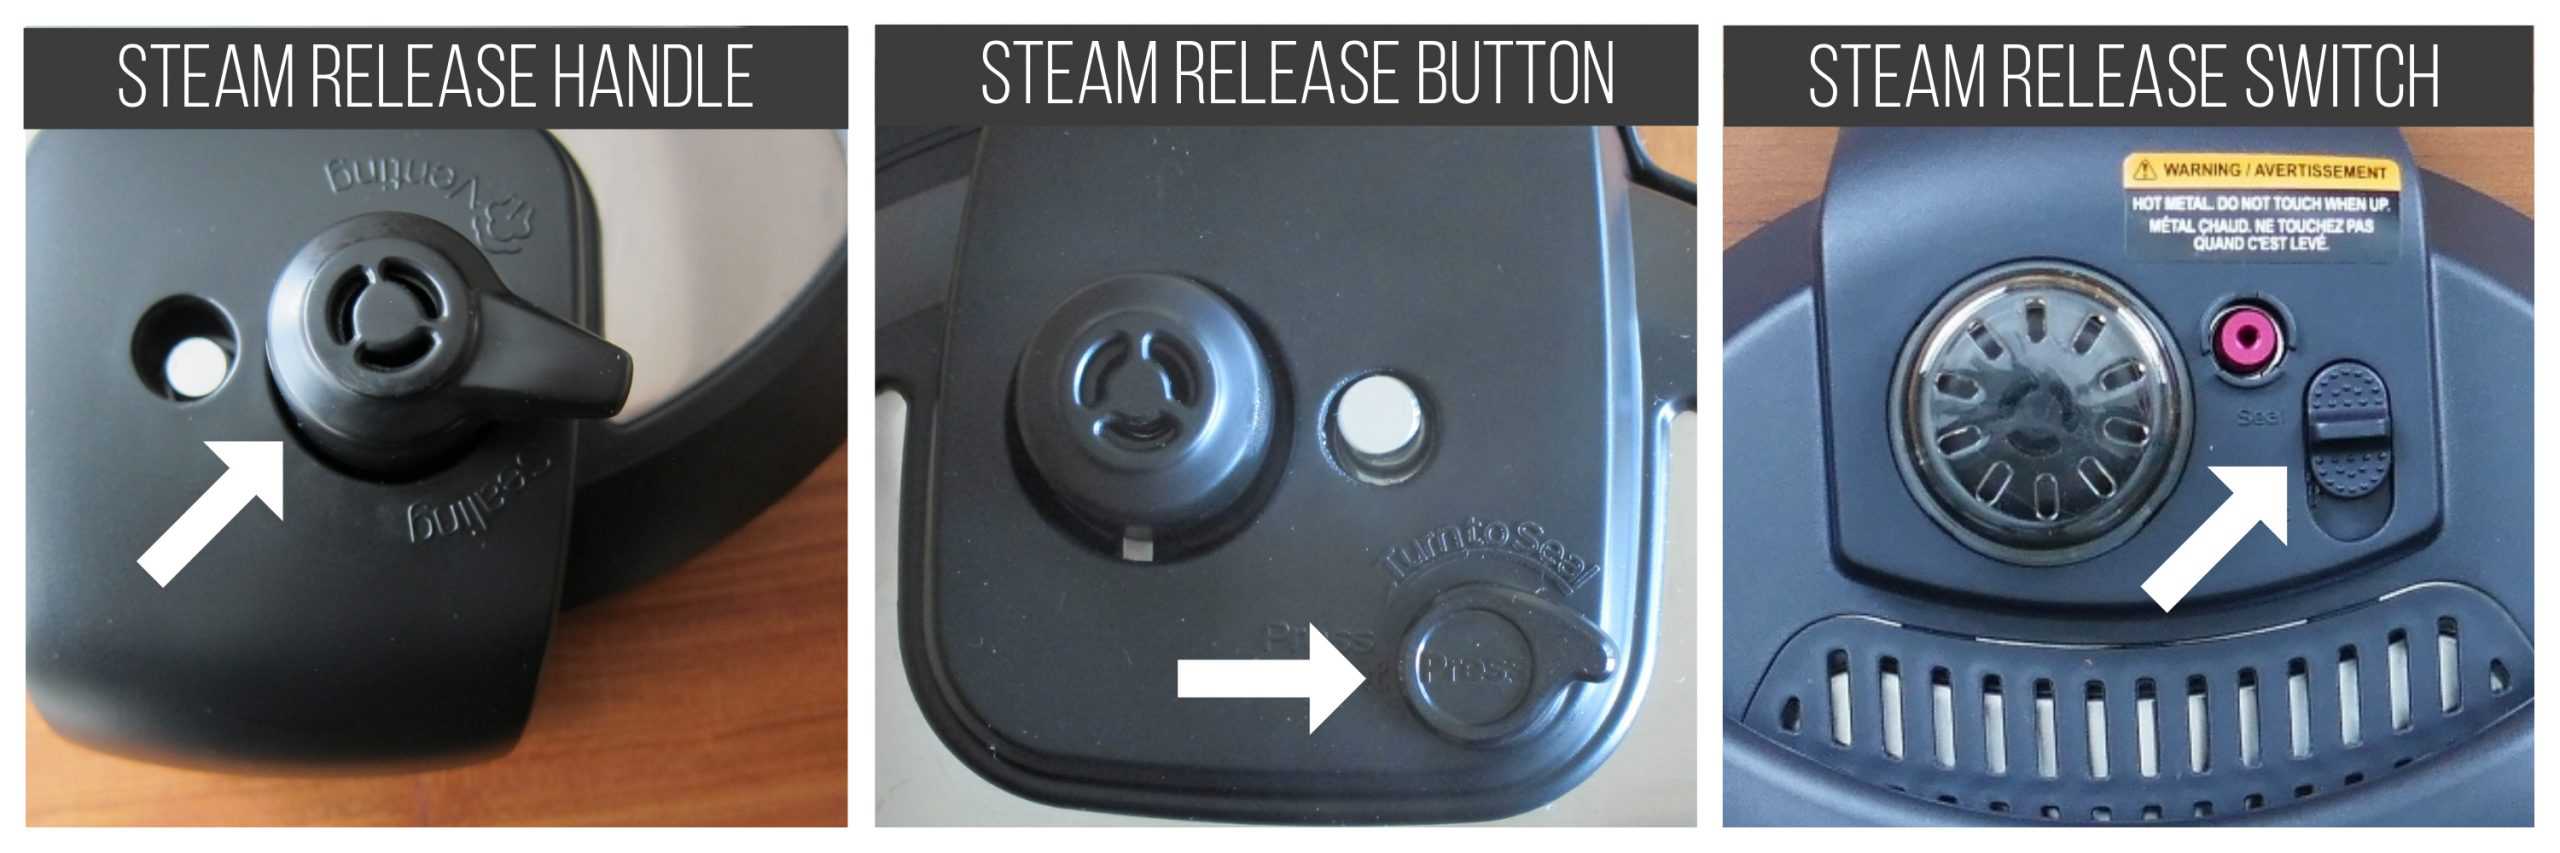
The different Instant Pot models have different mechanisms for steam release. If your steam release is in the Venting position, the pressure valve will leak steam, and that will cause the contents to burn.
💡 Solution: Make sure the steam release valve is in the sealing position before pressure cooking.
3. There isn’t enough liquid
Pressure cookers work by building pressure from steam inside the pot, which in turn cooks food at high temperatures. This steam cannot be created if there isn’t enough liquid in the pot and you can get a burn notice.
💡 Solution: Make sure you add enough thin liquid (water or broth). The minimum quantity of liquid depends on the size of Instant Pot:
- 3 quart: 1 cup
- 6 quart: 1 ½ cups
- 8 quart: 2 cups
- 10 quart: 2 ½ cups
Canned tomato products and thick sauces DO NOT count toward the minimum quantity of liquid because they are too dense.
When you’re adding liquid, make sure it gets underneath any food that’s already in the stainless steel liner. This prevents the food from scorching and helps create steam in the pot.
4. Food is stuck on the bottom of the inner pot during Saute mode
If you use the Saute function before you use the Pressure Cook function, food can caramelize and stick to the bottom of your pot.
When you begin pressure cooking, that food debris can get further scorched. This can block the heat sensor and you can get a burn warning.
💡 Solution: After you’re done sauteing, make sure you deglaze the pot. To deglaze the pot, add water or broth to the hot inner pot and scrape the bottom with a wooden spoon or silicone spatula.
The brown bits should get incorporated and the bottom should be clear of all stuck-on food. Try not to use the Saute function at a very high temperature.
5. Instant Pot Recipe contains dense or starchy ingredients
Recipes containing dense or starchy ingredients can be problematic.
Thick liquids such as tomato products (e.g. tomato paste, tomato sauce), prepared soup concentrates (e.g. cream of chicken), and thick sauces (e.g. alfredo sauce, mole sauce) can cause a burn error.
These ingredients are not thin enough to build steam and some contain fillers like cornstarch, flour, or cheese which tend to scorch.
Starches such as rice and pasta, and dairy products like cheese and heavy cream can also cause the Instant Pot to say food burn.
I frequently see complaints about chili recipes and pasta sauces causing the burn error. Take a look at this Instant Pot vegetarian pasta, and how I’ve layered the ingredients.
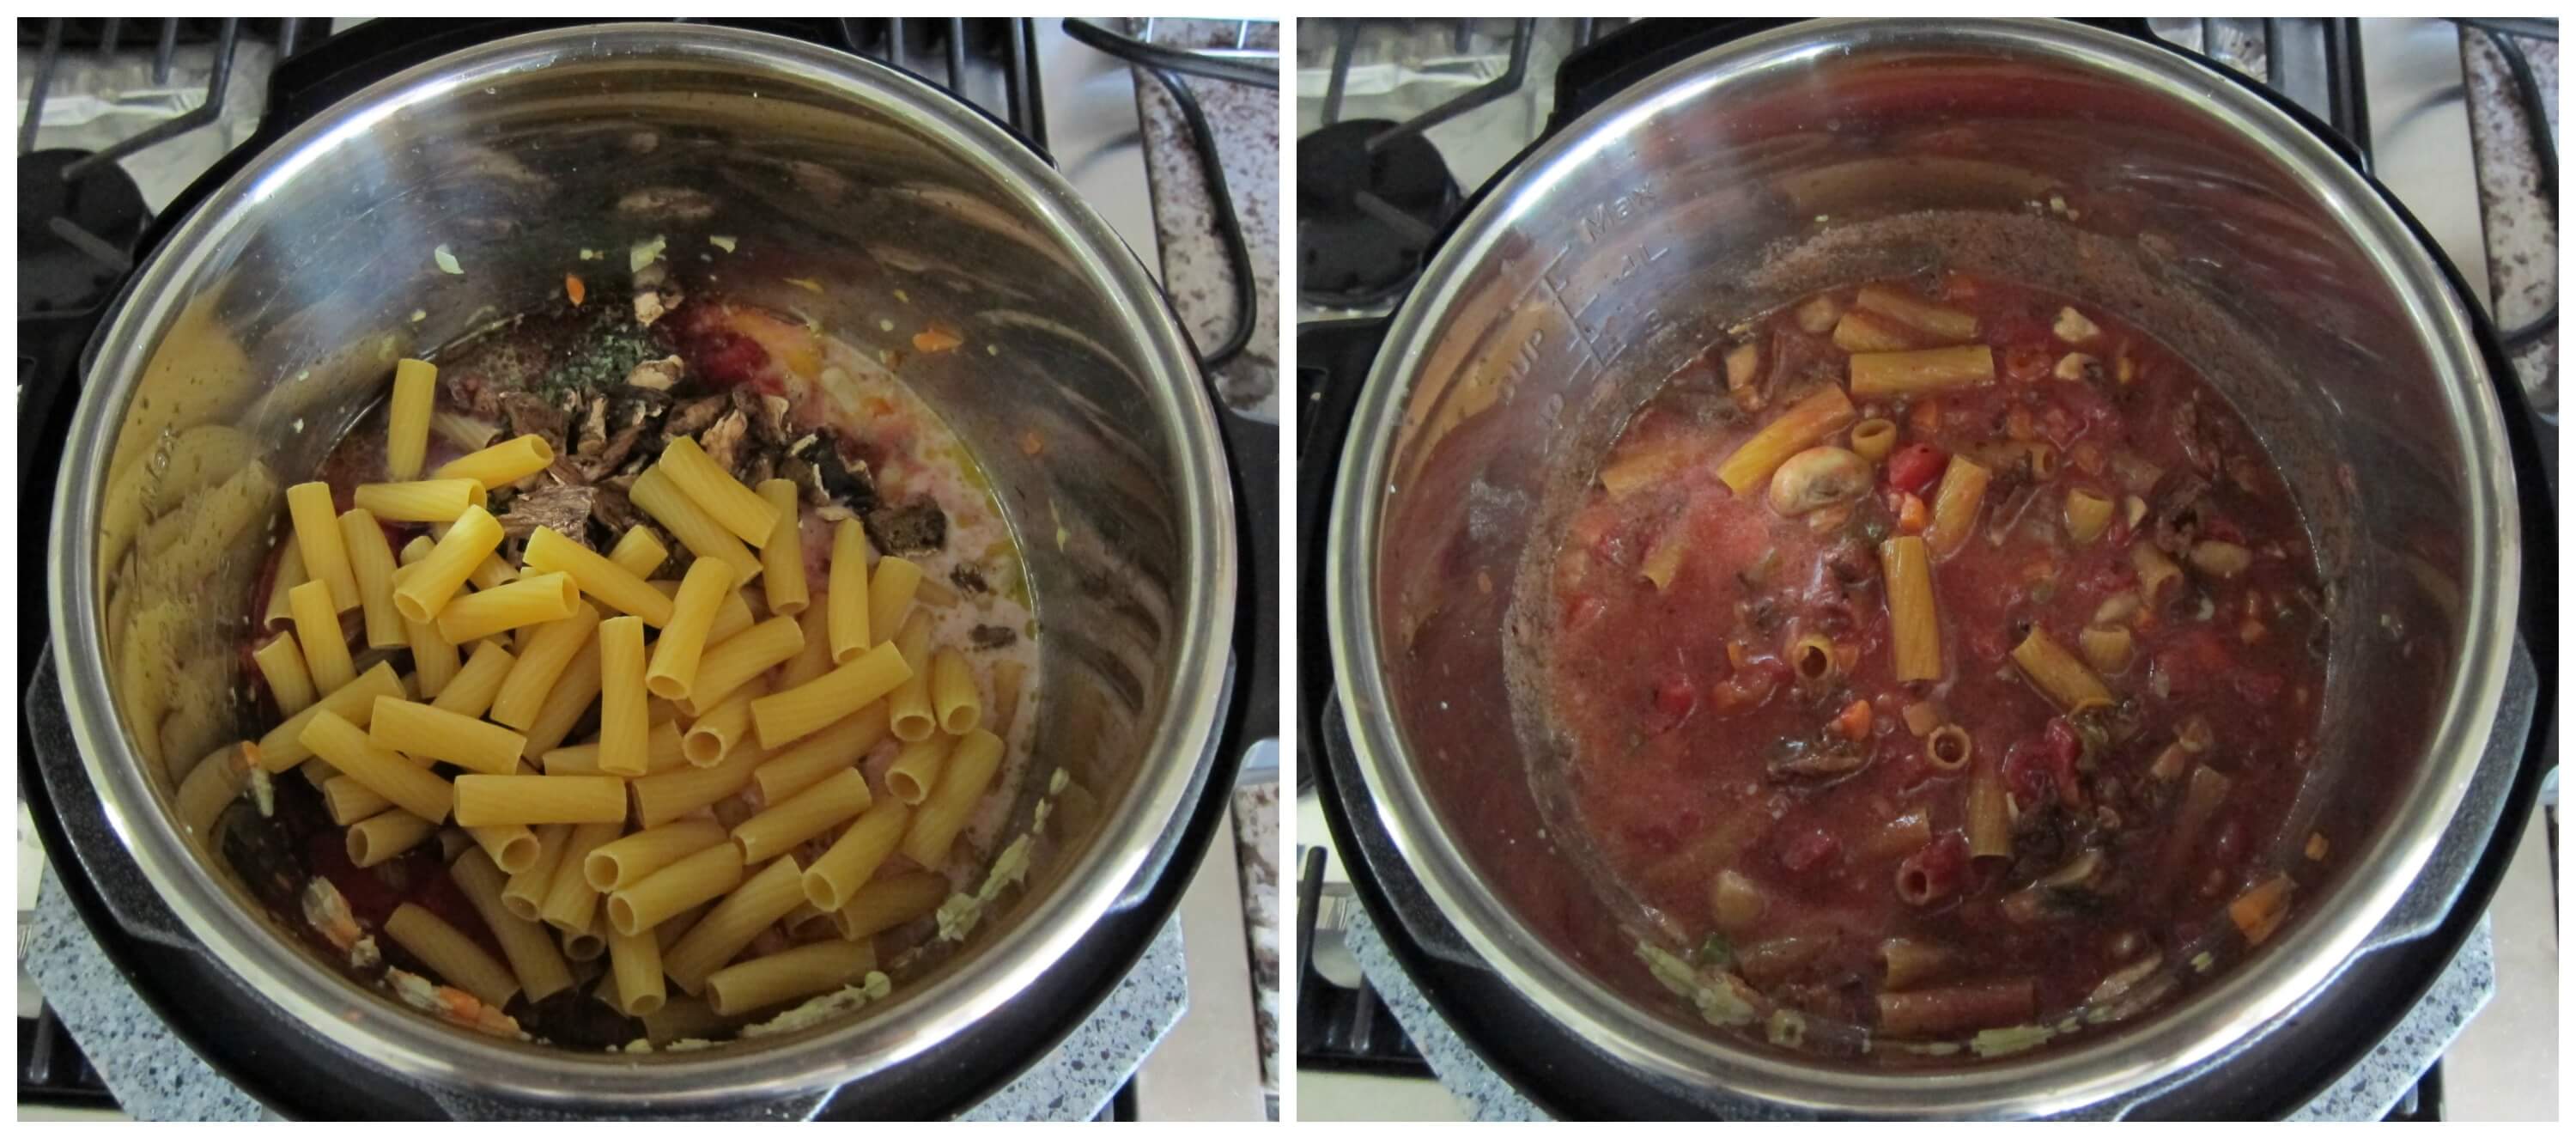
💡 Solution: To avoid the burn error when pressure cooking tricky ingredients, add ingredients in the following order in your Instant Pot recipes:
- First, add liquid such as water or broth.
- Next, add vegetables and meats.
- Next, add any pasta, rice, or other starchy ingredients, and push down gently with a large spatula so they’re covered by the liquid but DON’T stir!
- Finally, add any dense ingredients on top e.g. tomato sauce, tomato paste, and DON’T stir.
- Close the lid and pressure cook as directed.
6. Recipe contains starch
It’s common to use cornstarch and flour to thicken dishes such as soups. You can use these ingredients in the pressure cooker but you need to add them in after pressure cooking.
Stirring in and incorporating starchy ingredients like flour with all the other ingredients may give you a burn code.
💡 Solution: If the recipe calls for starches such as flour or cornstarch, add them in at the end, after pressure cooking. Heat through in Saute mode.
7. The recipe was tested with a different size of Instant Pot
If the recipe was written for the 6-quart, and you are using an 8-quart, it’s possible that there may not be enough liquid for the 8-quart to come to pressure.
💡 Solution: If you have an 8 quart Instant Pot and the quantity of liquid in the recipe is below the manufacturer-recommended quantity (see #3 above), either double the recipe or add an extra ½ to 1 cup of liquid. Keep the cooking time the same.
8. There’s a hot spot on the bottom of the pot
Some people notice that scorching happens at certain ‘hot spots’ on the bottom of the stainless steel liner. If you consistently notice food sticking to the bottom in one particular spot, you may have this issue.
💡 Solution: Although this is rare, if you encounter it, file a ticket with Instant Pot customer support.
What to do if you get the Instant Pot Burn message
If you’re getting the burn message, it’s usually possible to salvage your meal.
- The first thing to do is turn off the Instant Pot.
- Do a quick release of pressure if the float valve is up.
- Open the lid and take out the inner pot. The pot may be very hot, so use silicone gloves to remove it.
- Allow the Instant Pot unit to cool down for a bit.
- If there’s nothing stuck on the bottom of your pot, add more water or broth. Lift the food with a spatula to allow the liquid to reach the bottom of your inner pot.
- If there’s burnt food on the bottom of the pot:
- Transfer the contents to a large bowl, taking care to avoid the burnt parts.
- Scrape out the burned food from the pot and clean the inner pot so there’s nothing stuck on the bottom. The best way to clean out burnt food is to use very hot water and scrape out the burnt bits.
- Add water to the pot. Most likely, the original liquid may have fully or partially evaporated. Add enough liquid to replace the original liquid that evaporated, plus an additional ½ to 1 cup.
- Return the food to the pot.
- Resume pressure cooking the recipe. You might be able to reduce the original pressure cooking time since the food might have already been partially cooked.
- If there’s too much liquid left after pressure cooking has completed, reduce the liquid by cooking on Saute mode.
FOOD BURN MESSAGE FAQS
Many foods (e.g. vegetables, meats) release liquid and that counts toward the minimum liquid requirement. My Asian pulled pork recipe and chorizo and potato recipe are good examples. They have less than the minimum required liquid but come to pressure with no issue.
Sometimes my Instant Pot says food burn but the display changes to On. If this happens to you, you can just ignore the message and let it keep cooking. You’ll probably have some food stuck on the bottom, but you should be able to salvage most of it.
The fire symbol (a flame under a pot) is not the same as the burn error. It just means that the heating element is on and the Instant Pot is cooking.
Since the food burn notification is a safety feature, there is no way to override the error. You will need to open the lid, clean out the inner pot, add more liquid, and resume the pressure cooking process.
Bonus Tips to Avoid a Burn Message
1. Use pot in pot (PIP) cooking method
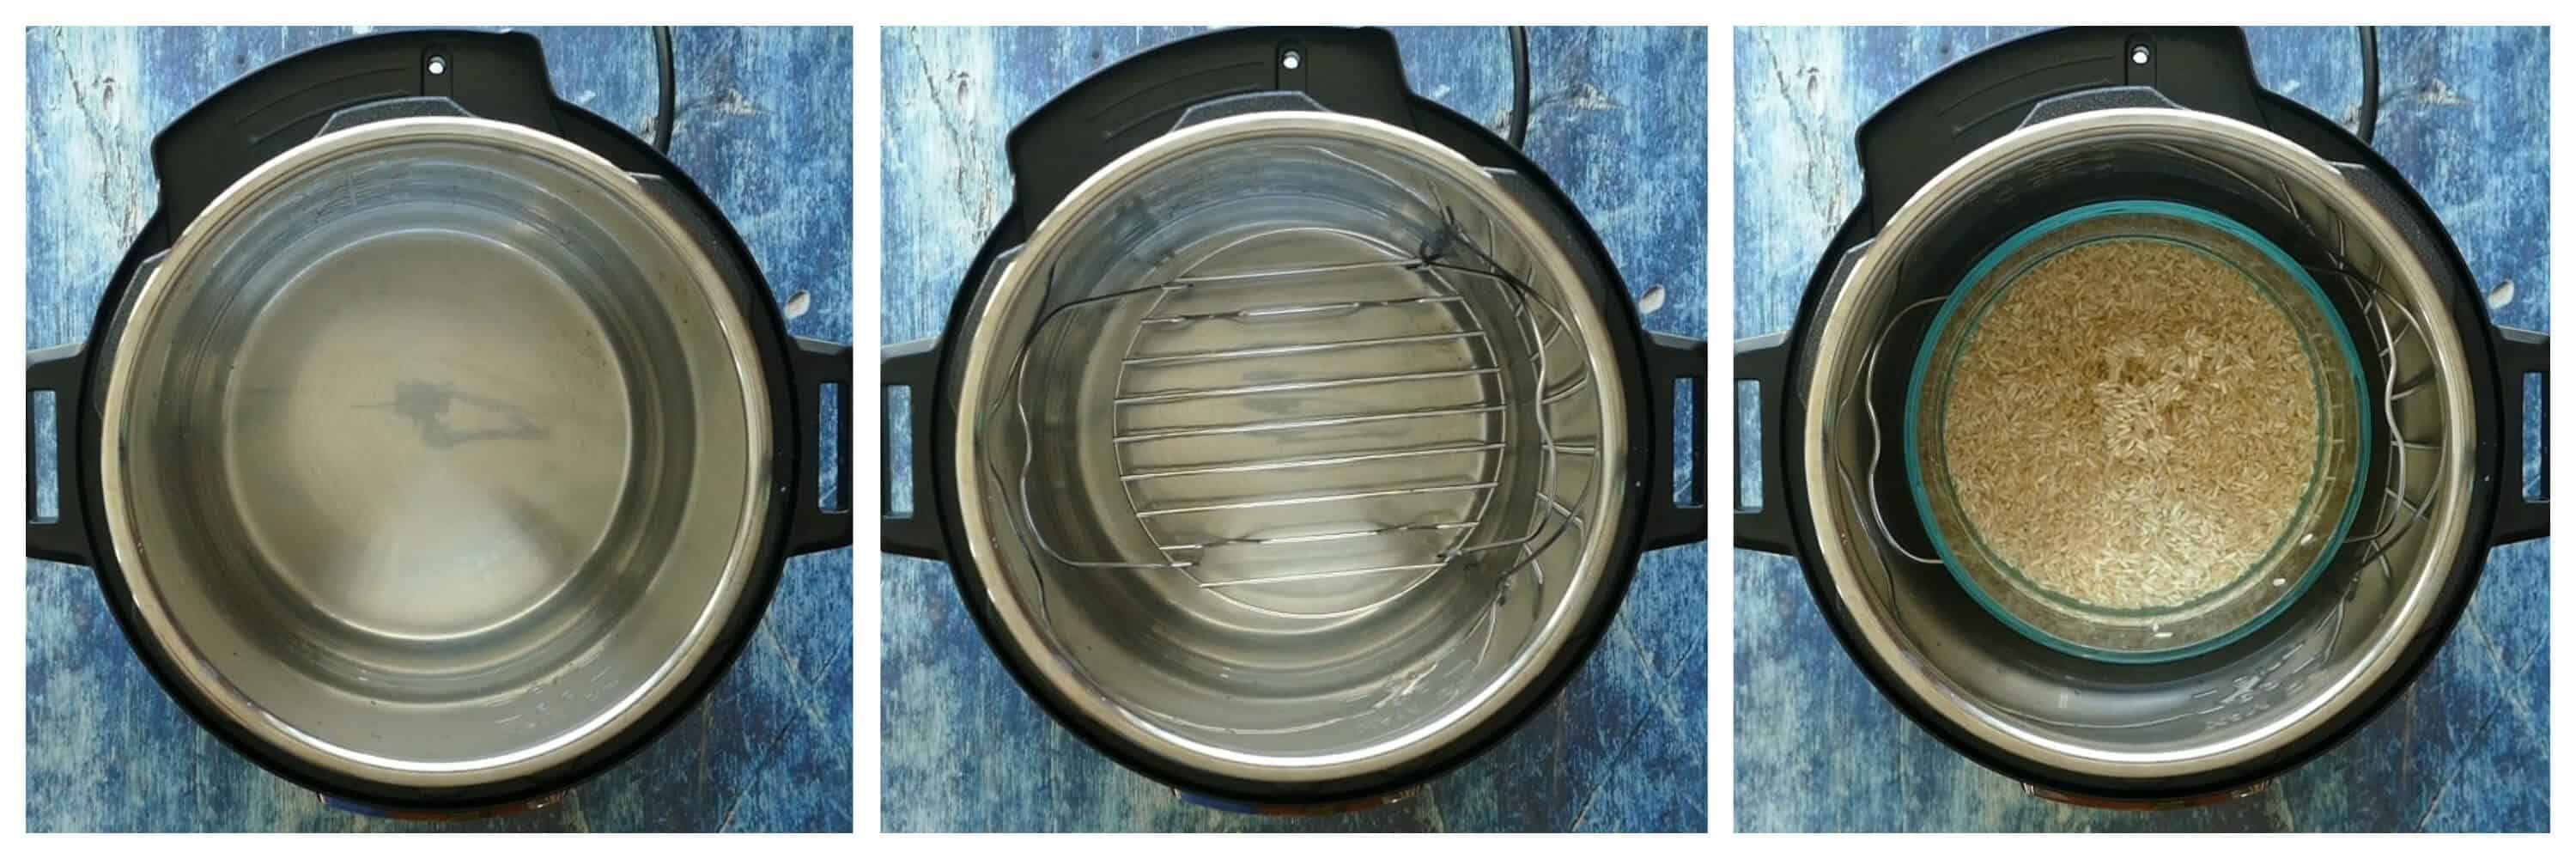
One way to avoid the burn notice in the future is to use the Pot-in-Pot (PIP) cooking method to cook dishes that have thick sauces, starchy foods, or minimal liquid.
You cook the food in a container that’s placed on a rack in some water. You don’t ever have to worry about this problem when you use the PIP technique.
2. Raise the food using a trivet
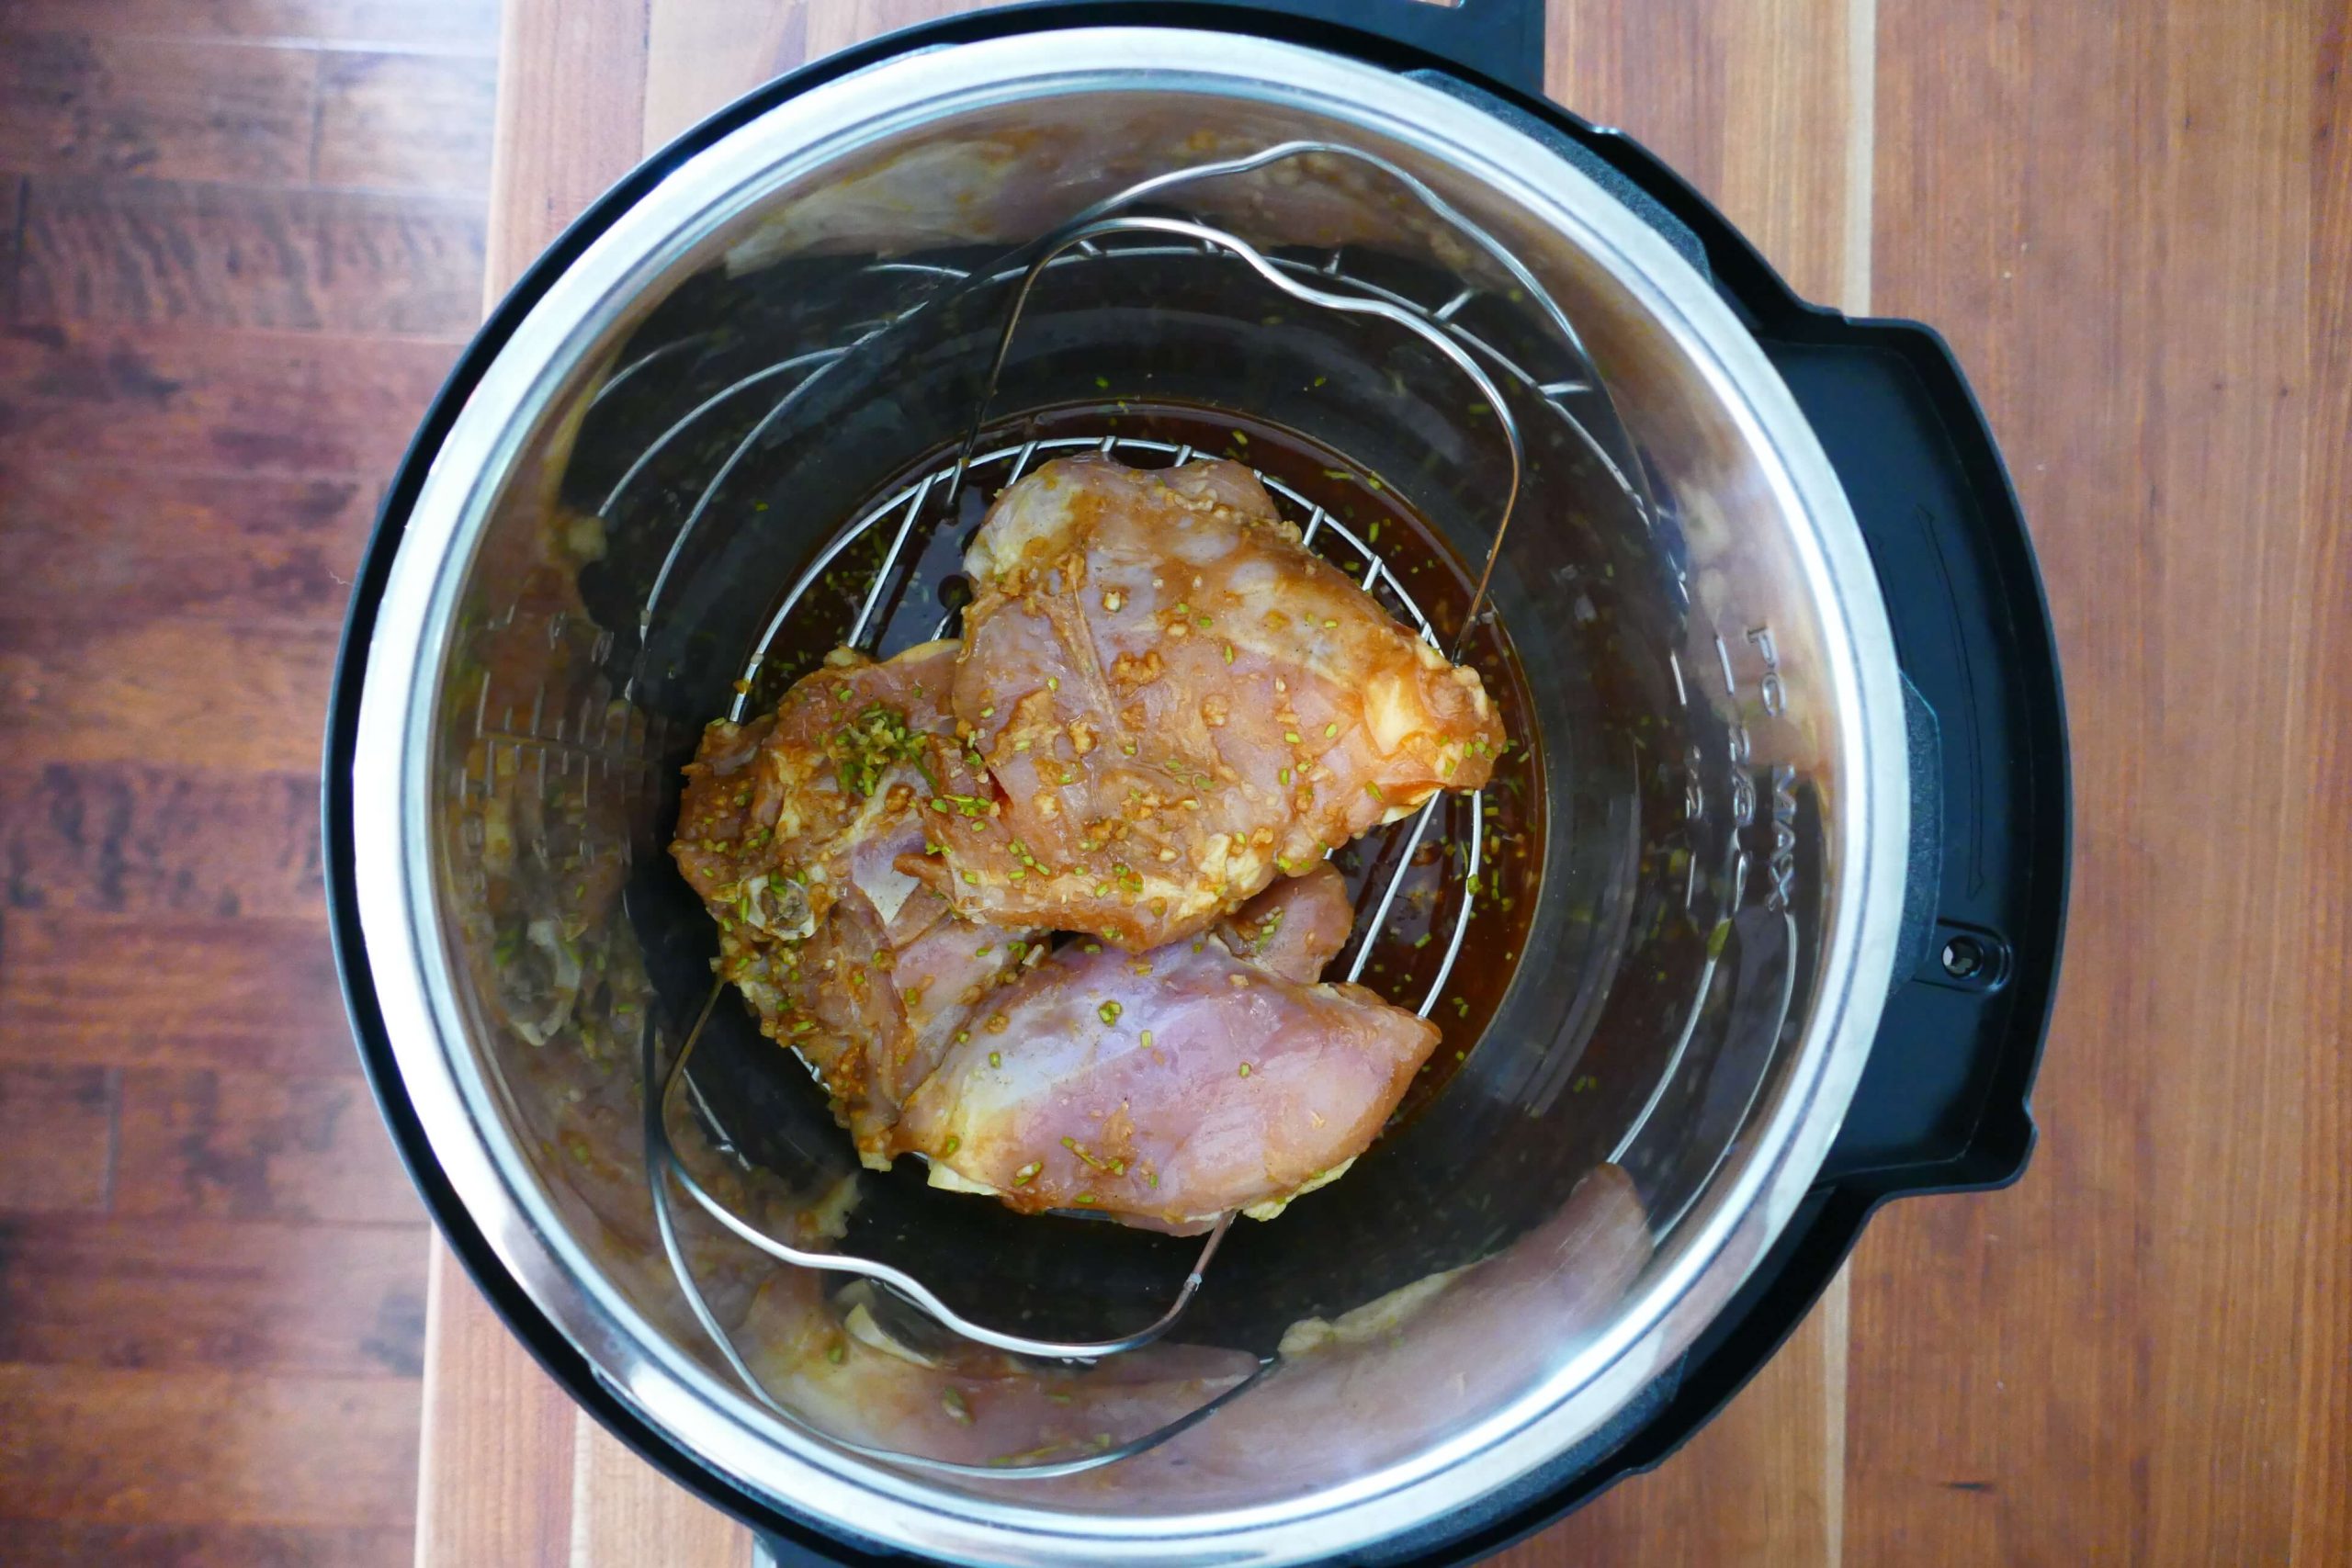
- I frequently put the food I’m pressure cooking (especially meat) on a trivet to raise it up a bit so that the liquid can cover the bottom of the inner pot. What is a trivet?
- This works really well when the quantity of liquid in a recipe is minimal.
3. Grease the inner pot
- Use a cooking spray or oil to grease the pot before you begin pressure cooking. This can help prevent food from sticking to the bottom.
Key Takeaways (TL;DR – Too Long; Didn’t Read)
I get it. You’re in a time crunch and just want to know why your Instant Pot says Food Burn. Here are the important points in this article but I suggest you come back and read the whole post so you can avoid the burn message in the future!
- Make sure the sealing ring is in place and the steam release valve is in the Sealing position.
- Deglaze after using Saute mode.
- Add adequate liquid to your recipes.
- Layer your food with starchy and dense ingredients on top.
✅ Why Trust Neena at Paint the Kitchen Red?

I’m Neena, and I have a lifetime of experience working with pressure cookers. I know how to maximize the potential of a pressure cooker to consistently produce delicious and easy meals. With my Instant Pot expertise, I can provide valuable insights, troubleshooting advice, and innovative recipe ideas so you can trust me on all things Instant Pot!
➡ New to the Instant Pot? Get my Instant Pot instructions for beginners.


Michael (no saute) says
Neena, thank you for the wonderful recipes. I make them all but with major modifications. I am obsessive- compulsive workaholic with limited time 3 quart ultra. Live alone with occasional guest. I get home around 5pm and watch the news (BBC) at 5:30. So, I have about 1/2 hour to change clothes, make a drink (martini or negroni) and prepare dinner. I cannot accomplish this if I saute. I know that I am missing out on some flavor but it works for me. I just throw everything in, push the button at 5:29, and chill in front of the TV until 6 when dinner is ready. Another 1/2 hour of leisure and bak to work. Works for me! Thank you again.
Paint the Kitchen Red says
Wow, thank you Michael! I have to say your comment is one of the most unique and fun ones I’ve received. Thank you so much for taking time to share. You made my day 🙂
Lynne says
After 2 yrs of ip use, I got the dreaded burn notice. I had tried to make a whole chicken in tomato sauce, onions and mushrooms, wine and spices. I kept getting the burn notice and leaking steam, I ended up putting the still raw bird in the oven to finish. I then brought the sauce to a boil on the stove. I think there were three things I did wrong. I will try it another time using wine and extra water on the bottom, the trivet, and keep the tomatoes on top of the bird. It did make the best sauce I have ever made, and I learned from an excellent Italian cook. Thank you for this article, it is extremely helpful. I’ve been cooking for more than 70 years.
Paint the Kitchen Red says
Lynne, thank you for your comment. I’m glad you were able to get past the burn message and complete your meal. Your years of experience probably helped 🙂
Joe says
I have a different problem. After the on comes on the countdown timer does not happen. What am i doing wrong ? I am a new timer with IP.
Paint the Kitchen Red says
Joe, I would suggest doing a water test first, to eliminate any variables based on the recipe e.g. a large quantity of food takes a long time to come to pressure. Pressure cook 2 cups of water for 5 minutes. If the On doesn’t change to 00:05 within about 15 minutes, it’s possible that you have a defective unit. I would return it if that’s an option. Otherwise, open a support ticket with the company at support.instantpot.com
Nat Haight says
Detailed and very useful!!
Paint the Kitchen Red says
Hey Nat, glad you found it useful and good luck with avoiding the error in the future!
Shelley says
Thank you great info…now I have a better understanding
Paint the Kitchen Red says
You’re welcome, Shelley. I’m glad you found it helpful!
Connie says
Thank you for explaining the food burn error! Coming from a different brand epc, I didn’t panic, but was frustrated that this error is not even mentioned in the user manual! I made one pot pasta last night and had to stop 3 times because of the error. I released the pressure, stirred the stuck on food from the bottom and tried again. I think 1, it was too hot from sauteing meats and veggies before starting and 2, I had a lot of sauce, but also had broth and wine. My mistake I believe was stirring it all together including the pasta. Next time, I will pour the thin liquids on the bottom and “float” the heavier sauce. Also resist the urge to stir the pasta in! You can stir and taste test once the pressure cycle is done.
Thank you for the informative and thorough article.
Paint the Kitchen Red says
You’re welcome, Connie. Hopefully you’ll be able to avoid the error in the future.
wanda l abbott says
where can i get one
Paint the Kitchen Red says
Wanda, I’m not sure what you’re referring to.
Jan says
This was VERY helpful. Thank you!
Paint the Kitchen Red says
You’re welcome, Jan!
Michelle says
Thank you for explaining the burn message. I was nervous just trying out the instant pot and freaked when it showed the burn message. They really should put it in the instruction manual. I was ready to pack it up and return it.
Paint the Kitchen Red says
Michelle, glad to be of help 🙂
Julie says
I am so glad I found this article! I am brand new to the instapot and pressure cooking world. I have made about 5 things in it so far and 3 of them have had the BURN notice. 🙁
I was shocked to see it the first time and then to find that NONE of the “instructions” that it comes with, tells you what to actually DO when it happens. No talk of how to deglaze or why you need to deglaze. I couldn’t believe it. And searching for help on the internet can be just as frustrating because as I am sure you know, there are plenty of people willing to help and while they are well meaning, some of them are just doing it wrong! Lol
I will be looking for more of your articles and recipients now that I have found you. The 3 dishes I had issues with are:
Chicken and Rice- Garlic Parmesan
Buffalo Chicken Dip
Beef Stroganoff
I’d really like to try the chicken and rice again but afraid of it now lol. Any hints or tricks?
Thanks!
Paint the Kitchen Red says
It is very frustrating! Without knowing the details of the recipe I can give you general advice about the chicken and rice: don’t stir in the rice, just add it in at the end and push down gently. You may also want to add some extra water/broth. Check out my Instant Pot Jambalaya recipe for ideas on how you can adapt your recipe using the technique in my recipe. Thanks for your comment!
Laura L. says
Thank you for this article! Every time I use tomato paste I get the BURN notice. Couldn’t figure out how to get around it and still use it to get that deep flavor I like. Now I’ll just put it on top before I seal the pot!
Paint the Kitchen Red says
I used to be skeptical about just pressure cooking tomato paste on the top, but find that it works quite well. Glad to be of help 🙂
David S Laker says
It’s been almost a year since I posted my comment regarding the BURN message/problem.
The original IP did not have such a function and I never had a problem. The 2018 model has the BURN notification. WHY? I cannot duplicate my perfectly satisfactory recipes done in the older version in the new model. Why would a manufacturer add a wrinkle like this? Has there been any investigation? Something stinks.
Paint the Kitchen Red says
David – I believe they did it because in the old models if something was burning, it would start counting down even when the Instant Pot didn’t pressurize. But I understand what you’re saying, they need to make it smarter maybe?
Cindy Thompson says
This article is great; however, I think my issue might actually be a defective IP. I was sauteing some cubed chuck roast for a soup and the burn notice came on (while sauteing). I turned the pot off and added some liquid (about 2 cups) to deglaze it. I turned it back on and almost immediately the notice came back on. I tried turning off, unplugging and scrapping the bottom 4 or 5 times and the notice came on immediately each time. I ended up cooking my soup on the stove. I cleaned the IP thoroughly. This was about 5 days ago. Yesterday I was going to hard boil some eggs and the IP immediate gave the burn notice. The pot wasn’t even hot yet. I think I’m going to have to get a new IP. 😢
Paint the Kitchen Red says
Cindy, I’m so sorry this has happened to you. But it definitely sounds like a defective Instant Pot. So frustrating!
Marsha Eckels says
Hi….. I came across your article by accident. I’m a cook from way back. Last Christmas I received a 8 qt IP as a gift. Circumstances of the new year had me moving about these last several months, so I haven’t used the pot as of yet. After reading your article , I have decided to regift the pot to someone else. Having been a blue ribbon chef for the past 70 years allows me a trick or two for making many meals quickly n delicious at the finish line. This IP sounds like a headache waiting to happen ..what a very nice person u must b trying to explain all of this to IP enthusiasts. Perhaps the manufacturer should step forward n send a book to everyone that buys one of these pot. It should b called “The dos n don’t do with your IP”… plus an address to ship back for a full refund. LOL. Good luck to u.
Paint the Kitchen Red says
Hi Marsha, pressure cooking is great for cooking eggs, rice, pulses/beans, and of course tougher cuts of meat. You might be pleasantly surprised if you try it out. But yes, there are do’s and don’ts for sure!
David J says
I also think the manufacturer should allow me the option of bypassing the burn notice and continue cooking my food. When I get the burn notice I don’t know how long my food has been cooking or how much longer to continue cooking it. It should be the users decision to continue cooking if there is a burn notice.
Nancy says
The instructions I have seen say to some or rinse rice become cooking. I have not seen you mention that. Is that necessary in all rice dishes? I also get burn notice when I cook a rice, chicken and veg combination.
Paint the Kitchen Red says
I generally do rinse my rice when I’m making it plain. When I’m making it with spices, I often rinse but do occasionally skip the rinse. If you’re getting a burn error, put the liquid in first, then the veg, and finally rice and don’t stir the rice in. See if that gives you better results. I would add more liquid if you still get the burn.
DSHEPP says
Hi Neena,
I have an Ultra 6qt. and I’ve tried both your “easy spaghetti” and “penne with sausage” recipes, and both times got the dreaded “burn” error. It’s my fault that I should have read further on your website (I just printed the recipes). But next time I will let the inner pot cool down after sauté, layer ingredients, add tomato based products last, don’t stir, and add an extra 1/4 cup liquid (if needed).
Thank you for all the great info here, I was able to salvage both meals and they were still the best spaghetti I’ve ever made, and the penne with sausage was better than East Side Mario’s (which was what I was trying to accomplish @ home), so thank you for the recipes.
P.S. I will update your website my 2nd attempt on both recipes, as they are that good.
Paint the Kitchen Red says
Hi there – you’re very welcome! I’m sorry you had some troubles but glad to hear that you were able to salvage and enjoy the meals! Once you get the liquid quantity right, and follow those suggestions, you’ll be all set to make these recipes again and again – feel free to shoot me an email if you continue to have troubles. And thanks for the lovely comment 🙂
Paul Nielsen says
How annoying. Spent the last hour trying to get chicken and rice to cook and repeated burn message. Gave up and went to the oven. Instant pot ended up making cooking time twice as long and more dirty pans to wash as well. I guess I should just use it to sterilize water
Paint the Kitchen Red says
Sounds very frustrating, Paul. Did you stir in the rice or did you leave it on top? It might help to not stir it in.
Kay says
I’m a newbie. Reason 1 solved my problem. Thanks.
Tracy says
Thank you for this! I’ve had my IP for over a year and had never gotten the burn notice. I tried restarting 2 times, got the same results. I deglazed the itty bit that was there, ( I hadn’t seared or sautéed anything) but I’m pretty sure putting the roast on The trivet was the trick!
Paint the Kitchen Red says
Yes, that trivet trick was something I discovered a year after getting my Instant Pot!
KGaylin says
Thank you so much for your instructive Instan Pot videos and posts. This latest one on The Burn message explained why I got this signal after sautéing on Hot. I will modify future sautés to medium and allow a cool down period in the future. Incidentally, your instructions are much better than the company’s own documentation.
Paint the Kitchen Red says
I’m happy to be of help – thanks for your kind words 🙂