
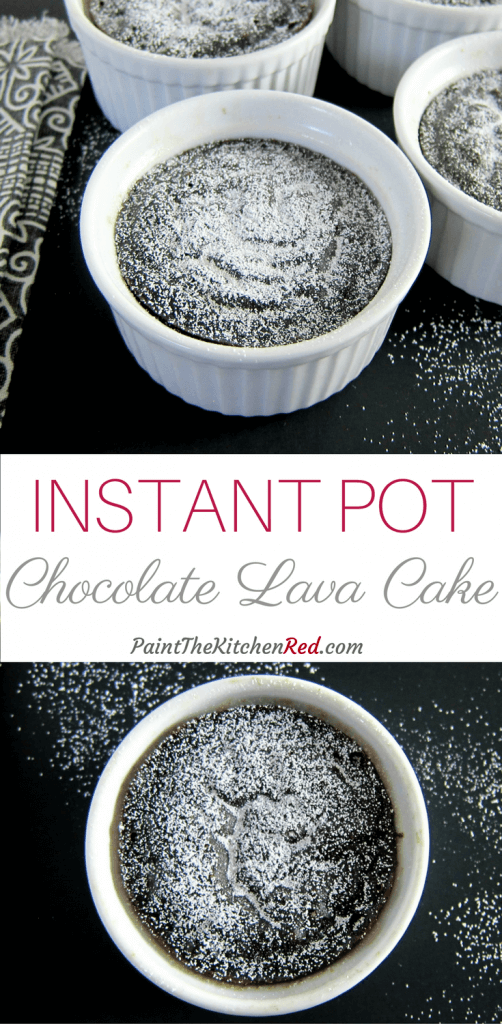
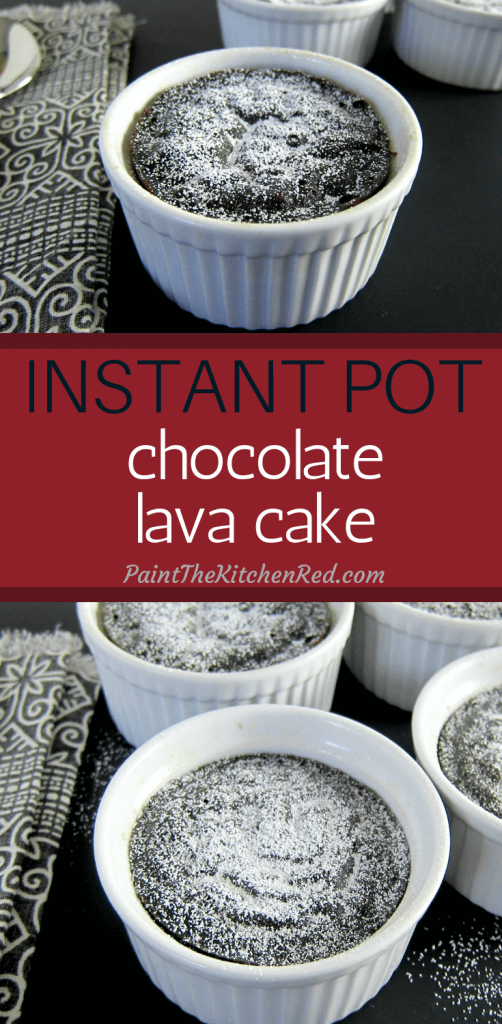
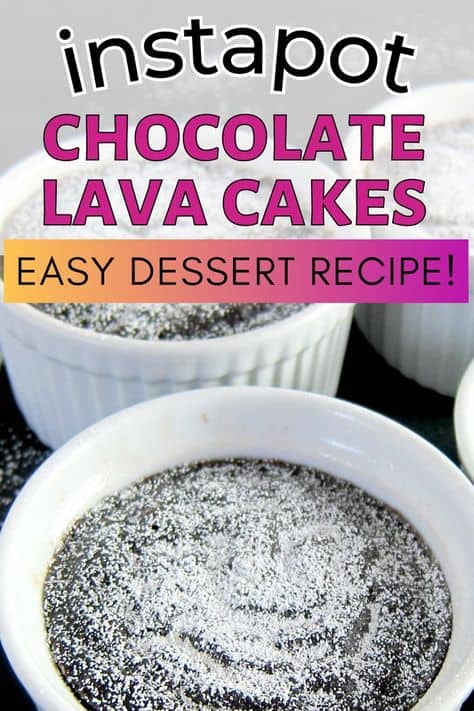
These Instant Pot lava cakes are the ultimate in decadence. They have a gooey chocolate center that oozes molten chocolate with every bite. With minimal ingredients and short preparation time, this easy Instant Pot dessert is perfect for satisfying your sweet tooth or impressing dinner guests! [Oven instructions also provided.]

This post contains affiliate links. As an Amazon Associate, I earn from qualifying purchases. Please read the disclosure.
When searching for a dessert recipe to adapt to the Instant Pot, this lava cake recipe stood out as the perfect choice. The original oven recipe uses a bain-marie (water bath), making it an ideal candidate for a quick and easy pressure cooker version.
Another reason I made this switch is to avoid heating up the kitchen during the summer months when the air conditioning is running.
These lava cakes are a wonderfully decadent treat that my whole family loves. With rich chocolate flavors and soft, gooey centers—true to their name—these molten lava cakes are always a hit.
I also love that I always have all the ingredients on hand and I can make them whenever I’m craving a chocolate treat.
They taste best when served warm, making them the perfect dessert for any occasion!
➡ I have many other desserts for you to try, like Instant Pot Oreo cheesecake, cupcakes, Instant Pot apple crisp, or peach crisp!
Ingredients and Tips
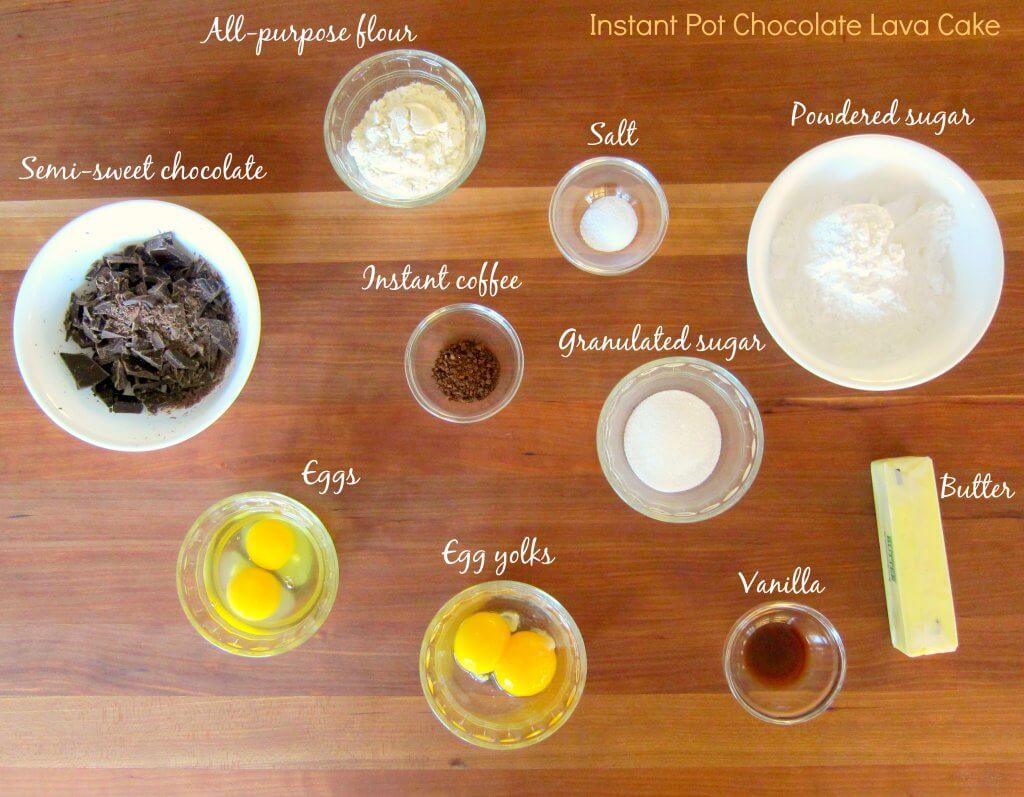
🧂 Instant Pot Lava Cake Ingredients
💡Ingredient and Recipe Tips
Here are some tips to help you make perfect Instant Pot lava cakes.
🥣 Equipment: Use 3 ½ inch ramekins or glass Pyrex custard cups. The recipe is for 6 oz. ramekins. Adjust cooking time for different containers or pressure cookers. Use the trivet that came with your Instant Pot.
☕ Coffee Flavor: Instant coffee granules add a nice balance to chocolate. Omit if you don’t like coffee.
🍫 Chocolate: Microwave at 50% power for a minute. Stir and repeat in 15-second bursts, stirring well between bursts. Stop when a few pieces remain unmelted. Let residual heat melt remaining chocolate. Overheating can ruin the recipe. Use the best quality chocolate you can afford to get.
⏱️ Cooking Time: May vary due to altitude, ingredient measurements, or Instant Pot model. If you’re a first-timer: Try 7 minutes, then add 1-2 minutes if undercooked. Experiment to find the perfect time for your setup.
❓ FAQS
You can cover them to prevent condensation from dripping in but I generally don’t.
These lava cakes taste best when eaten fresh. However, you can refrigerate them and warm them in the microwave. You may not have any molten lava, though.
I’ve found that different Instant Pot models cook these lava cakes at different rates. I would suggest cooking for two fewer minutes next time.
Again, it probably comes down to your specific Instant Pot model. If you see that the cake looks too jiggly, pressure cook for another 1 to 2 minutes.
How to Make Chocolate Lava Cakes
⏲️ Instant Pot Method
- Melt Chocolate
- Add eggs and flour
- Fill containers and set on a trivet
- Pressure cook and quick-release pressure
- Cool on a rack
- Sprinkle powdered sugar
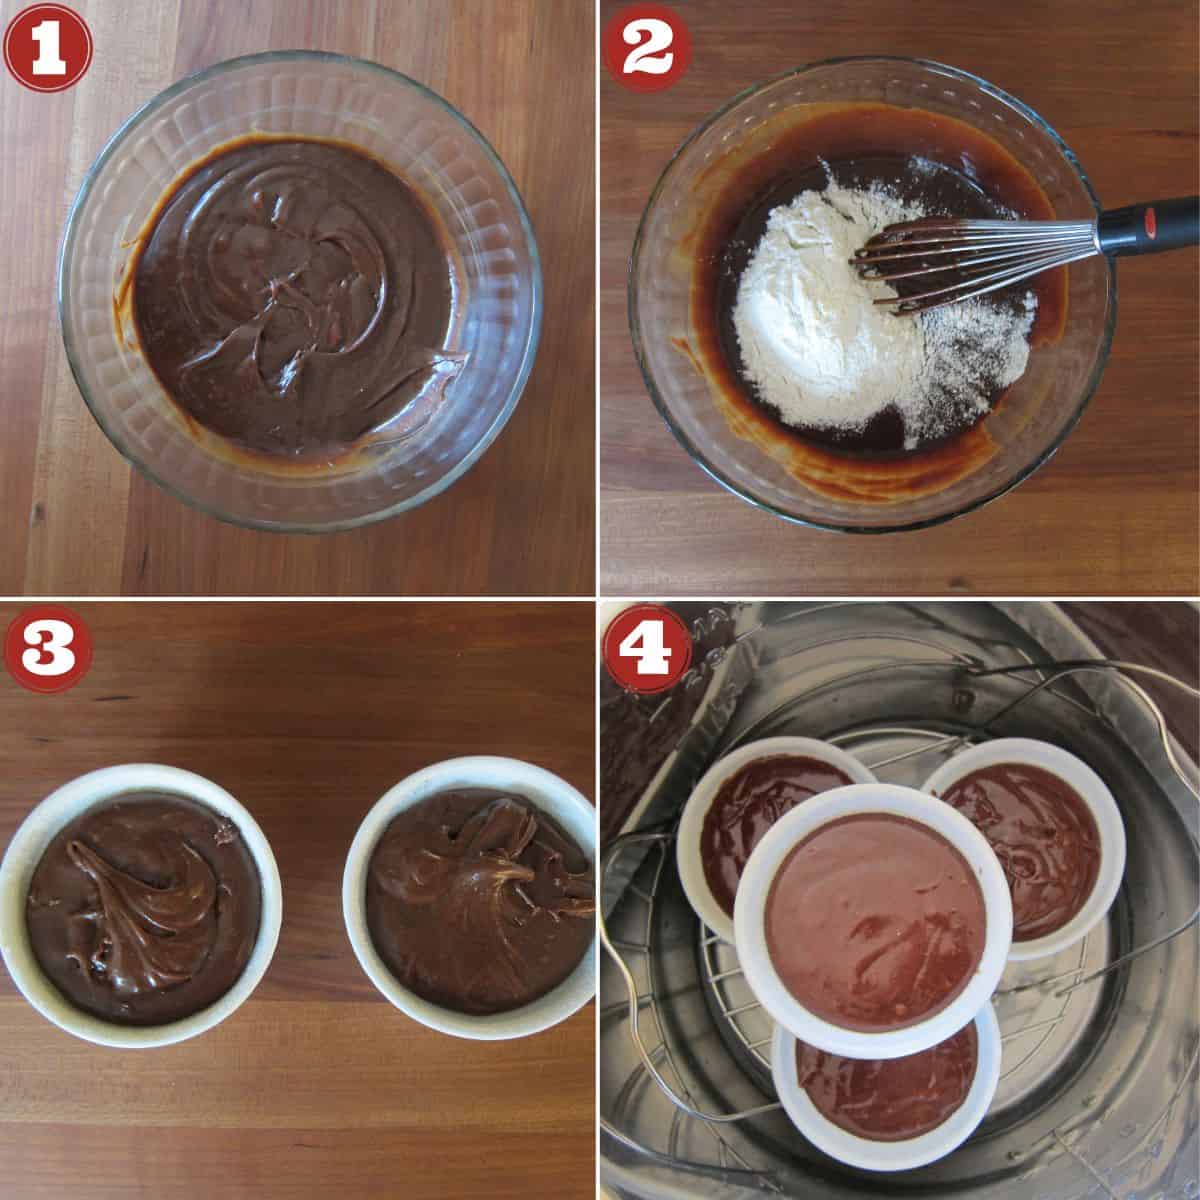
- Microwave butter and chocolate in medium bowl at 50% power for 1 minute. Stir. Heat in 15-second bursts, stirring each time, until mostly melted with a few small pieces remaining. Stir until completely smooth. Stir in confectioner’s sugar. *
- Whisk in eggs, yolks, coffee and vanilla. Stir in flour and salt.
- Grease the bottom and sides of four 6 oz. ramekins. Coat each with sugar. Divide batter among the lava cake containers.
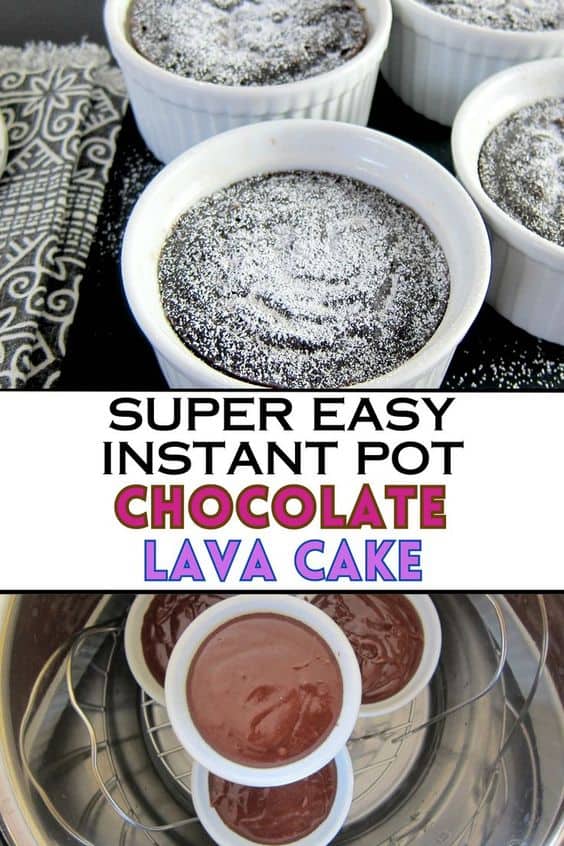
- Pour 2 cups water into the Instant Pot’s main compartment (inner pot) and place the trivet in water. Place 3 ramekins on the trivet and stack the fourth container on top.
* Make sure you don’t over-melt the chocolate. See this article about melting chocolate in the microwave.
✏️ Pro Tip
- Pressure cook time varies by Instant Pot model. First time? Try 7 minutes. If undercooked, add 1-2 minutes more.
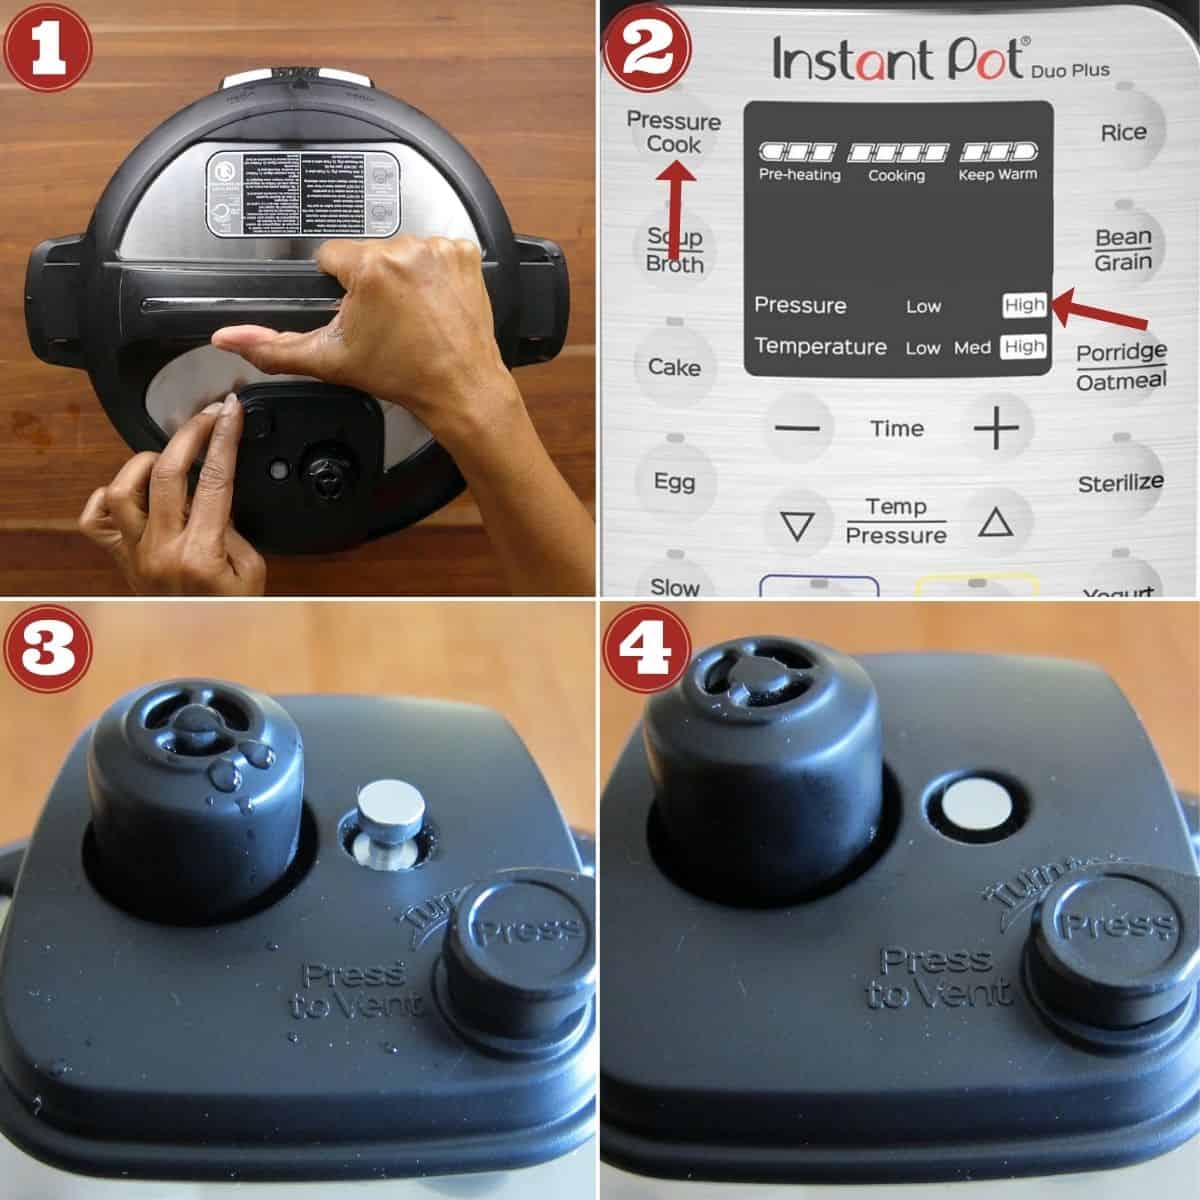
- Close the lid.
- Program the Instant Pot to pressure cook on high pressure for 9 minutes.
- The display will go from On to 9:00. The float valve will go up after a few minutes. The display will count down to 00:00.
- Do a quick release of pressure. Once the float valve goes down, the lid can be opened.
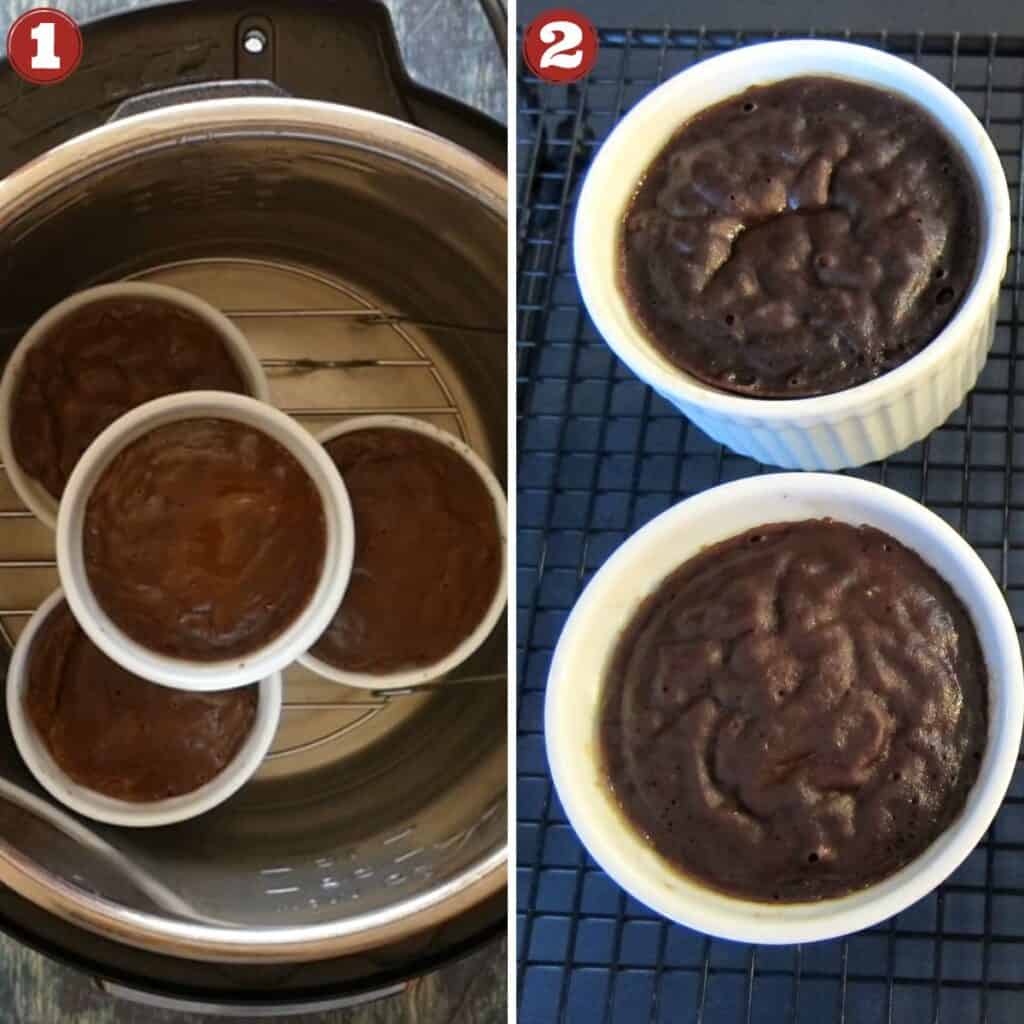
- Lift the trivet by the handles and carefully remove the ramekins from the Instant Pot. Use heat-resistant gloves.
- Place the lava cakes on a cooling rack to cool for a few minutes.
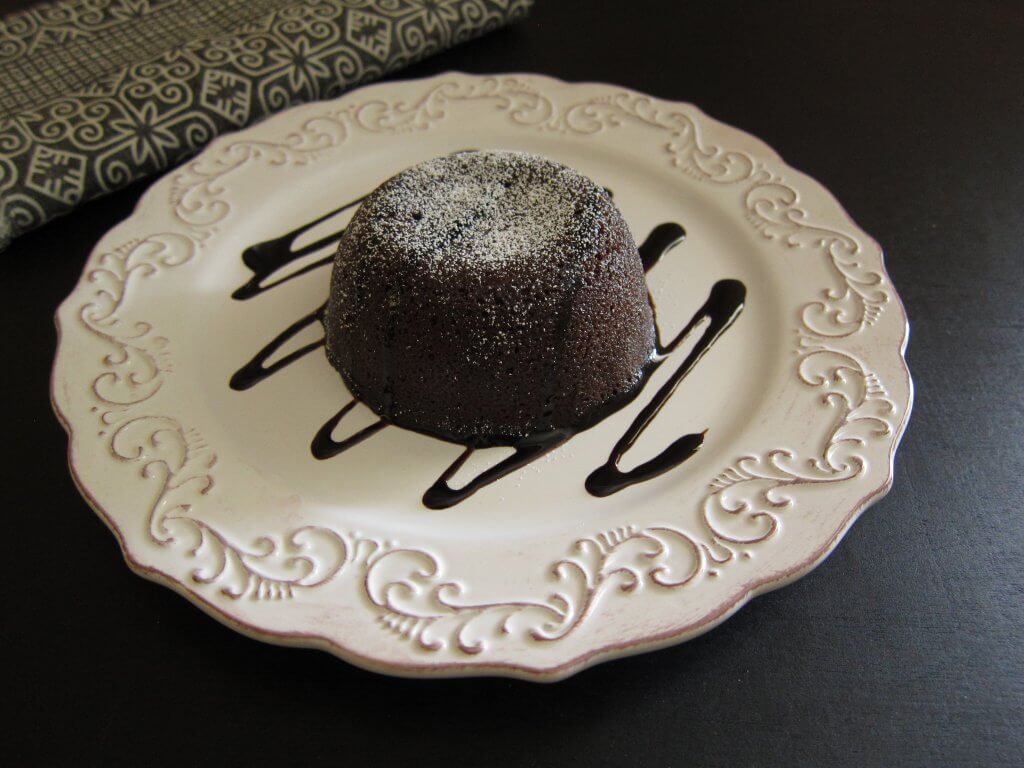
- Serve warm. To plate: Loosen cake edges with a knife. Place a plate on the ramekin. Flip both. The cake should release onto the plate. Sprinkle with powdered sugar.
♨️ Oven Method
- Follow the same directions to prepare the batter as the Instant Pot version
- Bake the lava cakes at 400 degrees F (204 degrees C) for about 12 minutes or until a thermometer reads 160 degrees F (71 degrees C)
- Remove ramekins to a wire rack and cool for 5 minutes
- Invert warm cakes onto serving plates and dust with powdered sugar
Instant Pot Chocolate Lava Cake
Ingredients
- 1 tablespoon granulated sugar
- ½ cup butter – 1 stick, cut into pieces (4 oz. or 113 grams)
- 4 oz. semisweet chocolate chopped (113 grams)
- 1 cup confectioners sugar
- 2 eggs
- 2 egg yolks
- 1 teaspoon instant coffee granules
- 1 teaspoon vanilla extract
- 6 tablespoon all purpose flour
- ¼ teaspoon salt
Instructions
- Grease the bottom and sides of four 6 oz ramekins. Coat each with sugar.
- Melt the chocolate and butter: In a medium-sized microwave-safe bowl, microwave butter and chocolate on medium heat for about 1 minute. Stir and scrape sides of the bowl with a silicone spatula and repeat heating at 15-second intervals, until the chocolate is melted and smooth but a few small pieces of chocolate still remain. Keep stirring to allow the chocolate to completely melt in the residual heat.
- Stir in confectioner’s sugar.
- Whisk in eggs, yolks, coffee and vanilla.
- Stir in flour and salt.
- Divide batter among the ramekins.
Instant Pot Instructions
- Pour 2 cups water into the Instant Pot’s main compartment (inner pot) and place trivet in water.
- Place 3 ramekins on the trivet and place 1 more on top of them, in the middle (staggered).
- Close the lid and pressure cook on High Pressure for 9 minutes. *
- Do a quick release of pressure (QR) and open the lid. [Read More: The Different Pressure Release Methods].
- Use the trivet handles to lift the trivet out of the inner pot and carefully remove the ramekins. Gently dab off any condensation from the surface of the cake.
- Dust the Insant Pot chocolate lava cakes with powdered sugar.
- Serve warm and enjoy!
Oven Instructions
- Preheat oven to 400 degrees Fahrenheit (204 degrees Celsius)
- Bake the ramekins for 12 minutes or until a thermometer reads 160 degrees F (71 degrees C), and the cake sides are set and the centers are soft.
- Transfer the ramekins to a wire rack and cool for about 5 minutes. Run a small knife around the edge of the cakes to loosen them. Invert the warm cakes onto serving plates and dust them with powdered sugar.
Notes
- If you have a larger Instant Pot, you might be able to fit all 4 ramekins in one layer.
- I use 6 oz ceramic ramekins and a 6 quart Instant Pot Duo and Ultra for this recipe as written; if you’re using different size or type of containers or pressure cooker, your cooking time may need to change.
- * The pressure cook time for this recipe can vary based on model of Instant Pot. If you’re doing this for the first time, you might want to try 7 minutes and if the lava cakes are undercooked, pressure cook them for another 1 to 2 minutes.
Nutrition
Thank you for visiting Paint the Kitchen Red. All photos and content are copyright protected. Please don’t use any content without prior written permission. If you’ve made this recipe and would like to share it with your friends, please link back to this recipe. Thank you!
I am not a certified nutritionist. I provide my best estimate of nutritional information merely as a courtesy to my readers. If you depend on nutritional information for dietary or health reasons, I suggest using your favorite online nutrition calculator to confirm the nutritional value of this recipe based on the actual ingredients that you use.
Did you know that the best way to support your favorite bloggers is to comment and rate recipes, and share on social media? If you loved this recipe, please comment and give it a five ⭐ rating in the comment section below. If you’re a pinner, pin this post using the Pin buttons at the top and bottom of this post and in the recipe card above. Thank you for your support!


Sharan says
Hi love his one! Am still getting used to my instant pot but have you made a vanilla sponge cake in yours? What’s the timing if you have made them? Would love to know your recipe for that one as well.
Paint the Kitchen Red says
Hi Sharan – thanks for the question. I will put that on my list of recipes to publish. Hope you’ll check back soon.
Emily says
This is the second recipe I have tried and it was fantastic. Thanks.
Paint the Kitchen Red says
Emily – you’re welcome – so glad you liked it!
Margaret says
I will be making this but wanted you to know I love your detailed photos, not for me so much but for those who are new to the Instant Pot. Great job!
Paint the Kitchen Red says
Thanks, Margaret. It’s always a fine balance, giving too much information vs too little! I try to do both by making the recipe card less detailed.
Cricket says
These sound delicious but I have a Cuisinart electric pressure cooker. How do I set it up to make them? Thank you.
Paint the Kitchen Red says
You would just use the High Pressure setting. Since your Cuisinart PC might cook faster, try a shorter amount of time than in the recipe and if it’s under-cooked, do it for another few minutes. I hope that answers your question.
Danielle says
I love the idea of making these lava cakes in the instant pot! I haven’t purchased one yet, but each time I read another instant pot recipe, I get closer to taking the plunge. This looks so easy and man do those lava cakes look delicious!
Paint the Kitchen Red says
Hi Danielle, you’ll love the Instant Pot. Just start off slow and get familiar with it by making rice or eggs. Enjoy!
Chris says
I made these tonight and found that even after increasing the cook time to 11 minutes, the majority of the cake was still liquid rather than just the center. Next time I’ll try 13 minutes. It was still very good though.
Paint the Kitchen Red says
I’m not sure what happened Chris. Mine are solid on the outside at 7 minutes even. There can be variations due to measurement differences especially since these are such small cakes. Next time if that happens, you can just close it up again and cook for another couple of minutes. Glad it tasted good anyway – lava puddings, maybe 🙂
Earl Rapp says
I just purchased an Instant Pot DUO80 and am looking forward to learning how to use it.
Paint the Kitchen Red says
Hi Earl, Congratulations – I think you’re going to love it. If you haven’t already, please visit this post to get started: https://www.paintthekitchenred.com/instant-pot-how-to-quick-start-guide/ Enjoy!
Young Meagher says
I had this bookmarked for more than a week. Tried it last night and it turned out really awesome.
Thank you.
Paint the Kitchen Red says
So glad! I think it’s time for me to post another Instant Pot dessert! Thinking of either bread pudding or cheesecake…
Ash says
I made this tonight, and it came out very differently than expected. Instructions were followed to a tee, but there was no liquidy, lava center, and the texture was much more baked-egg firmness than a cake-y sponge.
Any suggestions as to how it went wrong?
Paint the Kitchen Red says
My best advice would be to try it again, and cook for a shorter amount of time – I think you can reduce the time by 2 minutes to start. It’s hard to say what went wrong – could be the consistency of the batter, maybe a bit more flour than I used… Good luck and thanks for sharing.
Rebeka Small says
Have you ever tried stacking the ramekins and cooking all 4 at once? Do you think the time would change? Regardless, can’t wait to try!!
Paint the Kitchen Red says
I really haven’t tried stacking but I think it would work. And same amount of time. Let me know if you try it. I think I’ll try it the next time I make it…
Lisa says
I haven’t stacked these yet (I will be making this weekend for the Father’s Day crowd), but I have stacked for crème brulee and it works perfectly. With those I cover with aluminum foil so that the moisture doesn’t drip from the one on top, so I may try that with these too.
Susan says
I tried cooking all 4 at one time. They were delicious, but no lava! I find this surprising. You would think cooking more at once would require extra time. I guess we will just have to try it again with less time, Thank you for the delicious recipe!
Paint the Kitchen Red says
Hi Susan – did you increase cook time or leave it the same? Generally increasing quantity doesn’t require more time unless the size of the food is larger (e.g. larger piece of meat or container). One thing you might watch out for is over-melting the chocolate. Also using a different size of ramekin or custard cup can alter the results. I’m glad you like the recipe, though and thanks for your comment!
Jamie | A Sassy Spoon says
WOW. This looks GREAT! Thank you for sharing the step-by-step photos!
Paint the Kitchen Red says
Thanks Jamie! I didn’t think an Instant Pot dessert could come out so well! And so easy!
Joyce says
Wow I had no idea you could use the instapot like this! Multi-purpose I love this! Little chocolate pots of yum! Thanks for this Neena!
Erica says
Excellent advice about getting an extra sealing ring for desserts and such. I wouldn’t have thought of that!
Paint the Kitchen Red says
Thanks Erica! Some people have luck with lemon juice and denture cleaners to clean to Instant Pot sealing ring, but I was not satisfied with those solutions!
Mikaela | wyldflour says
I LOVE that you included baking instructions, too, because this chocolate lava cake looks luscious, delicious, rich, fudgey and everything that dessert should be! This is the PERFECT Valentine’s Day dessert!! I can just imagine it topped with a scoop of vanilla ice cream…
Paint the Kitchen Red says
Thanks Mikaela – It would make a great Valentine’s Day dessert. Oh, and IT IS good with ice cream or even whipped cream….. !
Alyssa @ A Bite of Inspiration says
This looks delicious! I love lava cake and the addition of the coffee makes for a much richer, tastier chocolate flavor! Saving this recipe for when I get an Instant Pot!
Paint the Kitchen Red says
I agree – coffee adds a nice touch! Try it in the oven if you don’t have an Instapot!
Christi says
No lava cake on Alyssa’sblog, even when searching “lava”. 😢
Alison @ The Sunday Glutton says
These look super easy and I love the gooey center. I have a pressure cooker, so I was glad to see your comment about just reducing the cooking time a little. These would be a great Valentine’s Day dessert 🙂
Paint the Kitchen Red says
Yes, Alison – stovetop pressure cookers reach pressure and temperature faster than the electric. The times do vary from pressure cooker to pressure cooker so you might have to adjust the timings.
Marie @ Yay! For Food says
What can’t you make with the Instant Pot?! Love this! The chocolate lava cakes look so delicious. I love the addition of coffee granules to enhance the chocolate flavour too.
Paint the Kitchen Red says
Thanks Marie! I have a sweet tooth and was very excited to make Instant Pot desserts! I will need to try out my other favorite in the Instant Pot – creme brulee!
Riva says
These are so pretty! These would be perfect for a special Valentine’s Day dinner at home. You really can make anything in the Instant Pot, can’t you?
Paint the Kitchen Red says
Thanks Riva! They would be perfect for Valentine’s Day. Add a heart shaped strawberry on top – perfect!
romain | glebekitchen says
If you keep posting great ideas like this I am going to have to get an Instant Pot. I love lava cake. Do you think this recipe would work in a bain marie? Any idea how long it might take if it would work?
Paint the Kitchen Red says
The recipe I use for the oven doesn’t require a bain marie. Just bake at 400 degrees F for about 12 minutes. You can also make it in a stovetop pressure cooker, but reduce cooking time by 2 minutes.
Lindsay says
This was such a helpful posting. Thank you! I am a loyal fan of Paint the Kitchen Red. I especially dialed in to what you said about the coffee granules enhancing the flavor of chocolate, as Ina Garner, the Barefoot Contessa, recommends that bakers do so to enhance and deepen the chocolate. Like you, I am not coffee drinker, and since my mother is a loyal follower of Ina, as I am of you, she uses coffee granules in all her chocolate cakes and brownies.Though I seldom bake, I would argue as a non-coffee drinker that one can taste the coffee influence, and I don’t like it. Maybe that’s a good thing, as I can taste the coffee every time. In light of my sensitive taste buds, I am delighted by your comment that it can be left out. You really do cover all the bases! Thank you for offering alternatives. My taste buds are especially grateful.
Paint the Kitchen Red says
Thank you for following the blog and for your thoughtful comment. I’m a fan of Ina Garten too! I thought it was just my kids who notice the taste of coffee, but interesting that you are sensitive to the taste too! You’ve taught me something.
Clint says
Not sure what I did wrong but no molten center and turned out more like a fudge brownie than a cake. Disappointed to say the least. Can you help me figure out what needs to be different. Only think I can think is I used semi sweet chocolate chips instead.
Paint the Kitchen Red says
Clint, I’m sorry you had this issue. This recipe can be tricky for some. One reason is over-microwaving the chocolate. It’s got to be melted just right and doing it too much can cause the cake to be like a brownie. Some models of the Instant Pot can cook differently too. You can try and cook for a minute less next time too. All the best.
Kerri says
You may also use an almond or hazelnut extract if you prefer them to the coffee.
Paint the Kitchen Red says
What a great idea, didn’t think of that! I love the taste of almond. Thanks for sharing.