
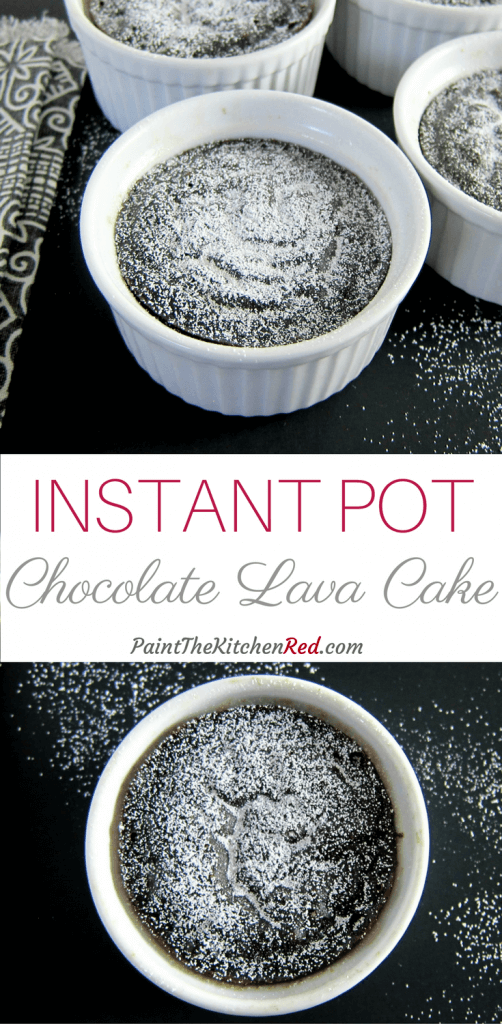
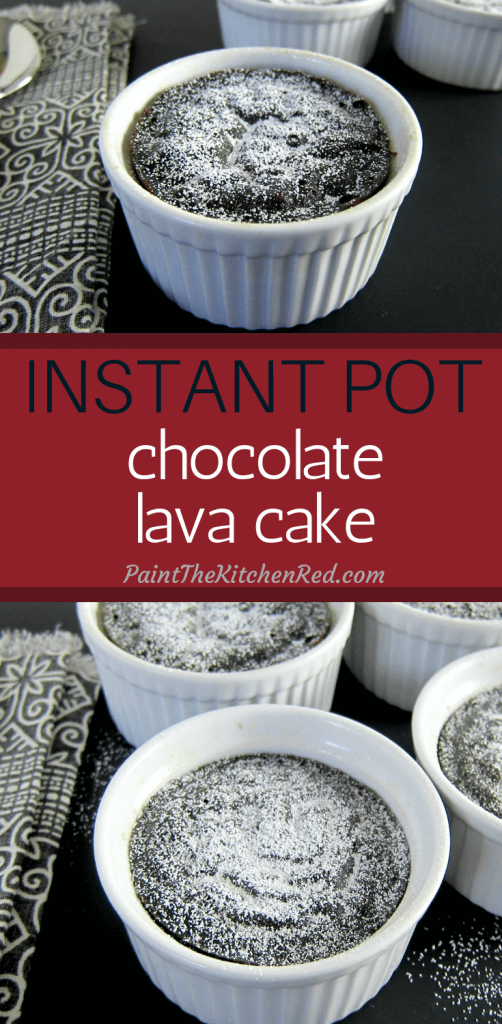
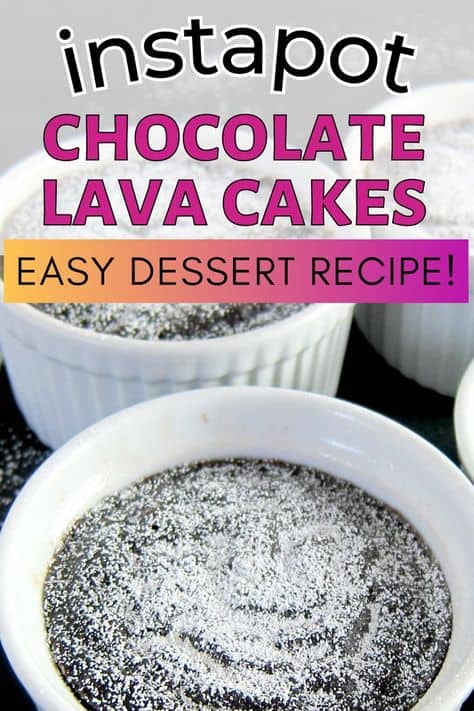
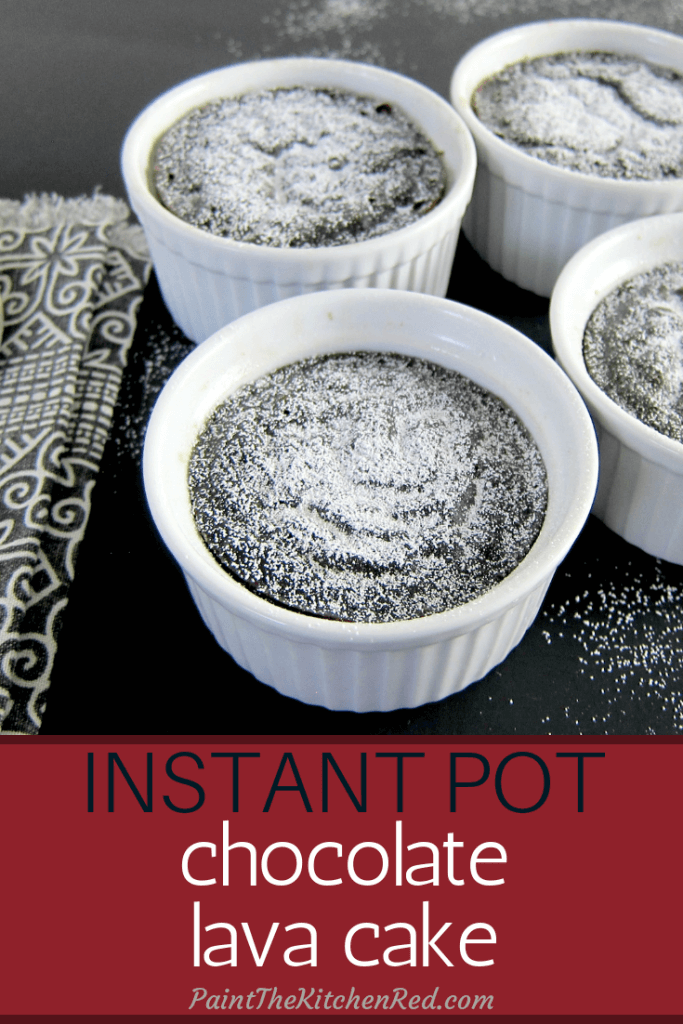
These Instant Pot lava cakes are the ultimate in decadence. They have a gooey chocolate center that oozes molten chocolate with every bite. With minimal ingredients and short preparation time, this easy Instant Pot dessert is perfect for satisfying your sweet tooth or impressing dinner guests! [Oven instructions also provided.]

This post contains affiliate links. As an Amazon Associate, I earn from qualifying purchases. Please read the disclosure.
When searching for a dessert recipe to adapt to the Instant Pot, this lava cake recipe stood out as the perfect choice. The original oven recipe uses a bain-marie (water bath), making it an ideal candidate for a quick and easy pressure cooker version.
Another reason I made this switch is to avoid heating up the kitchen during the summer months when the air conditioning is running.
These lava cakes are a wonderfully decadent treat that my whole family loves. With rich chocolate flavors and soft, gooey centers—true to their name—these molten lava cakes are always a hit.
I also love that I always have all the ingredients on hand and I can make them whenever I’m craving a chocolate treat.
They taste best when served warm, making them the perfect dessert for any occasion!
➡ I have many other desserts for you to try, like Instant Pot Oreo cheesecake, cupcakes, Instant Pot apple crisp, or peach crisp!
Ingredients and Tips
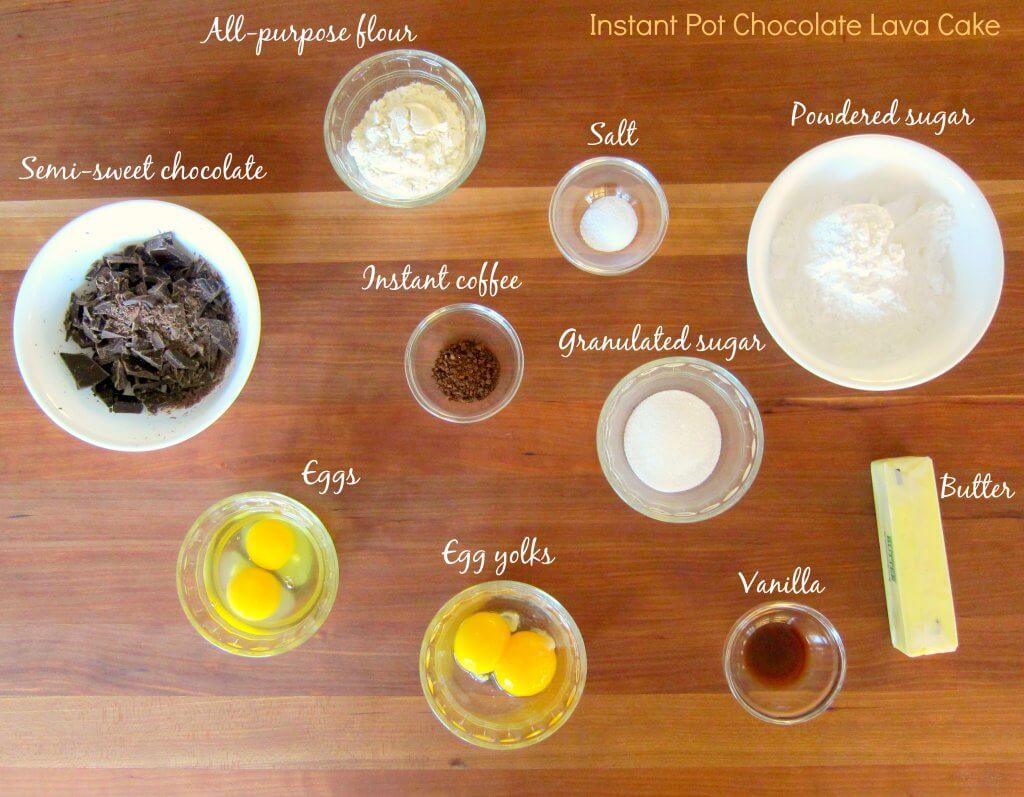
🧂 Instant Pot Lava Cake Ingredients
💡Ingredient and Recipe Tips
Here are some tips to help you make perfect Instant Pot lava cakes.
🥣 Equipment: Use 3 ½ inch ramekins or glass Pyrex custard cups. The recipe is for 6 oz. ramekins. Adjust cooking time for different containers or pressure cookers. Use the trivet that came with your Instant Pot.
☕ Coffee Flavor: Instant coffee granules add a nice balance to chocolate. Omit if you don’t like coffee.
🍫 Chocolate: Microwave at 50% power for a minute. Stir and repeat in 15-second bursts, stirring well between bursts. Stop when a few pieces remain unmelted. Let residual heat melt remaining chocolate. Overheating can ruin the recipe. Use the best quality chocolate you can afford to get.
⏱️ Cooking Time: May vary due to altitude, ingredient measurements, or Instant Pot model. If you’re a first-timer: Try 7 minutes, then add 1-2 minutes if undercooked. Experiment to find the perfect time for your setup.
❓ FAQS
You can cover them to prevent condensation from dripping in but I generally don’t.
These lava cakes taste best when eaten fresh. However, you can refrigerate them and warm them in the microwave. You may not have any molten lava, though.
I’ve found that different Instant Pot models cook these lava cakes at different rates. I would suggest cooking for two fewer minutes next time.
Again, it probably comes down to your specific Instant Pot model. If you see that the cake looks too jiggly, pressure cook for another 1 to 2 minutes.
How to Make Chocolate Lava Cakes
⏲️ Instant Pot Method
- Melt Chocolate
- Add eggs and flour
- Fill containers and set on a trivet
- Pressure cook and quick-release pressure
- Cool on a rack
- Sprinkle powdered sugar
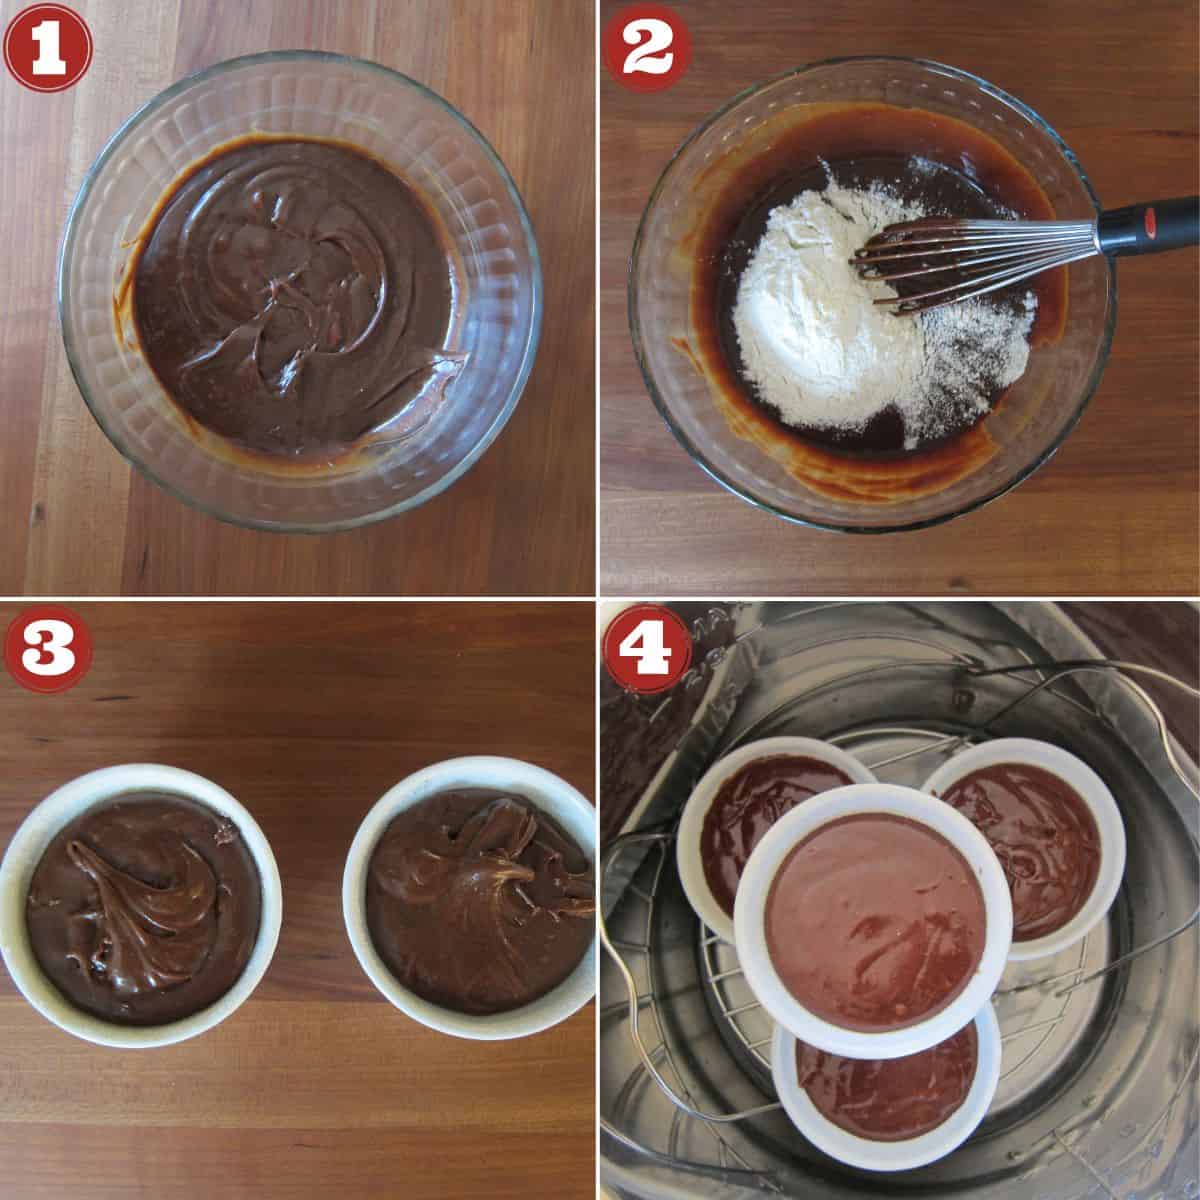
- Microwave butter and chocolate in medium bowl at 50% power for 1 minute. Stir. Heat in 15-second bursts, stirring each time, until mostly melted with a few small pieces remaining. Stir until completely smooth. Stir in confectioner’s sugar. *
- Whisk in eggs, yolks, coffee and vanilla. Stir in flour and salt.
- Grease the bottom and sides of four 6 oz. ramekins. Coat each with sugar. Divide batter among the lava cake containers.
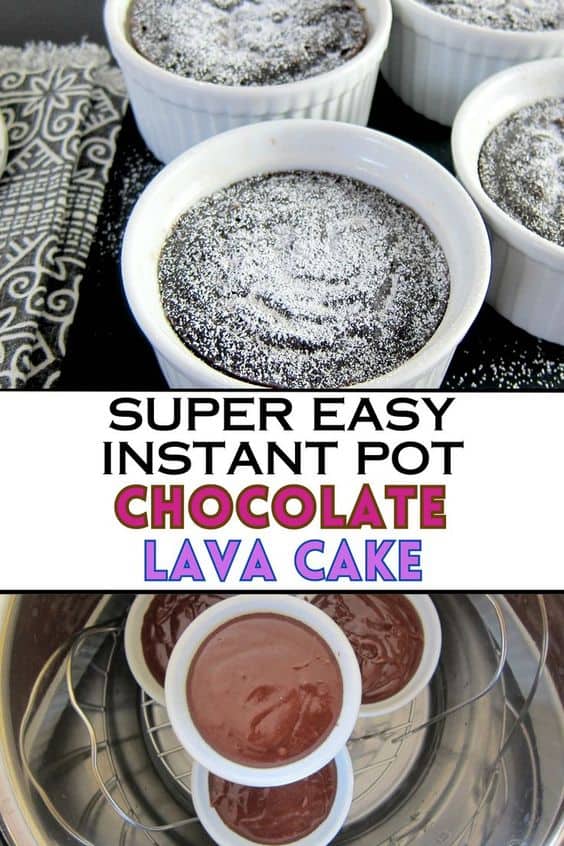
- Pour 2 cups water into the Instant Pot’s main compartment (inner pot) and place the trivet in water. Place 3 ramekins on the trivet and stack the fourth container on top.
* Make sure you don’t over-melt the chocolate. See this article about melting chocolate in the microwave.
✏️ Pro Tip
- Pressure cook time varies by Instant Pot model. First time? Try 7 minutes. If undercooked, add 1-2 minutes more.
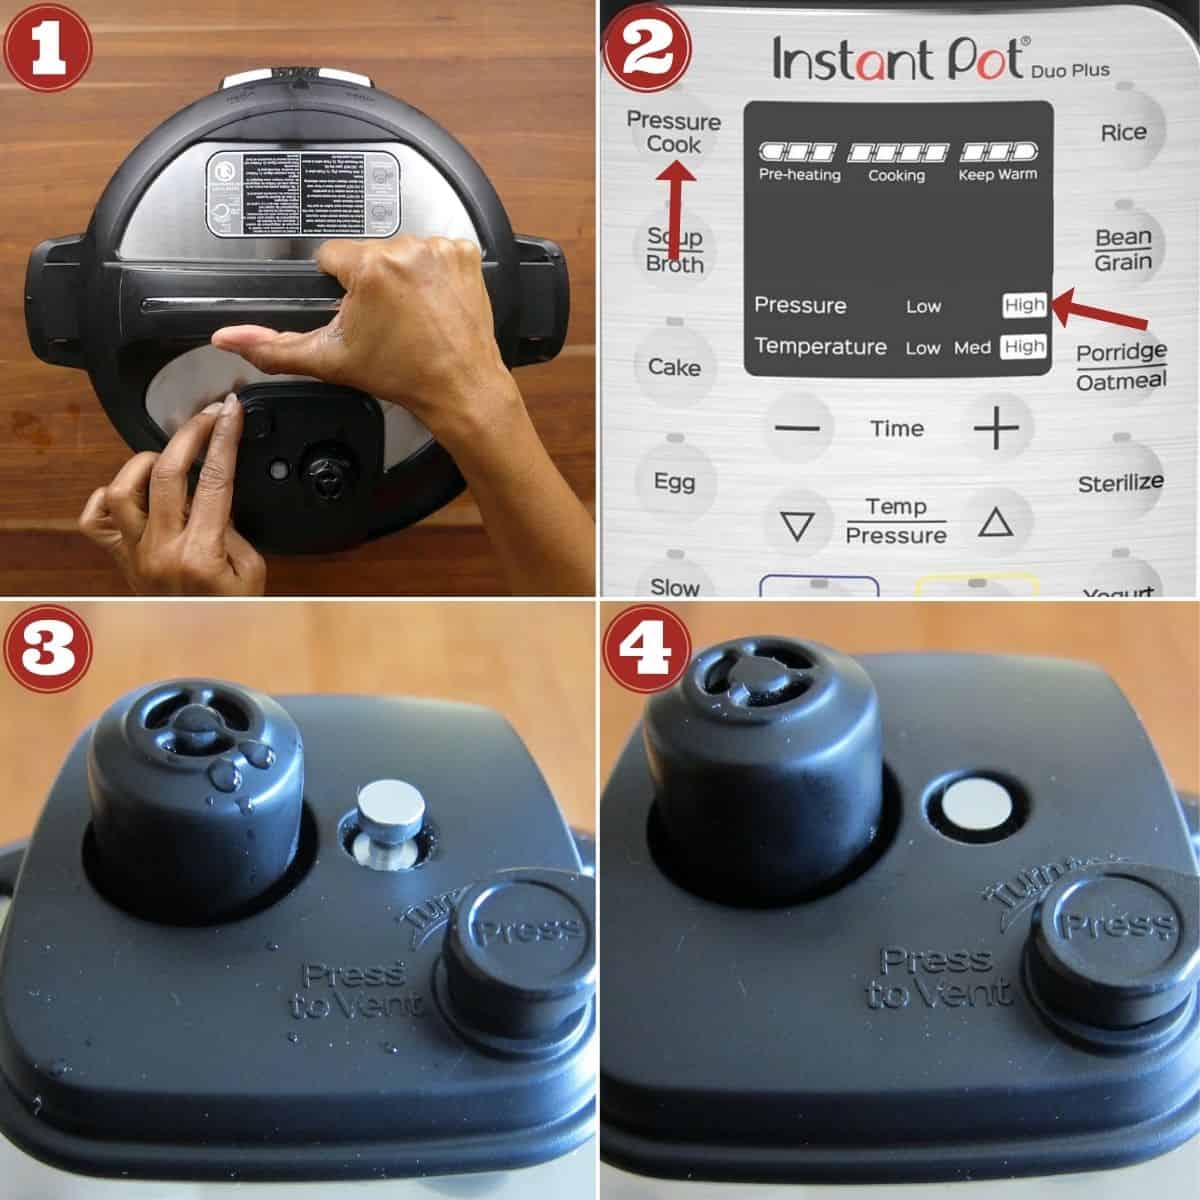
- Close the lid.
- Program the Instant Pot to pressure cook on high pressure for 9 minutes.
- The display will go from On to 9:00. The float valve will go up after a few minutes. The display will count down to 00:00.
- Do a quick release of pressure. Once the float valve goes down, the lid can be opened.
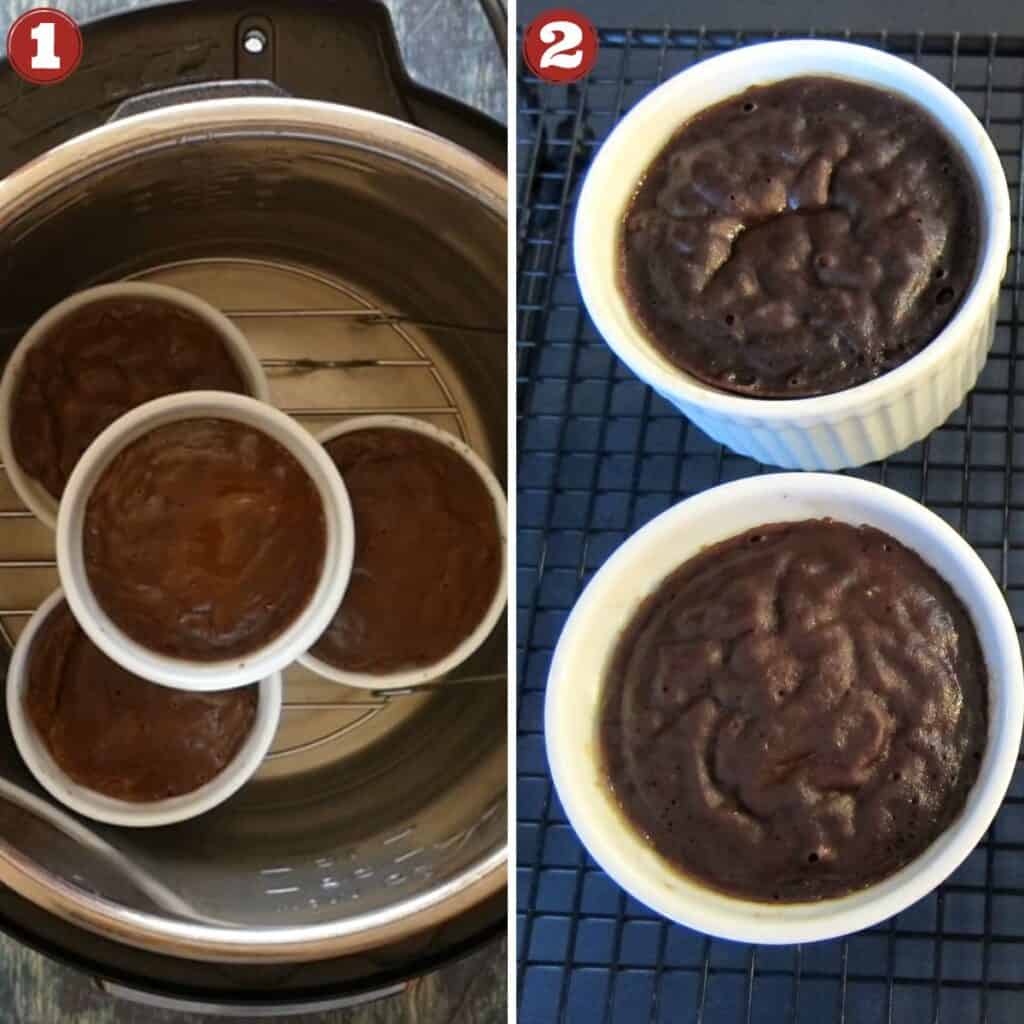
- Lift the trivet by the handles and carefully remove the ramekins from the Instant Pot. Use heat-resistant gloves.
- Place the lava cakes on a cooling rack to cool for a few minutes.
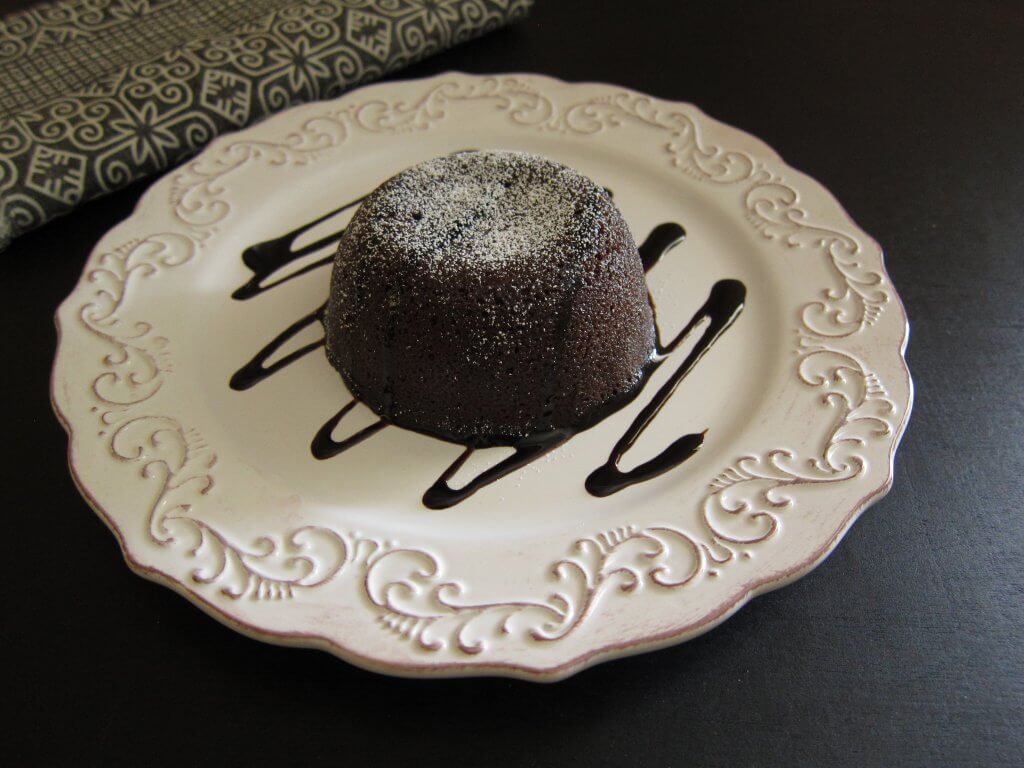
- Serve warm. To plate: Loosen cake edges with a knife. Place a plate on the ramekin. Flip both. The cake should release onto the plate. Sprinkle with powdered sugar.
♨️ Oven Method
- Follow the same directions to prepare the batter as the Instant Pot version
- Bake the lava cakes at 400 degrees F (204 degrees C) for about 12 minutes or until a thermometer reads 160 degrees F (71 degrees C)
- Remove ramekins to a wire rack and cool for 5 minutes
- Invert warm cakes onto serving plates and dust with powdered sugar
Instant Pot Chocolate Lava Cake
Ingredients
- 1 tablespoon granulated sugar
- ½ cup butter – 1 stick, cut into pieces (4 oz. or 113 grams)
- 4 oz. semisweet chocolate chopped (113 grams)
- 1 cup confectioners sugar
- 2 eggs
- 2 egg yolks
- 1 teaspoon instant coffee granules
- 1 teaspoon vanilla extract
- 6 tablespoon all purpose flour
- ¼ teaspoon salt
Instructions
- Grease the bottom and sides of four 6 oz ramekins. Coat each with sugar.
- Melt the chocolate and butter: In a medium-sized microwave-safe bowl, microwave butter and chocolate on medium heat for about 1 minute. Stir and scrape sides of the bowl with a silicone spatula and repeat heating at 15-second intervals, until the chocolate is melted and smooth but a few small pieces of chocolate still remain. Keep stirring to allow the chocolate to completely melt in the residual heat.
- Stir in confectioner’s sugar.
- Whisk in eggs, yolks, coffee and vanilla.
- Stir in flour and salt.
- Divide batter among the ramekins.
Instant Pot Instructions
- Pour 2 cups water into the Instant Pot’s main compartment (inner pot) and place trivet in water.
- Place 3 ramekins on the trivet and place 1 more on top of them, in the middle (staggered).
- Close the lid and pressure cook on High Pressure for 9 minutes. *
- Do a quick release of pressure (QR) and open the lid. [Read More: The Different Pressure Release Methods].
- Use the trivet handles to lift the trivet out of the inner pot and carefully remove the ramekins. Gently dab off any condensation from the surface of the cake.
- Dust the Insant Pot chocolate lava cakes with powdered sugar.
- Serve warm and enjoy!
Oven Instructions
- Preheat oven to 400 degrees Fahrenheit (204 degrees Celsius)
- Bake the ramekins for 12 minutes or until a thermometer reads 160 degrees F (71 degrees C), and the cake sides are set and the centers are soft.
- Transfer the ramekins to a wire rack and cool for about 5 minutes. Run a small knife around the edge of the cakes to loosen them. Invert the warm cakes onto serving plates and dust them with powdered sugar.
Notes
- If you have a larger Instant Pot, you might be able to fit all 4 ramekins in one layer.
- I use 6 oz ceramic ramekins and a 6 quart Instant Pot Duo and Ultra for this recipe as written; if you’re using different size or type of containers or pressure cooker, your cooking time may need to change.
- * The pressure cook time for this recipe can vary based on model of Instant Pot. If you’re doing this for the first time, you might want to try 7 minutes and if the lava cakes are undercooked, pressure cook them for another 1 to 2 minutes.
Nutrition
Thank you for visiting Paint the Kitchen Red. All photos and content are copyright protected. Please don’t use any content without prior written permission. If you’ve made this recipe and would like to share it with your friends, please link back to this recipe. Thank you!
I am not a certified nutritionist. I provide my best estimate of nutritional information merely as a courtesy to my readers. If you depend on nutritional information for dietary or health reasons, I suggest using your favorite online nutrition calculator to confirm the nutritional value of this recipe based on the actual ingredients that you use.
Did you know that the best way to support your favorite bloggers is to comment and rate recipes, and share on social media? If you loved this recipe, please comment and give it a five ⭐ rating in the comment section below. If you’re a pinner, pin this post using the Pin buttons at the top and bottom of this post and in the recipe card above. Thank you for your support!


Shanda says
Has anyone tried it with sugar free chocolate chips? I did my first attempt but no lava. Wondering if the chocolate or sub of splenda for powder sugar was the issue. I’m a diabetic so was trying to make it more diabetic friendly.
Paint the Kitchen Red says
Shanda, I’ve never used sugar free chocolate but I’m thinking you might just want to try cooking for 1 minute less. And take them out promptly.
Peggy G says
Love this!!
Paint the Kitchen Red says
Thanks, Peggy! Glad to hear it.
Lynn says
I always put espresso powder in my chocolate desserts such as brownies. Not sure if coffee granules have a different affect than espresso powder but I can’t say I’ve ever picked up a hint of coffee in my chocolate desserts but I do agree it enhances the depth of flavor in chocolate.
*I did order the Pyrex cups you recommended as I’ve had a difficult time finding 4 or 6 ounce ones that were ok for use in an instant pot. Very odd that Corningware came back with a NO to their ramekins in the IP.
Paint the Kitchen Red says
Thanks, Lynn! I’m glad you were able to get the Pyrex bowls.
Gail says
I give this recipe a five. Even tho. It didn’t turn out right the second time I made it. It was still good but no lava middle not quite sure what I did but thinking I might have cooked a minute longer than last time. But will try again. Thanks
Paint the Kitchen Red says
You’re welcome, Gail. It can be a picky recipe – you gotta get the time and ingredients just right!
Gail says
Oh my goodness I’m not to sure I have ever had a lava cake. But this was absolutely delicious. It’s very rich but right up my alley. Lol. I love coffee. But didn’t taste it. But that’s fine to my daughter doesn’t like coffee and she did not taste it either. This will be on my make again list. Thank you.
Paint the Kitchen Red says
Oh, thank you so much, Gail, for your comment. I know – it is rich! Sometimes we need to treat ourselves 🙂
Stephen Villarance says
Great article! But is it okay if I add some milk in?
It would be great if I can mix it with milk. Do you have any ideas on it?
Paint the Kitchen Red says
Stephen, I don’t think that you could add milk without adjusting other quantities 🙂
Catrina Rains says
Loved this! Made it tonight and it was a huge success…lava and all. The first time I’ve ever made lava cake. I started with 5 min pressure cook time. I felt like it needed another couple, so i repressurized for 2 more min. It was perfect! You were as clear as you could be with the instructions and your tips were very helpful. I used my crockpot express.
Paint the Kitchen Red says
Awesome! I’m glad the recipe worked out for you. Sounds like 7 minutes was the sweet spot for you. Thank you for sharing your experience!
KW says
I made the recipe exactly how you said and there was no molten anything! Rubbery brownie…my husband said it tasted great but it didn’t turn out the way I expected. I’ve read your comments on others posts but I made it exactly to your specifications so I cannot see where it went wrong. Same instant pot brand same size ramekins!
Paint the Kitchen Red says
Hi there, I’m sorry your lava cakes didn’t turn out molten. I haven’t figured out why this recipe gives some people trouble. My best advice is to try with one ramekin and see how it turns out, and then reduce the cooking time the next time.
Melissa says
I am so excited to try this but have been cautioned not to use Pyrex custard cups in an IP. None of the ceramic ones I find say ok for pressure cooker use either. I want to do this but have been scared off by people telling me any small bubble or crack and the glass could explode. Any thoughts?
Paint the Kitchen Red says
Melissa, I’ve used pyrex and ceramic oven-safe ramekins and never had issues. However, you should follow the directions for the bakeware you’re using. Another option is silicone, which I’ve not tried with this recipe.
Deb says
I am wondering if this could be done with 5 ramekins in the instant pot. I am looking for a fun dessert for Christmas meal with 5 people. I have not used an instant pot before but just purchased one. Any suggestions – would I need to add time if 5 ramekins were used? I am not rating the recipe as I have not tried it yet. Can you email me with your comment please?
Paint the Kitchen Red says
Deb, first of all, you don’t need to add cooking time if you’re increasing the number of ramekins. However, if you’re following the recipe and distributing the batter amongst 5 ramekins rather than 4, your ramekins will be less full and so I think that you will need to decrease cooking time.
Marianne says
I cooked mine for 9 minutes and came out with a spongy dry rubbery pudding – no lava. Might try it for a few less minutes once I get over the pain of failing! :-/ Tasted pretty damn good regardless!
Paint the Kitchen Red says
Arrgh – sorry! This recipe is a weird one; some people get it perfect, others don’t. I think there are a lot of variables: the model of IP, microwaving the chocolate (over microwaving can cause the recipe to fail), quantity of flour, etc (it’s such a small amount that being a bit off can cause issues), etc. Give it a try again if you have the patience and reduce the time to 7 minutes. Thanks for commenting.
Sasha says
The chocolate cake is as yummy as it looks. I am glad I found this recipe. Thank you!
Paint the Kitchen Red says
That’s great Sasha, I’m glad you liked it as much as I do!
Gabe says
Wow this is so good great recipe
Paint the Kitchen Red says
Glad you liked it, Gabe – it is divine!
Gabe says
Ok well I’m making it again
Renee says
WOW WOW WOW!!!! Just made this and it is heaven in my mouth as I type this!!!!!
Paint the Kitchen Red says
Thank you Renee for the resounding approval 🙂 I’m really happy you liked it.
lane says
how long do you pressure cook it for?
Paint the Kitchen Red says
Hi lane, the recipe states 9 minutes. You may have to try it out first to see if that’s the right amount of time for your Instant Pot.
Holly says
I have a question. If it is gooey in the middle, how do you know it is safe to eat? Doesn’t that mean the eggs aren’t fully cooked? I’m sure there is some easy explanation but I’m weird about undercooked food. Any explanation would be great because I cannot wait to try this recipe!
Paint the Kitchen Red says
Hi there Holly, I understand your concern. Because the Instant Pot reaches a very high temperature, it should be okay… but you should refrigerate any uneaten cakes. Maybe you can use pasteurized eggs, and then you don’t have to worry. There are lava cake recipes that have ganache in the middle. You could try that too. Thanks for your question.
Heather says
I was wondering if it would work to use the egg bite molds in lieu of ramekins? Just trying to get most bang for my buck when it comes to IP accessories 🙂
Paint the Kitchen Red says
Hi Heather – I think they would work, but not sure about the time – you might need to adjust the pressure cooking time due to size and material. Thanks for your question.
Cindy says
Help… this is my third go. First time I made it, was perfect second and third time, no lava… what am I doing wrong
Paint the Kitchen Red says
Cindy – did you see the reply above? If you’ve considered all those things, I would suggest cooking it for less time next time you try it, maybe a minute or even two minutes less. Did you change the brand of any of the ingredients or the container size after the first try?
Cindy says
1st time it came out perfect, 2nd time, no lava… trying again tonight. Regardless, it’s very tasty and really easy!
Paint the Kitchen Red says
Hi Cindy – I sometimes suspect that it could be overheating of the chocolate. Do you think that could have been the reason i.e. microwaved the chocolate a bit too long? Best thing to do is to microwave and stir in phases until just about completely melted and then let melt in the residual heat, stirring. Might be worth a try. I also think that the measurement of ingredients is particularly important in this recipe since the quantity of flour is so small. Thank you for the comment!
Stefan says
I made them tonight. 6 oz ramekins, 3 on the bottom and one on top. 9 minutes high pressure with a quick release. Mine were not gooey in the middle, more spongy and moist. The taste was fine so not a total loss. Will try 7 minutes the next time.
Paint the Kitchen Red says
Hi Stefan – thank you for commenting. For whatever reason, some people need less time to cook these. I would love to know how 7 minutes works for you!