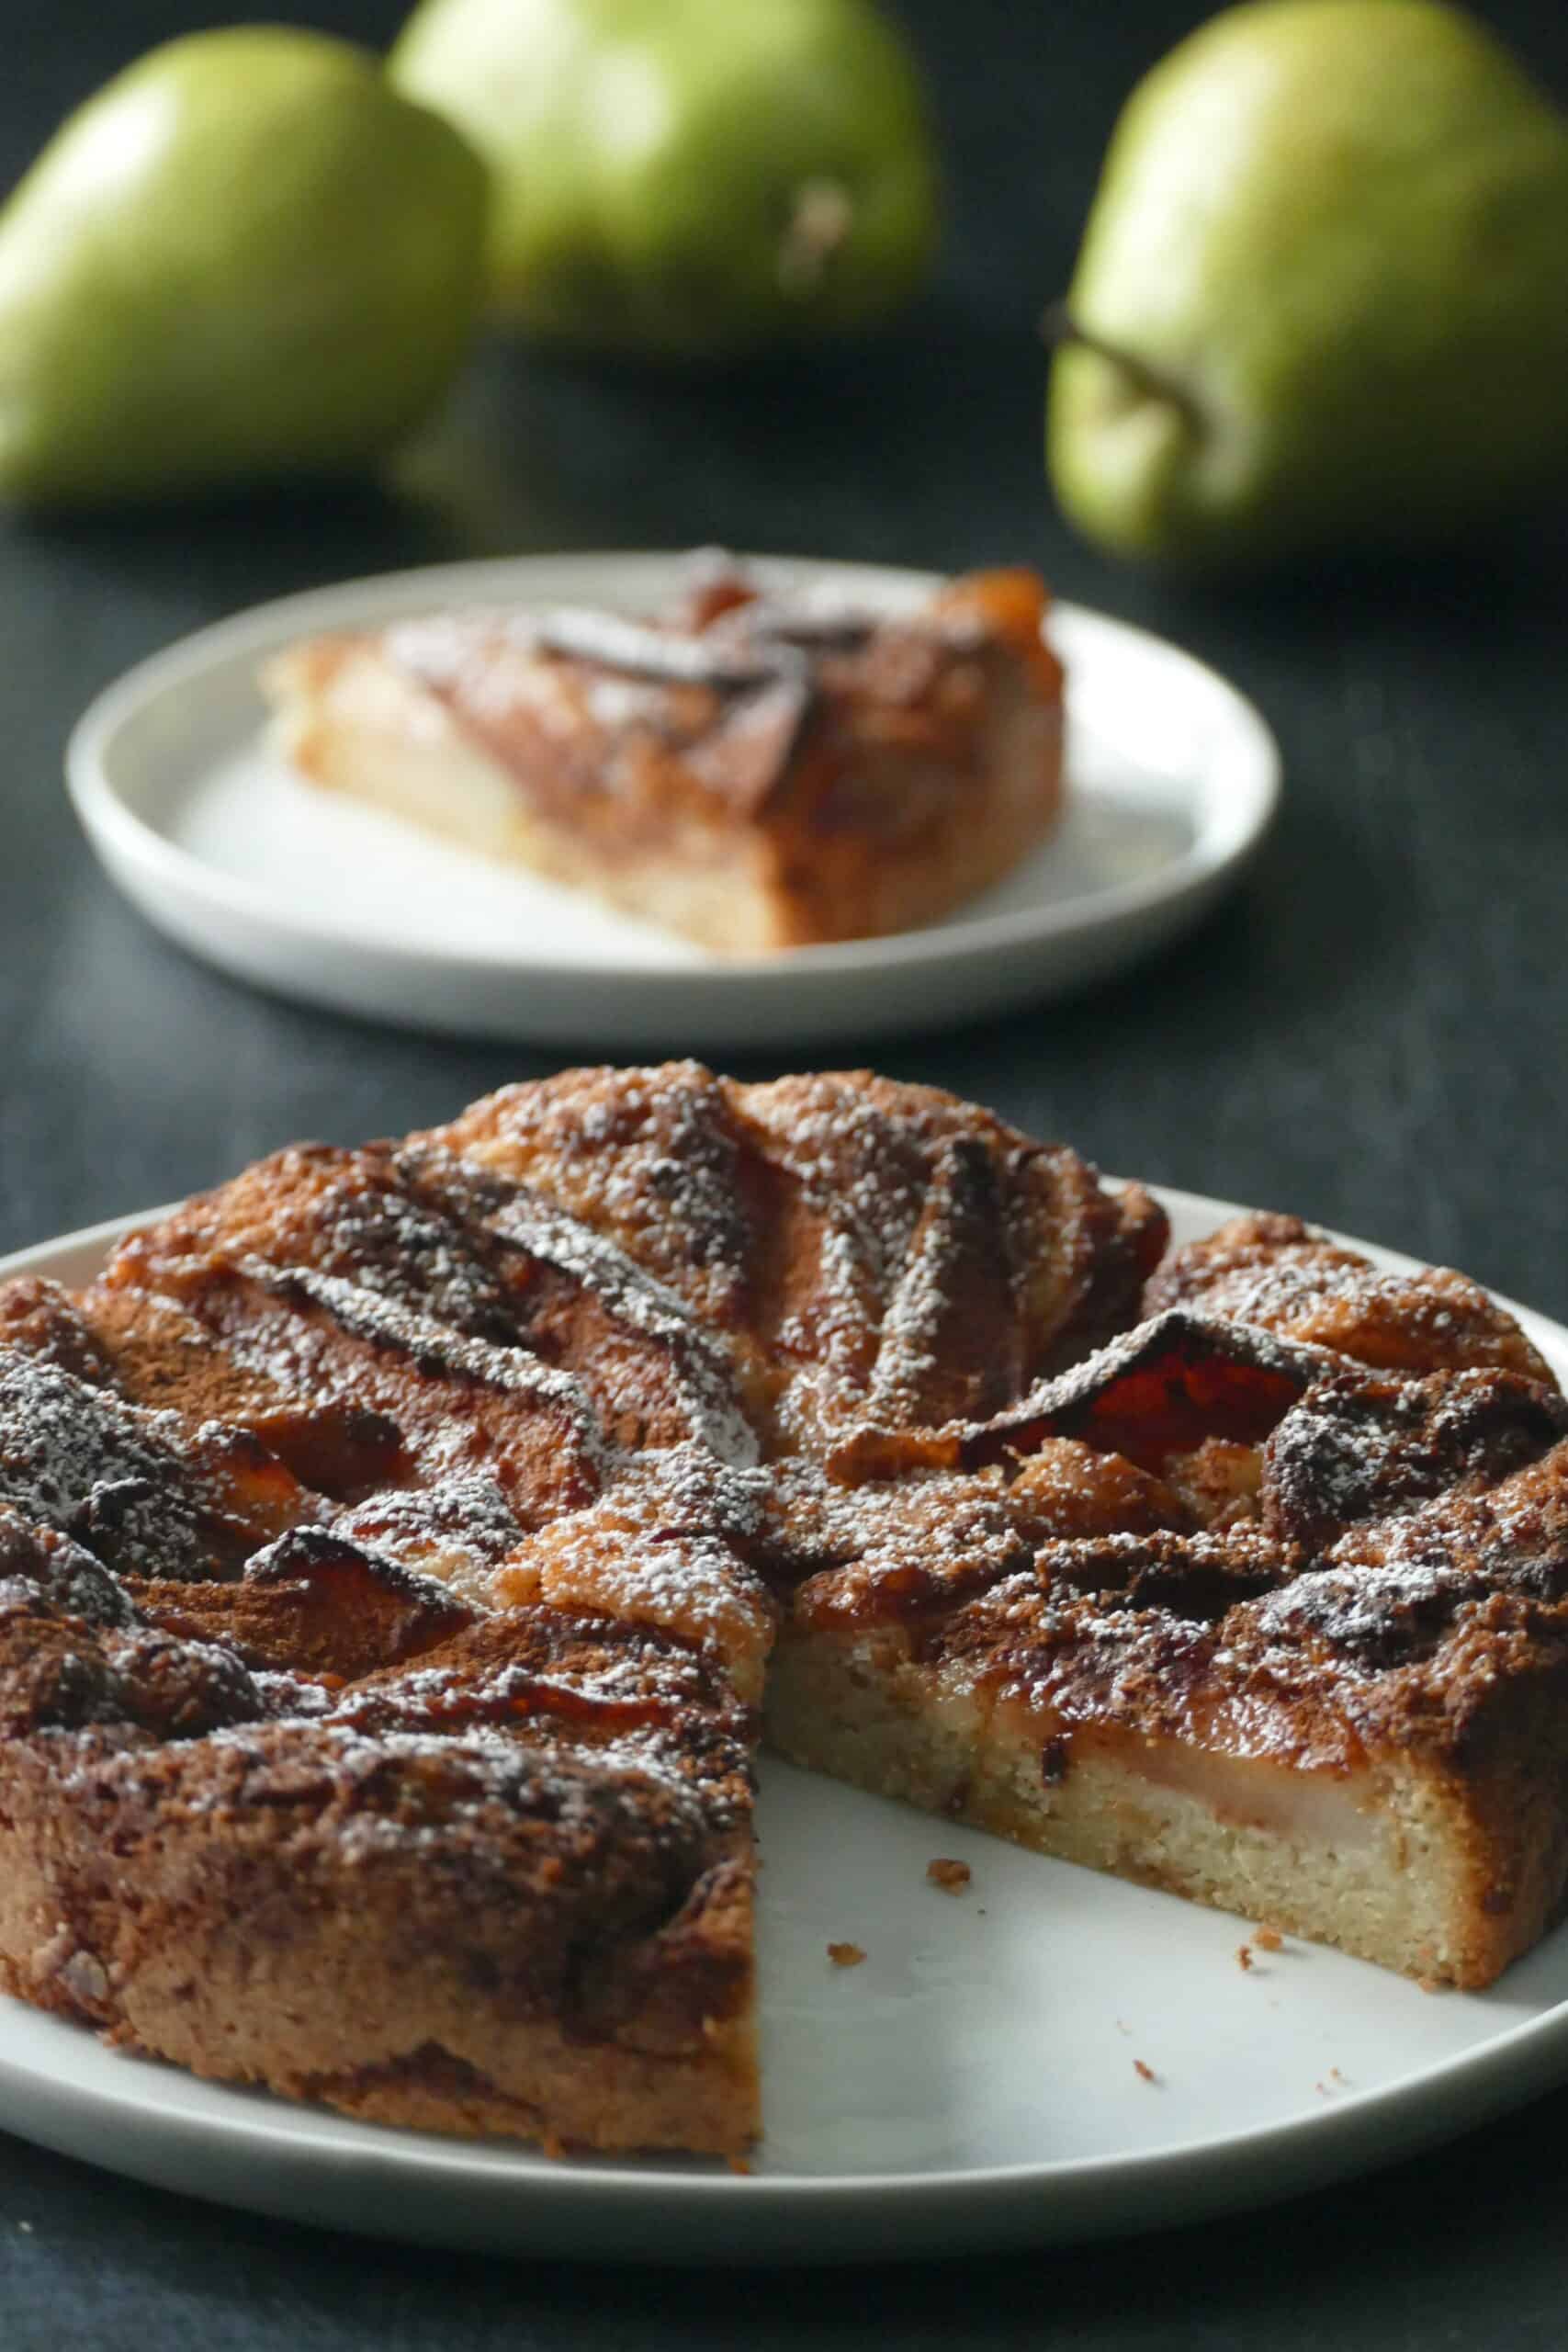
This pear cake is an old-fashioned cake that is so comforting and satisfying. It’s perfect during pear season when you have overripe pears. This is a no-frills tart that evokes nostalgia for simpler times, like being in grandma’s kitchen with a fruity vanilla aroma filling the air. [Oven instructions provided.]
This post contains affiliate links. As an Amazon Associate, I earn from qualifying purchases. Please read the disclosure.
Table of Contents
Introduction
I make this pear cake very often in the fall, especially when I have an abundance of fresh pears. I love the recipe because it’s so versatile. I make it with all kinds of fresh fruit including peaches, plums, or berries.
This recipe is similar to a French pear cake but is super easy to make and it’s a great option when you need a last-minute dessert that’s wholesome and simple. And the whole house smells divine while it’s baking.
The tart can be served warm or at room temperature. You can serve it plain, dusted with powdered sugar, drizzled with caramel, or topped with vanilla ice cream or whipped cream.
There are times when I want to bake a cake, but it’s summertime and I hate to heat the whole house up by turning on the oven. That’s when the air fryer comes into play.
But the thing about making this pear cake in the air fryer is that the cake is quite small, although it easily feeds six people generously.
Because of the size limitations, I can only fit a 7 to 8-inch cake pan in my air fryer. If you want a larger cake, use my instructions for the oven.
If you’re interested in other dessert recipes that you can make in the air fryer, try out my air fryer pound cake, or pecan coffee cake. Both are family favorites! Or try Swedish visiting cake, which is my most-requested dessert!
Tips and Substitutions
Fresh Pears
Make sure you use ripe pears. I’ve used Anjou and Bartlett pears. There’s no need to peel the pears.
The quantity of pears depends on the size of the pears. I use 12 ounces of pears, about 1 to 2 pears.
When arranging the pears on the batter, if you have liquid left in the bowl discard it.
Cake Pan
- This recipe was made using a 7-inch Fat Daddio push pan which works in both the 6 quart and 8 quart Instant Pots and the average basket-style air fryer. You could use the same size springform pan too.
- If you use a larger pan, you might need to increase the quantity of ingredients proportionately because the cake might be too thin otherwise.
- If you’re baking the cake in the oven, use a 9-inch springform pan.
- To prepare the pan, line the bottom with parchment paper. It makes the cake much easier to remove.
Butter
Use room temperature unsalted butter. I love Kerry Gold butter or Land O Lakes but you can use any brand.
Flour
My favorite brand of flour is King Arthur all-purpose flour.
Spoon the flour into the measuring cup and level off with a straight edge spatula or butter knife. Don’t scoop the flour directly from the container.
Temperature
I bake it at 370 degrees in the air fryer. If you find that it’s browning too quickly, reduce the temperature to 360 degrees and bake for a bit longer. If baking in the oven, bake it at 375 degrees.
Cooling the Cake
Once you remove the pear cake from the air fryer, run a blunt knife around the edges of the cake to separate the cake from the pan. This ensures that the melted sugar doesn’t cause the cake to stick to the pan as it cools.
Let the cake cool on a cake rack for 10 minutes and then remove the sides of the pan. Once the cake is cool enough to handle, remove the bottom and parchment paper. I use a large spatula to make sure the cake doesn’t fall apart. Allow the cake to cool completely before dusting with powdered sugar.
Mixer
I use my handheld mixer in this recipe but you can also use a whisk to beat the batter.
FAQS
Use a toothpick to poke the center of the cake. If it comes out clean, the cake is done. If it comes out wet, let it bake for a few minutes longer.
The pears may have released a lot of liquid. Add another 5 to 10 minutes of air frying time, checking on the cake every 5 minutes to make sure it’s not burning. The liquid should mostly evaporate.
This cake does tend to brown easily but I’ve never found it to have a burnt taste. I dust it with powdered sugar once cooled, and it looks beautiful.
It browns because of the cinnamon sugar on top. If you find that the cake is too brown on top, next time reduce the temperature to 360 degrees. You may need to increase the cooking time by 5 or more minutes.
The batter may have been too loose. The batter should be thick so it can hold up to the weight of the pears. Your measurement of flour may have been off by a bit. Also, make sure the pear slices are not cut too thickly.
Be sure to use ripe pears. The juices from the pears bring moistness to the cake.
The pear tart can be wrapped in plastic wrap and kept at room temperature for 24 to 48 hours.
Air Fryer Pear Cake – Ingredients
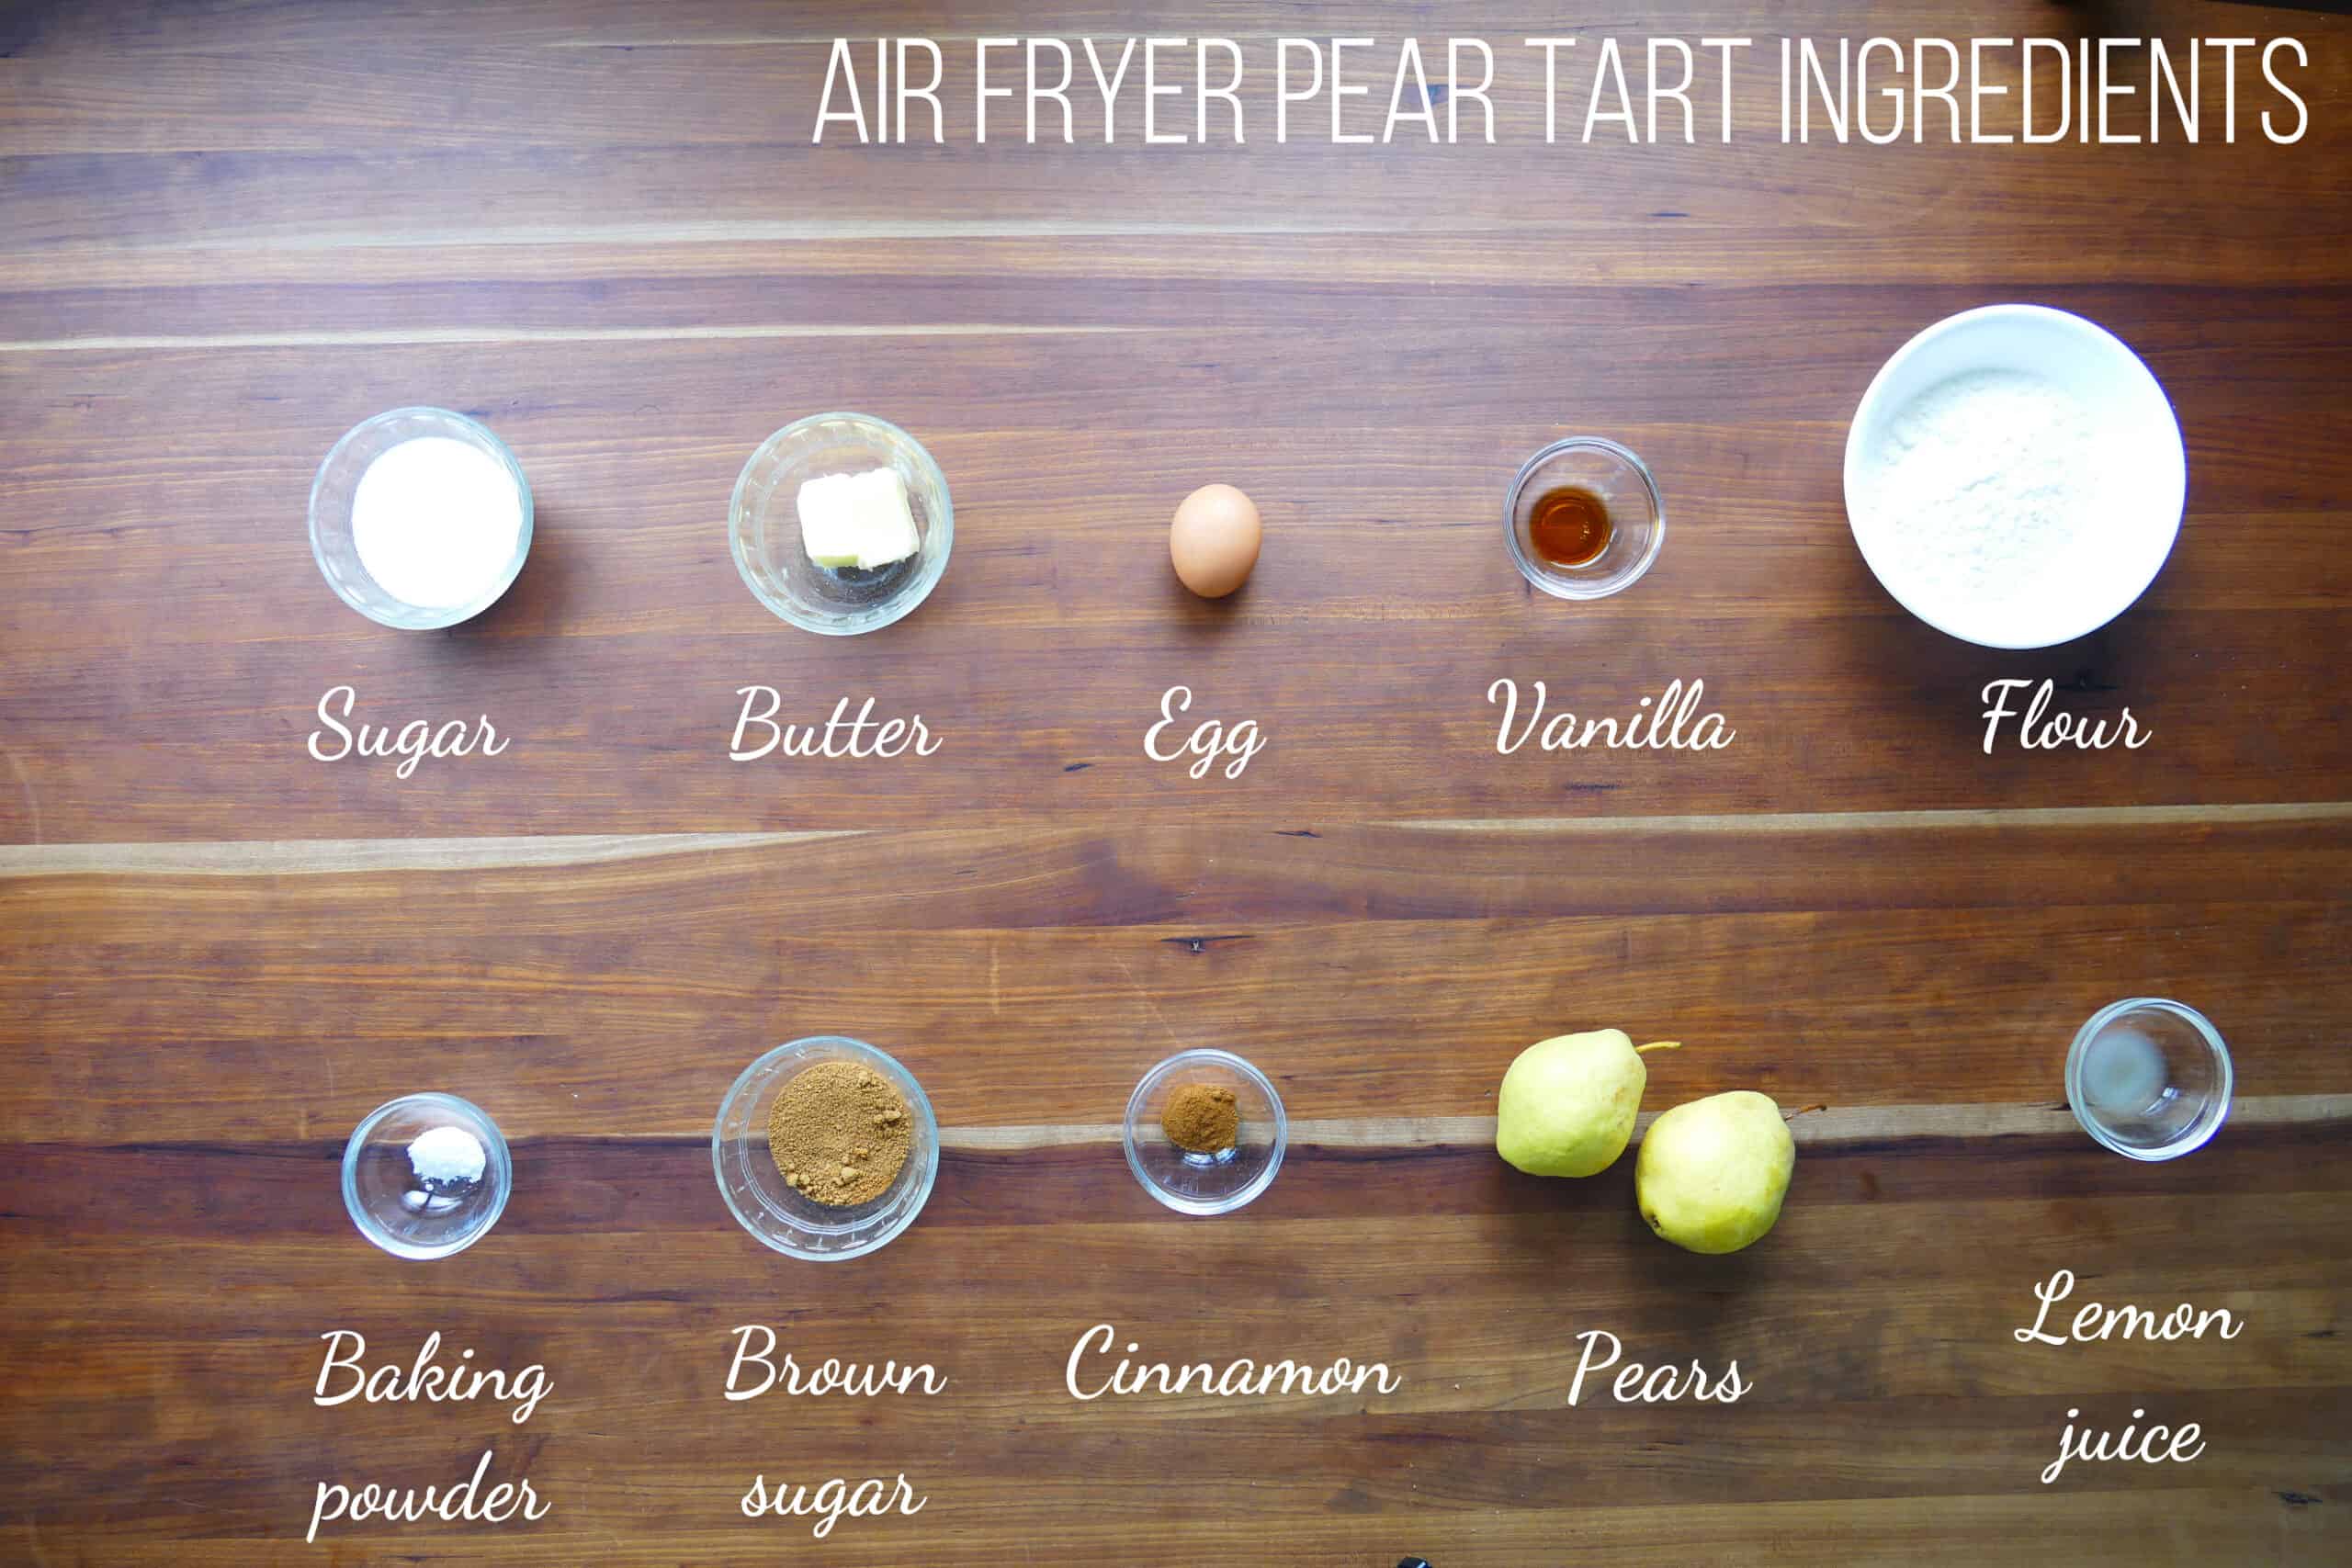
More details in the recipe card at the bottom of this post
How to Make Pear Cake in Air Fryer (Step by Step Instructions)
- Cream butter and sugar, add egg, and extract
- Mix in flour and pour batter into the cake pan
- Arrange pears on the batter
- Transfer cake pan to air fryer and air fry
- Test with toothpick and cool
Cream butter and sugar, add egg, and extracts

- Stir together flour, baking powder, and a pinch of salt and set aside.
- Grease and flour a 7-inch cake pan. Line the pan with parchment paper. (Find out how to grease and flour a cake pan.)
- Use a hand mixer or whisk to beat butter and sugar until light and fluffy.
- Scrape down the sides of the bowl with a silicone spatula.
- Add egg and vanilla extract and beat on low speed until incorporated. Don’t overmix.
Mix in flour and pour batter into cake pan

- Add the flour mixture and beat until combined.
- Make sure you scrape the sides of the mixing bowl periodically while mixing.
- The batter should be thick and creamy.
- Evenly pour the batter into the prepared cake pan.
- Use a spatula to gently smooth out the batter and make sure it’s evenly spread.
Arrange pears on batter

- Stir together brown sugar and cinnamon.
- Add half the lemon juice to the pears and stir to coat.
- Sprinkle half the cinnamon sugar over the pears and stir gently to coat.
- Arrange the fresh pear slices in concentric circles over the batter. Discard any liquid in the bowl.
- Sprinkle the remaining spice mixture over the pears.
- Evenly drizzle the remaining lemon juice over the pears.
Transfer cake pan to air fryer and air fry

- Preheat the air fryer.
- Place cake pan in the air fryer (If using Instant Pot air fryer lid, place a trivet in the inner pot and place the cake pan on the trivet.)
- Close the air fryer.
- Program the air fryer to bake at 370 degrees Fahrenheit (188 celsius) for 30 minutes.
Test with toothpick and cool

- When the time runs down, the air fryer will beep and turn off. Open the air fryer.
- Use a toothpick to test if the cake is done. If the toothpick comes out clean, the cake is done. If the toothpick is wet, air fry for another 3 to 5 minutes.
- Use oven mitts to remove the cake pan from the air fryer and place it on a cooling rack. Run a blunt knife around the edges to separate the cake from the pan.
- Allow the cake to cool for 10 minutes and remove the sides of the push pan or springform pan.
- Once the cake is cool enough to handle, remove the bottom of the pan and the parchment paper and let it cool completely.
- Sprinkle with powdered sugar, if desired.
Oven Instructions for Pear Cake
To make this recipe in the oven:
- Double the ingredient quantities.
- Preheat the oven to 375 degrees.
- Cream butter and sugar.
- Mix in eggs and vanilla extract.
- Mix in flour, baking powder, and salt.
- Pour batter into the prepared baking pan.
- Mix half the lemon juice, cinnamon, and sugar with the pears.
- Arrange pears in concentric circles on the batter.
- Sprinkle the remaining cinnamon sugar and lemon juice over the pears.
- Bake until done.
See the recipe card below for detailed instructions.
📍 Don’t Miss
- Be sure not to miss my favorite cookie recipe – cardamom cookies – that I like to share with friends and neighbors during the holidays!
Air Fryer Pear Cake
Equipment
- Cake Pan (7-inch) push pan or springform pan
Ingredients
- ½ cup all purpose flour
- ½ teaspoon baking powder
- pinch salt
- 4 tablespoon butter unsalted (½ stick or ¼ cup), at room temperature
- ½ cup granulated sugar
- 1 egg room temperature
- ½ teaspoon vanilla extract
- 2 tablespoon brown sugar
- 1½ teaspoon cinnamon powder
- 12 oz pears (about 2 small) cored and sliced ⅓ inch thick *
- 2 teaspoon lemon juice
- powdered sugar optional
Instructions
AIR FRYER INSTRUCTIONS (See Note!)
- Generously grease and flour a 7-inch springform or push pan. Line the bottom of the pan with parchment paper.
- In a small bowl, use a whisk to stir together flour, baking powder, and salt.
- Use a handheld or stand mixer to beat the butter and sugar on medium speed until light and creamy. Do not use high speed. Periodically scrape the sides of the bowl using a silicone spatula.
- Beat in the egg on medium speed until combined.
- Beat in vanilla extract until just incorporated.
- Add the flour and beat until combined. Don't overmix. Scrape the sides and bottom of the bowl periodically.
- Preheat the air fryer to 370 °F (188 °C) for 5 minutes.
- Pour the batter into the prepared cake pan. Use a spatula to gently even out the batter.
- Stir together the brown sugar and cinnamon.
- Mix the pears with half the lemon juice and half the cinnamon sugar. Be careful when mixing; avoid bruising the pears.
- Arrange the pears in concentric circles on the batter. Discard any liquid left in the bowl. Sprinkle the remaining cinnamon sugar over the pears and evenly drizzle with remaining lemon juice.
- Place the baking pan in the air fryer and bake at 370 °F (188 °C) for 30 minutes.
- Once the time is up, test the cake for doneness with a toothpick. If the toothpick comes out wet or has crumbs on it, bake for another 3 to 5 minutes.
- Transfer the cake from the air fryer onto a cooling rack. Run a knife along the edge of the cake to separate it from the pan. This makes sure the sugar doesn't harden and cause the cake to stick to the sides. Allow the cake to cool for 10 minutes.
- Remove the sides of the springform or push pan and set the cake onto a cake rack and allow it to cool a bit.
- Once the cake is cool enough to handle, remove the bottom of the pan and let the cake cool completely.
- Dust the cake with powdered sugar if desired.
OVEN INSTRUCTIONS
To Make in the Oven, Follow Air Fryer Instructions Except:
- Double all ingredients and use a 9-inch cake pan.
- Preheat the oven to 375 °F (190 °C)
- Bake for 45 to 55 minutes or until the top is golden brown and a toothpick comes out clean.
Notes
- Note: Every air fryer’s cooking time will vary due to wattage, capacity, and other factors. Always check on the food 2 to 3 minutes before the time is up to make sure it’s not burning or overcooking!
- * You don’t need to use two pears. You can go lighter on the pears and use 1 or 1 ½ pears.
- Prep time does not include steps that are already accounted for in the ingredient list, e.g. room temperature eggs, softened butter, cut pears, etc.
- If baking in a basket-style air fryer (like Cosori), check on the cake at 22 minutes to make sure it’s not over-browning. If you find it’s too brown at 370 degrees Fahrenheit, the next time reduce the temperature to 360 degrees.
- See the blog post for more detailed recipe tips, including some pro tips for success!
Nutrition
Thank you for visiting Paint the Kitchen Red. All photos and content are copyright protected. Please don’t use any content without prior written permission. If you’ve made this recipe and would like to share it with your friends, please link back to this recipe. Thank you!
I am not a certified nutritionist. I provide my best estimate of nutritional information merely as a courtesy to my readers. If you depend on nutritional information for dietary or health reasons, I suggest using your favorite online nutrition calculator to confirm the nutritional value of this recipe based on the actual ingredients that you use.
Did you know that the best way to support your favorite bloggers is to comment and rate recipes, and share on social media? If you loved this recipe, please comment and give it a five ⭐ rating in the comment section below. If you’re a pinner, pin this post using the Pin buttons at the top and bottom of this post and in the recipe card above. Thank you for your support!
You Might Also Like



Roxy says
I just made this recipe in the oven by doubling the ingredients and baking at 375 as the recipe states. It was amazing! I let the cake bake about 60 minutes and it was perfect. I only changed one thing, I used half the lemon juice.
Paint the Kitchen Red says
Thank you for trying it out. I’ve made this air fryer cake twice in a week because I have so many ripe pears!