• Skip to primary navigation
  • Skip to main content
  • Skip to primary sidebar
  • Skip to footer
Paint The Kitchen Red
  • Home
  • Recipes
    • Instant Pot
    • Air Fryer
    • Other
  • Tips
  • Shop
  • About
menu icon
go to homepage
subscribe
search icon
Homepage link
  • Home
  • Tips
  • Instant Pot Recipes
  • Air Fryer Recipes
  • Other Recipes
  • About
  • ×

    Home » Instant Pot

    Homemade Instant Pot Ghee | Clarified Butter

    This post contains affiliate links. As an Amazon Associate I earn from qualifying purchases. Please read the disclosure.    

    Published: Apr 11, 2017 | Updated: Mar 22, 2021 | Author: Paint the Kitchen Red | 44 Comments

    JUMP TO RECIPE
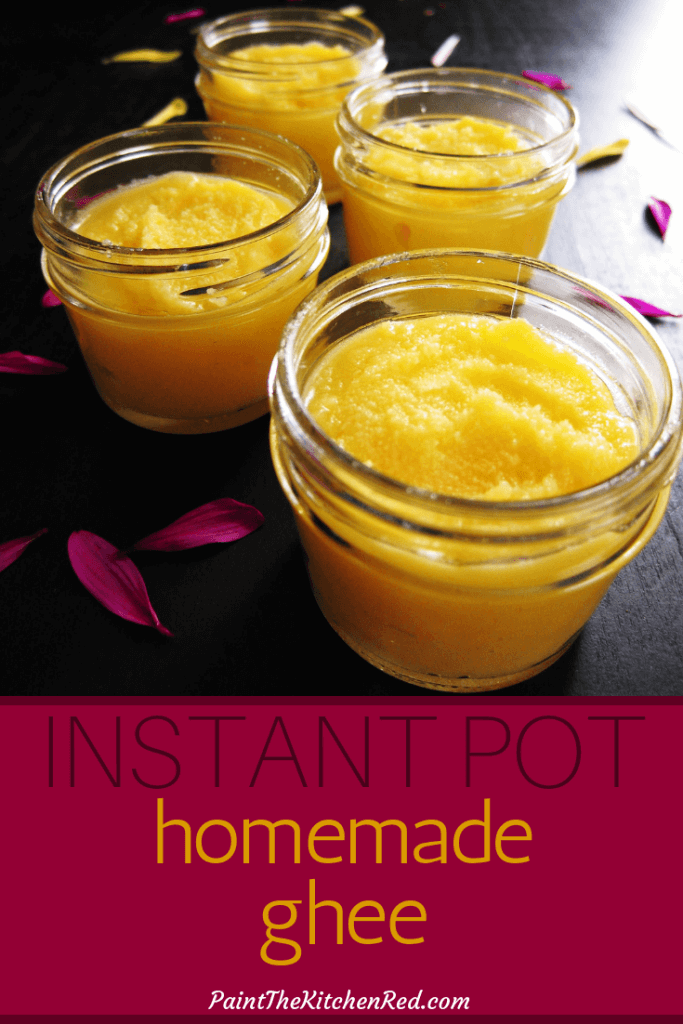
    Instant Pot Homemade Ghee pinterest pin - golden ghee in small mason jars - with flower petals on black background

    Learn how to make ghee with this Homemade Instant Pot Ghee recipe, perfect every time. Using the Instant Pot, you can make ghee with very little hands-on time.

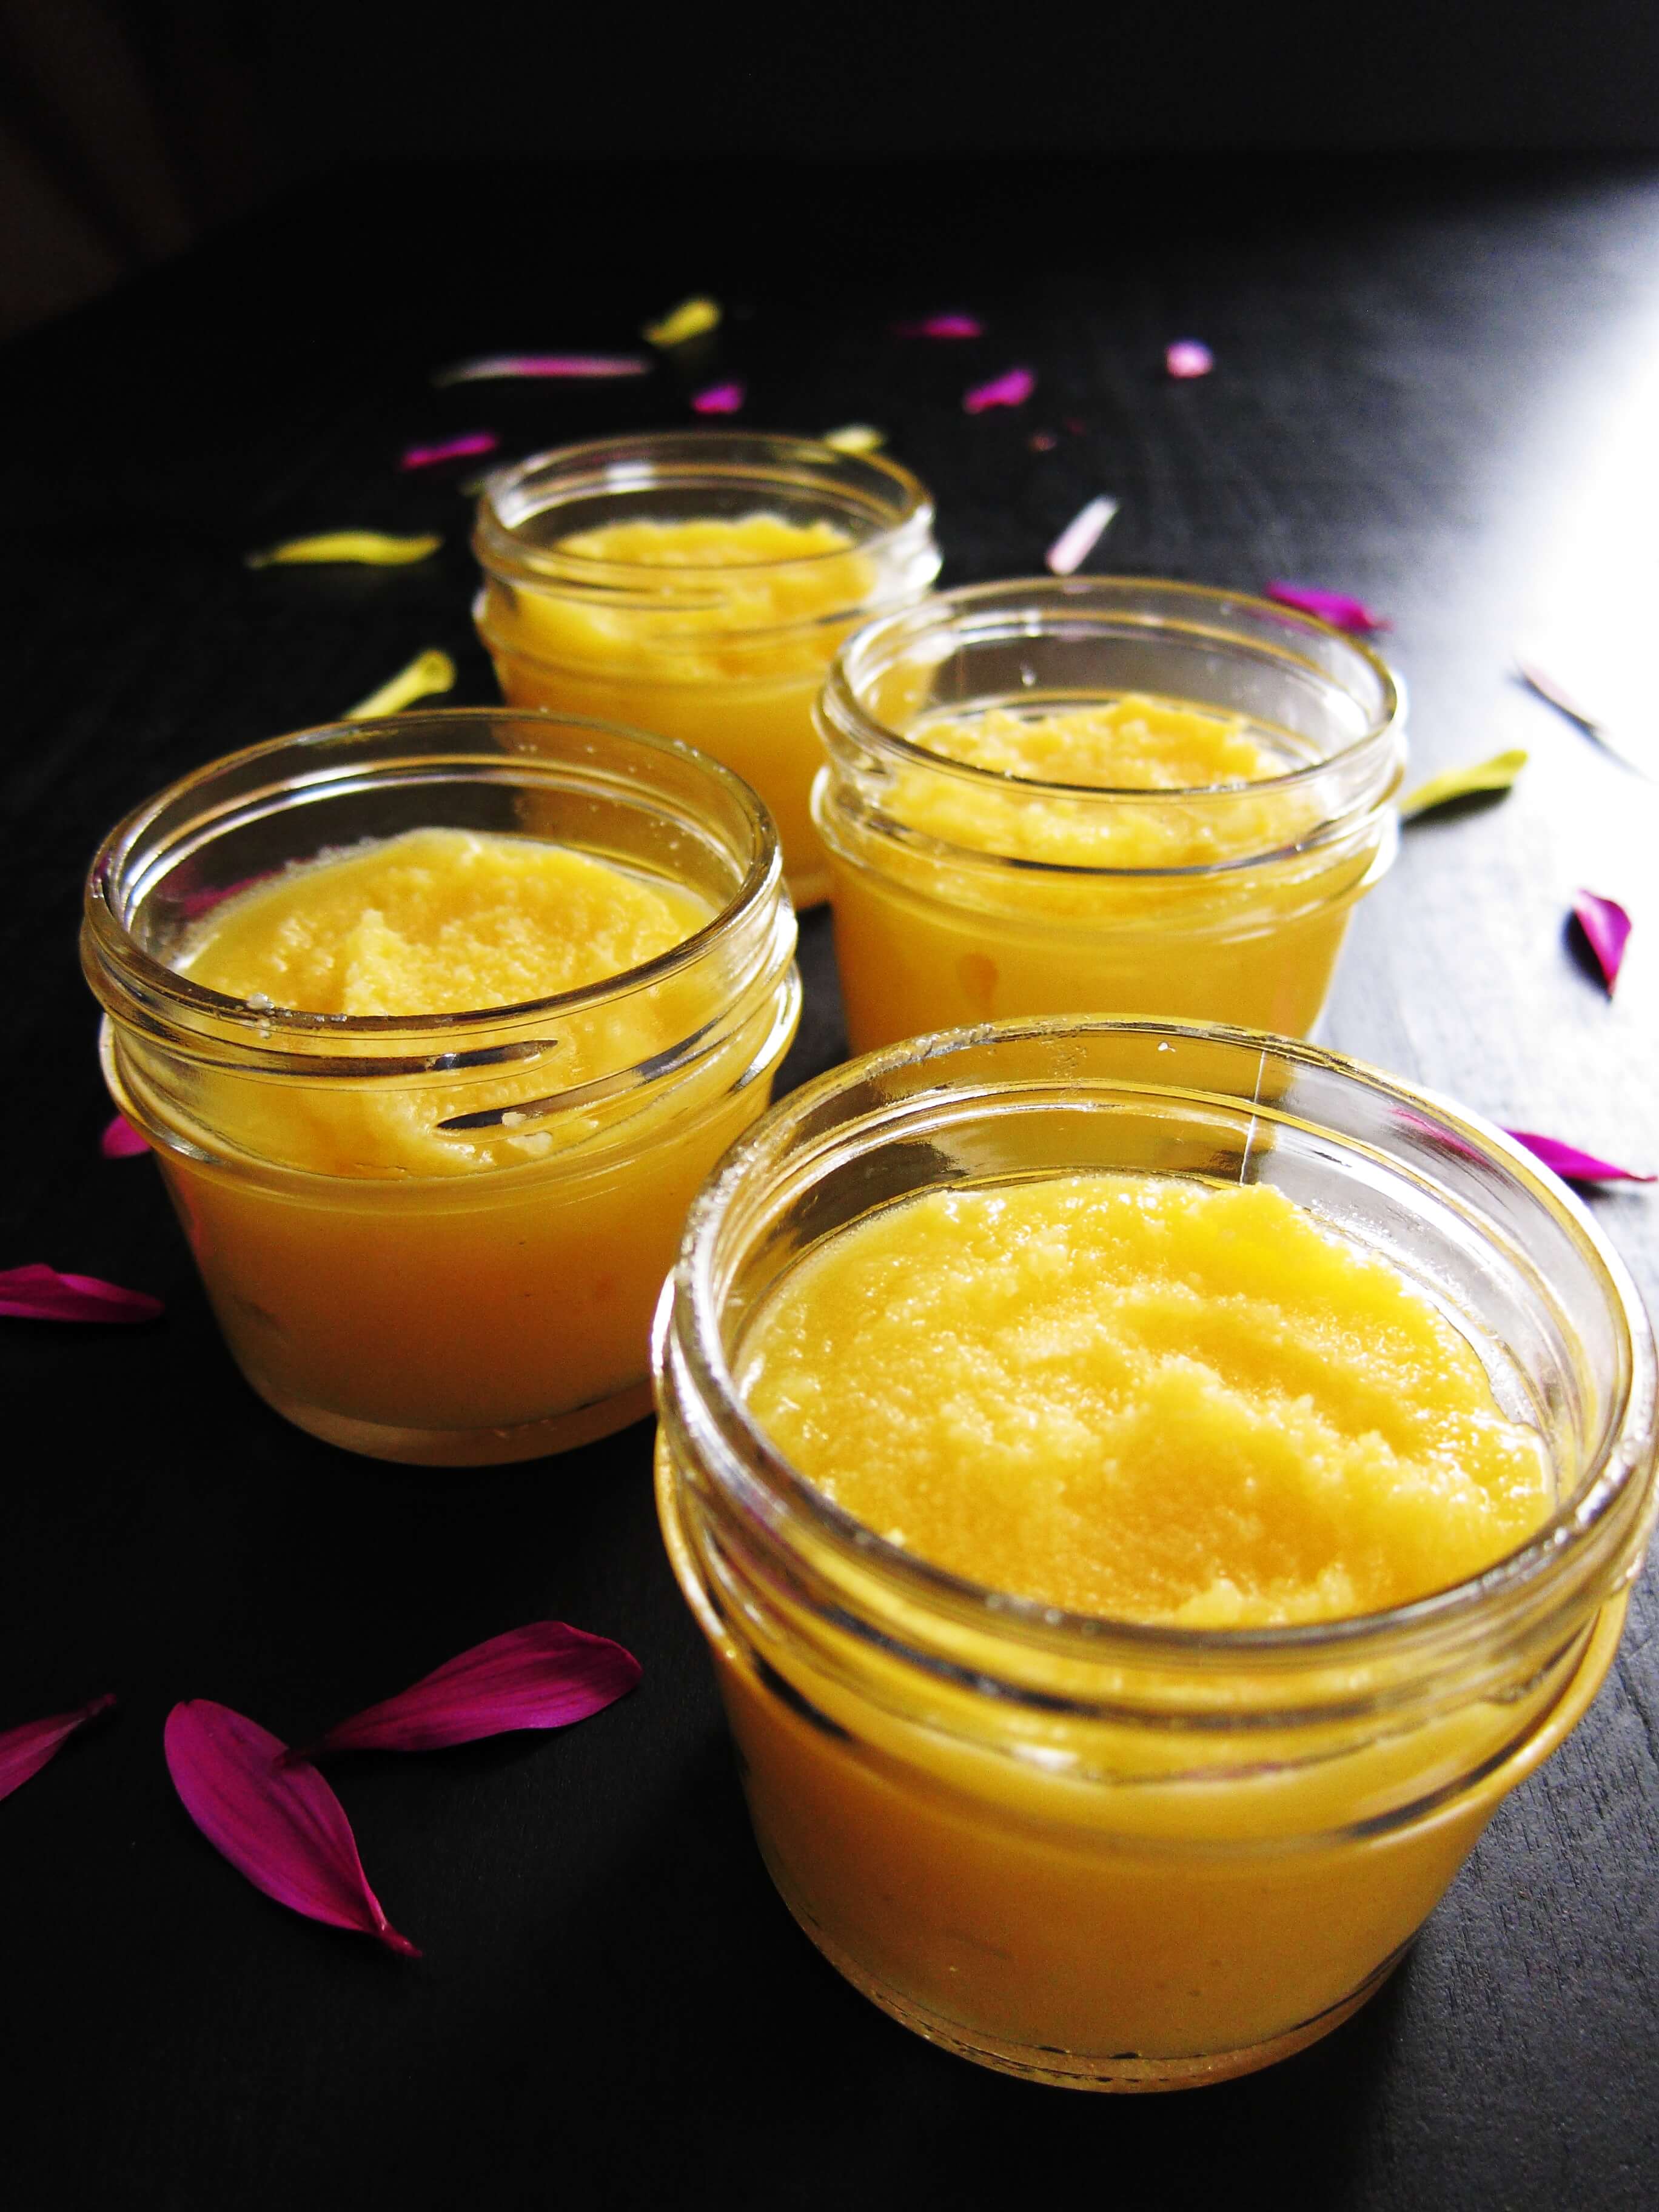
    Instant Pot Ghee - four mason jars with golden ghee on black background with pink petals - Paint the Kitchen Red

    Table of Contents


    1. INTRODUCTION
    2. TIPS
    3. INGREDIENTS
    4. STEP BY STEP INSTRUCTIONS
    5. RECIPE CARD – PRINTABLE
    6. RELATED RECIPES AND GUIDES

    Introduction

    It seems that the world has discovered ghee, something that Indians have used for thousands of years for everyday cooking, medicinal purposes, and religious ceremonies.  I never imagined there would be a day when ghee would become a staple in Western kitchens, and I think that’s terrific!

    I’m going to show you how to make homemade ghee, so you never have to buy it in the store again.  It can get quite expensive buying good quality ghee!

    So, what is ghee?  Ghee is essentially clarified butter.  This means that butter is heated, melted, and removed of all milk solids and impurities.

    However, unlike regular clarified butter, ghee is cooked for a bit longer, to the point that the milk solids have a caramelized color. What’s remaining has an intense flavor, aroma, and color.

    Ghee has a high smoke point, much higher than butter, and that means it can be heated to high temperatures.  It also tastes great unheated, used in place of butter.

    Ghee doesn’t spoil at room temperature like butter can and it has a longer shelf life than clarified butter.

    So how do you make traditional ghee? You don’t use butter; you use milk skin (lactoderm), which is the sticky film that forms on top of hot milk. My mom has been making ghee this way for years. She boils milk every day for tea and coffee. She collects the milk film that builds up when she boils milk and freezes it.

    Over time, she gets enough lactoderm to make ghee. She processes the milk fat in a food processor to make butter and then melts it and makes ghee in a similar way to how you’ll be making ghee with this recipe. I use store-bought butter as the base ingredient.

    This Instant Pot Ghee recipe is simple and easy, but not “instant”!  You’ll need a couple of hours, of which hands-on time is about 10 minutes. There are ghee recipes out there that cook the ghee on Saute mode and it’s done in 20 minutes. I find that the low and slow method yields better-tasting nutty-flavored ghee.

    And no, it’s not a typo – you set the Instant Pot on Slow Cook with the lid off so condensation doesn’t drip back into the butter. It’s fine to keep the lid on during the Slow Cook stage, but you may have some splatter in the second stage of cooking (Saute mode).

    Here are some delicious recipes using ghee:
    – Chicken Curry Soup

    – Ethiopian Lentil Stew (Misir Wot)
    – Rogan Josh
    – Chicken Curry
    – Cashew Butter Chicken
    – Vegetarian Risotto

    Tips and Substitutions


    Equipment

    There are a few kitchen items that I recommed for this recipe:

    • Splatter screen to protect your countertop and floor in case the melted butter bubbles up.  This can happen during the Slow Cook phase and the Saute phase.
    • Fine mesh strainer to strain the ghee from the milk solids.
    • Large mason jar or a few smaller jars.

    Butter

    I use butter made from grass-fed cows. I like to use Kerry Gold or Trader Joe’s butter for making ghee.

    Although grass-fed butter is more expensive, I feel it’s worth it because good-quality ghee makes good quality recipes! I also find that there’s less foaming with the grass-fed butter.

    The color of Kerrygold butter gives the ghee a wonderful golden color, as you see in my photographs.  The choice of butter is entirely up to you; use what you like. Even regular supermarket butter works well.

    I prefer to make ghee from unsalted butter. Salt is a preservative and therefore unsalted butter is fresher. It tastes more authentic and the leftover milk solids are not salty and can be used in desserts.

    Also if you use unsalted butter, you won’t need to adjust your recipes to account for the salt.

    But can you make ghee with salted butter? Yes, you can. If it’s all you can find, then go ahead and make ghee from salted butter.

    Slow Cook vs. Saute

    There are many Instant Pot ghee recipes that go directly into the Saute mode and skip the Slow Cook part of the recipe. And that’s fine, but you have a greater chance of burning the butter and that’s why I prefer this recipe. You melt the butter on Slow Cook mode and although it takes more time, it requires no babysitting.

    That being said, you can skip the Slow Cook stage and melt the butter in Saute mode. Keep a very close eye on the butter to make sure it doesn’t brown too fast.


    Temperature

    When you’re programming Saute mode, it’s very important the temperature isn’t too high. Make sure it’s on Normal or Medium (Level 3 on some models) temperature.

    Please note that the Instant Pot models vary and so the amount of time it takes for the milk solids to turn color may be different for you. For me, it takes about 9 minutes. You need to keep a close eye on the ghee and take it off heat when it’s a golden color.

    To a certain extent, this recipe takes a little practice and experience. Maybe you’ll have darker ghee the first time, that’s okay! As long as it’s fragrant and not burned, it’s usable.

    If you’re new to the Instant Pot and aren’t familiar with how to use it, you might find it helpful to first read one of the following guides and then come back here to learn how to make this recipe.

    • Instant Pot DUO Beginner’s Manual
    • Instant Pot ULTRA Beginner’s Manual
    • Instant Pot DUO EVO PLUS Beginner’s Manual
    • Instant Pot DUO NOVA Beginner’s Manual
    • Instant Pot DUO GOURMET Beginner’s Manual
    • Instant Pot DUO CRISP Beginner’s Manual
    • Instant Pot PRO Beginner’s Manual
    • Instant Pot PRO CRISP Beginner’s Manual

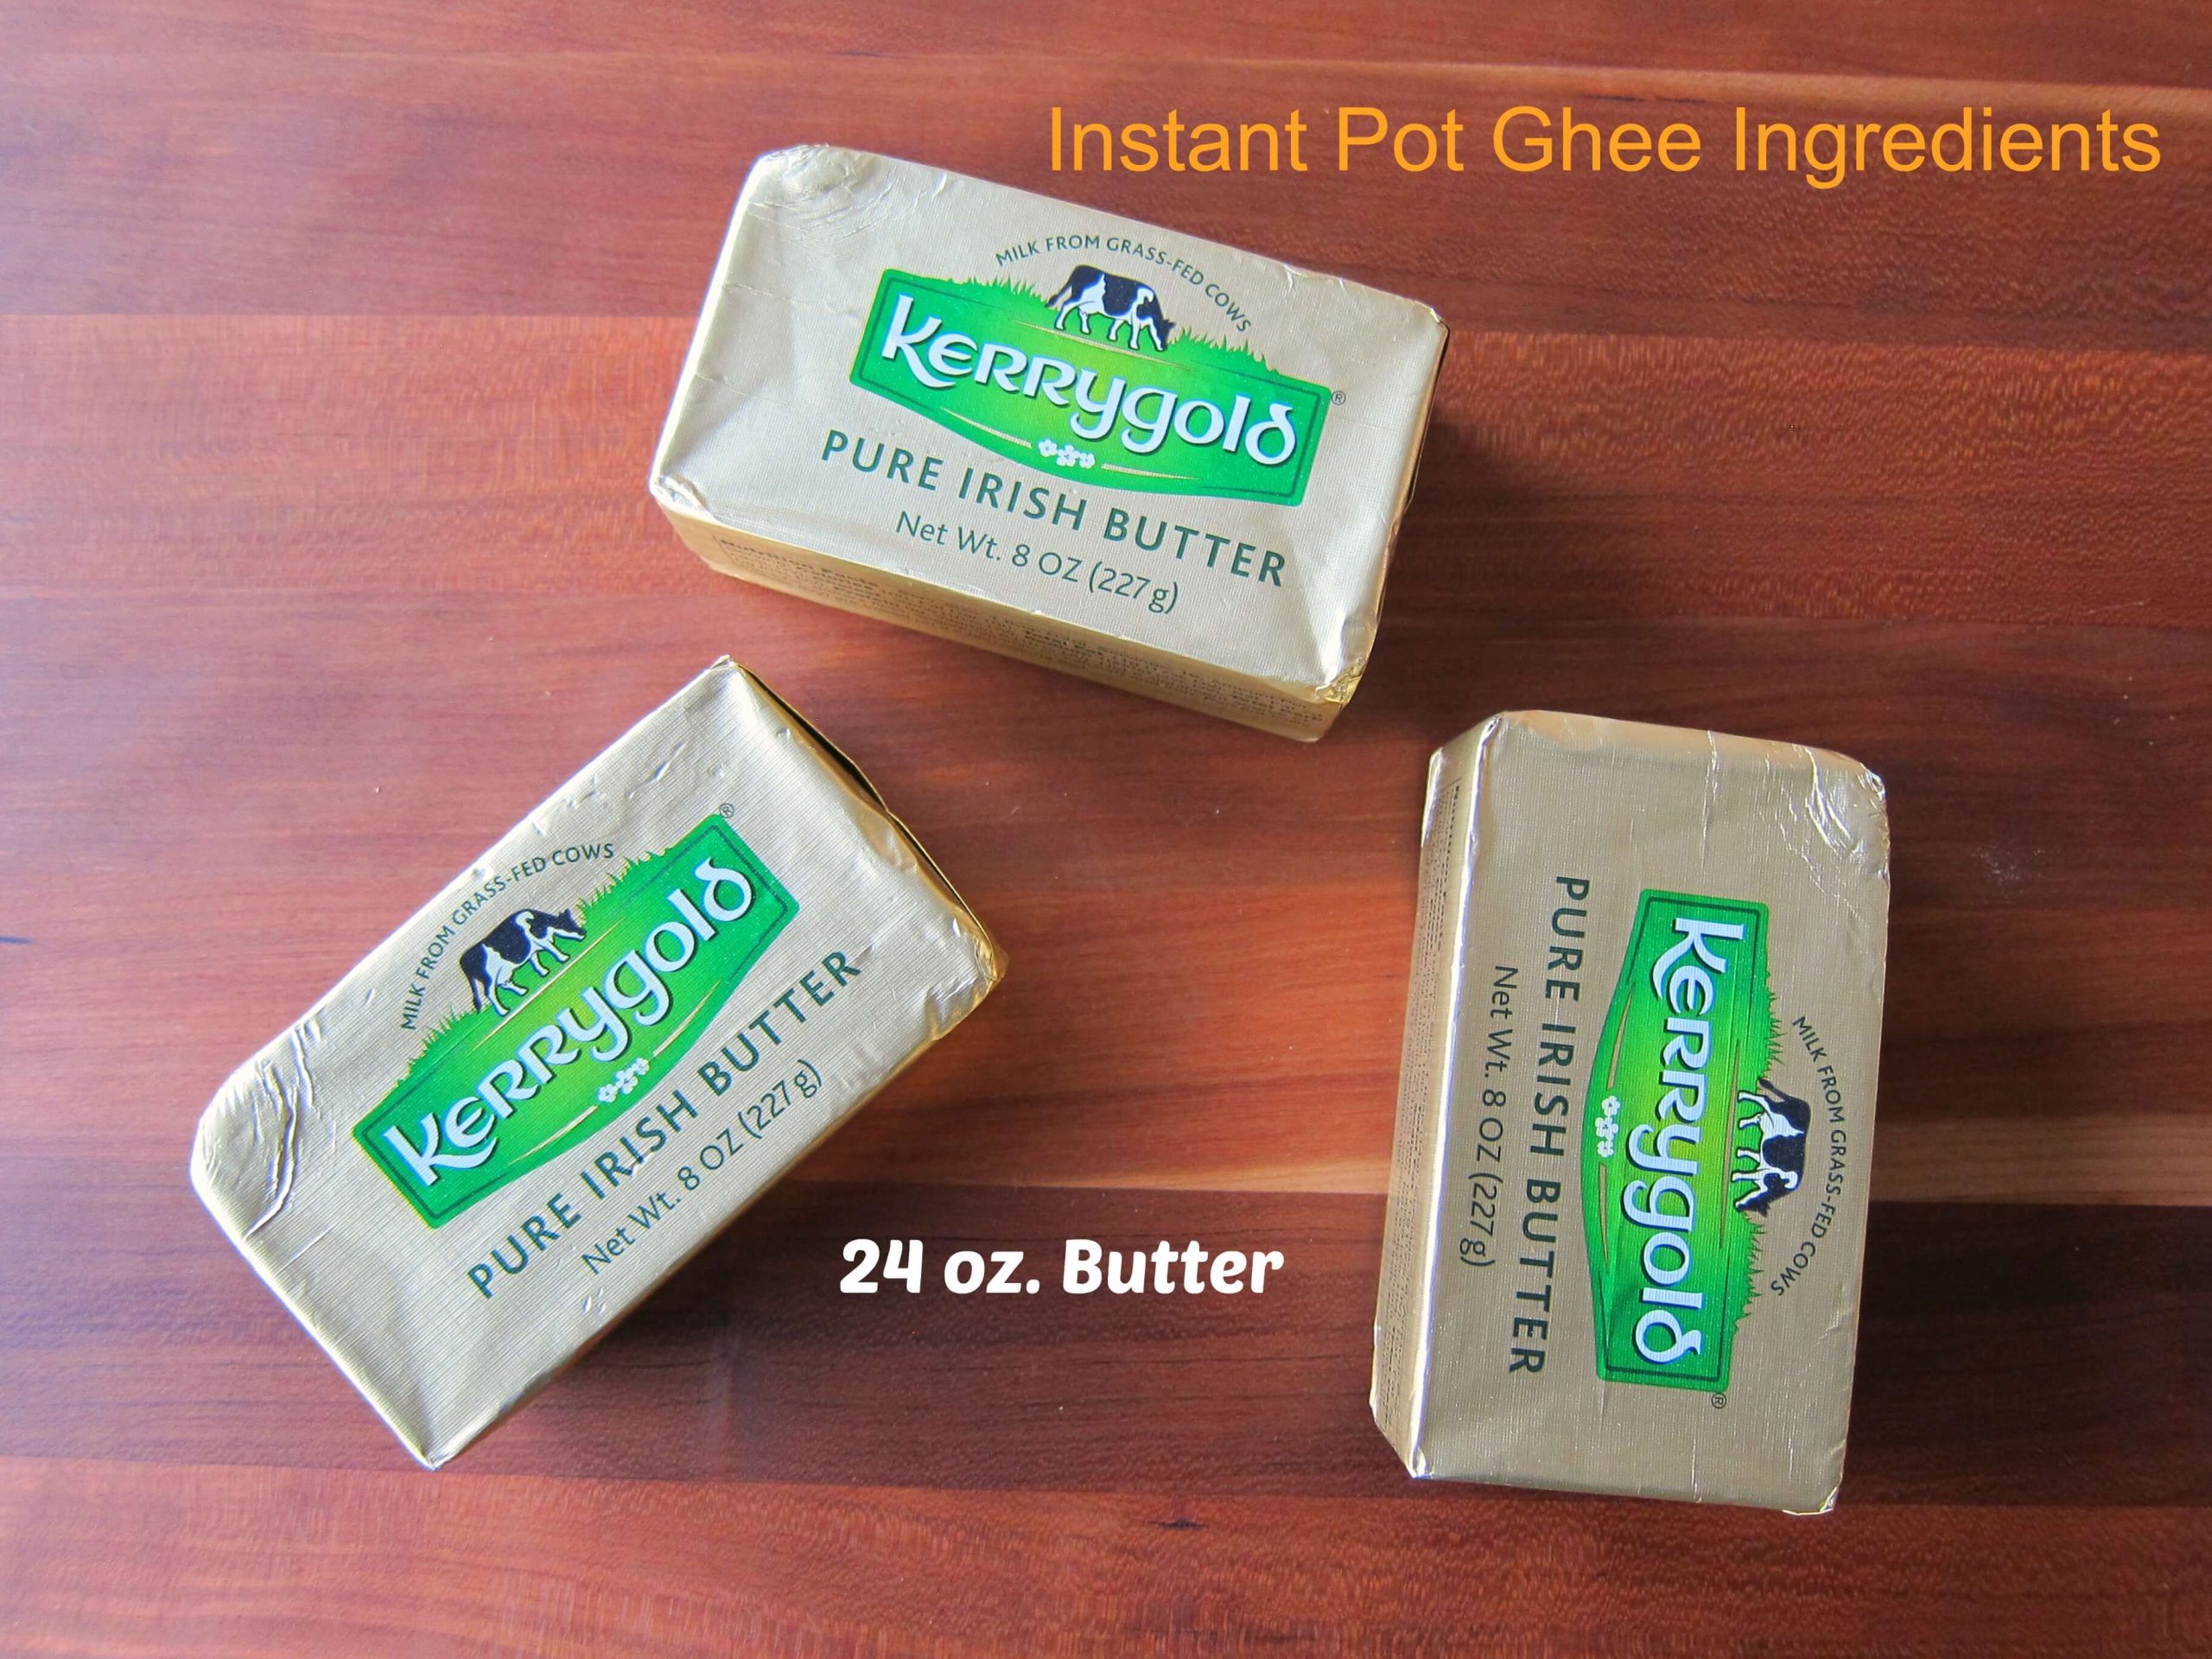
    Instant Pot Ghee – Ingredients

    Instant Pot Ghee Ingredients  - 3 sticks of Kerrygold butter
    • Butter

    More details in the recipe card at the bottom of this post

    How to Make Ghee in Instant Pot (Step by Step Instructions)

    1. Slow cook the butter.
    2. Turn on Saute mode.
    3. Allow the milk solids to darken.
    4. Strain the ghee.

    Slow Cook Butter

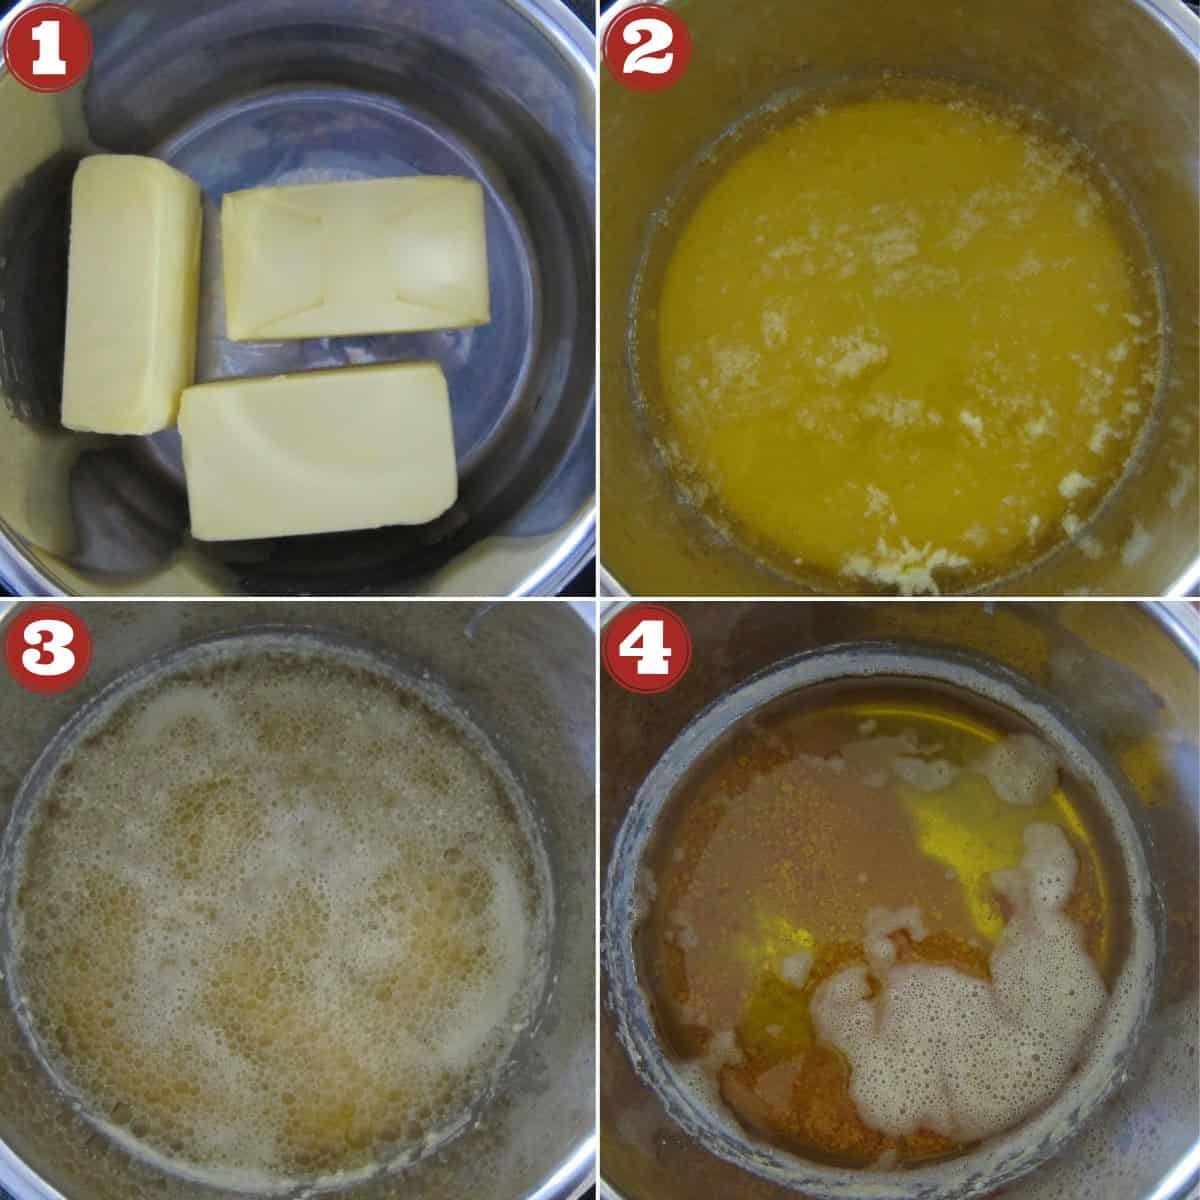
    Instant Pot ghee - put butter in inner pot, select slow cook, adjust time to 2:00
    • Place sticks of butter in Instant Pot.
    • Leave the lid off. This will keep condensation from dripping into the melting butter.
    • Press Slow Cook, press Adjust to set the temperature to Normal then press + or – till time shows 2 hours (2:00)
    • The timer will count down to 0:00.  After 2 hours, the timer will beep. Press Cancel.

    Pro Tip


    It’s possible that your butter may bubble up initially, while it’s melting. A splatter screen is really handy to make sure you don’t have butter splatter on your countertop.

    Turn on Saute Mode

    Instant Pot Ghee Instructions collage - butter melted with milk solids on bottom, select saute, adjust temperature to normal
    • The milk solids will have settled to the bottom and will still be pale yellow in color.
    • Press Saute and press Adjust to set the temperature to Normal (medium heat level).

    Allow Milk Solids to Darken

    Instant Pot Ghee instructions collage, melted butter, splatter screen covering Instant Pot, foam on top of butter
    • Cover the pot with a splatter screen, because there may be some bubbling and splatter.
    • While stirring often, cook till the milk solids turn a golden color, about 8-10 minutes.
    • Be careful to keep your face away from the Instant Pot in case the ghee bubbles up.
    • Press Cancel and let the ghee cool down. The milk solids will darken to a caramel color in the residual heat.
    • If the milk solids start to darken too much, remove the inner pot from the Instant Pot, to cut off the heat source.

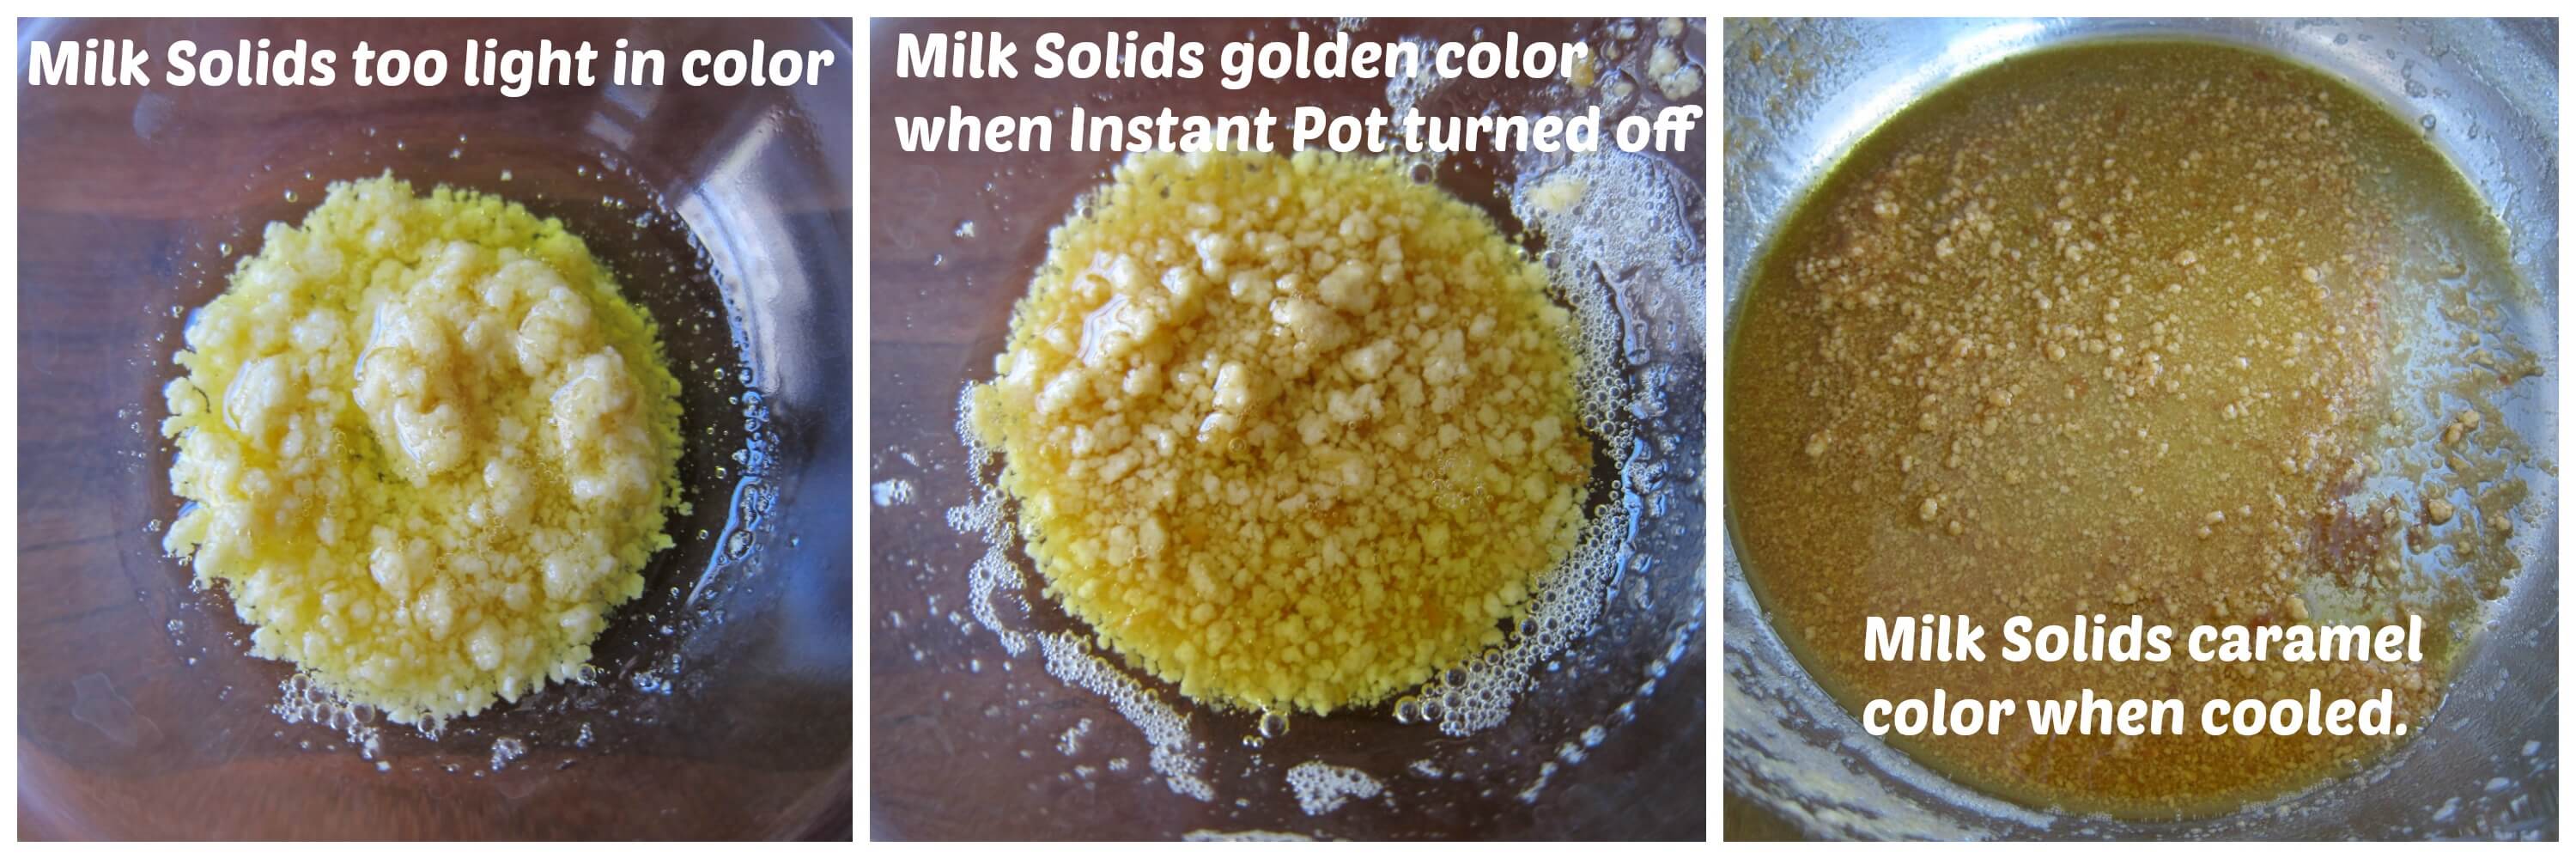
    Milk Solid Colors at Each Stage

    Instant Pot Ghee collage - milk solids too light, milk solids golden, milk solids caramel color
    • If the milk solids are too light, the ghee will spoil quicker.
    • Make sure the milk solids are a golden yellow color when you press Cancel.
    • When they cool down in the residual heat of the Instant Pot they will become a caramel color.

    Strain the Ghee

    Instant Pot Ghee collage - inner pot on counter ghee cooling, jar with strainer, ghee poured into jar
    • Allow the ghee to cool completely.
    • Strain the ghee through a fine-mesh strainer into mason jars.
    • Store in a cabinet away from sunlight. Ghee will last for months at room temperature because all the milk solids have been removed.  Storing in the refrigerator will make it last even longer.
    Instant Pot Ghee - four mason jars with golden ghee on black background with pink petals - Paint the Kitchen Red

    Homemade Instant Pot Ghee

    Enjoy the health and nutritional benefits of homemade ghee with this Homemade Instant Pot Ghee recipe, perfect every time.
    4.45 from 9 votes
    PRINT PIN RATE
    Prep Time: 5 minutes
    Cook Time: 2 hours 10 minutes
    Total Time: 2 hours 15 minutes
    Servings: 2 cups
    Calories: 45
    Author: Paint the Kitchen Red

    Equipment

    • Instant Pot
    • Splatter Screen
    • Fine mesh sieve
    • 8 oz. canning jars

    Ingredients
      

    • 24 oz. butter (1 1/2 lbs), preferably grass-fed

    Instructions
     

    • Place sticks of butter in Instant Pot.
    • Leave the lid off. This will keep condensation from dripping into the melting butter. *
    • Cook in Slow Cook mode for 2 hours at Normal temperature.  Use a splatter screen if necessary.
    • The milk solids will have settled to the bottom and will still be pale yellow in color.  Turn off Instant Pot.
    • Cover the pot with a splatter screen because there may be some bubbling and splatter.
    • Select Saute mode and make sure the temperature level is at Normal, Medium or Level 3 (depending on the model). Cook in Saute mode for 8 to 10 minutes, stirring often till the milk solids turn to a GOLDEN color.  Don't be tempted to cook for longer to make them darker; the milk solids will darken more after the heat is turned off. 
      (Be careful to keep your face away from the Instant Pot in case the ghee bubbles up.)
    • Press Cancel and let the ghee cool down. The milk solids will darken to a CARAMEL color in the residual heat. If the color changes too quickly, remove the inner pot from the Instant Pot and place the inner pot on a heatproof surface.
    • Allow to cool completely.
    • Strain the ghee through a fine mesh strainer into mason jars or glass bottles that can be closed tightly.
    • Store in a cabinet away from sunlight. Ghee will last for months at room temperature because all the milk solids have been removed. Storing in the refrigerator will make it last even longer.

    Notes

    • * If the butter starts bubbling up during the melting phase while in Slow Cook mode or during the Saute mode, use a splatter screen to keep your countertops from becoming messy.
    • If the milk solids are too light, the ghee will spoil quicker.
    • Every Instant Pot is different, so the times I’ve listed may be different for you.  The important thing is to keep an eye on the milk solids and remove them from heat when they turn golden.
    • See the blog post for more detailed recipe tips, and see the step-by-step instructions and photographs for details on what color the milk solids should be.

    Nutrition

    Serving: 1 teaspoon | Calories: 45 kcal | Fat: 5 g | Saturated Fat: 3 g | Cholesterol: 15 mg
    Course Sauces
    Cuisine Indian
    Main Ingredient vegetarian
    Have you made this recipe? I love seeing your photos! Tag me on Instagram @PaintTheKitchenRed or #PaintTheKitchenRed!

    Thank you for visiting Paint the Kitchen Red. All photos and content are copyright protected. Please don’t use any content without prior written permission. If you’ve made this recipe and would like to share it with your friends, please link back to this recipe. Thank you!

    I am not a certified nutritionist.  I provide my best estimate of nutritional information merely as a courtesy to my readers.  If you depend on nutritional information for dietary or health reasons,  I suggest using your favorite online nutrition calculator to confirm the nutritional value of this recipe based on the actual ingredients that you use.

    If you loved this recipe, please give it a five ⭐ rating in the comment section below and please share it on social media using the social media share buttons at the top and bottom of this post. Thank you so much!

    BACK TO TOP

    Recipes You Might Also Like

    Ethiopian Lentils | Misir Wot (Instant Pot and Stovetop)

    This Ethiopian Lentil Stew recipe, also known as Misir Wot, makes for an irresistible vegetarian meal. Made with red lentils cooked to creamy perfection and enhanced by the bright, warming flavors of Berbere spice mix, this is a simple and delicious recipe that can be part of a healthy weeknight meal. Instant Pot and stovetop instructions included.
    GET RECIPE DETAILS
    Blue bowl of orange red Ethiopian lentils garnished with cilantro on a red and gold napkin

    Coconut Curry Instant Pot Vegetarian Risotto

    This Instant Pot Vegetarian Risotto is an Indian-inspired pressure cooker risotto recipe that's a hearty and delicious one-pot meal. The bright warming flavors of coconut curry combined with the creaminess of risotto makes this a family-pleasing recipe that's healthy and easy enough for a weeknight!
    GET RECIPE DETAILS
    Instant Pot Curried Risotto with chickpeas garnished with cilantro

    Kerala Egg Curry – Instant Pot and Stovetop

    This rich, creamy, flavor-packed egg curry from the South Indian state of Kerala can be eaten with rice, naan, crusty bread, or the Kerala staples of lacy rice pancakes (appam) or fresh rice noodles (idiyappam) – anything that can soak up the bright flavors of the curry in every bite! [Instant Pot and Stovetop instructions included.]
    GET RECIPE DETAILS
    Blue speckled bowl of egg curry garnished with cilantro, with another bowl of curry, naan and brown eggs in the background
    « Instant Pot Parsnips and Potatoes
    Easy Instant Pot Aloo Gobi | Indian Cauliflower with Potatoes »

    Reader Interactions

    Comments

    1. Linda Kidwell

      May 18, 2021 at 1:30 pm

      Worked great came out with a beautiful golden color.

      Reply
      • Paint the Kitchen Red

        May 19, 2021 at 11:11 am

        I’m glad to hear it, Linda!

        Reply
    2. Christine

      July 19, 2020 at 12:15 pm

      Hi
      Thanks for the recipe! I think it turned out good! How long does it take for the ghee to thicken once in the jar?
      Thank you!

      Reply
      • Paint the Kitchen Red

        July 19, 2020 at 1:41 pm

        Christine, it all depends on the temperature. Ghee hardens as it gets colder. If your kitchen is warm, it can be more liquidy, and that’s fine. To keep it longer you can put it in the fridge. But mine never lasts that long 🙂

        Reply
    3. Loren Messarra

      March 16, 2020 at 5:42 pm

      2 stars
      I’m so disappointed. I followed the directions exactly with KerryGold butter, but mine burned really quickly during the saute stage. It’s now coffee-colored and tastes burned. Wish the recipe had more details about how to prevent burning, as I see others have had similar issues.

      Reply
      • Paint the Kitchen Red

        March 17, 2020 at 2:22 pm

        Loren, I’m sorry you had issues. It’s very hard to give an exact time to saute the ghee because Instant Pot temperature may be different based on model, year, size and also what level your Saute mode is on. You just have to watch the butter and shut the Instant Pot off when it reaches a golden color. If you remove the inner pot, it stops cooking immediately and will turn a caramel color.

        Reply
    4. Patricia

      September 20, 2019 at 4:05 pm

      Just made this and wasted 1 and a half pounds of butter! Followed directions exactly and it is burned! I wish I could include pictures of the disaster. Not too happy.

      Reply
      • Paint the Kitchen Red

        September 21, 2019 at 8:54 am

        Patricia, I am so sorry you had such a bad experience with the recipe. First of all, are you sure it’s burned? Even if the ghee is a bit dark it can still taste good. It’s certainly because it was cooked too long, but the “why” is harder. Did you remove the inner pot from the base unit when the milk solids color turned golden? You do have to watch it. Thanks for your comment.

        Reply
    5. Kathleen

      July 24, 2019 at 1:49 am

      4 stars
      I think my first attempt was underdone. The white portions did not sink to the bottom in two hours. After the saute step, it looked ok but after cooling wasn’t really quite clear. It probably will taste good but I’m not sure it will keep long so I’m going to refrigerate it–it is still liquid five hours later at room temp. Just hope enough lactose is removed that it won’t make me have lactose intolerance problems.

      Reply
      • Paint the Kitchen Red

        July 29, 2019 at 8:11 pm

        Kathleen, I’m not sure why it was undercooked; possible that the type of butter made a difference. But sounds like you’re right and that you probably needed to let it saute for more than the 9 minutes. The solids should have been caramel-colored when you turned it off. Next time add another minute or two.

        Reply
    6. gina

      April 05, 2019 at 6:25 am

      Can I double the recipe?

      Reply
      • Paint the Kitchen Red

        April 05, 2019 at 7:24 am

        Gina, yes you should be able to double the recipe just fine.

        Reply
    7. Bonita

      April 04, 2019 at 10:29 am

      5 stars
      Used this recipe/method in my IP to make my first batch of ghee yesterday. Turned out great! I used Kerry Gold unsalted butter. I’m on the Whole30 diet right now, and ghee is a recommended fat to consume. Can’t wait to cook with it. Thanks for posting this method of making ghee, certainly will save money and be fresher!

      Reply
      • Paint the Kitchen Red

        April 04, 2019 at 10:52 am

        Me too! I just created a video for the recipe and in the process got myself a batch of ghee 🙂 This time I used salted butter. Both work great. But Kerrygold all the way!

        Reply
    8. Robyn Miller

      January 03, 2019 at 4:46 pm

      5 stars
      Can you freeze ghee? I live alone and I think I would have a hard time using 2 cups of ghee on my own. Thanks!

      Reply
      • Paint the Kitchen Red

        January 03, 2019 at 6:08 pm

        Yes, Robyn, you should be able to freeze it. If there’s any sediment, it would probably settle to the bottom and you might need to filter it. If the ghee separates, just stir it up.

        Reply
      • Fiefster

        September 13, 2019 at 10:08 am

        You don’t have to freeze ghee. Ghee, if made correctly can be stored outside the fridge for many years.

        Reply
    9. Emma

      December 25, 2018 at 1:41 pm

      Hi there! I was wondering how long the shelf life usually is for this? Thanks!

      Reply
      • Paint the Kitchen Red

        December 25, 2018 at 3:14 pm

        I usually finish what I make within a couple of months and it’s fine. You can tell if it goes bad, because it’ll smell rancid.

        Reply
    10. Penny Forte

      December 18, 2018 at 3:19 pm

      5 stars
      This recipe is AWESOME and so EASY!! My child was recently diagnosed with Chrons and I am lactose intolerant. Only since his diagnosis have I found ghee, but it’s just so expensive! So this recipe is a game changer for us! I can purchase the grass-fed butter and make this recipe at home for about half the cost of buying ghee in the store. The first batch I made ended up brown butter, but I’ll use that for some holiday baking. My subsequent batches have easily produce gorgeous, wonderful the!! Thank you so very much!!

      Reply
      • Paint the Kitchen Red

        December 18, 2018 at 4:01 pm

        Hi Penny – yes, it’s a fine line between brown butter and ghee. I think the first time most people think it’s not the right color, and keep cooking not realizing that it will darken. Thank you for your lovely comment, and good wishes to your child in their fight against Chrons.

        Reply
    11. Jill

      September 06, 2018 at 9:04 am

      5 stars
      I have used this over and over with success. I like to do a pot roast with the solids in the same pot!

      I have to be careful
      at the sauté point because they get brown quickly.

      I like to put coconut oil with mine at the end 1:1.

      Reply
      • Paint the Kitchen Red

        September 06, 2018 at 9:30 am

        Thank you Jill, for sharing! I’ve never heard of mixing coconut oil and ghee before.

        Reply
    12. Marie Dunn

      August 10, 2018 at 3:51 pm

      I followed all directions and my butter color is brown not golden. It taste good, like brown butter and not burnt. I think it went past the Ghee stage. I was wanting all the milk fat solids out of my butter, but brown butter has all the milk fat solids, correct?

      I hate to waste this butter, but I donl’t want all the fat.

      Reply
      • Paint the Kitchen Red

        August 12, 2018 at 8:15 pm

        Marie, did you use Kerrygold butter? I get that golden color with that brand. When I buy regular butter, it still works but the color isn’t the same – more light brown. If it’s not burned, and you actually had milk solids left over, I think you should be fine to use it.

        Reply
      • Deborah Blom

        August 28, 2021 at 7:51 am

        I am pretty sure ghee is 100% fat since the other parts are removed.

        Reply
    13. Sue Jackson

      July 26, 2018 at 11:31 am

      What setting on Saute do you use, less, normal or more? I am using 6qt DUO Instant Pot. Thanks, Sue

      Reply
      • Paint the Kitchen Red

        July 26, 2018 at 8:00 pm

        Sue – I use the middle setting (normal). Thanks for your question.

        Reply
    14. Cindy

      April 22, 2018 at 5:41 am

      Hi! Can you tell me how much ghee this recipe makes?

      Reply
      • Paint the Kitchen Red

        April 23, 2018 at 7:32 am

        Hi Cindy – it makes about 2 cups of ghee.

        Reply
        • Cindy

          August 24, 2018 at 10:49 am

          …when would i add Himalayan salt? I like mine with salt~

          Thank you

          Reply
          • Paint the Kitchen Red

            August 24, 2018 at 11:38 am

            Cindy – you could use salted butter. A lot of the salt is left over in the milk solids but the ghee will have a light salt taste. Or you can add salt after straining and before it solidifies.

            Reply
        • Cindy

          August 25, 2018 at 1:05 pm

          Hi again, and thank you; also….what is the milk solids used/good for~

          Reply
          • Paint the Kitchen Red

            August 25, 2018 at 1:41 pm

            Hi Cindy – as long as they’re not burnt or too brown, you can add them to curries, rice, mashed potatoes, pasta, risotto, veggies. We make Indian sweets with the milk solids too!

            Reply
    15. Donna

      January 30, 2018 at 9:28 pm

      4 stars
      Do you have to use Kerry Gold butter or can you use any butter in the food store. Not margarine right?

      Reply
      • Paint the Kitchen Red

        January 31, 2018 at 6:51 am

        Donna – thanks for your question. You can use any butter, I do that sometimes. Find one that expires the latest. Land O Lakes works fine as do the Sam’s club and Costco brands.

        Reply
    16. Sally

      January 19, 2018 at 5:34 pm

      Can you use the milk solids for anything?

      Reply
      • Paint the Kitchen Red

        January 19, 2018 at 6:07 pm

        Hi Sally, thanks for your question. I mainly use in Indian dishes: desserts (sauteed with flour and sugar), rice, bread, and curries. You might be able to add to bread or pizza dough and a rice pilaf. Just make sure the solids aren’t burned 🙂

        Reply
    17. Teresa

      January 13, 2018 at 7:20 pm

      Does it matter if the butter is salted or not?

      Reply
      • Paint the Kitchen Red

        January 13, 2018 at 7:58 pm

        Teresa, You should be fine. Usually the salt gets strained out with the solids. Make sure you use a fine mesh strainer.

        Reply
    18. Momof2

      October 16, 2017 at 1:50 pm

      Instead of slow cooking for 2 hours and then saute for 10 minutes, is it possible to slow cook for 2.5 or 3 hours?

      Reply
      • Paint the Kitchen Red

        October 16, 2017 at 2:53 pm

        Hi there, I’m sure you can do it entirely on slow cook mode, but I’m not sure that time will be enough. You might try it out and just keep an eye on it for the solids to become caramel colored. If you find that it’s taking too long, just short-cut and turn on saute mode. You might also try it on ‘More’ rather than ‘Normal’ slow cooker temperature setting. Do let us know how it goes if you try it out. I’m sure others, including me, would love to know!

        Reply
    19. Sheila

      April 19, 2017 at 1:46 pm

      5 stars
      I grew up with ghee and make it on the stove. I never thought of making it in an Instant Pot. Thanks for the clear instructions. Never going back to the stove version!

      Reply
      • Paint the Kitchen Red

        April 28, 2017 at 11:12 am

        You’re so welcome. I love that you don’t have to watch it every minute except for the last 10 minutes.

        Reply

    Questions, Comments? I love hearing from my readers and I reply to all comments! Cancel reply

    Your email address will not be published. Required fields are marked *

    Rate This!


    Primary Sidebar

    Neena in red sweater head tilted

    Hi, I'm Neena and welcome! I am the creator, photographer, and author of recipes and tips at Paint the Kitchen Red. I live in the glorious west in Salt Lake City, Utah with my family.

    More about me →

    Popular

    • Easy Instant Pot Fried Rice Recipe (Chinese Style)
    • Coconut Chicken Curry Soup
    • Instant Pot Sausage Pasta in Creamy Tomato Sauce
    • Best Instant Pot Jambalaya Recipe

    Seasonal

    • Coconut Chicken Curry Soup
    • Instant Pot African Peanut Stew
    • Vegetarian Instant Pot Moroccan Stew
    • Creamy Instant Pot Chipotle Shrimp Soup

    Footer

    AS FEATURED ON

    Paint the Kitchen Red As Featured On Huffington Post, BuzzFeed, Brides.com, CNBC, msn, NBC News, Popsugar

    Footer

    ↑ back to top

    About

    • Privacy Policy
    • About Me
    • Contact

    Newsletter

    • Sign Up! for emails and updates

    Web Stories

    • Google Web Stories

    Instant Pot

    • Recipe Index
    • Tips and Resources

    Air Fryer

    • Recipes

    As an Amazon Associate I earn from qualifying purchases.

    Copyright © 2023 Paint the Kitchen Red